谷粒商城分布式高级(四)—— 商城业务(商城首页分类 & nginx域名访问环境)
一、商城系统首页
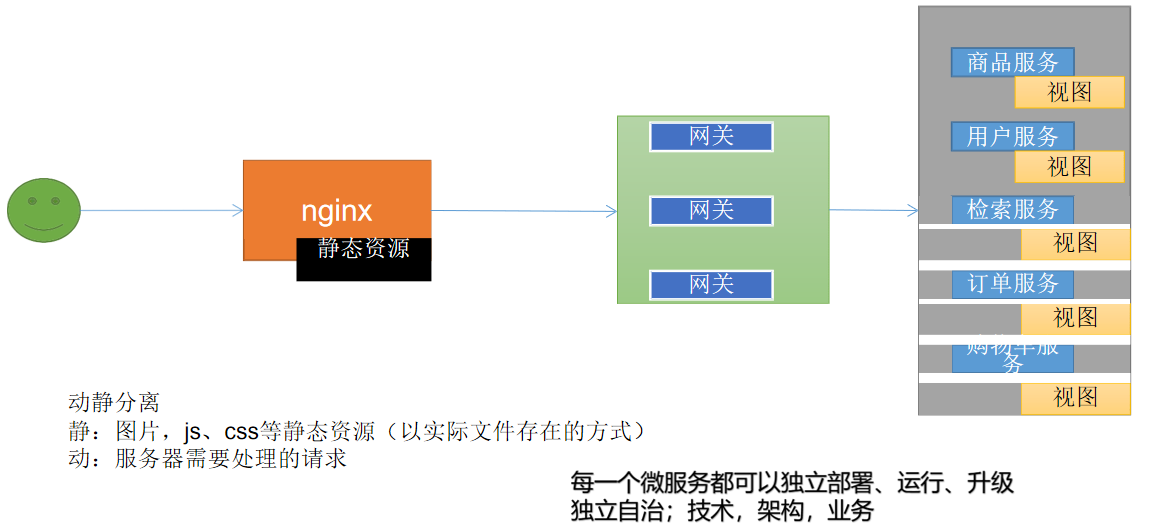
nginx发给网关集群,网关再路由到微服务
静态资源放到nginx中
1、整合 thymeleaf 渲染首页
模板引擎总结
(a)thymeleaf-starter:关闭缓存
(b)静态资源都放在static文件夹下就可以按照路径直接访问
(c)页面放在templates下,直接访问
  springboot访问项目的时候,默认会找index
(d)页面修改不重启服务器实时更新
  (1)引入dev-tools
  (2)修改完页面 ctrl + shift + f9 重新自动编译下页面,代码配置,推荐重启
(1)gulimall-product 导入thymeleaf依赖、热部署依赖devtools使页面实时生效
<dependency>
   <groupId>org.springframework.boot</groupId>
   <artifactId>spring-boot-devtools</artifactId>
   <optional>true</optional>
</dependency>

<!--模板引擎:thymeleaf-->
<dependency>
   <groupId>org.springframework.boot</groupId>
   <artifactId>spring-boot-starter-thymeleaf</artifactId>
</dependency>
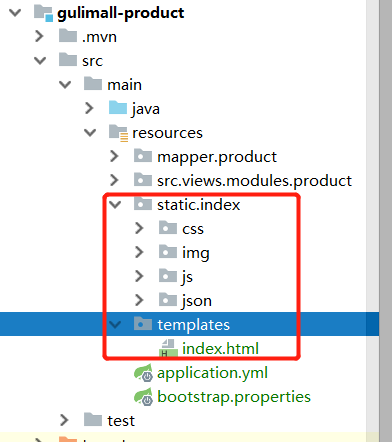
(2)html\首页资源\index放到gulimall-product下的static文件夹
  把index.html放到templates中
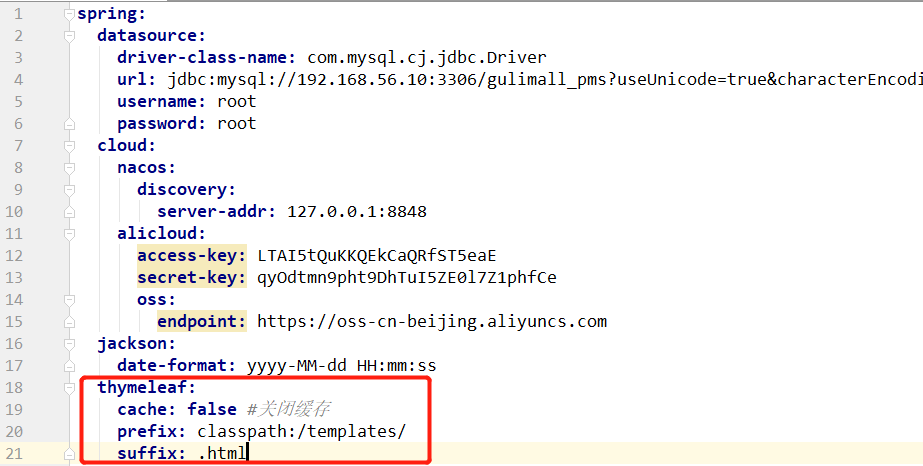
(3)修改application.yml,关闭缓存
thymeleaf:
  cache: false #关闭缓存
  prefix: classpath:/templates/
  suffix: .html
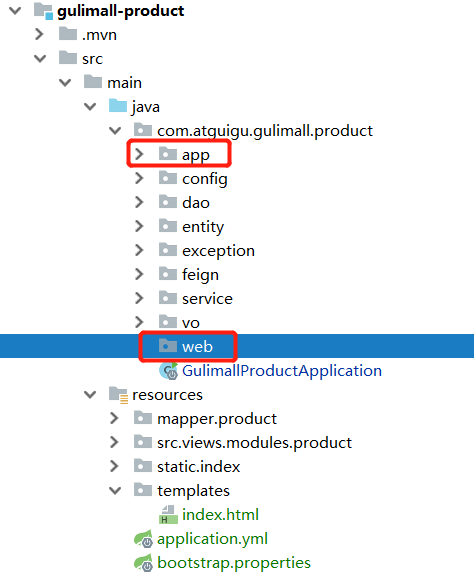
(4)web开发放到web包下,原来的controller是前后分离对接手机等访问的,所以可 以改成app,对接app应用
(5)启动gulimall-product
访问 http://localhost:10000

http://localhost:10000/index/css/GL.css
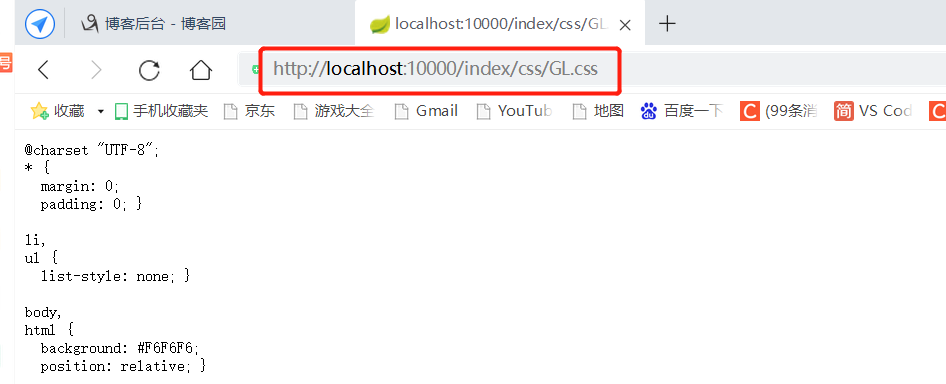
注意:springboot访问项目的时候,默认会找index
2、整合dev-tools渲染一级分类数据
刚导入index.html时,里面的分类菜单都是写死的,我们要访问数据库拿到放到model中,然后在页面foreach填入

(1)新增文件com.atguigu.gulimall.product.web.IndexController
package com.atguigu.gulimall.product.web;

import com.atguigu.gulimall.product.entity.CategoryEntity;
import com.atguigu.gulimall.product.service.CategoryService;
import org.springframework.beans.factory.annotation.Autowired;
import org.springframework.stereotype.Controller;
import org.springframework.ui.Model;
import org.springframework.web.bind.annotation.GetMapping;

import java.util.List;

@Controller
public class IndexController {

    @Autowired
    CategoryService categoryService;

    /**
     * 跳转首页并且查询一级分类
     * @param model
     * @return
     */
    @GetMapping(value = {"/","index.html"})
    private String indexPage(Model model) {
        //1、查出所有的一级分类
        List<CategoryEntity> categoryEntities = categoryService.getLevel1Catagories();
        model.addAttribute("categories",categoryEntities);
        return "index";
    }
}

(2)新增接口和实现类方法 getLevel1Catagories
/**
* 查询一级分类
* @return
*/
@Override
public List<CategoryEntity> getLevel1Catagories() {
return baseMapper.selectList(new QueryWrapper<CategoryEntity>().eq("parent_cid",0));
}
(3)页面遍历菜单数据
<li th:each="category : ${categories}">
  <a href="#" class="header_main_left_a"   th:attr="ctg-data = ${category.catId}"><b th:text="${category.name}">家用电器</b></a>
</li>

(4)效果
访问:http://localhost:10000/
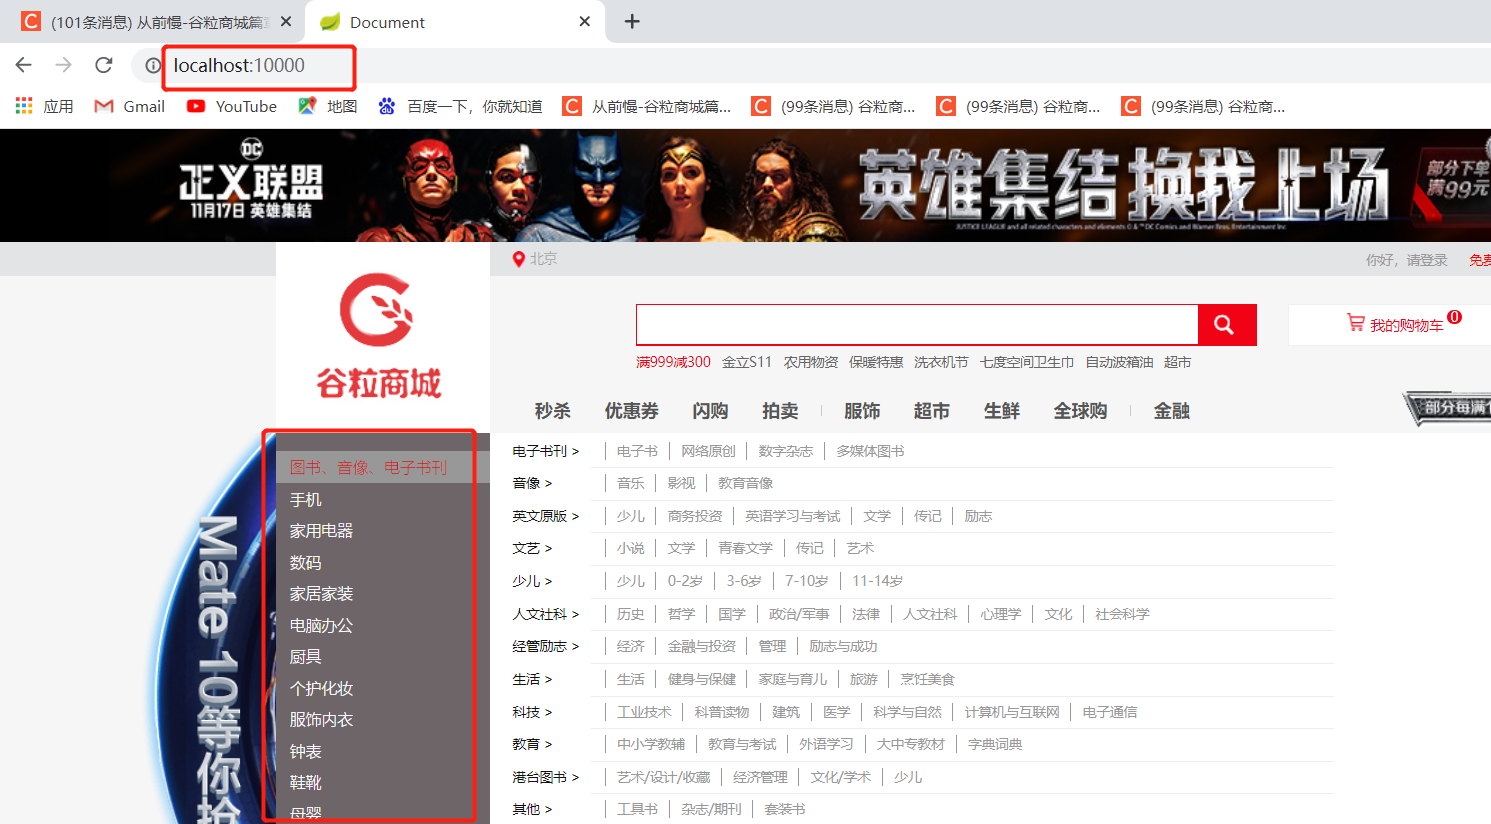
注意:这里二级和三级分类出现了,是因为 index.html 引入了 catalogLoader.js,而 catalogLoader.js 读取了 catalog.json


3、渲染二级三级分类数据
上面2中展示的二级和三级分类数据是json里面写死的,这里我们来改造一下,让他从数据库读取

(1)删除 resource 下的 /static/index/json 文件夹

(2)com.atguigu.gulimall.product.web.IndexController 新增方法 getCatalogJson
@ResponseBody
@GetMapping(value = "/index/json/catalog.json")
public Map<String, List<Catelog2Vo>> getCatalogJson(){
    Map<String, List<Catelog2Vo>> map = categoryService.getCatalogJson();
    return map;
}
(3)com.atguigu.gulimall.product.service.impl.CategoryServiceImpl 新增接口实现类方法 getCatalogJson
@Override
public  Map<String, List<Catelog2Vo>> getCatalogJson() {
    //1、查询所有一级分类
    List<CategoryEntity> level1Catagorys = getLevel1Catagories();

    //2、封装数据
    Map<String, List<Catelog2Vo>> parent_cid = level1Catagorys.stream().collect(Collectors.toMap(k -> k.getCatId().toString(), v -> {
        // 1、每一个的一级分类,查到这个以及分类的二级分类
        List<CategoryEntity> categoryEntities = baseMapper.selectList(new QueryWrapper<CategoryEntity>().eq("parent_cid", v.getCatId()));
        //2、封装上面的结果
        List<Catelog2Vo> catelog2Vos = null;
        if (categoryEntities != null) {
            catelog2Vos = categoryEntities.stream().map(l2 -> {
                Catelog2Vo catelog2Vo = new Catelog2Vo(v.getCatId().toString(), null, l2.getCatId().toString(), l2.getName());
                //1、找当前二级分类的三级分类封装成vo
                List<CategoryEntity> level3Catalog = baseMapper.selectList(new QueryWrapper<CategoryEntity>().eq("parent_cid", l2.getCatId()));
                if(level3Catalog!=null){
                    List<Catelog2Vo.Category3Vo> collect = level3Catalog.stream().map(l3 -> {
                        //2、封装成指定格式
                        Catelog2Vo.Category3Vo category3Vo = new Catelog2Vo.Category3Vo(l2.getCatId().toString(), l3.getCatId().toString(), l3.getName());
                        return category3Vo;
                    }).collect(Collectors.toList());
                    catelog2Vo.setCatalog3List(collect);
                }
                return catelog2Vo;
            }).collect(Collectors.toList());
        }
        return catelog2Vos;
    }));
    return parent_cid;
}

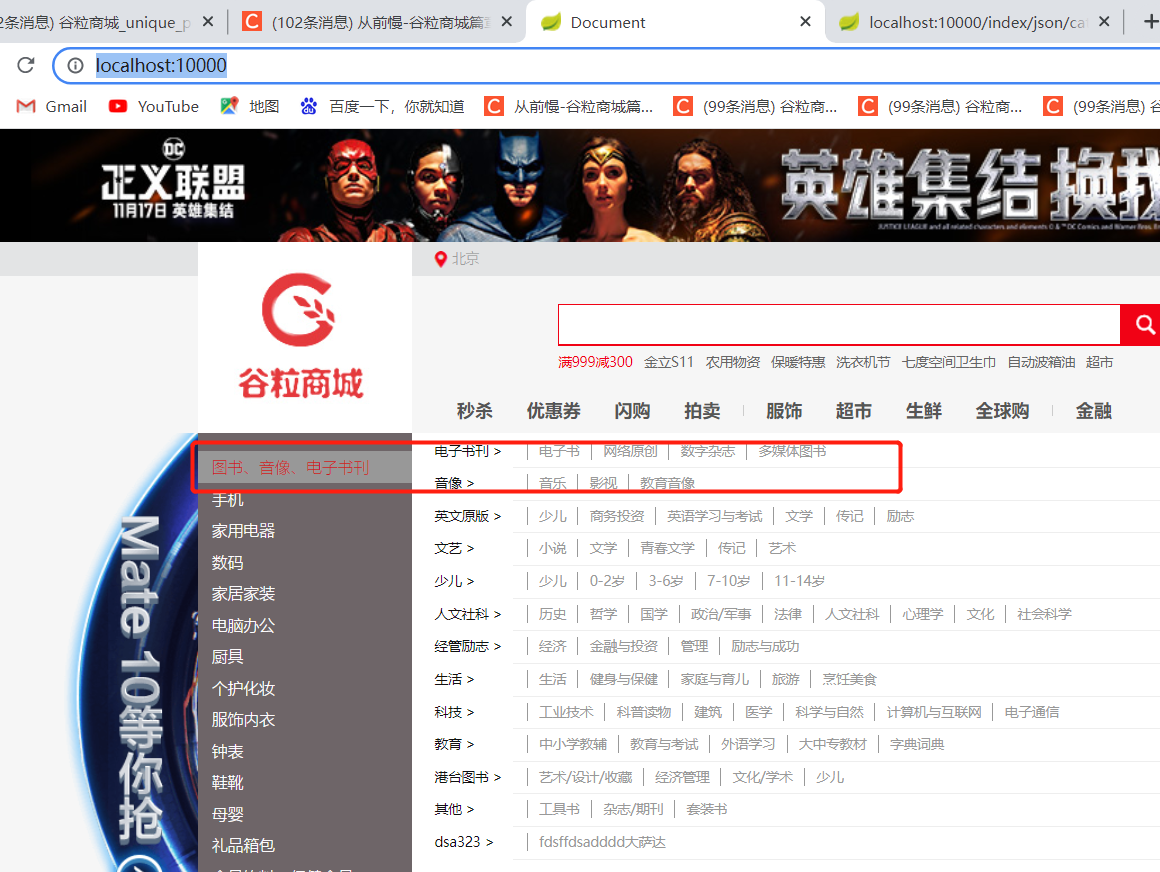
(4)测试
  访问:http://localhost:10000/index/json/catalog.json

访问:http://localhost:10000
二、nginx-搭建域名访问环境(反向代理配置 & 负载均衡到网关)
参考文章 谷粒商城分布式高级(一)—— 环境搭建(高级篇补充)(ElasticSearch & nginx) 中的 “3、搭建域名访问环境(反向代理配置 & 负载均衡到网关)”
分类:
谷粒商城




【推荐】国内首个AI IDE,深度理解中文开发场景,立即下载体验Trae
【推荐】编程新体验,更懂你的AI,立即体验豆包MarsCode编程助手
【推荐】抖音旗下AI助手豆包,你的智能百科全书,全免费不限次数
【推荐】轻量又高性能的 SSH 工具 IShell:AI 加持,快人一步
· 10年+ .NET Coder 心语,封装的思维:从隐藏、稳定开始理解其本质意义
· .NET Core 中如何实现缓存的预热?
· 从 HTTP 原因短语缺失研究 HTTP/2 和 HTTP/3 的设计差异
· AI与.NET技术实操系列:向量存储与相似性搜索在 .NET 中的实现
· 基于Microsoft.Extensions.AI核心库实现RAG应用
· 阿里巴巴 QwQ-32B真的超越了 DeepSeek R-1吗?
· 【译】Visual Studio 中新的强大生产力特性
· 10年+ .NET Coder 心语 ── 封装的思维:从隐藏、稳定开始理解其本质意义
· 【设计模式】告别冗长if-else语句:使用策略模式优化代码结构
· 字符编码:从基础到乱码解决
2020-12-23 设计模式—单例模式的六种写法