qemu模拟器下编译运行基于riscv指令集的Linux操作系统
基本原理:
在物理服务器Ubuntu14.04上安装qemu模拟器,模拟器中运行基于riscv指令集编译的linux镜像文件。
用到的工具包括:
riscv-qemu(模拟器,可以模拟运行riscv指令集的程序或镜像)
riscv-tools(基于riscv指令集的交叉编译工具)
riscv-pk(用于包装内核文件vmlinux)
busybox(用于给linux镜像安装基本命令,如ls,cat,mv等等)
以上工具安装路径在我们的物理服务器里分别为:

一、安装toolchain
1.下载交叉编译工具:
$ git clone --recursive https://github.com/riscv/riscv-gnu-toolchain

2.安装运行库
$ sudo apt-get install autoconf automake autotools-dev curl libmpc-dev libmpfr-dev libgmp-dev gawk build-essential bison flex texinfo gperf libtool patchutils bc zlib1g-dev
3.配置安装路径
$ ./configure --prefix=/opt/riscv
4.编译(linux版本)
$ make linux
5.验证交叉编译工具:
编译hello.c到hello 注:要加上-static 静态编译选项
riscv64-unknown-linux-gnu-gcc -static hello.c -o hello

在x86环境下执行hello(x86下的gcc无法执行hello,因为格式为riscv)
./hello
无法执行不要紧,因为还没有安装qemu模拟器,我们继续操作
二、安装qemu
1.安装运行库
$ sudo apt-get install gcc libc6-dev pkg-config bridge-utils uml-utilities zlib1g-dev libglib2.0-dev autoconf automake libtool libsdl1.2-dev
2.下载master分支的qemu
$ git clone https://github.com/riscv/riscv-qemu

$ cd riscv-qemu $ git submodule update --init pixman
3.配置qemu,riscv-64-linux-user为用户模式,可以运行基于riscv指令集编译的程序文件,softmmu为镜像模拟器,可以运行基于riscv指令集编译的linux镜像,为了测试方便,这两个我都安装了
$ ./configure --target-list=riscv64-linux-user,riscv64-softmmu [--prefix=INSTALL_LOCATION]
4.编译qemu
$ make
5.安装qemu
$ [make install] # if you supplied prefix above
6.测试qemu用户模式:
6.1使用交叉编译器编译一个helloword程序
$ riscv64-unknown-linux-gnu-gcc hello.c -o hello
6.2使用qemu的用户模式运行riscv指令集的hello二进制文件
$ ./riscv64-linux-user/qemu-riscv64 -L $RISCV/sysroot hello

7.测试qemu镜像模式:
启动qemu,载入bbl示例镜像文件,下载地址:bblvmlinuxinitramfs_dynamic
$ riscv-qemu/riscv64-softmmu/qemu-system-riscv64 -kernel /home/tank/bblvmlinuxinitramfs_dynamic -nographic
出现riscv图案并且可以使用镜像,代表qemu镜像模拟器安装正常。
三、安装riscv-pk
1.下载对应分支的riscv-pk工具
$ git clone -b bigbuf https://github.com/riscv/riscv-pk

2.创建build目录,用于存放镜像bbl
$ cd riscv-pk
$ mkdir build $ cd build
3.配置交叉编译工具路径,$RICSV代表交叉工具的路径 第一步中设置为了/opt/riscv
$ ../configure --prefix=$RISCV --host=riscv64-unknown-linux-gcc
4.编译
$ make
5.安装pk
$ make install
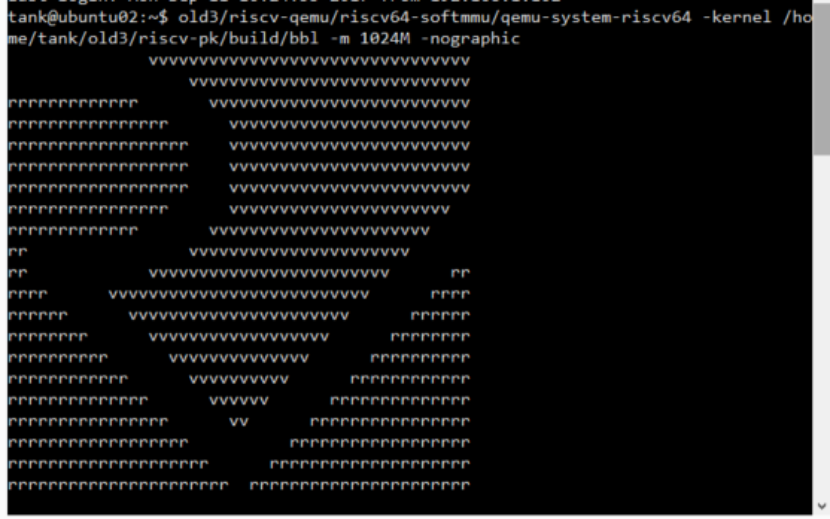
注:耗时较长,验证pk工具的方法是用pk包装镜像文件vmlinux成bbl,qemu启动bbl的时候出现如下图案,代表pk工具没有问题
四、安装busybox
1.下载对应版本的busybox
$ curl -L http://busybox.net/downloads/busybox-1.26.2.tar.bz2 > busybox-1.26.2.tar.bz2
2.解压缩文件
$ tar xvjf busybox-1.26.2.tar.bz2
$ cd busybox-1.26.2
3.清空其它所以配置(这样可以自己添加需要的命令组件)
$ make allnoconfig
4.进入菜单页面配置
$ sudo apt-get install libncurses5-dev
$ make menuconfig
下图中这几项为核心项,配置完成后只能使用ash init等几个命令
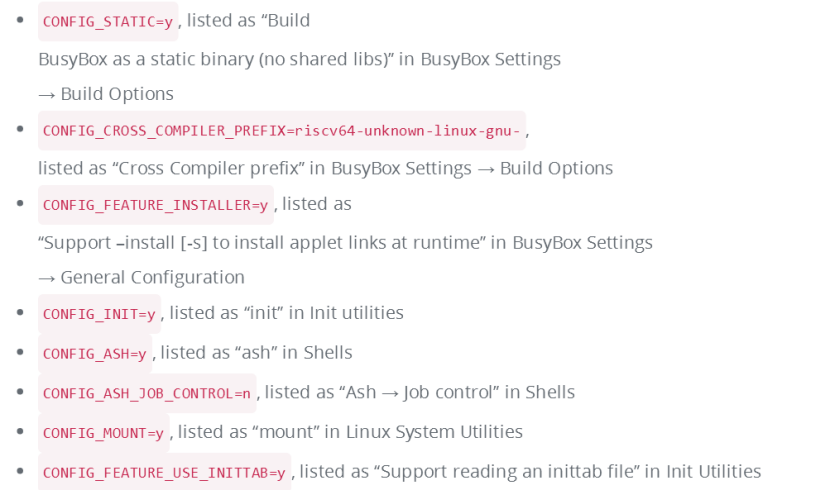
如果想使用ls,cat等命令,参考配置链接https://wenku.baidu.com/view/5d25420602020740be1e9b0b.html
5.采用16线程的速度进行编译
$ make -j16
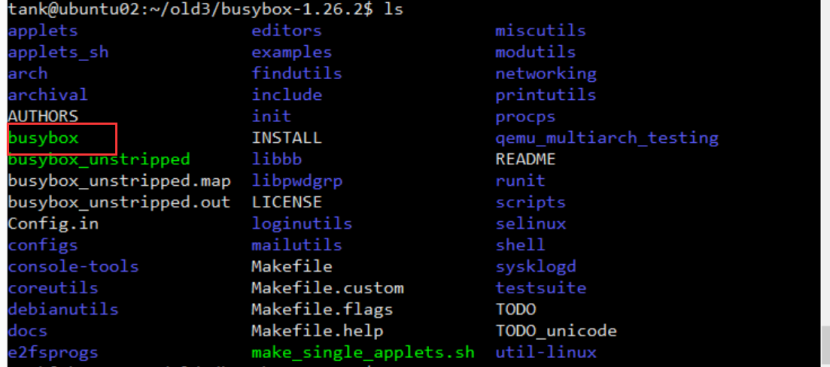
编译完成后会在busybox-1.26.2目录下生成busybox二进制执行文件
6.测试busybox,使用qemu的镜像模式载入busybox文件,启动模拟器
$ ./riscv64-linux-user/qemu-riscv64 -L $RISCV/sysroot busybox ash
如果出现以下界面代表busybox安装成功(即可以使用busybox的一些命令)

五、编译linux内核
1.下载对应分支的内核
$ git clone -b fix-gcc-flags https://github.com/riscv/riscv-linux.git

$ cd linux-4.6.2
2.配置内核信息
$ make ARCH=riscv defconfig
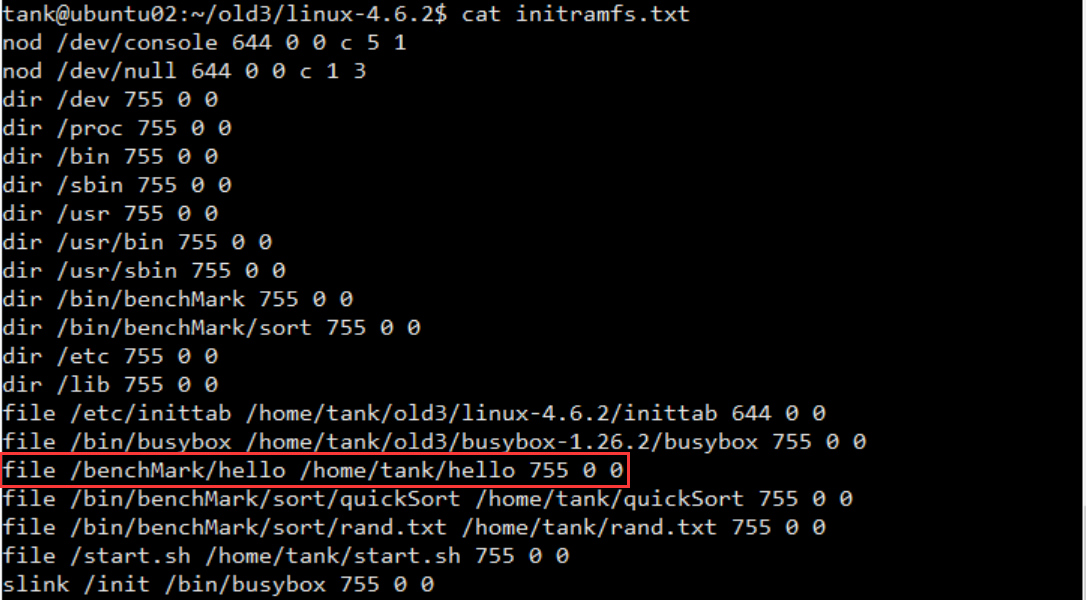
3.在内核目录下新建initramfs.txt文件,并保存以下内容
$ vi initramfs.txt
4.在内核目录下新建inittab文件,并保存以下内容
$ vi inittab

5.进入菜单页面配置
$ make ARCH=riscv menuconfig
注:更改下面两个选项
"General setup -> Initial RAM Filesystem..." (CONFIG_BLK_DEV_INITRD=y)
"General setup -> Initramfs source files = initramfs.txt" (CONFIG_INITRAMFS_SRC=initramfs.txt)
6.编译内核,生成vmlinux文件
$ make -j4 ARCH=riscv vmlinux
注:编译完成在linux4-6.2文件夹下出现vmlinux

六、使用pk包装vmlinux
1.进入pk工具的build目录
$ cd /path/to/risv-tools/riscv-pk/build
$ rm -rf *
2.配置要编译的内核文件以及使用的指令集路径及名称
$ ../configure --prefix=$RISCV --with-payload=/path/to/linux-4.6.2/vmlinux --host=riscv64-unknown-linux-gnu
3.包装生成bbl镜像文件
$ make bbl

七、qemu模拟运行镜像bbl
$ riscv-qemu/riscv64-softmmu/qemu-system-riscv64 -kernel /home/tank/old3/riscv-pk/build/bbl -m 1024M -nographic
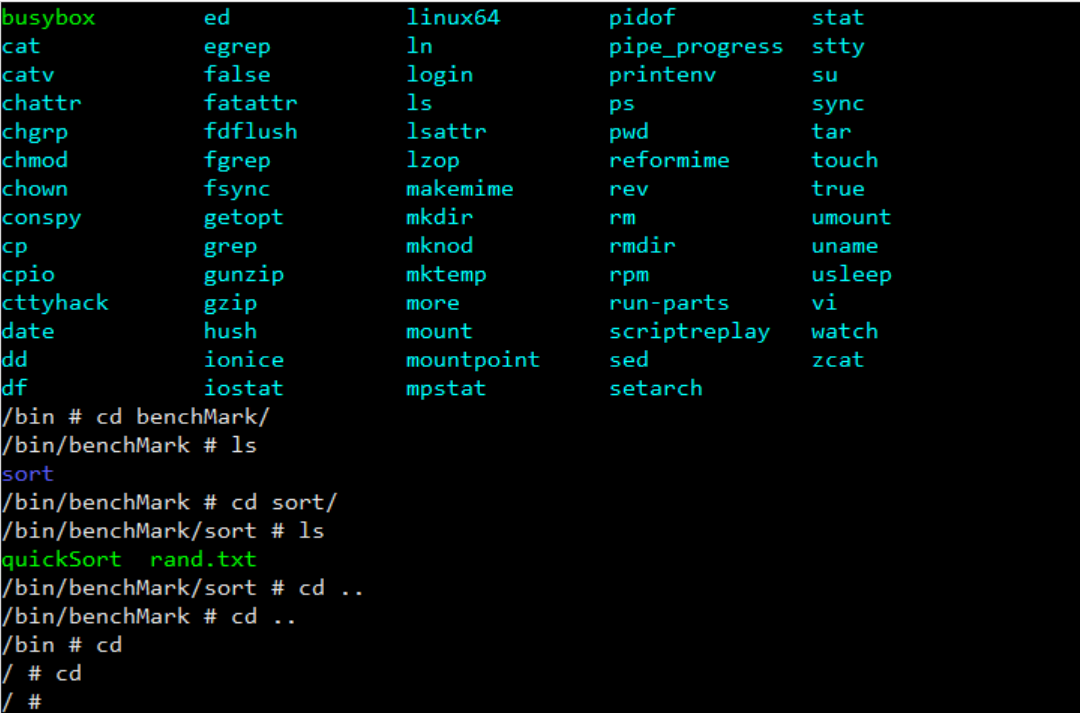
可以使用ls cat等命令,代表运行成功
博主原创,转载请标明出处!谢谢


 浙公网安备 33010602011771号