
CentOS6.9安装WordPress搭建自己的博客网站
首先说明我用的是服务器上之前装的mysql数据库,只需要配置上就行了
准备工作

CentOS6.9
在/目录下创建一个目录src,把下载的东西都放到这个文件夹下
下载Apache Httpd,下载地址:
http://httpd.apache.org/download.cgi#apache24
wget http://mirrors.tuna.tsinghua.edu.cn/apache//httpd/httpd-2.4.34.tar.gz
下载APR和APR-util
http://apr.apache.org/download.cgi
wget http://mirrors.tuna.tsinghua.edu.cn/apache//apr/apr-1.6.3.tar.gz
wget http://mirrors.tuna.tsinghua.edu.cn/apache//apr/apr-util-1.6.1.tar.gz
下载php
http://www.php.net/downloads.php
这个只能先下载到本地,然后上传到服务器上
下载WordPress
https://wordpress.org/download/ 英文版
wget https://wordpress.org/latest.tar.gz
https://cn.wordpress.org/download/ 中文版
wget https://cn.wordpress.org/wordpress-4.9.4-zh_CN.tar.gz
下载xcache
http://xcache.lighttpd.net/wiki/Release-3.2.0
wget http://xcache.lighttpd.net/pub/Releases/3.2.0/xcache-3.2.0.tar.gz
开始安装
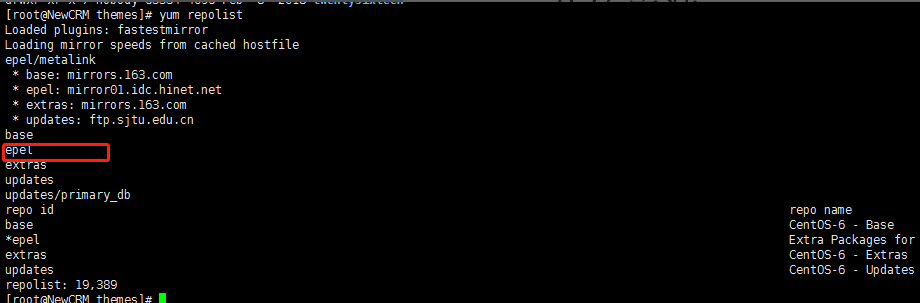
但是还是要看看自己的yum源是否配了epel源,没有赶快配,因为php里面有个依赖包需要epel源下载,用命令yum repolist
1.安装开发包组
首先我们先安装开发包组,运行命令
yum groupinstall "Development Tools" -y

安装完毕以后
2.安装httpd的依赖包
我们开始安装httpd的依赖包运行命令
yum install pcre-devel openssl-devel -y

说明已经安装过
3.解压文件并转移,编译并安装httpd
首先先解压apr-1.6.3.tar.gz
tar -zxvf apr-1.6.3.tar.gz
再解压apr-util-1.6.1.tar.gz
tar -zxvf apr-util-1.6.1.tar.gz
最后解压httpd-2.4.34.tar.gz
tar -zxvf httpd-2.4.34.tar.gz
解压完毕后转移文件并重命名
mv apr-1.6.3 httpd-2.4.34/srclib/apr
mv apr-util-1.6.1 httpd-2.4.34/srclib/apr-util
操作完毕以后
cd httpd-2.4.34
开始编译
./configure --prefix=/app/httpd24 --enable-so --enable-ssl --enable-cgi --enable-rewrite --with-zlib --with-pcre --with-included-apr --enable-modules=most --enable-mpms-shared=all --with-mpm=prefork
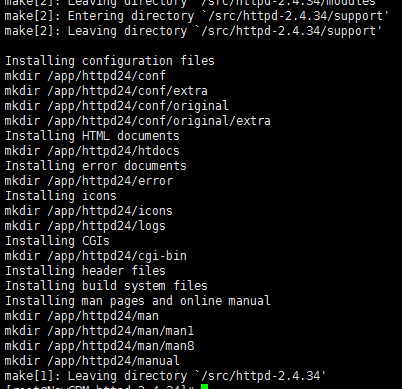
编译成功以后,接下来就是安装了运行make && make install开始安装
make && make install
有可能会出现以下问题
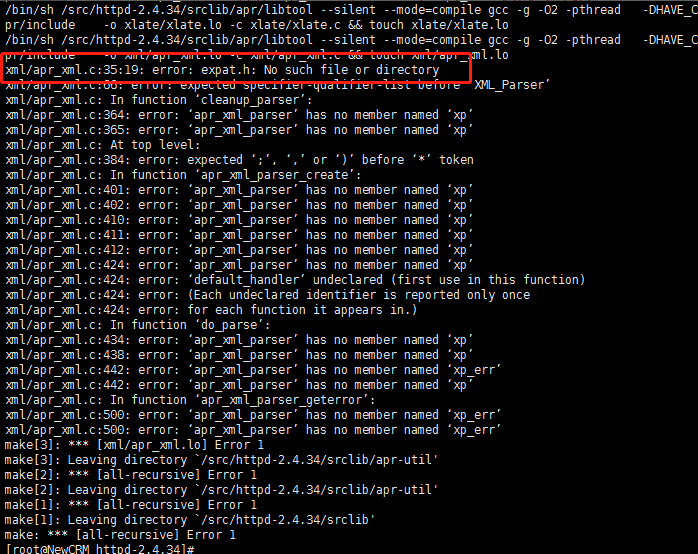
原因是是少了expat库,需要安装该库
yum install expat-devel
安装完expat库以后,需要重新编译
./configure --prefix=/app/httpd24 --enable-so --enable-ssl --enable-cgi --enable-rewrite --with-zlib --with-pcre --with-included-apr --enable-modules=most --enable-mpms-shared=all --with-mpm=prefork
然后重新安装
make && make install
安装成功
4.配置环境变量
安装完成以后接下来我们,开始配置环境变量,运行命令:
vim /etc/profile
在最下面加上
#httpd
export PATH=/app/httpd24/bin:$PATH
然后运行
source /etc/profile
5.安装脚本 httpd
开始安装脚本 httpd
yum install httpd -y
切换文件夹
cd /etc/rc.d/init.d/
复制一个httpd,以后用这个24做脚本
cp httpd httpd24
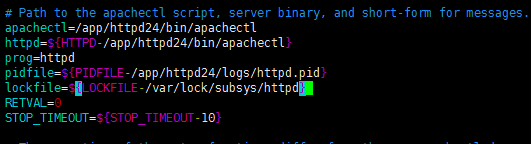
我们还需要修改几项,运行vim httpd24
# Path to the apachectl script, server binary, and short-form for messages.
apachectl=/app/httpd24/bin/apachectl
httpd=${HTTPD-/app/httpd24/bin/apachectl}
prog=httpd
pidfile=${PIDFILE-/app/httpd24/logs/httpd.pid}
lockfile=${LOCKFILE-/var/lock/subsys/httpd}
RETVAL=0
STOP_TIMEOUT=${STOP_TIMEOUT-10}
完成以后我们就可以启动下看看了,运行命令
service httpd24 start

在浏览器访问
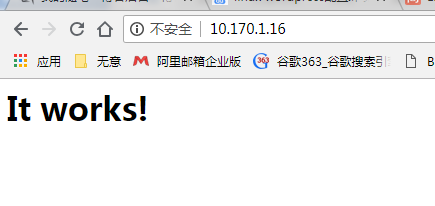
如果不成功,则用ss -nutl命令来查看下端口,80端口有没有打开

如果连接不上可能是你的CentOS系统防火墙的问题,必须要关闭掉防火墙
查询防火墙状态:
[root@localhost ~]# service iptables status
停止防火墙:
[root@localhost ~]# service iptables stop
启动防火墙:
[root@localhost ~]# service iptables start
重启防火墙:
[root@localhost ~]# service iptables restart
永久关闭防火墙:
[root@localhost ~]# chkconfig iptables off
永久关闭后启用:
[root@localhost ~]# chkconfig iptables on
6.编译并安装PHP
回到我们的上传目录src
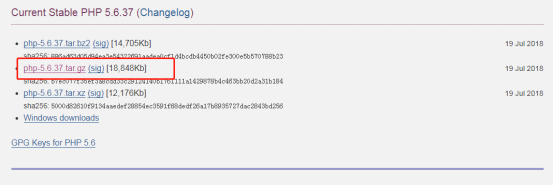
tar -zxvf php-5.6.37.tar.gz
安装依赖包
yum -y install bzip2-devel libxml2-devel libmcrypt-devel
切换到php下
cd php-5.6.37
注:关于mysql相关的路径根据安装情况填写,可以用find / -name 查找相关mysql的路径
运行命令
./configure --prefix=/app/php --with-mysql=/usr --with-openssl --with-mysqli=/usr/bin/mysql_config --enable-mbstring --with-freetype-dir --with-jpeg-dir --with-png-dir --with-zlib --with-libxml-dir=/usr --enable-xml --enable-sockets --with-apxs2=/app/httpd24/bin/apxs --with-mcrypt --with-config-file-path=/etc --with-config-file-scan-dir=/etc/php.d --with-bz2
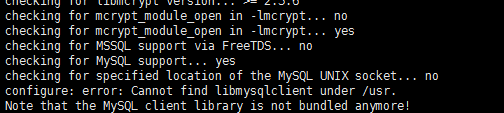
cp -rp /usr/lib64/mysql/libmysqlclient.so.16.0.0 /usr/libmysqlclient.so
再次编译
./configure --prefix=/app/php --with-mysql=/usr --with-openssl --with-mysqli=/usr/bin/mysql_config --enable-mbstring --with-freetype-dir --with-jpeg-dir --with-png-dir --with-zlib --with-libxml-dir=/usr --enable-xml --enable-sockets --with-apxs2=/app/httpd24/bin/apxs --with-mcrypt --with-config-file-path=/etc --with-config-file-scan-dir=/etc/php.d --with-bz2

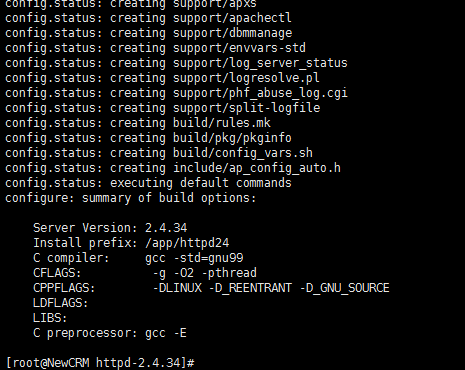
出现上面画面表示编译成功
然后开始安装
make && make install
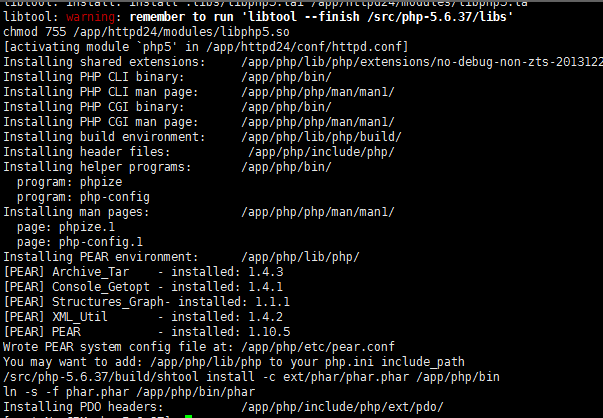
安装完毕后运行
cp php.ini-production /etc/php.ini
7.修改httpd的配置文件以支持PHP
然后我们开始修改httpd的配置文件,让他支持PHP
vim /app/httpd24/conf/httpd.conf
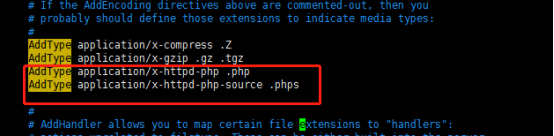
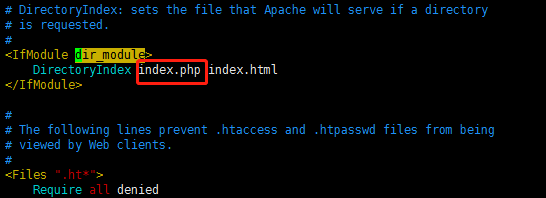
添加
AddType application/x-httpd-php .php
AddType application/x-httpd-php-source .phps
index.php
修改完以后以后重启下httpd24
service httpd24 restart
接下下来我们测试下,用以下命令来创建下
vim /app/httpd24/htdocs/index.php
把下面粘贴进去
<?php
$conn=mysql_connect('localhost','数据库账户','数据库密码');
if($conn)
echo "OK";
else
echo "Not OK";
mysql_close();
phpinfo();
?>
然后我们再次访问
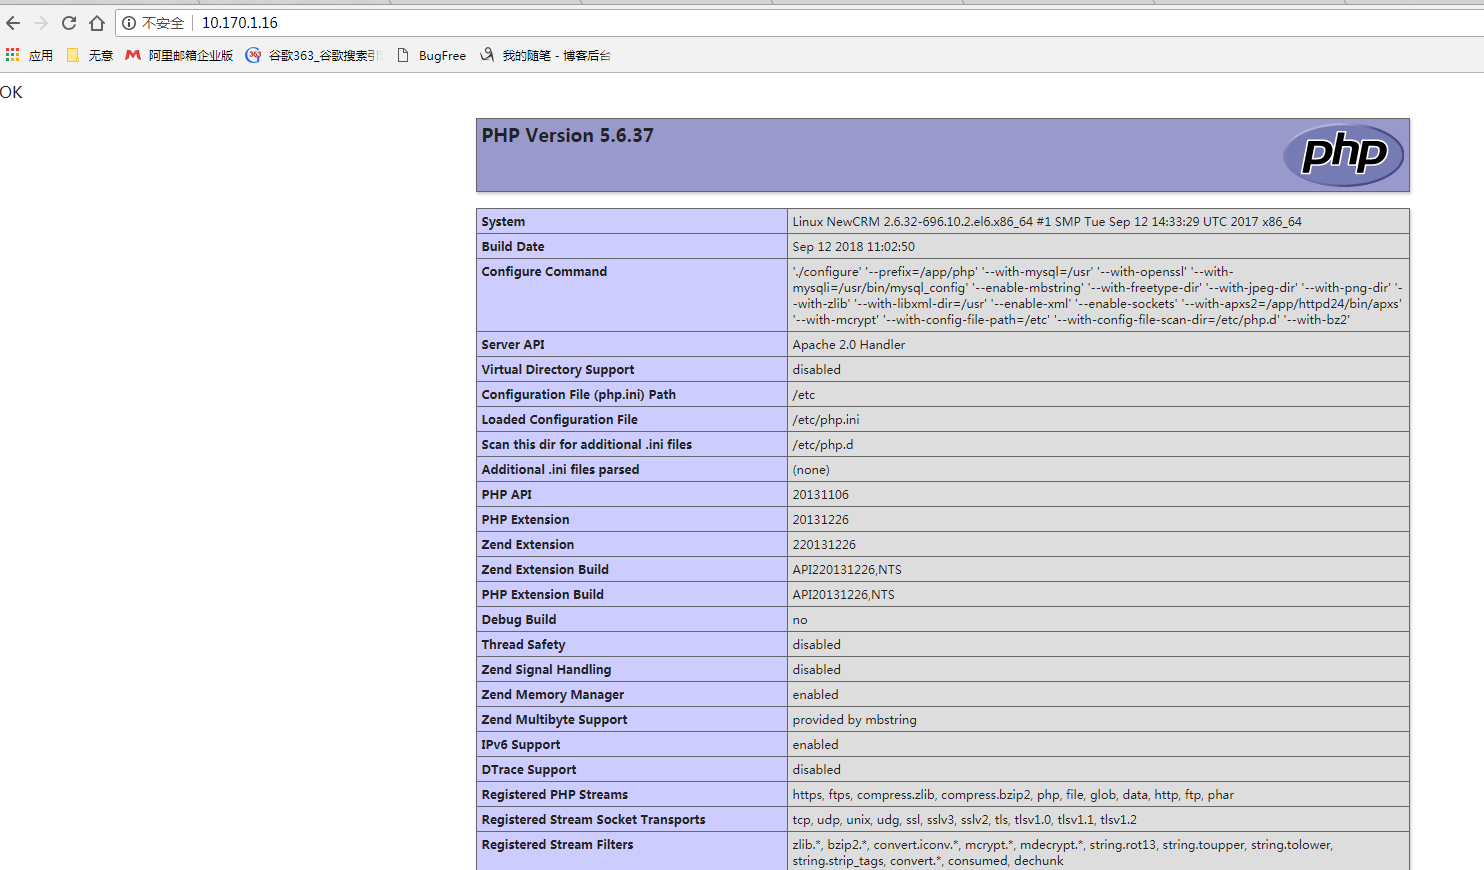
成功!!!
8.安装Wordpress
转移到src下-C代表解压到哪个目录下
tar -zxvf wordpress-4.9.4-zh_CN.tar.gz -C /app/httpd24/htdocs/
然后
cd /app/httpd24/htdocs/

然后转移文件
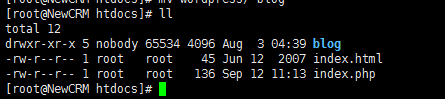
mv wordpress/ blog
然后
cd blog/
改名
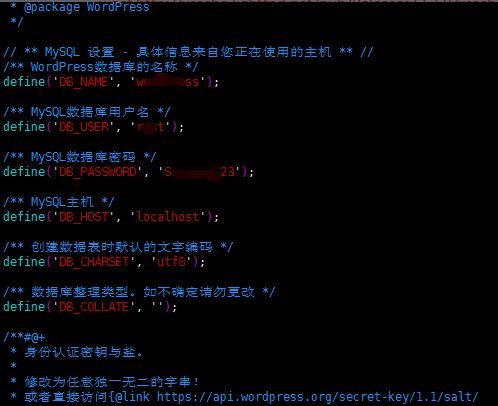
cp wp-config-sample.php wp-config.php
然后修改配置文件
vim wp-config.php
8.1访问wordpress
修改完以后,我们访问http://10.170.1.16/blog
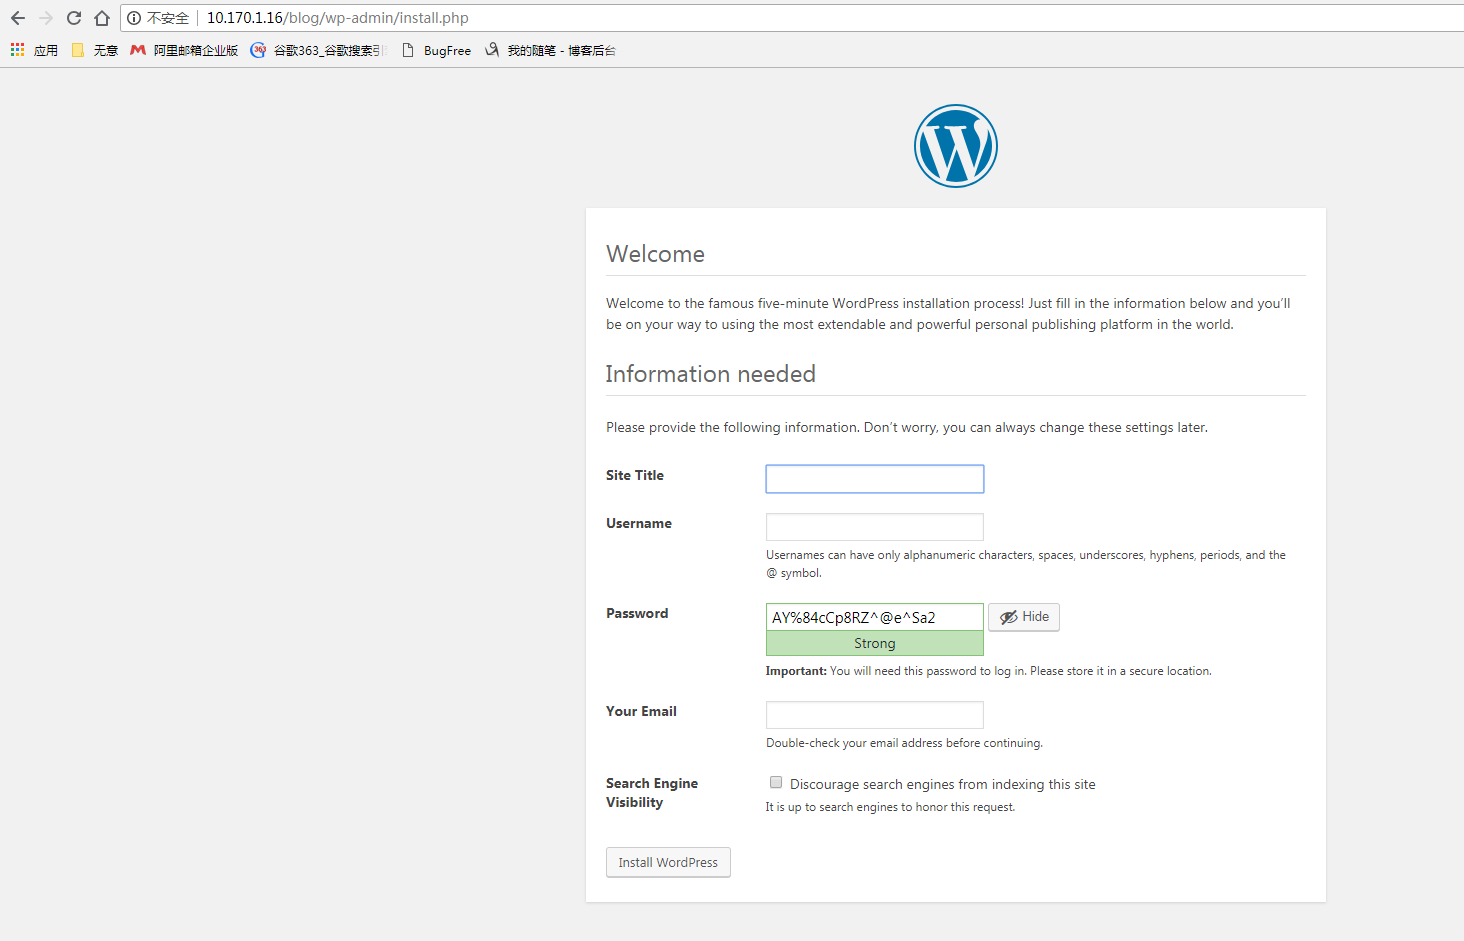
设置自己的网站标题,用户名和密码
然后点击安装WordPress
成功后会自动转到登陆页面

 浙公网安备 33010602011771号