
SpringBoot整合Xxl-Job,实现各种任务调度(源码加避坑)
前言:学习一个技术最好的方式就是先学会运行一个demo,去了解一个大概后,再去深究细节;
所以,本篇教大家首先如何部署任务的调度中心控制台,然后书写自己的任务以及部署执行器,最后通过控制台来实现任务调度;
源码链接:
xxl-job-master(任务调度管理中心控制台): https://files.cnblogs.com/files/blogs/721495/xxl-job-master.zip?t=1647765632
xxljob-demo(任务编写,任务执行器):https://files.cnblogs.com/files/blogs/721495/xxljob-demo.zip?t=1647765603
一、部署调度中心
下载地址:https://files.cnblogs.com/files/blogs/721495/xxl-job-master.zip?t=1647765632 步骤如下
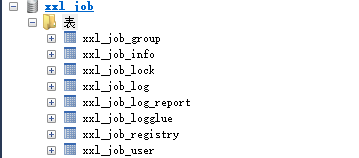
1、复制下载好代码中doc目录下的db目录中的sql语句到MySQL执行一遍创建数据库。
2、xxl-job-admin即为调度中心控制台,需要修改application.properties文件中数据源的配置信息为自己刚刚创建的数据库。
### xxl-job, datasource
spring.datasource.url=jdbc:mysql://127.0.0.1:3306/xxl_job?useUnicode=true&characterEncoding=UTF-8&autoReconnect=true&serverTimezone=Asia/Shanghai
spring.datasource.username=root
spring.datasource.password=123456
spring.datasource.driver-class-name=com.mysql.cj.jdbc.Driver
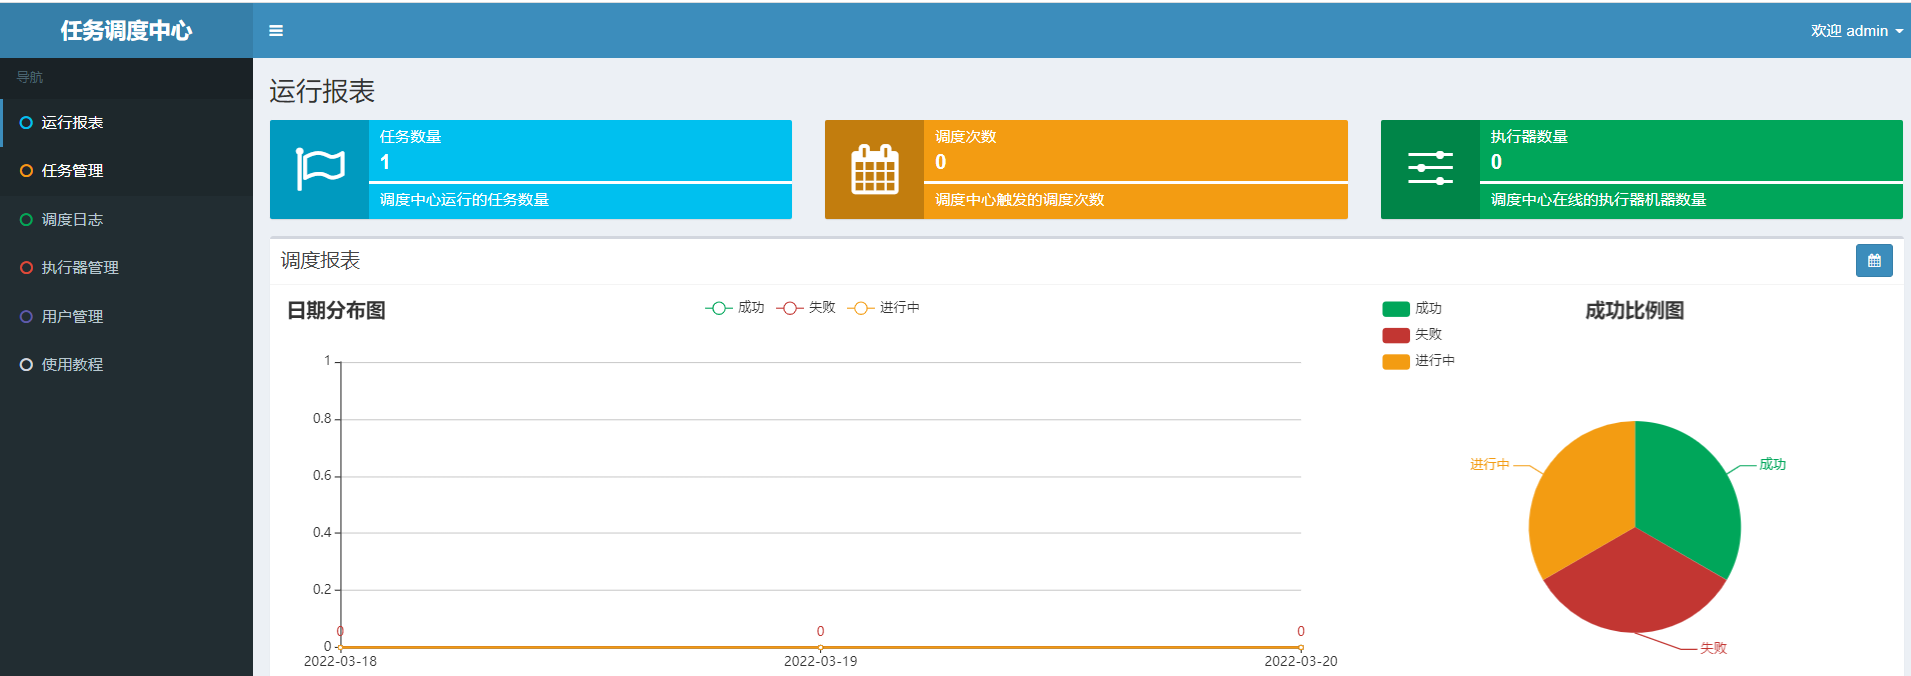
3、启动xxl-job-admin项目,访问http://localhost:8080/xxl-job-admin,用户名:admin,密码:123456,到此调度中心部署完毕。
二、编写任务,部署执行器
刚才下载的代码中,其实xxl-job-executor-samples模块中包含官方提供的编写任务部署执行器的相关代码,但这边为了更好地理解,我们将这部分代码重新抽离了出来;
源码链接: https://files.cnblogs.com/files/blogs/721495/xxljob-demo.zip?t=1647765603 主要步骤如下:
2.1、添加依赖
<!-- 任务调度xxl-job -->
<dependency>
   <groupId>com.xuxueli</groupId>
   <artifactId>xxl-job-core</artifactId>
   <version>2.2.0</version>
</dependency>
2.2、编写application.yml配置文件
注意点:xxl.job.admin.addresses这边地址的书写不要用127.0.0.1,通过ipconfig去查看具体是多少,不然后面执行任务会报错,端口为9999,后续会用到;
server:
  port: 8186

spring:
  application:
    name: xxljob-demo

# xxl-job配置
xxl:
  job:
    admin:
      # 调度中心部署跟地址 [选填]:如调度中心集群部署存在多个地址则用逗号分隔。执行器将会使用该地址进行"执行器心跳注册"和"任务结果回调";为空则关闭自动注册;
      addresses: http://127.0.0.1:8080/xxl-job-admin
    executor:
      # 执行器注册 [选填]:优先使用该配置作为注册地址,为空时使用内嵌服务 ”IP:PORT“ 作为注册地址。从而更灵活的支持容器类型执行器动态IP和动态映射端口问题。
      address:
      # 执行器AppName [选填]:执行器心跳注册分组依据;为空则关闭自动注册
      appname: demo-app
      # 执行器IP [选填]:默认为空表示自动获取IP,多网卡时可手动设置指定IP,该IP不会绑定Host仅作为通讯实用;地址信息用于 "执行器注册" 和 "调度中心请求并触发任务";
      ip:
      # 执行器端口号 [选填]:小于等于0则自动获取;默认端口为9999,单机部署多个执行器时,注意要配置不同执行器端口;
      port: 9999
      # 执行器运行日志文件存储磁盘路径 [选填] :需要对该路径拥有读写权限;为空则使用默认路径;
      logpath: /Users/luoyu/Documents/log/xxl-job/jobhandler
      # 执行器日志文件保存天数 [选填] : 过期日志自动清理, 限制值大于等于3时生效; 否则, 如-1, 关闭自动清理功能;
      logretentiondays: 15
    # 执行器通讯TOKEN [选填]:非空时启用;
    accessToken:
2.2、编写配置类
这边配置类主要是用到了刚才配置文件中定义的信息来配置XxlJobConfig;
import com.xxl.job.core.executor.impl.XxlJobSpringExecutor;
import lombok.extern.slf4j.Slf4j;
import org.springframework.beans.factory.annotation.Value;
import org.springframework.context.annotation.Bean;
import org.springframework.context.annotation.Configuration;

@Slf4j
@Configuration
public class XxlJobConfig {

    @Value("${xxl.job.admin.addresses}")
    private String adminAddresses;

    @Value("${xxl.job.accessToken}")
    private String accessToken;

    @Value("${xxl.job.executor.appname}")
    private String appname;

    @Value("${xxl.job.executor.address}")
    private String address;

    @Value("${xxl.job.executor.ip}")
    private String ip;

    @Value("${xxl.job.executor.port}")
    private int port;

    @Value("${xxl.job.executor.logpath}")
    private String logPath;

    @Value("${xxl.job.executor.logretentiondays}")
    private int logRetentionDays;

    @Bean
    public XxlJobSpringExecutor xxlJobExecutor() {
        log.info(">>>>>>>>>>> xxl-job config init.");
        XxlJobSpringExecutor xxlJobSpringExecutor = new XxlJobSpringExecutor();
        xxlJobSpringExecutor.setAdminAddresses(adminAddresses);
        xxlJobSpringExecutor.setAppname(appname);
        xxlJobSpringExecutor.setAddress(address);
        xxlJobSpringExecutor.setIp(ip);
        xxlJobSpringExecutor.setPort(port);
        xxlJobSpringExecutor.setAccessToken(accessToken);
        xxlJobSpringExecutor.setLogPath(logPath);
        xxlJobSpringExecutor.setLogRetentionDays(logRetentionDays);

        return xxlJobSpringExecutor;
    }

    /**
     * 针对多网卡、容器内部署等情况,可借助 "spring-cloud-commons" 提供的 "InetUtils" 组件灵活定制注册IP;
     *
     *      1、引入依赖:
     *          <dependency>
     *             <groupId>org.springframework.cloud</groupId>
     *             <artifactId>spring-cloud-commons</artifactId>
     *             <version>${version}</version>
     *         </dependency>
     *
     *      2、配置文件,或者容器启动变量
     *          spring.cloud.inetutils.preferred-networks: 'xxx.xxx.xxx.'
     *
     *      3、获取IP
     *          String ip_ = inetUtils.findFirstNonLoopbackHostInfo().getIpAddress();
     */

}
2.3、创建各种任务
简单任务、分片广播任务、命令行任务、跨平台Http任务、生命周期任务示例:任务初始化与销毁时,支持自定义相关逻辑;
@XxlJob("demoJobHandler") :该注解中的value待会在控制台会用到,用来关联该任务以便后续的启动执行;
import com.xxl.job.core.biz.model.ReturnT;
import com.xxl.job.core.handler.IJobHandler;
import com.xxl.job.core.handler.annotation.XxlJob;
import com.xxl.job.core.log.XxlJobLogger;
import com.xxl.job.core.util.ShardingUtil;
import lombok.extern.slf4j.Slf4j;
import org.springframework.stereotype.Component;

import java.io.BufferedInputStream;
import java.io.BufferedReader;
import java.io.InputStreamReader;
import java.net.HttpURLConnection;
import java.net.URL;
import java.util.concurrent.TimeUnit;

/**
 * XxlJob开发示例(Bean模式)
 *
 * 开发步骤:
 * 1、在Spring Bean实例中,开发Job方法,方式格式要求为 "public ReturnT<String> execute(String param)"
 * 2、为Job方法添加注解 "@XxlJob(value="自定义jobhandler名称", init = "JobHandler初始化方法", destroy = "JobHandler销毁方法")",注解value值对应的是调度中心新建任务的JobHandler属性的值。
 * 3、执行日志:需要通过 "XxlJobLogger.log" 打印执行日志;
 *
 * @author xuxueli 2019-12-11 21:52:51
 */
@Slf4j
@Component
public class XxlJobService {

    /**
     * 1、简单任务示例(Bean模式)
     */
    @XxlJob("demoJobHandler")
    public ReturnT<String> demoJobHandler(String param) throws Exception {
        XxlJobLogger.log("XXL-JOB, Hello World.");

        for (int i = 0; i < 5; i++) {
            XxlJobLogger.log("beat at:" + i);
            TimeUnit.SECONDS.sleep(2);
        }
        return ReturnT.SUCCESS;
    }

    /**
     * 2、分片广播任务
     */
    @XxlJob("shardingJobHandler")
    public ReturnT<String> shardingJobHandler(String param) throws Exception {

        // 分片参数
        ShardingUtil.ShardingVO shardingVO = ShardingUtil.getShardingVo();
        XxlJobLogger.log("分片参数:当前分片序号 = {}, 总分片数 = {}", shardingVO.getIndex(), shardingVO.getTotal());

        // 业务逻辑
        for (int i = 0; i < shardingVO.getTotal(); i++) {
            if (i == shardingVO.getIndex()) {
                XxlJobLogger.log("第 {} 片, 命中分片开始处理", i);
            } else {
                XxlJobLogger.log("第 {} 片, 忽略", i);
            }
        }

        return ReturnT.SUCCESS;
    }

    /**
     * 3、命令行任务
     */
    @XxlJob("commandJobHandler")
    public ReturnT<String> commandJobHandler(String param) throws Exception {
        String command = param;
        int exitValue = -1;

        BufferedReader bufferedReader = null;
        try {
            // command process
            Process process = Runtime.getRuntime().exec(command);
            BufferedInputStream bufferedInputStream = new BufferedInputStream(process.getInputStream());
            bufferedReader = new BufferedReader(new InputStreamReader(bufferedInputStream));

            // command log
            String line;
            while ((line = bufferedReader.readLine()) != null) {
                XxlJobLogger.log(line);
            }

            // command exit
            process.waitFor();
            exitValue = process.exitValue();
        } catch (Exception e) {
            XxlJobLogger.log(e);
        } finally {
            if (bufferedReader != null) {
                bufferedReader.close();
            }
        }

        if (exitValue == 0) {
            return IJobHandler.SUCCESS;
        } else {
            return new ReturnT<String>(IJobHandler.FAIL.getCode(), "command exit value("+exitValue+") is failed");
        }
    }

    /**
     * 4、跨平台Http任务
     */
    @XxlJob("httpJobHandler")
    public ReturnT<String> httpJobHandler(String param) throws Exception {

        // request
        HttpURLConnection connection = null;
        BufferedReader bufferedReader = null;
        try {
            // connection
            URL realUrl = new URL(param);
            connection = (HttpURLConnection) realUrl.openConnection();

            // connection setting
            connection.setRequestMethod("GET");
            connection.setDoOutput(true);
            connection.setDoInput(true);
            connection.setUseCaches(false);
            connection.setReadTimeout(5 * 1000);
            connection.setConnectTimeout(3 * 1000);
            connection.setRequestProperty("connection", "Keep-Alive");
            connection.setRequestProperty("Content-Type", "application/json;charset=UTF-8");
            connection.setRequestProperty("Accept-Charset", "application/json;charset=UTF-8");

            // do connection
            connection.connect();

            //Map<String, List<String>> map = connection.getHeaderFields();

            // valid StatusCode
            int statusCode = connection.getResponseCode();
            if (statusCode != 200) {
                throw new RuntimeException("Http Request StatusCode(" + statusCode + ") Invalid.");
            }

            // result
            bufferedReader = new BufferedReader(new InputStreamReader(connection.getInputStream(), "UTF-8"));
            StringBuilder result = new StringBuilder();
            String line;
            while ((line = bufferedReader.readLine()) != null) {
                result.append(line);
            }
            String responseMsg = result.toString();

            XxlJobLogger.log(responseMsg);
            return ReturnT.SUCCESS;
        } catch (Exception e) {
            XxlJobLogger.log(e);
            return ReturnT.FAIL;
        } finally {
            try {
                if (bufferedReader != null) {
                    bufferedReader.close();
                }
                if (connection != null) {
                    connection.disconnect();
                }
            } catch (Exception e2) {
                XxlJobLogger.log(e2);
            }
        }

    }

    /**
     * 5、生命周期任务示例:任务初始化与销毁时,支持自定义相关逻辑;
     */
    @XxlJob(value = "demoJobHandler2", init = "init", destroy = "destroy")
    public ReturnT<String> demoJobHandler2(String param) throws Exception {
        XxlJobLogger.log("XXL-JOB, Hello World.");
        return ReturnT.SUCCESS;
    }

    public void init(){
        log.info("init");
    }

    public void destroy(){
        log.info("destory");
    }

}
2.4、启动XxljobApplication
控制台信息:

三、控制台调度执行任务
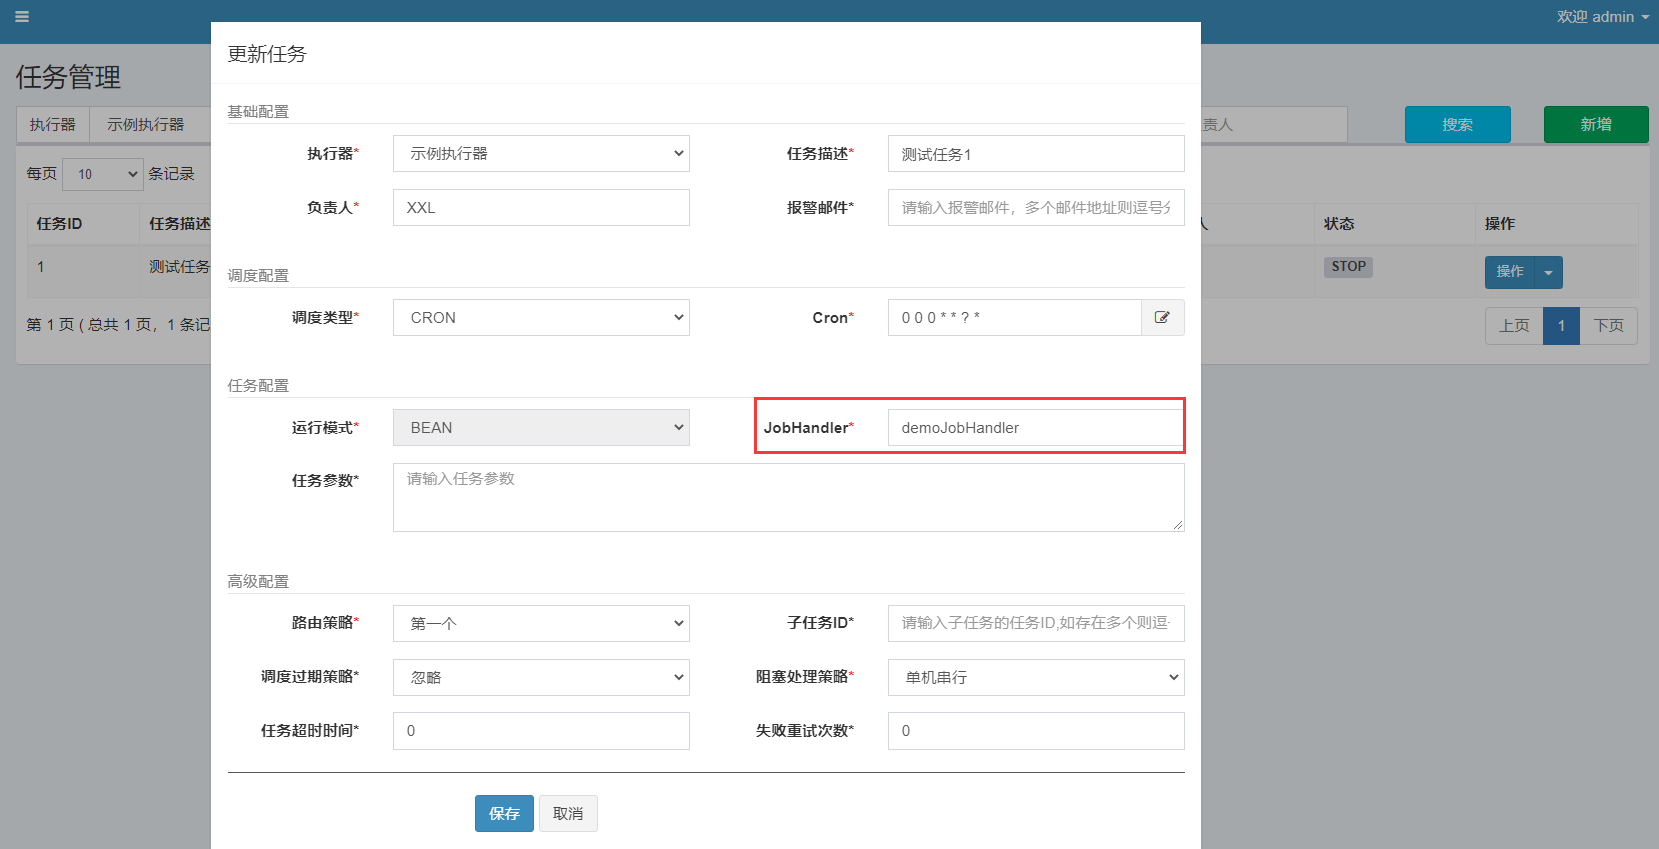
3.1、观察已存在的任务信息
可以看到控制台上已经有了一个任务,通过操作中的编辑,我们可以注意到JobHandler与第一个简单任务注解中@XxlJob("demoJobHandler")的value相同;

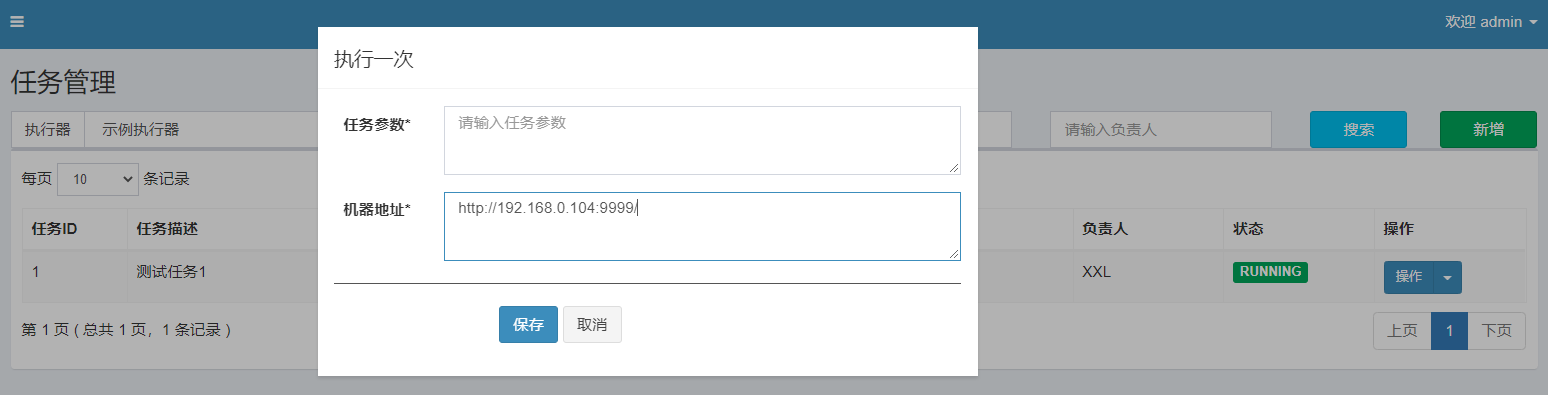
3.2、启动任务执行
这边的机器地址需要与任务执行器的地址一致,端口因为我们在编写任务的配置文件中定义了9999;
3.3、查询日志


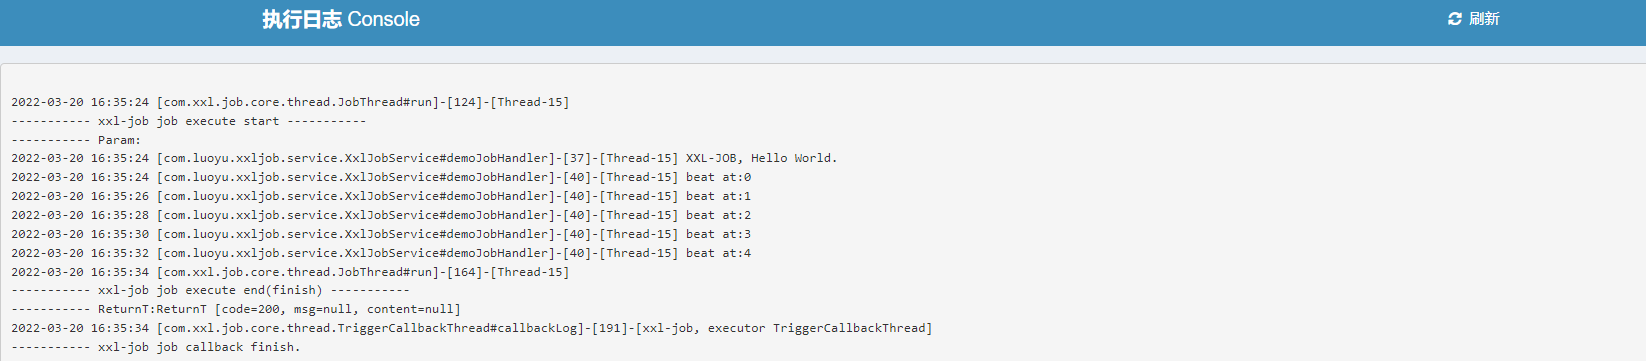
5 总结
通过简单任务模式去了解了 如何去编写任务以及控制台如何去管理调度执行任务,其他的几种任务方式大家可以自行去理解哈, 觉得有帮助的话可以关注下公众号哈,欢迎关注微信公众号<彭晓琪>
少年的志向,不应该是房子,他们应该伏案疾书,或为心中的梦想而挥洒汗水,畅想着自己未来光明的人生,少年的梦想,也不应该是生活,他们应该想要集齐七颗龙珠,或者幻想着拥有一颗皮卡丘。欢迎关注微信公众号<彭晓琪>


 浙公网安备 33010602011771号