Check/Uncheck all Items in an ASP.NET CheckBox List using jQuery
The CheckBoxList control in ASP.NET provides a group of checkboxes that can be dynamically generated by binding it to a data source. A few months ago, I had written a similar article using ASP.NET and JavaScript over here Check/Uncheck all items in a CheckBoxList using ASP.NET and Javascript . The approach we had taken using JavaScript was, we first retrieved the checkboxlist control using document.getElementById(cbControl) and then counted the number of <input> tags inside that control. Once we got the count, we used a loop to set the state of each control.
In this article, we will explore how to use jQuery to select unselect all the checkboxes in an ASP.NET CheckBoxList. If you are new to jQuery, check this: Using jQuery with ASP.NET - A Beginner's Guide
Open Visual Studio 2008 > File > New > Website > Choose ‘ASP.NET 3.5 website’ from the templates > Choose your language (C# or VB) > Enter the location > Ok. In the Solution Explorer, right click your project > New Folder > rename the folder as ‘Scripts’.
Right click the Scripts folder > Add Existing Item > Browse to the path where you downloaded the jQuery library (jquery-1.2.6.js) and the intellisense documentation (jquery-1.2.6-vsdoc.js) > Select the files and click Add.
Now drag and drop the jquery-1.2.6.js file from the Solution Explorer on to your page to create a reference as shown below

Drag and drop a CheckBoxList control to the page. Rename it to ‘cbList’.
<asp:CheckBoxList ID="cbList" runat="server">

</asp:CheckBoxList>
Now add items programmatically to the CheckBoxList by using the following code at the Page load event:
C#
protected void Page_Load(object sender, EventArgs e)

{

if (!Page.IsPostBack)

{

cbList.Items.Add(new ListItem("Items 1", "Items 1"));

cbList.Items.Add(new ListItem("Items 2", "Items 2"));

cbList.Items.Add(new ListItem("Items 3", "Items 3"));

cbList.Items.Add(new ListItem("Items 4", "Items 4"));

cbList.Items.Add(new ListItem("Items 5", "Items 5"));

}

}
VB.NET
Protected Sub Page_Load(ByVal sender As Object, ByVal e As EventArgs)

If (Not Page.IsPostBack) Then

            cbList.Items.Add(New ListItem("Items 1", "Items 1"))

cbList.Items.Add(New ListItem("Items 2", "Items 2"))

cbList.Items.Add(New ListItem("Items 3", "Items 3"))

cbList.Items.Add(New ListItem("Items 4", "Items 4"))

cbList.Items.Add(New ListItem("Items 5", "Items 5"))

End If

End Sub
Now drag and drop a CheckBox from the toolbox to the page and rename it as ‘chkAll’. Now if you observe the JavaScript solution in a previous article over here, I had to loop through the checkboxes and then set its ‘checked’ property. Let us see how we can achieve this in jQuery using 3 different jQuery approaches.
I have included all these approaches to show you how I reduced my code from Approach 1 to Approach 3
Approach 1: The longer approach
$("#chkAll").toggle(

function() {

$("input[@type='checkbox']").not('#chkAll').each(function() {

this.checked = true;

});

},

function() {

$("input[@type='checkbox']").not('#chkAll').each(function() {

this.checked = false;

});

});

});
Approach 2: Shortening the approach
<script type="text/javascript">

        $(document).ready(function() {

$("#chkAll").toggle(

function() {

$('input[@type=checkbox]').attr('checked', 'true');

},

function() {

$('input[@type=checkbox]').removeAttr('checked');

});

});


</script>
Approach 3: Freezing it
<script type="text/javascript">

        $(document).ready(function() {

$('#chkAll').click(

function() {

$("INPUT[type='checkbox']").attr('checked', $('#chkAll').is(':checked'));

});

});
I liked the last approach which I got from here. In the code above, we are first assigning the click event to the CheckBox(chkAll).
1 <script type="text/javascript">
2 $(document).ready(function() {
3 $('#chkAll').click(
 <script type="text/javascript">
2
 $(document).ready(function() {
3
 $('#chkAll').click(
When the user clicks the checkbox, we run a function which finds all elements of the checkbox type and sets the ‘checked’ value of all items in the CheckBoxList to true or false based on the checked value of the ‘chkAll’ checkbox.
If you have multiple checkboxlist on your page, you can pass the CheckBoxList name and id as a parameter to the jQuery function as shown here:
$("INPUT[@name=" + name + "][type='checkbox']").attr('checked', $('#' + id).is(':checked'));
The entire code with the finalized approach (Approach 3) will look similar to the following:
<%@ Page Language="C#" AutoEventWireup="true" CodeFile="Default.aspx.cs" Inherits="_Default" %>


<!DOCTYPE html PUBLIC "-//W3C//DTD XHTML 1.0 Transitional//EN" "http://www.w3.org/TR/xhtml1/DTD/xhtml1-transitional.dtd">


<html xmlns="http://www.w3.org/1999/xhtml">

<head runat="server">

    <title>Check/Uncheck All CheckBoxes Using JQuery</title>


<script src="Scripts/jquery-1.2.6.js" type="text/javascript"></script>


<script type="text/javascript">

        $(document).ready(function() {

$('#chkAll').click(

function() {

$("INPUT[type='checkbox']").attr('checked', $('#chkAll').is(':checked'));

});

});


</script>


</head>

<body>

    <form id="form1" runat="server">

    <div>


<asp:CheckBox ID="chkAll" runat="server" Text="Check All" /><br />


<asp:CheckBoxList ID="cbList" runat="server">

        </asp:CheckBoxList>


</div>

    </form>

</body>

</html>
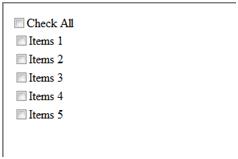
On running the application, you get a screen similar to the following:

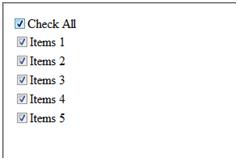
On clicking the CheckAll checkbox, all the checkboxes gets selected, similar to a gmail application

On clicking the CheckAll checkbox again, the checkboxes gets unselected.

I hope you liked the article and I thank you for viewing it.
这篇文章英文非常简单,就不用翻译了,是个jquery的小技巧,希望能有用!

 $(document).ready(

