SPI机制
SPI机制
该项目地址:代码仓库
【项目里面的 spi开头的项目】
1. java的spi机制
SPI (Service Provider Interface)是 Java 标准中一种服务发现机制,允许在运行时动态地发现和加载服务实现类,而无需在编译时显式绑定。它广泛用于 Java 生态中(如 JDBC 驱动加载、日志框架等)。
①SPI 的核心思想
- 解耦接口与实现:定义一个公共接口(
Service Provider Interface),不同的厂商或模块可以实现该接口的不同版本。 - 动态加载:运行时通过配置文件(
META-INF/services/接口全限定名)找到所有实现类,并加载它们。 - 扩展性强:无需修改主程序代码即可添加新的服务实现。
②经典案例:JDBC 驱动加载
JDBC 驱动的加载是 SPI 的典型应用:
- 接口:
java.sql.Driver - 实现类:各个数据库厂商的驱动(如 MySQL 的
com.mysql.cj.jdbc.Driver) - 配置文件:
META-INF/services/java.sql.Driver中列出所有驱动类名。
③自定义案例
不修改代码,根据加载的包不同,调用不同的实现方式。
先定义接口提供者
创建项目spi-provider
里面只定义一个接口 UserService
// spi对外暴露的接口
public interface UserService {
    String hello(String name);
}
然后创建两个不同的实现
- 创建项目
spi-impl-mysql,引入spi-provider
public class MysqlUserImpl implements UserService {
    @Override
    public String hello(String name) {
        return "【MySQL】:" + name;
    }
}
在该项目的resources目录下面创建如下目录
resources
--META-INF
----services
------com.feng.spi.UserService [这个是文件]
文件的内容是
com.feng.impl.MysqlUserImpl
- 创建项目
spi-impl-redis,引入spi-provider
public class RedisUserImpl implements UserService {
    @Override
    public String hello(String name) {
        return "【Redis】 " + name;
    }
}
在该项目的resources目录下面创建如下目录
resources
--META-INF
----services
------com.feng.spi.UserService [这个是文件]
文件的内容是
com.feng.impl.RedisUserImpl
创建新项目测试
创建spi-use项目
// 用这个类加载
public class UserServer {
    private static final List<UserService> services = new ArrayList<>();
    private static final UserServer userServer = new UserServer();

    private UserServer(){
        ServiceLoader<UserService> userServices = ServiceLoader.load(UserService.class); // 加载实现类
        for (UserService userService : userServices) {
            services.add(userService);
        }
    }

    public static String hello(String name){
        if (services.isEmpty()) {
            // System.err.println("No UserService implementation found");
            return "No UserService implementation found";
        }
        return services.get(0).hello(name);
    }
}

// 用这个类运行测试
public class App {
    public static void main(String[] args) {
        String hello = UserServer.hello("田小锋");
        System.err.println(hello);
    }
}
第一步,spi-use先引入mysql的项目
<dependency>
    <groupId>com.feng.impl</groupId>
    <artifactId>spi-impl-mysql</artifactId>
    <version>1.0-SNAPSHOT</version>
</dependency>
运行测试:
输出结果是:【MySQL】:田小锋
第二步, 将mysql依赖注释掉,引入redis的
<dependency>
    <groupId>com.feng.impl</groupId>
    <artifactId>spi-impl-redis</artifactId>
    <version>1.0-SNAPSHOT</version>
</dependency>
运行测试:
输出结果是:【Redis】 田小锋
pom文件依赖发生更改后,一定要记得reload一下pom文件哦。
这样就实现了,更改依赖,我们并没有更改java代码,就实现了导入不同场景,就可以实现不同的功能了。有没有点像SpringBoot的意思了。
通过上面的自定义案例,我们可以总结出java的spi机制的实现方式:
- 定义接口;
- 提供实现;
- 配置文件:META-INF/services/借口全限定名(文件),文件内容是具体实现类的全限定名;
- 使用、加载服务;
④java spi原理
非常容易就可以看出来,下面这几行代码是核心。
ServiceLoader<UserService> userServices = ServiceLoader.load(UserService.class); // 加载实现类
for (UserService userService : userServices) {
    services.add(userService);
}
从头开始,一步一步分析其源码
public final class ServiceLoader<S> implements Iterable<S> {
....
}
调用了load(Class<S> service)方法
public static <S> ServiceLoader<S> load(Class<S> service) {
    // 获取当前线程的上下文类加载器
    ClassLoader cl = Thread.currentThread().getContextClassLoader();
    // 调用重载的 load 方法
    return ServiceLoader.load(service, cl);
}
调用重载的load(Class<S> service, ClassLoader loader)方法
public static <S> ServiceLoader<S> load(Class<S> service, ClassLoader loader) {
    return new ServiceLoader<>(service, loader); // new 一个对象
}
构造函数ServiceLoader(Class<S> svc, ClassLoader cl)
private ServiceLoader(Class<S> svc, ClassLoader cl) {
    // 判断null
    service = Objects.requireNonNull(svc, "Service interface cannot be null");
    // 传过来的上下文类加载器如果是null,就用系统类加载器
    loader = (cl == null) ? ClassLoader.getSystemClassLoader() : cl;
    // 这个不是很了解,对于本文章来说不重要
    acc = (System.getSecurityManager() != null) ? AccessController.getContext() : null;
    // 这个才是重点!!!!!!!!!
    reload();
}
reload()方法
public void reload() {
    providers.clear();
    lookupIterator = new LazyIterator(service, loader); // 创建对象,就没了=====
}
但是哦,ServiceLoader实现了Iterable接口,那么在for遍历的时候,就会隐式调用iterator()获取迭代器。
来看看ServiceLoader实现的iterator()方法里面
public Iterator<S> iterator() {
    return new Iterator<S>() {

        Iterator<Map.Entry<String,S>> knownProviders
            = providers.entrySet().iterator();

        public boolean hasNext() {
            if (knownProviders.hasNext())
                return true;
            return lookupIterator.hasNext(); // ================
        }

        public S next() {
            if (knownProviders.hasNext())
                return knownProviders.next().getValue();
            return lookupIterator.next(); // ================
        }

        public void remove() {
            throw new UnsupportedOperationException();
        }
    };
}
可以看到在上面reload()里面lookupIterator = new LazyIterator(service, loader);的对象起作用了!
LazyIterator是ServiceLoader的内部类,实现了Iterator接口。接下来就看LazyIterator的hasNext()和next();
private class LazyIterator implements Iterator<S>{
    public boolean hasNext() {
        if (acc == null) {
            return hasNextService();//=========================重点
        } else {
            PrivilegedAction<Boolean> action = new PrivilegedAction<Boolean>() {
                public Boolean run() { return hasNextService();} //=========================重点
            };
            ...........
        }
    }
    public S next() {
        if (acc == null) {
            return nextService();//=========================重点
        } else {
            PrivilegedAction<S> action = new PrivilegedAction<S>() {
                public S run() { return nextService();} //=========================重点
            };
            .....
        }
    }
    // 重点------------------------
    private boolean hasNextService() {
        if (nextName != null) {
            return true;
        }
        if (configs == null) {
            try {
                // PREFIX = "META-INF/services/"
                String fullName = PREFIX + service.getName();
                if (loader == null)
                    configs = ClassLoader.getSystemResources(fullName);
                else
                    configs = loader.getResources(fullName);
            ...........
        return true;
    }
    //重点----------------------------
    private S nextService() {
        ...
        String cn = nextName;
        nextName = null;
        Class<?> c = null;
        try {
            // 加载
            c = Class.forName(cn, false, loader);
        } catch (ClassNotFoundException x) {
            ....
        }
        .....
        try {
            // c.newInstance()
            S p = service.cast(c.newInstance());
            providers.put(cn, p); // 放到LinkedHashMap
            return p;
        } .....
    }
}
三个重要的点:
-
经过源码分析。PREFIX = "META-INF/services/",是约定好的。所以要这么写
-
底层还是反射。c.newInstance()。无参构造方法创建对象。
-
迭代器的设计模式
那SPI有什么缺点吗?每次加载都要读取文件,可能会有性能问题,不过可能实际影响不大。另外,只能通过无参构造器实例化类,如果实现类需要参数,可能不太方便。还有,如果有多个实现,需要自己选择使用哪一个,ServiceLoader只是简单地迭代所有实现,可能需要通过某些条件判断来选择。
2.SpringBoot的spi机制
在上面自定义案例的那部分,不是说了这样一句话吗?
并没有更改java代码,就实现了导入不同场景,就可以实现不同的功能了。有没有点像SpringBoot的意思了。
没有错!Spring Boot 对 Java 的 SPI 机制进行了深度集成和扩展,形成了自己的自动配置体系(Auto-configuration)。它的核心思想与 Java SPI 类似,但通过注解和条件化编程进一步简化了服务发现和依赖注入的流程。
其提供了一种解耦容器注入的方式,帮助外部包(独立于spring-boot项目)注册Bean到spring boot项目容器中。
在 SpringBoot的原理分析文章 中已经了解到。
在2.x版本中它是扫描的META-INF/spring.factories文件 【在2.7及以后的版本的EnableAutoConfiguration挪到了 META-INF/spring/org.springframework.boot.autoconfigure.AutoConfiguration.imports】。这里只是简述一下。
# spring.factories
# 键:需要被扩展的接口全限定类名
# 值:实现类的全限定类名(多个实现类用逗号分隔)
# 例如
org.springframework.boot.autoconfigure.AutoConfigurationImportFilter=\
org.springframework.boot.autoconfigure.condition.OnBeanCondition,\
org.springframework.boot.autoconfigure.condition.OnClassCondition,\
org.springframework.boot.autoconfigure.condition.OnWebApplicationCondition
Spring boot中默认使用了很多factories机制,主要包含:【copy的别人的】
- ApplicationContextInitializer:用于在spring容器刷新之前初始化Spring ConfigurableApplicationContext的回调接口。
- ApplicationListener:用于处理容器初始化各个阶段的事件。
- AutoConfigurationImportListener:导入配置类的时候,获取类的详细信息(Listener that can be registered with spring.factories to receive details of imported auto-configurations.)。
- AutoConfigurationImportFilter:用于按条件过滤导入的配置类(Filter that can be registered in spring.factories to limit the auto-configuration classes considered. This interface is designed to allow fast removal of auto-configuration classes before their bytecode is even read.)
- EnableAutoConfiguration:指定自动加载的配置类列表(Enable auto-configuration of the Spring Application Context, attempting to guess and configure beans that you are likely to need. Auto-configuration classes are usually applied based on your classpath and what beans you have defined. For example, if you have tomcat-embedded.jar on your classpath you are likely to want a TomcatServletWebServerFactory (unless you have defined your own ServletWebServerFactory bean).
- FailureAnalyzer:在启动时拦截异常并将其转换为易读的消息,并将其包含在FailureAnalysis中。 Spring Boot为应用程序上下文相关异常、JSR-303验证等提供了此类分析器(A FailureAnalyzer is used to analyze a failure and provide diagnostic information that can be displayed to the user.)
- TemplateAvailabilityProvider:模版引擎配置。(Collection of TemplateAvailabilityProvider beans that can be used to check which (if any) templating engine supports a given view. Caches responses unless the spring.template.provider.cache property is set to false.)
①SpringBoot SPI 的核心机制
1. 基于 spring.factories 的服务发现
- 配置文件位置:
META-INF/spring.factories - 作用:用于声明 Spring Boot 的自动配置类(
@Configuration类)或 SPI 实现类。 - 格式:每行以
键=值形式定义,键通常是接口全限定名,值是实现类的全限定名。
Spring Boot 通过扫描 spring.factories 中的类,并将它们作为自动配置类加载到 Spring 容器中。
2. 条件化注解驱动
Spring Boot 使用 @ConditionalOnMissingBean、@ConditionalOnClass 等注解动态控制自动配置是否生效。
②SpringBoot SPI 的工作流程
- 启动时扫描:
Spring Boot 启动时会通过SpringFactoriesLoader.loadFactoryClasses()方法扫描所有类加载器下的spring.factories文件。 - 加载自动配置类:
将spring.factories中声明的类实例化为Configuration对象,并注册到 Spring 容器中。 - 条件过滤:
使用@Conditional注解(如@ConditionalOnClass、@ConditionalOnProperty)筛选符合条件的自动配置类。 - 依赖注入:
将自动配置类中的@Bean方法生成的对象注入到 Spring 容器中。
③SpringBoot SPI vs Java SPI
| 特性 | Spring Boot SPI | 标准 Java SPI |
|---|---|---|
| 配置方式 | 通过 spring.factories 文件 + @Configuration |
通过 META-INF/services/ 配置文件 |
| 依赖注入 | 自动将实现类注册为 Spring Bean | 需手动调用 ServiceLoader 并管理实例 |
| 条件化支持 | 支持丰富的条件注解(如 @ConditionalOnMissingBean) |
无条件过滤机制 |
| 生态系统集成 | 深度集成 Spring Boot 的自动配置体系 | 独立于 Spring 框架 |
④自定义案例
见项目里面的【spi-springboot项目】
还是用上面的例子。我们分别创建项目去实现接口。
首先,我们自定义的项目场景,是没有被Spring官方收录的,不在他的自动配置场景包里面,所以,我们只有模仿@SpringBootApplication注解,通过@Import导入bean。
spi-mysql-starter项目
@Service("mysqlUserService")
public class MysqlUserServiceImpl implements UserService {
@Override
public String hello(String name) {
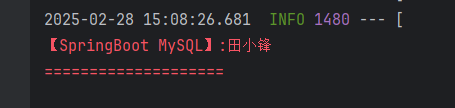
return "【SpringBoot MySQL】:" + name;
}
} // 定义实现类
然后再resources目录下面创建META-INF/spring.factories文件
# 键:需要被扩展的接口全限定类名
# 值:实现类的全限定类名(多个实现类用逗号分隔)
com.feng.spi.UserService=com.feng.spimysql.MysqlUserServiceImpl
spi-redis-starter项目
@Service("redisUserService")
public class RedisUserServiceImpl implements UserService {
    @Override
    public String hello(String name) {
        return "【SpringBoot Redis】:" + name;
    }
}
同理
com.feng.spi.UserService=com.feng.spiredis.RedisUserServiceImpl
spi-springboot-use项目中
引入上面mysql,redis二者之一、或者都引入。
启动类里面看效果
@SpringBootApplication
public class App {
    public static void main(String[] args) {
        ConfigurableApplicationContext context = SpringApplication.run(App.class, args);
        // 引入其中一个
        try{
            UserService bean = context.getBean(UserService.class);
            System.err.println(bean.hello("田小锋"));
            System.err.println("====================");
        } catch (Exception e ) {
            System.err.println("不止一个UserService");
        }
    }
}
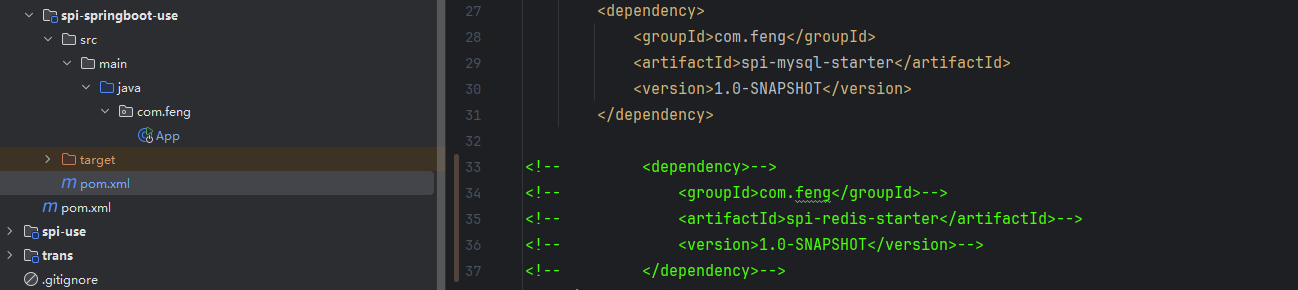
如上图,先引入mysql的。
接下来,换一个依赖,引入redis的。看下图
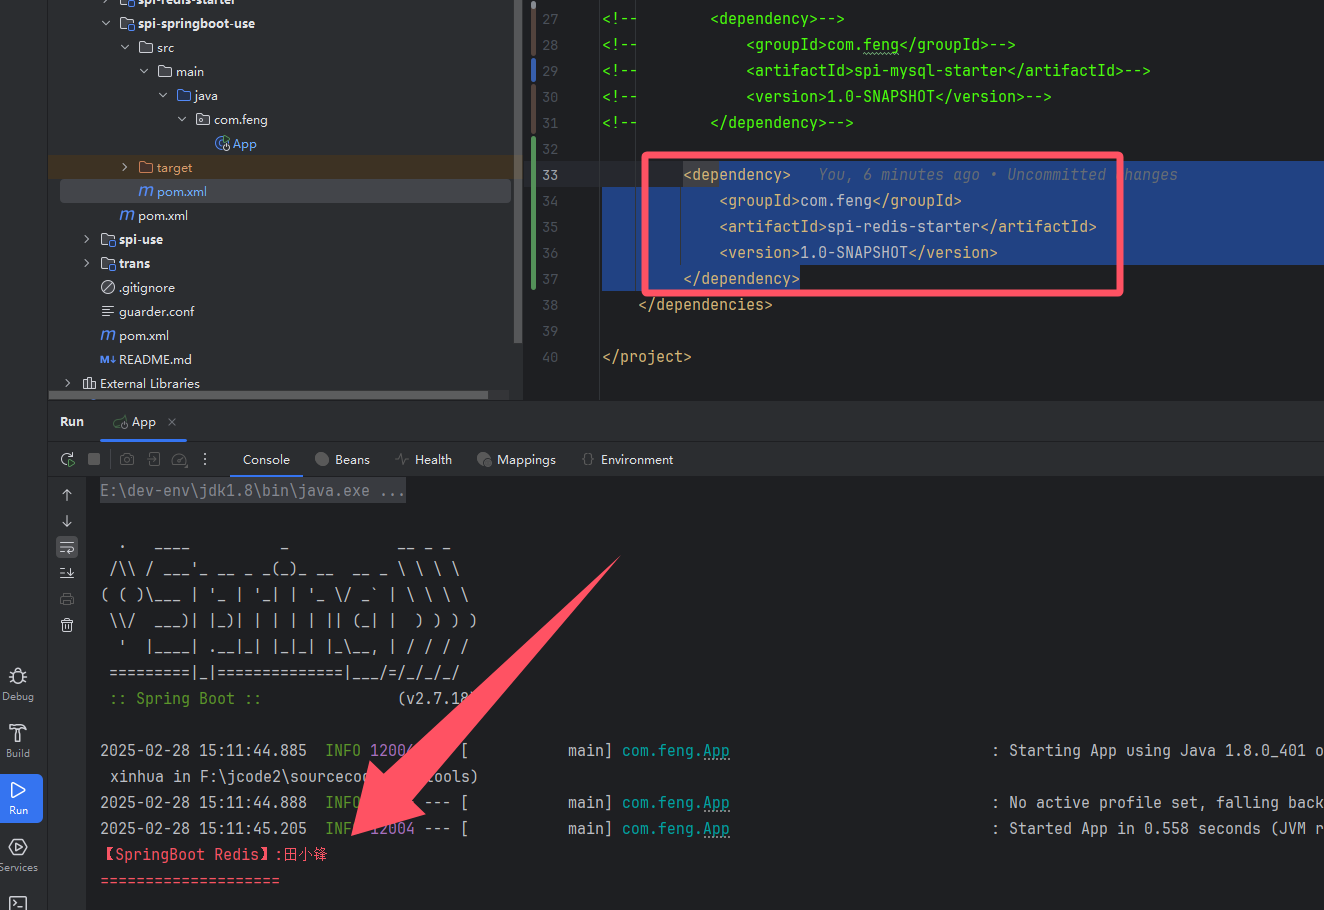
这样,一个简单的例子就完成了,导入不同场景,然后可以让容器里面的bean有不同的功能了。
3.参考
【java中的SPI机制】:https://blog.csdn.net/sigangjun/article/details/79071850
【Spring的Factories机制介绍】: https://segmentfault.com/a/1190000042247124
deepseek

 浙公网安备 33010602011771号