
自定义spring-starter
自定义 starter 应用场景
在日常开发中,经常会有一些独立于业务的公共模块,如果多个工程中都可以复用这个公共模块的话,不需要手动拷贝到工程中,我们将公共的模块封装成一个个starter,复用的时候直接引入依赖即可,springboot为我们完成自动装配。比如我们可以封装自己的log-starter组件,redis-stater组件,kafka-starter组件... 开箱即用
命名规则
springboot官方提供的 starter 以 spring-boot-starter-xxx 方式命名。官方建议自定义的 starter 使用 xxx-spring-boot-starter 的方式命名,以区分这两种 starter
自定义starter
1.新建maven工程 hello-spring-boot-starter
pom 坐标
<groupId>com.springboot</groupId>
<artifactId>hello-spring-boot-starter</artifactId>
<version>1.0-SNAPSHOT</version>
2.新建完maven工程后,在pom文件中引入spring-boot自动装配的包
<dependencies>
    <dependency>
        <groupId>org.springframework.boot</groupId>
        <artifactId>spring-boot-autoconfigure</artifactId>
        <version>2.2.9.RELEASE</version>
    </dependency>

    <!--支持读取xml/properties文件配置-->
    <dependency>
        <groupId>org.springframework.boot</groupId>
        <artifactId>spring-boot-configuration-processor</artifactId>
        <version>2.2.9.RELEASE</version>
    </dependency>
</dependencies>
3.新建HelloService类,这个就是我们提供给外部调用的,注意没有spring注解
public class HelloService {
    private String name;
    private Integer age;

    public HelloService(String name, Integer age) {
        this.name = name;
        this.age = age;
    }

    public String sayHello(String name) {
        return "hello..." + name;
    }

    public String helloWorld() {
        return String.format("[name=%s, age=%d]", this.name, this.age);
    }
}
2.新建HelloServiceAutoConfiguration 类,这个就是的入口类,会配置在spring.factories文件中,让spring-boot帮我们自动装配
@Configuration
@EnableConfigurationProperties(HelloProperties.class)
public class HelloServiceAutoConfiguration {

    private final HelloProperties helloProperties;

    public HelloServiceAutoConfiguration(HelloProperties helloProperties) {
        this.helloProperties = helloProperties;
    }

    @Bean
    @ConditionalOnMissingBean        // HelloService 类不存在时执行此方法
    public HelloService helloService() {
        return new HelloService(this.helloProperties.getName(), this.helloProperties.getAge());
    }
}
4.新建一个配置类 HelloProperties,这个类负责我们项目的一些配置参数管理
@ConfigurationProperties("my.hello")
public class HelloProperties {

    private String name;
    private Integer age;

    public String getName() {
        return name;
    }

    public void setName(String name) {
        this.name = name;
    }

    public Integer getAge() {
        return age;
    }
}
5.META-INF 下新建spring.factories文件,文件内容
org.springframework.boot.autoconfigure.EnableAutoConfiguration=\
 config.HelloServiceAutoConfiguration
6.用maven打包,生成jar包到本地仓库
到目前我们就制作完成了一个自定义的hello-spring-boot-starter了。
下面介绍如何使用hello-spring-boot-starter
1.引入上面制作好的 hello-spring-boot-starter jar包
<dependency>
    <groupId>com.springboot</groupId>
    <artifactId>hello-spring-boot-starter</artifactId>
    <version>1.0-SNAPSHOT</version>
</dependency>
2.新建测试类,HelloService类,我们是没有加spring注解的,但也被注入到spring容器中了,这个就是spring-boot帮我们自动注入了
@RestController
@RequestMapping("/hello")
public class HelloController {
    @Resource
    private HelloService helloService;

    @GetMapping("/{name}")
    public String hello(@PathVariable String name) {
        return helloService.sayHello(name);
    }

    @GetMapping
    public String helloWorld() {
        return helloService.helloWorld();
    }
}
在application.yml配置里面加入如下配置
my:
hello:
name: jack
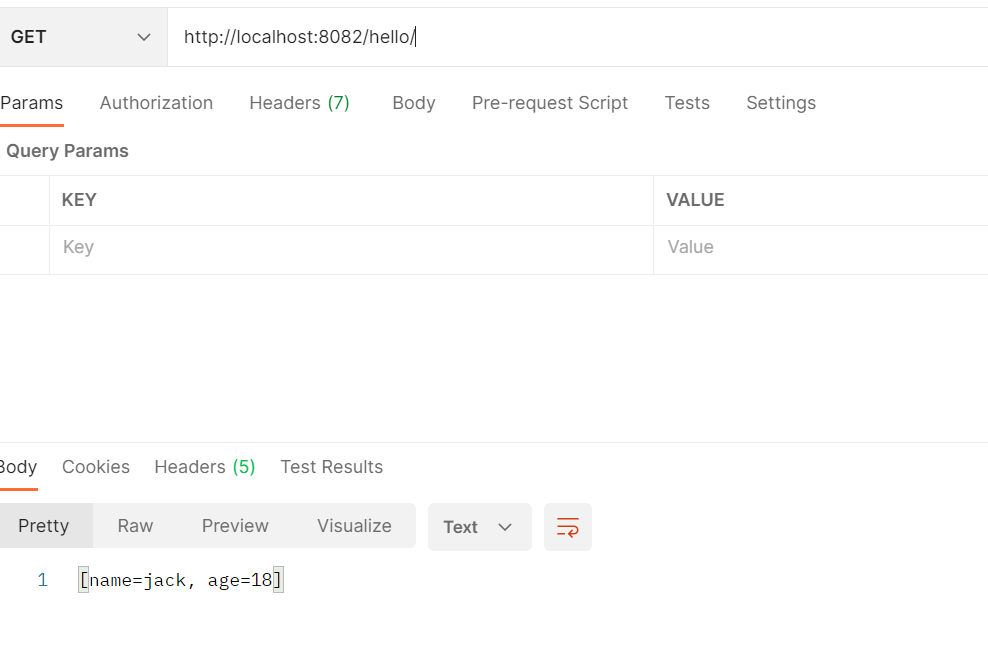
age: 18然后调用http://localhost:8082/hello/
PS:我们也可以在配置类中加入enable参数来控制配置类的是否注入
HelloServiceAutoConfiguration 类上加入
@ConditionalOnProperty(prefix = "my.hello",name = "enable",havingValue = "true")这样,我们就能控制是否使用starter功能了。

 浙公网安备 33010602011771号