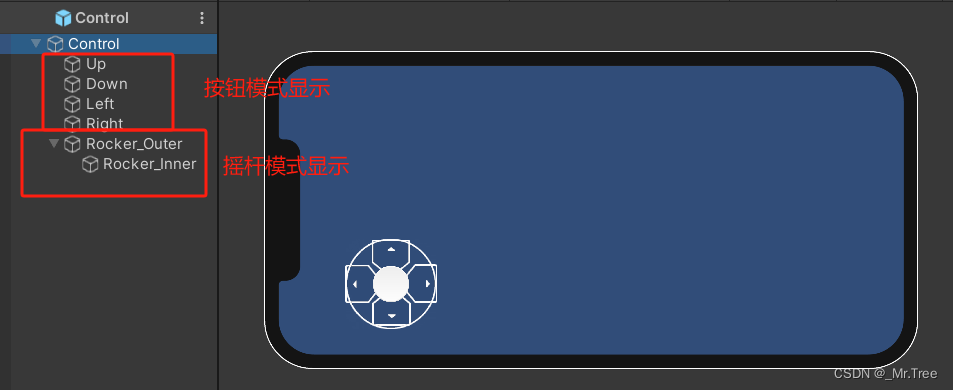
1,创建控制器UI
![]()
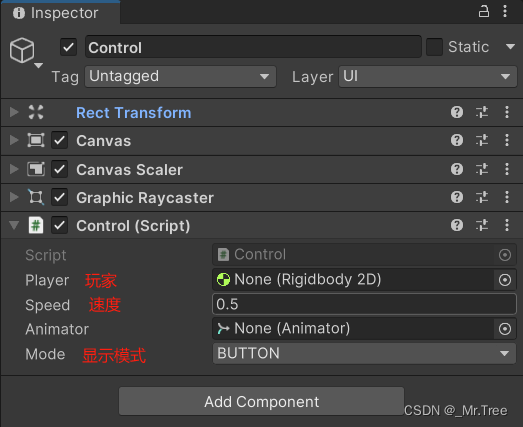
2,挂载脚本
![]()
3,脚本编写
    [Tooltip("玩家游戏体")]
    public Rigidbody2D player;
    [Tooltip("玩家速度")]
    public float speed = 1f;
    [Tooltip("玩家动画")]
    public Animator animator;

    public enum Mode {
        BUTTON,
        ROCKER,
    }
    [Tooltip("模式")]
    public Mode mode = Mode.ROCKER;
- 模式切换---在Start()方法中根据mode的值,设置相关物体的Active
- 基本移动逻辑
因为需要不断的更新移动(长按不松开),而Update方法每帧都在执行,所以在Update方法中执行移动操作。
void Update()
{
    doMove();
}
private void doMove()
{
    if (player == null) {
        return;
    }
    // 获取方向
    Vector2 dir = getDir();
    if (dir == Vector2.zero) return;

    Vector2 pos = player.position;
    // 10是随便设置的一个控制值,不然太慢
    pos.y += Time.deltaTime * speed * 10 * dir.y;
    pos.x += Time.deltaTime * speed * 10 * dir.x;

    player.MovePosition(pos);
}

private Vector2 getDir()
{
    if (mode == Mode.BUTTON)
    {
        if (curPointerObj == null) return Vector2.zero;
        switch(curPointerObj.name)
        {
            case "Up":
                return Vector2.up;
            case "Down":
                return Vector2.down;
            case "Left":
                return Vector2.left;
            default:
                return Vector2.right;
        }
    }

    return rockerDir;
}
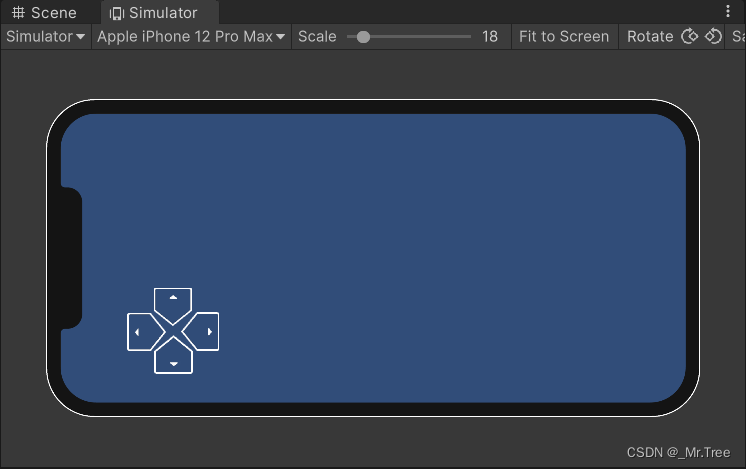
3.1,按钮模式实现
![]()
监听触摸事件,按下(IPointerDownHandler)为开始移动,抬起(IPointerUpHandler)为结束移动,实现按下按钮并松开的移动过程。
3.1.1,脚本
// 值为当前按下的按钮
private GameObject curPointerObj = null;
public void OnPointerDown(PointerEventData eventData)
{
    if (player == null || mode != Mode.BUTTON) {
        return;
    }
    GameObject pointerObj = eventData.pointerEnter;
    if (curPointerObj != null) {
        return;
    }
    curPointerObj = pointerObj;
}
public void OnPointerUp(PointerEventData eventData)
{
    if (player == null || mode != Mode.BUTTON) {
        return;
    }
    GameObject pointerObj = eventData.pointerEnter;
    if (curPointerObj == null || curPointerObj != pointerObj) {
        return;
    }
    curPointerObj = null;
}
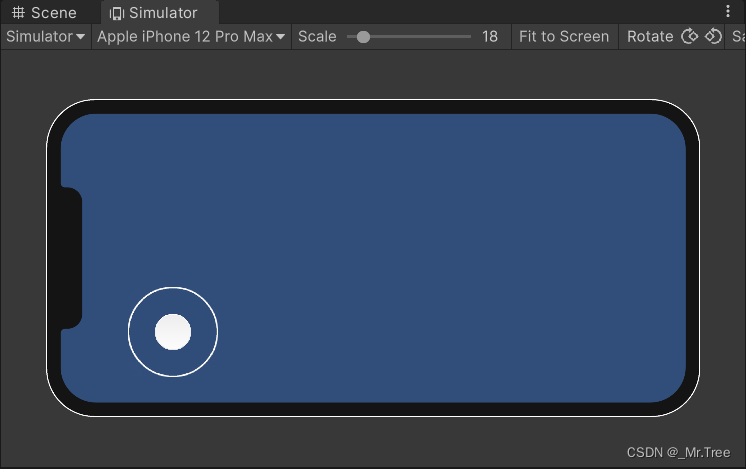
3.2,摇杆模式实现
![]()
监听拖拽事件,拖拽中(IEndDragHandler)为开始/移动中,拖拽结束(IDragHandler)为结束移动,实现拖拽并松开的移动过程。
3.1.1,脚本
// 摇杆内部可拖拽部分
private RectTransform rockerInnerTransform;
// 摇杆外部不可拖拽部分-边界
private RectTransform rockerOuterTransform;
// 当前摇杆方向
private Vector2 rockerDir = Vector2.zero;
public void OnDrag(PointerEventData eventData)
{
    if (player == null || mode != Mode.ROCKER) return;

    Vector2 pos = Camera.main.ScreenToWorldPoint(eventData.position);

    Vector2 rockerOriginPosition = rockerOuterTransform.position;
    // 拖拽方向
    rockerDir = (pos - rockerOriginPosition).normalized;

    float distance = Vector2.Distance(pos, rockerOriginPosition);

    if (distance <= 1.5f) // 1.5f刚好是摇杆外部边界和摇杆内部可拖拽部分中心重合时的距离
    {
        rockerInnerTransform.position = pos;
    }
    else
    {
        Vector2 dir = pos - rockerOriginPosition;
        // 拖拽超过摇杆外部边界时,摇杆内部可拖拽的位置为:外部中心 + 当前拖拽方向指定的拖拽距离位置(此时设置为1.5f,到达边界)。
        rockerInnerTransform.position = rockerOriginPosition + dir.normalized * 1.5f;
    }
}
public void OnEndDrag(PointerEventData eventData)
{
    if (player == null || mode != Mode.ROCKER) return;

	// 恢复方向和位置
    rockerDir = Vector2.zero;
    rockerInnerTransform.position = rockerOuterTransform.position;
}

 浙公网安备 33010602011771号