
6.依赖注入(DI)
6.依赖注入(DI)
1.构造器注入
2.set方式注入【重点☆】
依赖注入:set注入
依赖:bean对象的创建依赖于容器
注入:bean对象中所有属性,由容器注入。
【环境搭建】
1.复杂类型
public classAddress {
private String address;

publicString getAddress() {
returnaddress;
    }

public void setAddress(String address) {
this.address= address;
    }

}
2.真实测试对象
public classStudent {
privateStringname;
privateAddressaddress;
privateString[]books;
privateList<String>hobbys;
privateMap<String,String>card;
privateSet<String>games;
privateStringwife;//空指针,有无妻子
privatePropertiesinfo;//学生信息
}
3.beans.xml
<?xml version="1.0"encoding="UTF-8"?>
<beans xmlns="<http://www.springframework.org/schema/beans>"
xmlns:xsi="<http://www.w3.org/2001/XMLSchema-instance>"
xsi:schemaLocation="<http://www.springframework.org/schema/beans>
        <https://www.springframework.org/schema/beans/spring-beans.xsd>">

 <bean id="student" class="com.itxiaofei.pojo.Student">
		<!--第一种,普通值注入,直接使用value-->
		<property name="name"value="小飞"/>
  </bean>
</beans>
4.测试类
public classAddress {
privateStringaddress;

publicString getAddress() {
returnaddress;
    }

public voidsetAddress(String address) {
this.address= address;
    }

}
完善注入信息:
<?xml version="1.0" encoding="UTF-8"?>
<beans xmlns="<http://www.springframework.org/schema/beans>"
       xmlns:xsi="<http://www.w3.org/2001/XMLSchema-instance>"
       xsi:schemaLocation="<http://www.springframework.org/schema/beans>
        <https://www.springframework.org/schema/beans/spring-beans.xsd>">

        <bean id="address" class="com.itxiaofei.pojo.Address">
            <property name="address" value="山西"/>
        </bean>

        <bean id="student" class="com.itxiaofei.pojo.Student">
            <!--第一种,普通值注入,直接使用value-->
            <property name="name" value="小飞飞"/>

            <!--第二种,bean注入-->
            <property name="address" ref="address"/>

            <!--第三种,数组注入-->
            <property name="books">
                <array>
                    <value>红楼梦</value>
                    <value>水浒传</value>
                    <value>西游记</value>
                    <value>三国演义</value>
                </array>
            </property>
            <!--第四种,List-->
            <property name="hobbys">
                <list>
                    <value>听音乐</value>
                    <value>敲代码</value>
                    <value>打篮球</value>
                </list>
            </property>

            <!--第五种,Map-->
            <property name="card">
                <map>
                    <entry key="学号" value="1931030***"/>
                    <entry key="电话" value="18104131***"/>
                </map>
            </property>

            <!--第六种,Set-->
            <property name="games">
                <set>
                    <value>英雄联盟</value>
                    <value>地下城与勇士</value>
                </set>
            </property>

            <!--第七种,Null-->
            <property name="wife">
                <null/>
            </property>

            <!--第八种,properties(特殊类型) key=value...-->
            <property name="info">
                <props>
                    <prop key="学号">1931030***</prop>
                    <prop key="性别">男</prop>
                    <prop key="姓名">小飞</prop>
                </props>
            </property>

        </bean>
</beans>
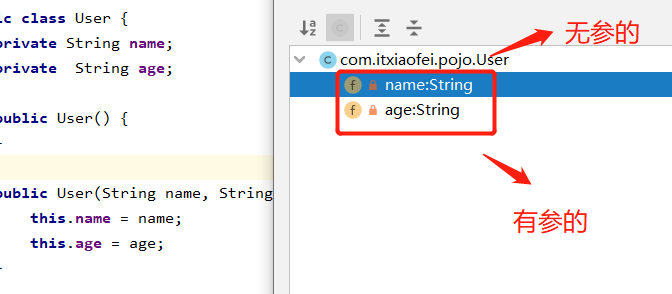
3.拓展方式注入
生成有参构造:
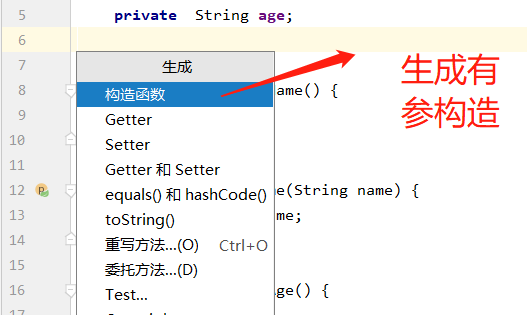
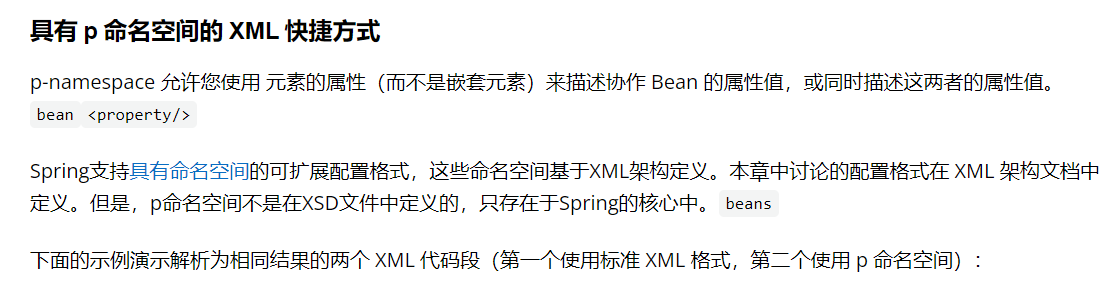
我们可以使用p命名空间和c命名空间进行注入
官方解释:
p命名:
<beans xmlns="<http://www.springframework.org/schema/beans>"
    xmlns:xsi="<http://www.w3.org/2001/XMLSchema-instance>"
    xmlns:p="<http://www.springframework.org/schema/p>"
    xsi:schemaLocation="<http://www.springframework.org/schema/beans>
        <https://www.springframework.org/schema/beans/spring-beans.xsd>">

    <bean name="classic" class="com.example.ExampleBean">
        <property name="email" value="someone@somewhere.com"/>
    </bean>

    <bean name="p-namespace" class="com.example.ExampleBean"
        p:email="someone@somewhere.com"/>
</beans>
测试:
@Test
    public static void main(String[] args) {
        ApplicationContext Context = new ClassPathXmlApplicationContext("Userbeans.xml");
        User user = Context.getBean("user", User.class);
        User user2 = Context.getBean("user2", User.class);
        System.out.println(user);
        System.out.println(user2);
    }
缺点:p 命名空间不如标准 XML 格式灵活。例如,用于声明属性引用的格式与以 结尾的属性冲突,而标准 XML 格式则不然。我们建议您仔细选择方法并将其传达给团队成员,以避免生成同时使用所有三种方法的 XML 文档
c命名:
与带有 p 命名空间的 XML 快捷方式类似,Spring 3.1 中引入的 c-命名空间允许内联属性用于配置构造函数参数,而不是嵌套元素。
<beans xmlns="<http://www.springframework.org/schema/beans>"
    xmlns:xsi="<http://www.w3.org/2001/XMLSchema-instance>"
    xmlns:c="<http://www.springframework.org/schema/c>"
    xsi:schemaLocation="<http://www.springframework.org/schema/beans>
        <https://www.springframework.org/schema/beans/spring-beans.xsd>">

    <bean id="beanTwo" class="x.y.ThingTwo"/>
    <bean id="beanThree" class="x.y.ThingThree"/>

    <!-- traditional declaration with optional argument names -->
    <bean id="beanOne" class="x.y.ThingOne">
        <constructor-arg name="thingTwo" ref="beanTwo"/>
        <constructor-arg name="thingThree" ref="beanThree"/>
        <constructor-arg name="email" value="something@somewhere.com"/>
    </bean>

    <!-- c-namespace declaration with argument names -->
    <bean id="beanOne" class="x.y.ThingOne" c:thingTwo-ref="beanTwo"
        c:thingThree-ref="beanThree" c:email="something@somewhere.com"/>

</beans>
缺点:由于 XML 语法,索引表示法需要存在 前导 ,因为 XML 属性名称不能以数字开头(即使某些 IDE 允许)。相应的索引表示法也可用于元素,但不常用,因为声明的简单顺序通常就足够了。
总结:在实践中,构造函数解析机制在匹配参数方面非常有效,因此,除非确实需要,否则我们建议在整个配置中使用名称表示法。p命名与c命名空间不能直接使用,需要导入xml约束。
xmlns:p="<http://www.springframework.org/schema/p>"
xmlns:c="<http://www.springframework.org/schema/c>"
4.bean soupes(bean的作用域)
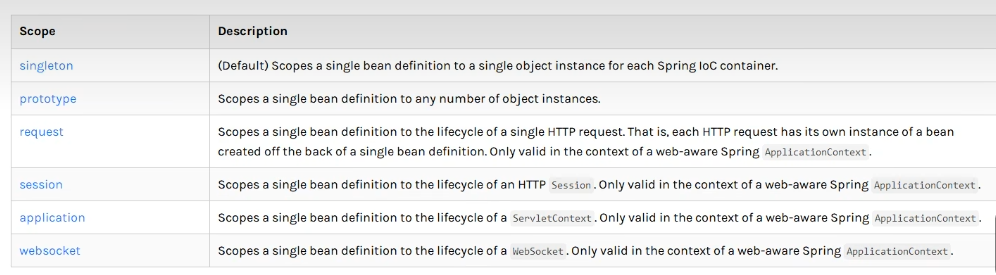
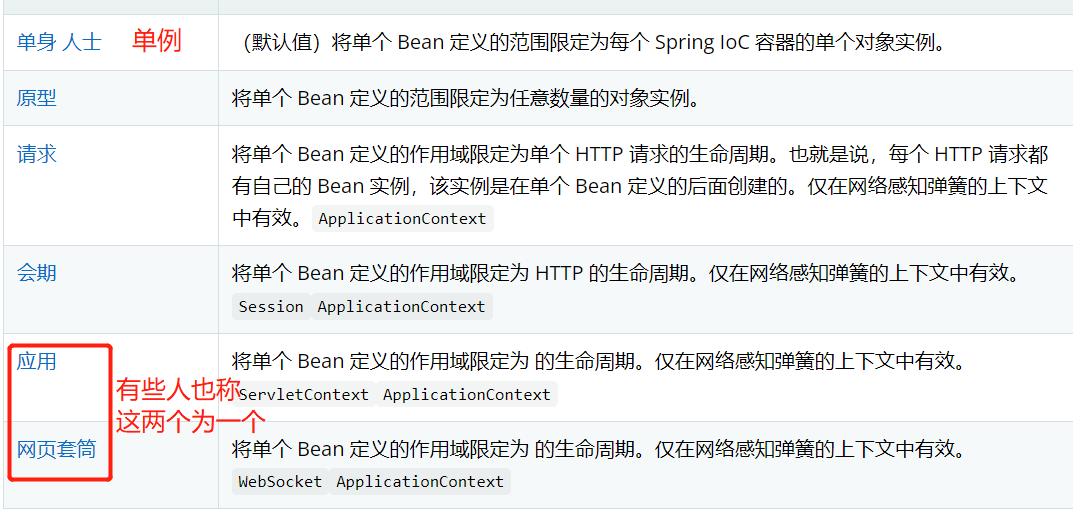
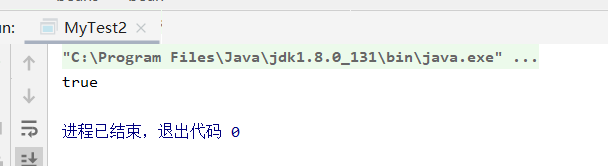
1.单例模式(spring默认机制)
<bean id="user2" class="com.itxiaofei.pojo.User" c:name="小飞学java" c:age="23"
scope="**singleton**"/>
				User user = Context.getBean("user2", User.class);
				User user2 = Context.getBean("user2", User.class);
        System.out.println(user==user2);
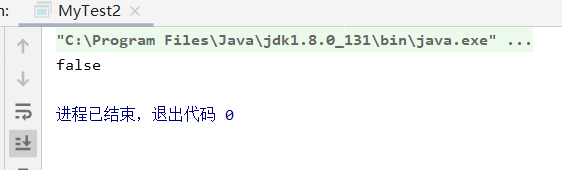
2.原型模式:每次从容器中get的时候都会产生新对象
<bean id="user2" class="com.itxiaofei.pojo.User" c:name="小飞学java" c:age="23"
scope="**prototype**"/>
				User user = Context.getBean("user2", User.class);
				User user2 = Context.getBean("user2", User.class);
        System.out.println(user==user2);

 浙公网安备 33010602011771号