搭建LAMP环境部署Nextcloud私人网盘
搭建 LAMP 环境部署 Nextcloud 私人网盘
前言
Nextcloudd 是一个开源的、基于本地的文件共享和协作平台,它允许您保存文件并通过多个设备(如PC、智能手机和平板电脑)访问它们。
同样的我们可以自己购买一个云服务器,部署一个属于自己的私人网盘,用来存储一些图片,文件等东西,以后需要可以从私人网盘上下载,就会比其他的例如百度网盘快很多
首关闭防火墙和selinux
[root@localhost ~]# systemctl disable --now firewalld
Removed symlink /etc/systemd/system/multi-user.target.wants/firewalld.service.
Removed symlink /etc/systemd/system/dbus-org.fedoraproject.FirewallD1.service.
[root@localhost ~]# sed -i "/^SELINUX/cSELINUX=disabled" /etc/selinux/config
[root@localhost ~]# setenforce 0
安装依赖包
[root@localhost ~]# yum install -y epel-release yum-utils unzip curl wget bash-completion policycoreutils-python mlocate bzip2
安装 web 服务和数据库服务
[root@localhost ~]# yum install -y httpd mariadb-server mariadb
启动 web 服务和数据库服务,并设置开机自启
[root@localhost ~]# systemctl enable --now httpd
[root@localhost ~]# systemctl enable --now mariadb
安装php7.2(部署netxtcloud必须使用php7以上的版本)
[root@localhost ~]# rpm -Uvh https://mirror.webtatic.com/yum/el7/webtatic-release.rpm
Retrieving https://mirror.webtatic.com/yum/el7/webtatic-release.rpm
warning: /var/tmp/rpm-tmp.Ajn7R7: Header V4 RSA/SHA1 Signature, key ID 62e74ca5: NOKEY
Preparing...                          ################################# [100%]
Updating / installing...
   1:webtatic-release-7-3             ################################# [100%]
[root@localhost ~]#  yum install -y php72w php72w-cli php72w-common php72w-curl php72w-gd php72w-mbstring php72w-mysqlnd php72w-process php72w-xml php72w-zip php72w-opcache php72w-pecl-apcu php72w-intl php72w-pecl-redis
设置数据库管理员密码
[root@localhost ~]# mysqladmin -u root password 'your_password' # your_password 是需要自己设置的密码
进入数据库,给Nextcloud创建数据库,并授权
[root@localhost ~]# mysql -u root -p
Enter password:
Welcome to the MariaDB monitor.  Commands end with ; or \g.
Your MariaDB connection id is 246
Server version: 10.3.17-MariaDB MariaDB Server

Copyright (c) 2000, 2018, Oracle, MariaDB Corporation Ab and others.

Type 'help;' or '\h' for help. Type '\c' to clear the current input statement.

MariaDB [(none)]> create database nextcloud;
MariaDB [(none)]> grant all on nextcloud.* to "root"@"localhost";
MariaDB [(none)]> flush privileges;
MariaDB [(none)]> show databases;
+--------------------+
| Database           |
+--------------------+
| information_schema |
| mysql              |
| nextcloud          |
| performance_schema |
+--------------------+
4 rows in set (0.003 sec)
MariaDB [(none)]> exit
Bye
上传nextcloud压缩包
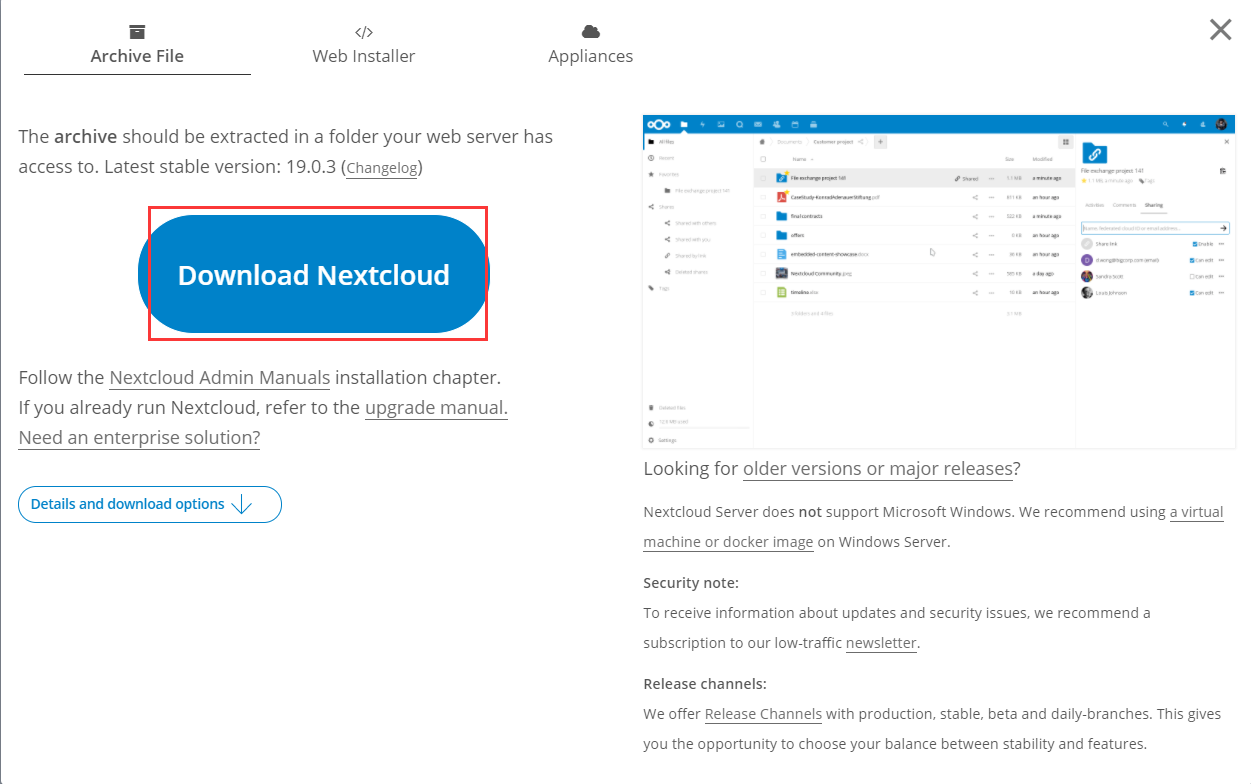
访问Nextcloud官网:https://nextcloud.com/install/#instructions-server

点击下载到本地
- 也可以使用:
wget https://download.nextcloud.com/server/releases/nextcloud-19.0.3.zip - 但是这种方式很慢,推荐先下载到本地,再上传到机器上
上传完成后,将文件解压缩到/var/www/html/目录下
[root@localhost ~]# unzip nextcloud-16.0.3.zip -d /var/www/html/
接着,创建一个目录来存储管理用户数据
[root@localhost ~]# mkdir -p /var/www/html/nextcloud/data
修改NextCloud的目录权限,以便Apache用户可以向其中添加数据
[root@localhost ~]# chown -R apache:apache /var/www/html/nextcloud/
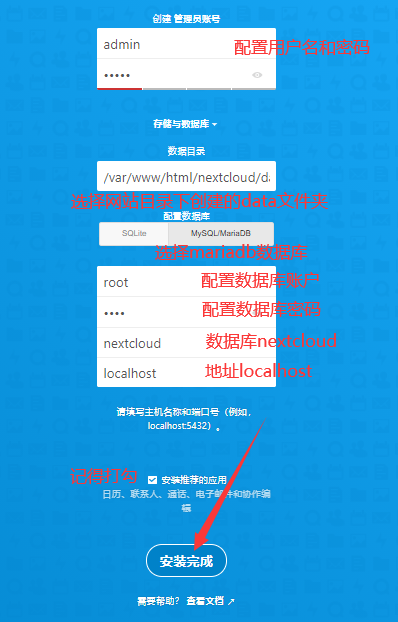
通过 web 界面安装 nextcloud 浏览器访问:ip/nextcloud

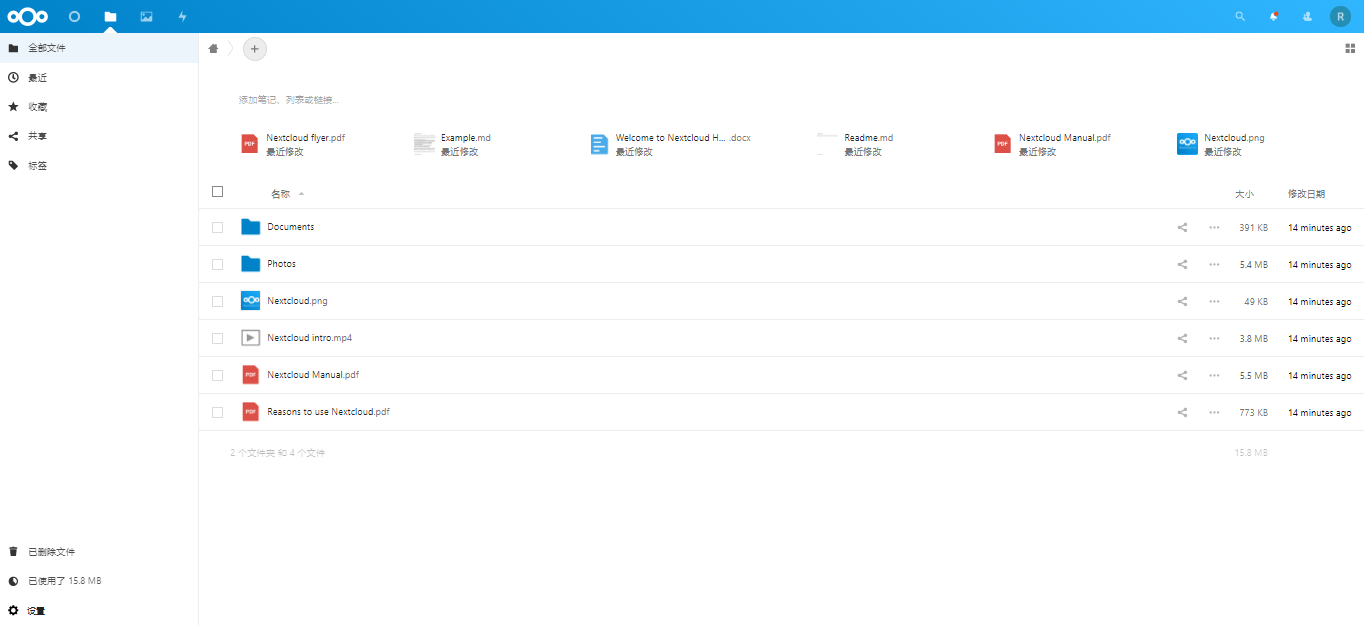
- 安装完成可能会无法登陆,会话窗口输入用户名和密码没反应
[root@localhost ~]# chown -R apache.apache /var/lib/php/session
[root@localhost ~]# systemctl restart htpd


