SpringBoot 入门教程实例详解(一) 开发第一个SpringBoot应用程序实例
构建你的第一个Spring Boot应用程序
更多精彩请阅读 东陆之滇的csdn博客:http://blog.csdn.net/zixiao217
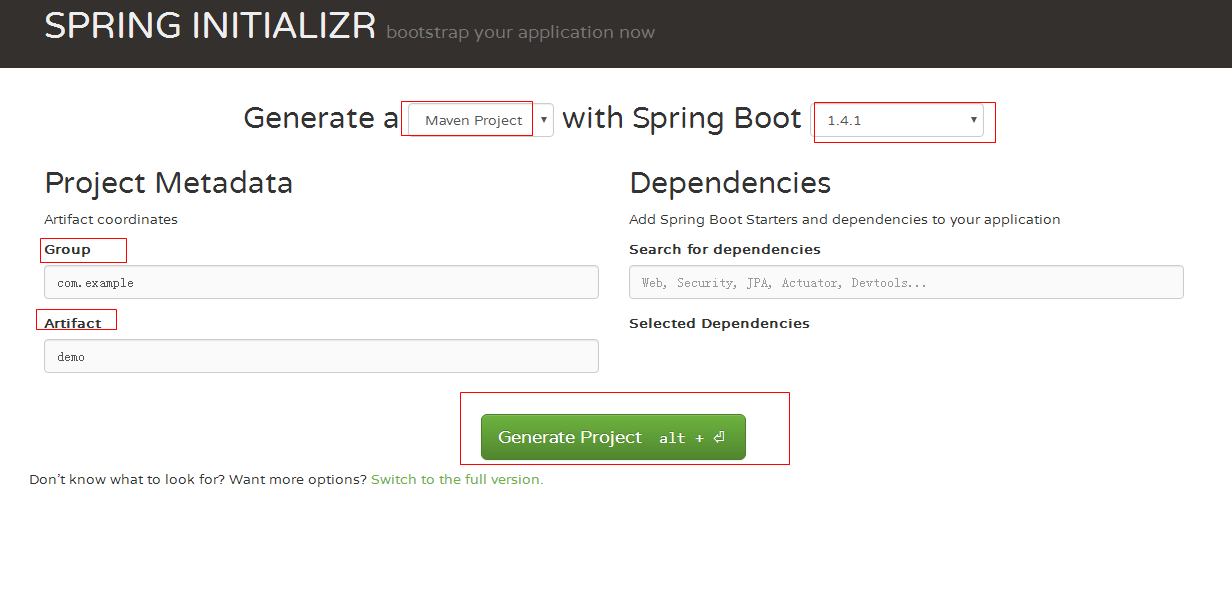
此教程提供一个入门应用程序例子,来展示Spring Boot是如何帮助快速、敏捷开发新一代应用的。你还可以通过 Spring Initializr快速生成一个基于Spring Boot的Maven工程(zip形式,你可以保存到自己计算机):
第一个目标
我们将会构建一个基于Spring Boot的应用程序,并为它添加一些有用的服务。
准备工作
你仅仅需要15分钟的时间
一个你喜爱的IDE或者文本编辑器
JDK1.8及以上版本
你也可以安装Spring Tool Suite (STS)套件,导入本示例代码,在IDE中直接打开网页视图查看效果。
pom.xml
引入Spring Boot相关依赖
<project xmlns="http://maven.apache.org/POM/4.0.0" xmlns:xsi="http://www.w3.org/2001/XMLSchema-instance"
    xsi:schemaLocation="http://maven.apache.org/POM/4.0.0 http://maven.apache.org/xsd/maven-4.0.0.xsd">
    <modelVersion>4.0.0</modelVersion>

    <groupId>org.byron4j</groupId>
    <artifactId>springBoot</artifactId>
    <version>1.0.0-SNAPSHOT</version>
    <packaging>jar</packaging>

    <name>springBoot</name>
    <url>http://maven.apache.org</url>

    <properties>
        <project.build.sourceEncoding>UTF-8</project.build.sourceEncoding>
    </properties>

    <!--引入Spring Boot的parent模块-->
    <parent>
        <groupId>org.springframework.boot</groupId>
        <artifactId>spring-boot-starter-parent</artifactId>
        <version>1.4.1.RELEASE</version>
    </parent>


    <dependencies>
        <!--引入Spring Boot 的web依赖-->
        <dependency>
            <groupId>org.springframework.boot</groupId>
            <artifactId>spring-boot-starter-web</artifactId>
        </dependency>

        <!--引入Spring Boot 的单元测试依赖-->
        <dependency>
            <groupId>org.springframework.boot</groupId>
            <artifactId>spring-boot-starter-test</artifactId>
            <scope>test</scope>
        </dependency>

        <dependency>
            <groupId>junit</groupId>
            <artifactId>junit</artifactId>
            <scope>test</scope>
        </dependency>
    </dependencies>

    <build>
        <plugins>
        <plugin>
            <groupId>org.apache.maven.plugins</groupId>
            <artifactId>maven-compiler-plugin</artifactId>
            <version>3.5.1</version>
            <!--指定JDK版本1.8-->
            <configuration>
                <source>1.8</source>
                <target>1.8</target>
            </configuration>
        </plugin>
    </plugins>
    </build>


</project>
第一个应用:
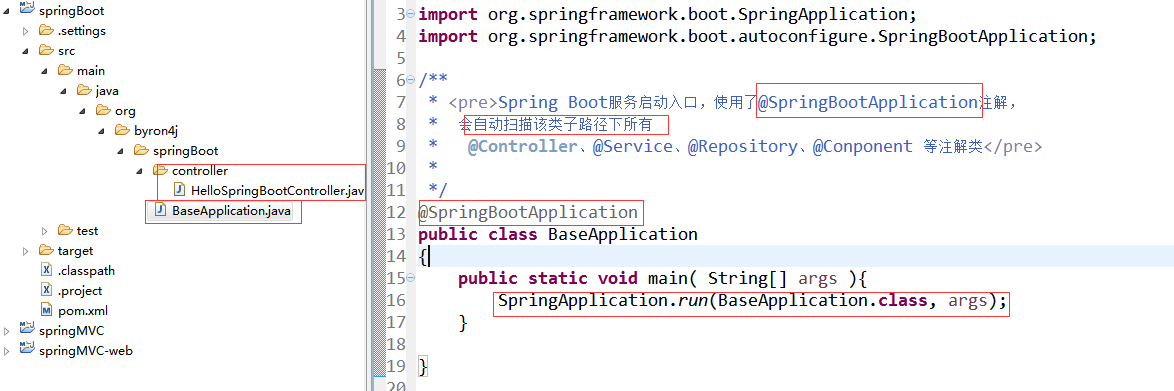
BaseApplication.java代码示例, Spring Boot默认扫描使用
@SpringBootApplication注解的子路径下的被@Controller、@Service、@Repository、@Conponent 等注解类标注的类。
package org.byron4j.springBoot;

import org.springframework.boot.SpringApplication;
import org.springframework.boot.autoconfigure.SpringBootApplication;

/**
 * <pre>Spring Boot服务启动入口,使用了@SpringBootApplication注解,
 *  会自动扫描该类子路径下所有
 *   @Controller、@Service、@Repository、@Conponent 等注解类</pre>
 *
 */
@SpringBootApplication
public class BaseApplication
{
    public static void main( String[] args ){
        SpringApplication.run(BaseApplication.class, args);
    }

}
第一个Hello Spring Boot!程序:
/**
 *
 */
package org.byron4j.springBoot.controller;

import org.springframework.stereotype.Controller;
import org.springframework.web.bind.annotation.RequestMapping;

/**
 * @author Byron.Y.Y
 * @date 2016年10月12日
 */
@Controller
public class HelloSpringBootController {

    @RequestMapping("/hello")
    public String hello(){
        return "Hello, SpringBoot!";
    }
}
Spring Boot极大简化了配置,基于注解,运行BaseApplication#main方法,出现启动界面:
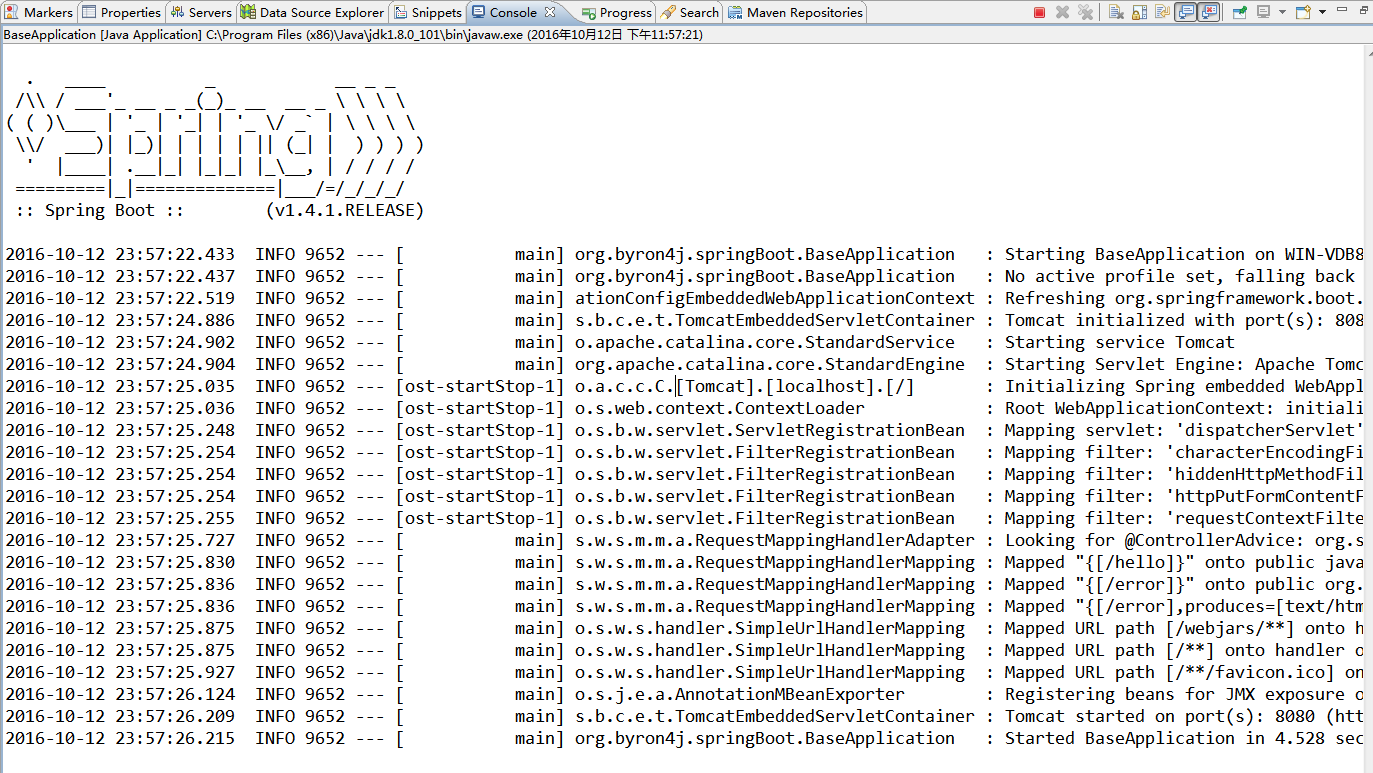
Spring Boot内置了一个Tomcat容器,启动成功后,在浏览器端输入localhost:8080/hello,看看效果吧。

 浙公网安备 33010602011771号