前端CSS3布局display:flex用法
前端CSS3布局display:flex用法
先附上代码
点击查看代码
<!DOCTYPE html>
<html>

  <head>
    <meta charset="utf-8">
    <title>display:flex</title>
    <style>
      .flex-box {
        background-color: aquamarine;
      }

      .flex-box>div {
        background-color: lightgray;
        width: 100px;
        height: 100px;
        text-align: center;
        border: 1px solid red;
      }
    </style>
  </head>

  <body>
    <div class="flex-box">
      <div>1</div>
      <div>2</div>
      <div>3</div>
      <div>4</div>
      <div>5</div>
      <div>6</div>
      <div>7</div>
      <div>8</div>
    </div>
  </body>

</html>
运行效果

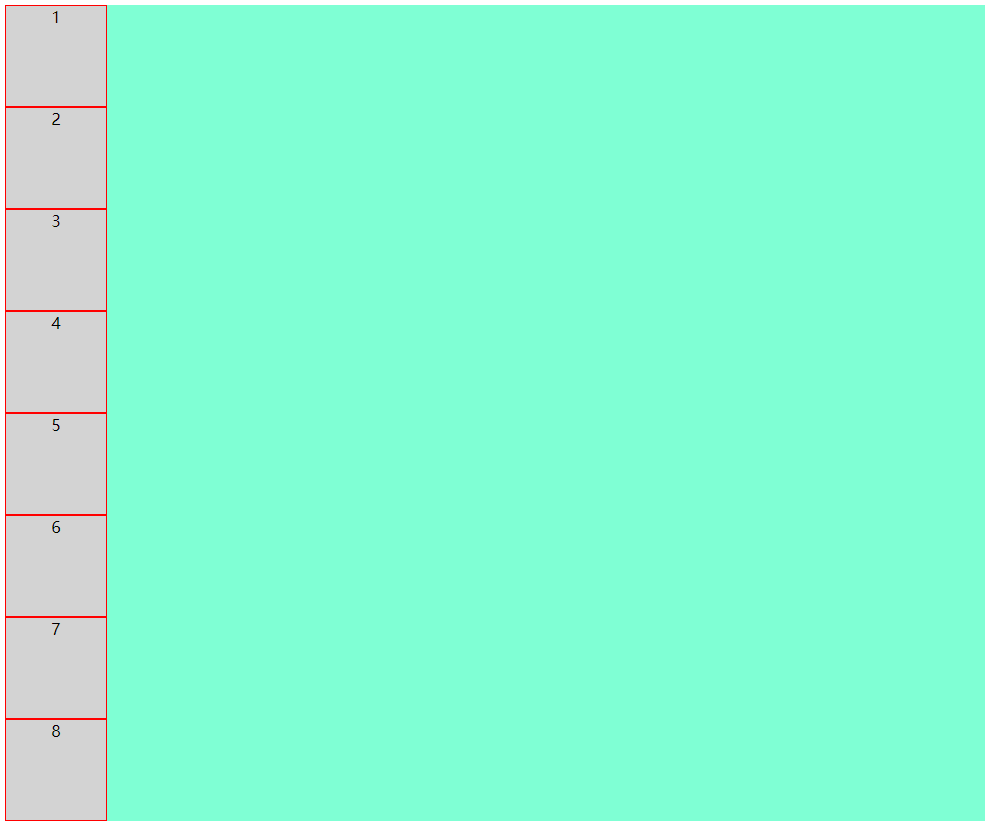
8个小方块呈纵向排列
好,接下来我们看看display:flex到底有哪些好处
先在flex-box中设置display:flex,看看效果
上代码
点击查看代码
.flex-box {
    background-color: aquamarine;
    display: flex;
}
效果图

仅仅设置了display: flex,8个小方块呈横向排列了
接下来详解flex布局的几个常用属性
-
flex-direction
-
flex-wrap
-
flex-flow
-
justify-content
-
align-items
1. flex-direction
该属性决定小方块按横向或纵向排列
(1):row(决定小方块横向排列,起点在左端)
上代码
点击查看代码
.flex-box {
    background-color: aquamarine;
    display: flex;
    flex-direction: row;
}
效果图

可以看到,样式并没有什么变化,这是因为row是flex-direction的默认排列方式
(2):row-reverse(决定小方块横向排列,起点在右端)
上代码
点击查看代码
.flex-box {
    background-color: aquamarine;
    display: flex;
    flex-direction: row-reverse;
}
效果图

(3):column(决定小方块纵向排列,起点在上端)
上代码
点击查看代码
.flex-box {
    background-color: aquamarine;
    display: flex;
    flex-direction: column;
}
效果图

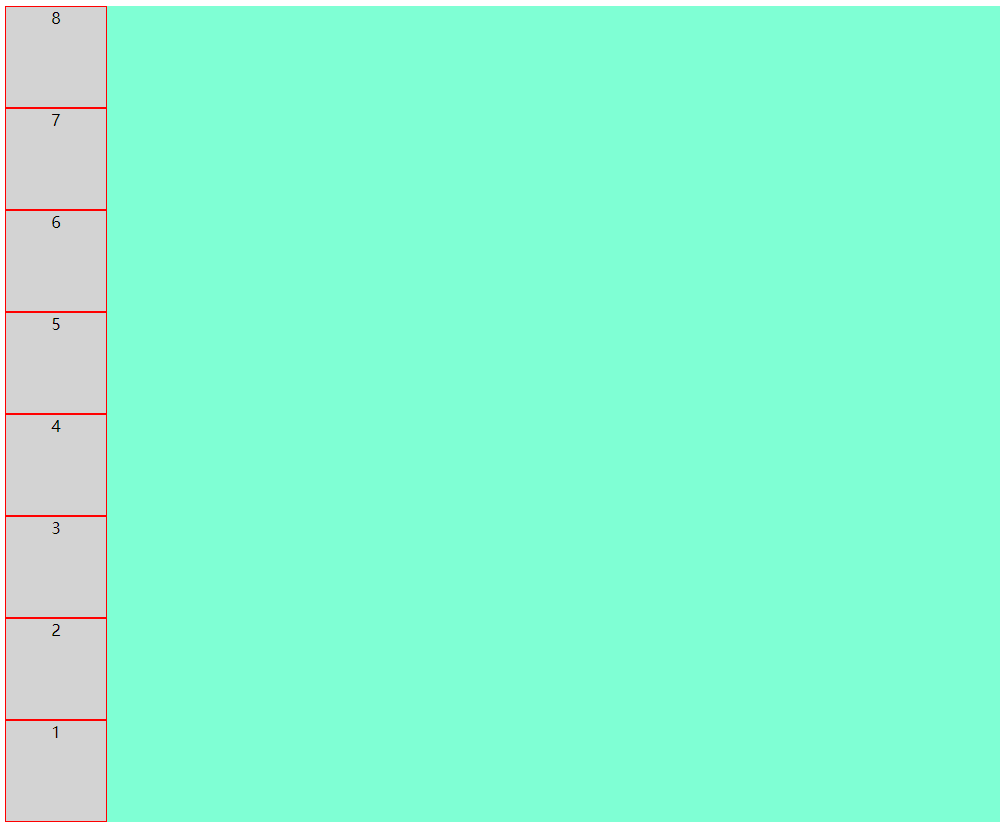
(4):column-reverse(决定小方块纵向排列,起点在下端)
上代码
点击查看代码
.flex-box {
    background-color: aquamarine;
    display: flex;
    flex-direction: column-reverse;
}
效果图

到此,flex-direction属性就讲完了
接下来讲解flex-wrap
2. flex-wrap
该属性决定小方块是否换行,默认不换行,内容会被挤压
(1):nowrap(决定小方块不换行,起点在上端,内容会被挤压)
上代码
点击查看代码
.flex-box {
    background-color: aquamarine;
    display: flex;
    flex-wrap: nowrap;
}
效果图

(2):wrap(决定小方块换行,起点在上端,内容不会被挤压,)
上代码
点击查看代码
.flex-box {
    background-color: aquamarine;
    display: flex;
    flex-wrap: wrap;
}
效果图

(3):wrap-reverse(决定小方块换行,起点在下端,内容不会被挤压,)
上代码
点击查看代码
.flex-box {
    background-color: aquamarine;
    display: flex;
    flex-wrap: wrap-reverse;
}
效果图

3. flex-flow
该属性是用于同时设置 flex-direction 和 flex-wrap 属性的简写属性
包含如下几种可能
-
row nowrap|wrap|wrap-reverse
-
row-reverse nowrap|wrap|wrap-reverse
-
column nowrap|wrap|wrap-reverse
-
column-reverse nowrap|wrap|wrap-reverse
由于可能太多了,下面只列举了一种,但小编试过了,所有的可能都是对的
(1):row-reverse wrap-reverse(决定小方块呈横向排列且起点在右端,换行且起点在下端,内容不会被挤压)
上代码
点击查看代码
.flex-box {
    background-color: aquamarine;
    display: flex;
    flex-flow: row-reverse wrap-reverse;
}
效果图

4. justify-content
该属性决定小方块在纵轴上的对齐方式
(1):flex-start(决定小方块左对齐)
上代码
点击查看代码
.flex-box {
    background-color: aquamarine;
    display: flex;
    justify-content: flex-start;
}
效果图

(2):center(决定小方块中心对齐)
上代码
点击查看代码
.flex-box {
    background-color: aquamarine;
    display: flex;
    justify-content: center;
}
效果图

(3):flex-end(决定小方块右对齐)
上代码
点击查看代码
.flex-box {
    background-color: aquamarine;
    display: flex;
    justify-content: flex-end;
}
效果图

(4):space-around(决定小方块之间的间隔比小方块与边框的间隔大一倍)
上代码
点击查看代码
.flex-box {
    background-color: aquamarine;
    display: flex;
    justify-content: space-around;
}
效果图

(5):space-between(决定小方块两端对齐,小方块之间间隔相等)
上代码
点击查看代码
.flex-box {
    background-color: aquamarine;
    display: flex;
    justify-content: space-between;
}
效果图

(6):space-evenly(决定小方块之间的间隔相等)
上代码
点击查看代码
.flex-box {
    background-color: aquamarine;
    display: flex;
    justify-content: space-evenly;
}
效果图

5. align-items
该属性决定小方块在横轴上的对齐方式
(1):flex-start(决定小方块上对齐)
上代码
点击查看代码
.flex-box {
    background-color: aquamarine;
    display: flex;
    align-items: flex-start;
}
效果图

(2):center(决定小方块中心对齐)
上代码
点击查看代码
.flex-box {
    background-color: aquamarine;
    display: flex;
    align-items: center;
}
效果图

(3):flex-end(决定小方块下对齐)
上代码
点击查看代码
.flex-box {
    background-color: aquamarine;
    display: flex;
    align-items: flex-end;
}
效果图

(4):baseline(决定小方块第一行文字的基线对齐)
上代码
点击查看代码
.flex-box {
    background-color: aquamarine;
    display: flex;
    align-items: baseline;
}
效果图

(5):stretch(决定小方块占满整个容器的高度)
注意:小方块的高度应不设置或设置为auto
上代码
点击查看代码
.flex-box {
    background-color: aquamarine;
    display: flex;
    align-items: stretch;
}
效果图

以上是容器的属性,接下来我们讲解小方块的属性
-
order
-
flex-grow
-
flex-shrink
-
flex-basis
-
flex
-
align-self
(1):order(决定小方块显示的顺序,默认为0)
注意:小方块order不设置或设置为0的优先级比设置为1的优先级高
注意:该值必须为数字
上代码
点击查看代码
<div class="flex-box">
  <div style="order: 1">1</div>
  <div style="order: 2">2</div>
  <div style="order: 0">3</div>
  <div>4</div>
  <div>5</div>
  <div>6</div>
</div>
效果图

(2):flex-grow(决定某个小方块相对于其它小方块将增长多少)
注意:该值必须为数字,数值越大,增长越多
上代码
点击查看代码
<div class="flex-box">
  <div style="flex-grow: 1">1</div>
  <div style="flex-grow: 2">2</div>
  <div style="flex-grow: 3">3</div>
  <div>4</div>
  <div>5</div>
  <div>6</div>
</div>
效果图

将窗口变长

(3):flex-shrink(决定某个小方块相对于其它小方块将收缩多少)
注意:该值必须为数字,数值越大,收缩越多
上代码
点击查看代码
<div class="flex-box">
  <div style="flex-shrink: 1">1</div>
  <div style="flex-shrink: 2">2</div>
  <div style="flex-shrink: 3">3</div>
  <div>4</div>
  <div>5</div>
  <div>6</div>
</div>
效果图

将窗口缩小

(4):flex-basis(决定某个小方块的初始长度)
上代码
点击查看代码
<div class="flex-box">
  <div style="flex-basis: 60px">1</div>
  <div style="flex-basis: 80px">2</div>
  <div style="flex-basis: 120px">3</div>
  <div>4</div>
  <div>5</div>
  <div>6</div>
</div>
效果图

(5):flex(flex-grow、flex-shrink 和 flex-basis 属性的简写属性)
上代码
点击查看代码
<div class="flex-box">
  <div>1</div>
  <div>2</div>
  <div style="flex: 0 0 200px">3</div>
  <div>4</div>
  <div>5</div>
  <div>6</div>
</div>
效果图

(6):align-self(决定某个小方块的对齐方式,将覆盖容器的 align-items 属性所设置的默认对齐方式)
上代码
点击查看代码
<div class="flex-box">
  <div style="align-self: flex-start; height: 60px;">1</div>
  <div style="align-self: center;  height: 80px;">2</div>
  <div style="align-self: flex-end;  height: 160px;">3</div>
  <div>4</div>
  <div>5</div>
  <div>6</div>
</div>
效果图


【推荐】国内首个AI IDE,深度理解中文开发场景,立即下载体验Trae
【推荐】编程新体验,更懂你的AI,立即体验豆包MarsCode编程助手
【推荐】抖音旗下AI助手豆包,你的智能百科全书,全免费不限次数
【推荐】轻量又高性能的 SSH 工具 IShell:AI 加持,快人一步
· 震惊!C++程序真的从main开始吗?99%的程序员都答错了
· 【硬核科普】Trae如何「偷看」你的代码?零基础破解AI编程运行原理
· 单元测试从入门到精通
· 上周热点回顾(3.3-3.9)
· winform 绘制太阳,地球,月球 运作规律