[译]使用NuGet管理共享代码
可以在内网部署自己的私人NuGet仓储服务。
Setting it up
本例中我们创建一个发邮件的类,将其作为我们自己的NuGet包:
using System;
using System.Net.Mail;

namespace MyCompany.WebCommon
{
    /// <summary>
    /// Contains code to send a HTML email using SMTP
    /// </summary>
    public class Emailer
    {
        /// <summary>
        /// Contains the error message if SendMail fails
        /// </summary>
        public string Error { get; private set; }

        /// <summary>
        /// Sends an email, returns false if failed
        /// </summary>
        /// <param name="emailAddress">Email address to send to - only one address allowed</param>
        /// <param name="subject">Subject line of email</param>
        /// <param name="emailBodyHtml">Contents of email - make sure to escape any HTML</param>
        /// <param name="emailFrom">Email address the email comes from (can be anything)</param>
        /// <param name="smtpServerName">Smtp server name</param>
        /// <returns>boolean indicating email was sent (not neccesarily delivered)</returns>
        public bool SendEmail(
            string emailAddress,
            string subject,
            string emailBodyHtml,
            string emailFrom,
            string smtpServerName = "localhost")
        {
            SmtpClient Smtp_Server = new SmtpClient();
            MailMessage e_mail = new MailMessage();
            Smtp_Server.Host = smtpServerName;

            e_mail = new MailMessage();
            e_mail.From = new MailAddress(emailFrom);
            e_mail.To.Add(emailAddress);
            e_mail.Subject = subject;
            e_mail.IsBodyHtml = true;
            e_mail.Body = emailBodyHtml;

            try
            {
                Smtp_Server.Send(e_mail);
            }
            catch (Exception e)
            {
                this.Error = e.ToString();
                return false;
            }
            return true;
        }
    }
}
假设我们有五个项目都要有发邮件的功能,我们希望这五个项目都能复用上面的类。
首先,创建一个解决方案,创建如上的类,编译项目:
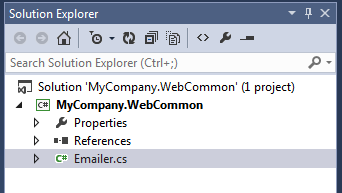
这里有两处要注意。首先编辑Properties/AssemblyInfo.cs文件为你的程序集添加描述。同时可以设置公司名,作者等。
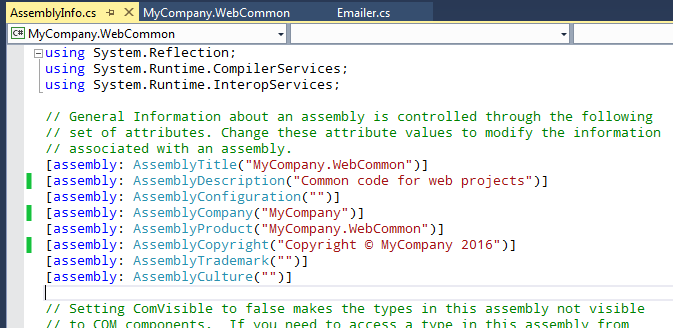
第二个要注意的是确保启用了xml comment文件生成,这样才有智能提示。注意修改XML扩展名为小写。
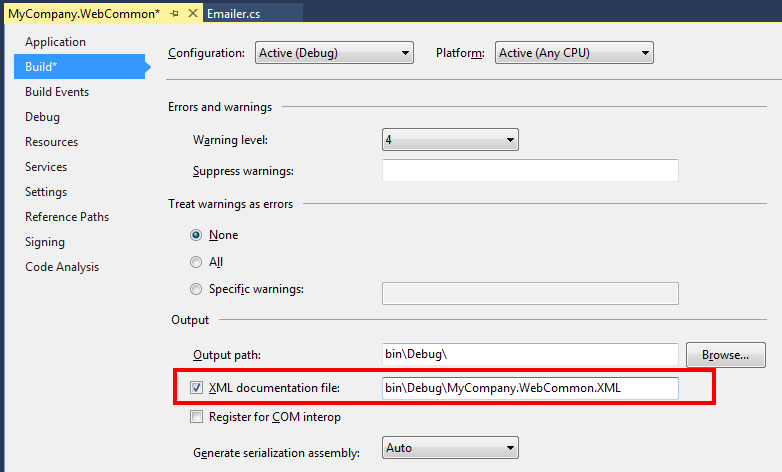
在控制台中cd到.csproj文件的所在目录,然后执行下面的命令:
nuget spec
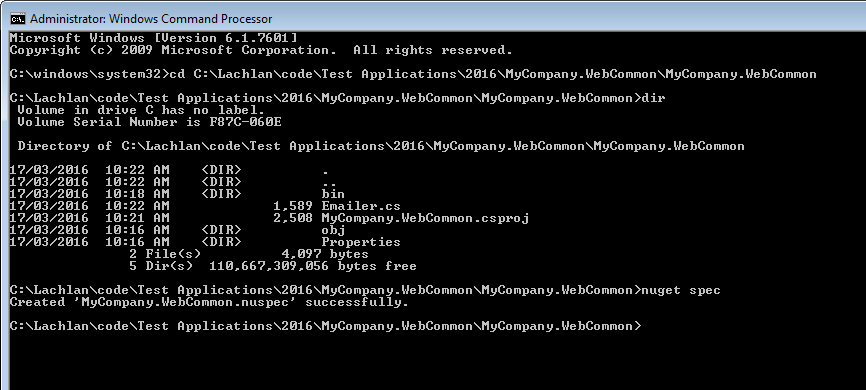
这会生成一个名为MyCompany.WebCommon.nuspec的文件,内容如下:
<?xml version="1.0"?>
<package >
  <metadata>
    <id>$id$</id>
    <version>$version$</version>
    <title>$title$</title>
    <authors>$author$</authors>
    <owners>$author$</owners>
    <requireLicenseAcceptance>false</requireLicenseAcceptance>
    <description>$description$</description>
    <projectUrl>http://myserver/wiki/MyCompany.WebCommon.html</projectUrl>
    <releaseNotes>Initial release of code library to send emails</releaseNotes>
    <copyright>Copyright 2016</copyright>
    <tags>MyCompany Web Common Emailer Emails</tags>
  </metadata>
</package>
这个文件被NuGet用来创建你的package。
注意上面的$XXX$,NuGet会自动查看AssemblyInfo.cs文件使用对应的meta data替代掉nuspec文件中的$XXX$。
然后编译项目,执行下面的命令:
NuGet Pack

这将创建一个名为MyCompany.WebCommon.1.0.0.0.nupkg的文件 - 这个就是你的第一个package。
设置你的私有NuGet server
Tools -> options -> NuGet Package Manager -> Package Sources

注意添加/nuget到你的私有仓储url。
And you can now add the package to your project! Right click on your project, select Manage NuGet packages and you should see:
更新的你包
修改下SendEmail() :
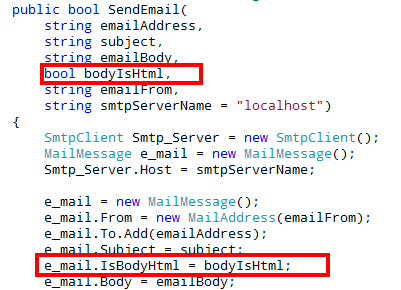
修改**AssemblyInfo.cs **文件中的AssemblyVersion和AssemblyFileVersion为1.1,重编译项目。然后使用nuget pack重新构建package。
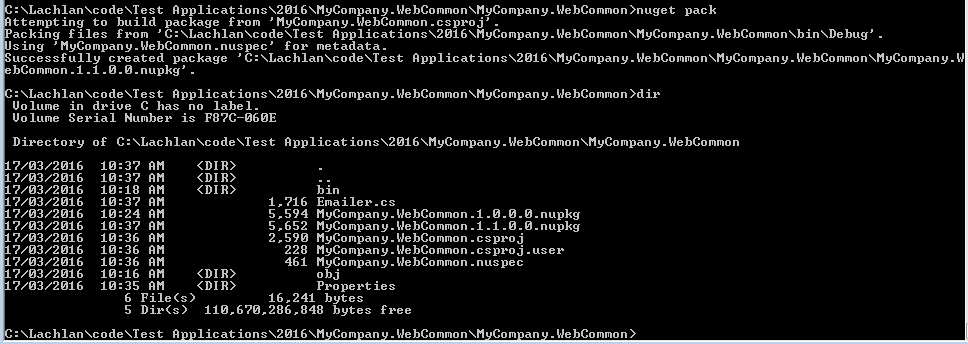
新package的版本为1.1。这意味将它发布到你的私人仓储中去不会覆盖1.0的版本。The new package has the 1.1 version number at the end. This means we can publish it to our repository and not lose our earlier version. It also means that once published, it's easy to update your code to use the new package. Simply right click on your project and go to Manage NuGet packages, and then click on the "Updates" section. From here you can see what packages have been updated along with it's release notes:


 浙公网安备 33010602011771号