
Netty(一):ByteBuf读写过程图解
我们知道ByteBuf通过读写两个索引分离,避免了NIO中ByteBuffer中读写模式切换时,需要flip等繁琐的操作。
今天就通过一段测试代码以及图例来直观的了解下ByteBuf中的readIndex, writeIndex以及capacity的概念。
先贴出测试代码:
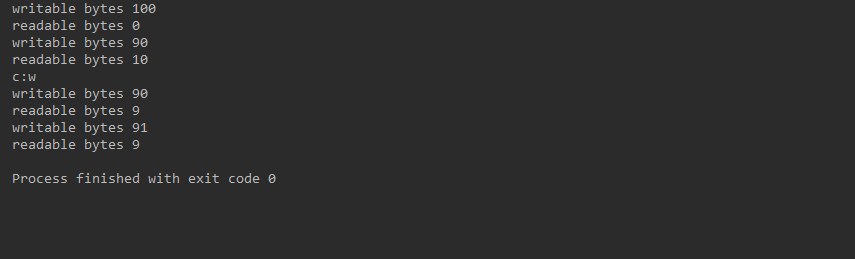
 1 public class ByteBuffTest {
 2
 3     public static void main(String[] args){
 4         /*******************初始阶段**********************/
 5         ByteBuf buf = Unpooled.buffer(100, 200);
 6         System.out.println("writable bytes " + buf.writableBytes());
 7         System.out.println("readable bytes " + buf.readableBytes());
 8
 9         /*******************写入数据**********************/
10         String str = "write test";//UTF-8 英文字符占一个字节
11         int length = str.getBytes().length;//因此得到的字节长度为10
12         buf.writeBytes(str.getBytes());
13         System.out.println("writable bytes " + buf.writableBytes());
14         System.out.println("readable bytes " + buf.readableBytes());
15
16         /*******************读取数据*********************/
17         char c = (char)buf.readByte();//读取第一个字节,并转换成字符打印
18         System.out.println("c:" + c);
19         System.out.println("writable bytes " + buf.writableBytes());
20         System.out.println("readable bytes " + buf.readableBytes());
21
22         /*******************丢弃已读*********************/
23         buf.discardReadBytes();
24         System.out.println("writable bytes " + buf.writableBytes());
25         System.out.println("readable bytes " + buf.readableBytes());
26
27     }
28 }
然后是测试打印结果:
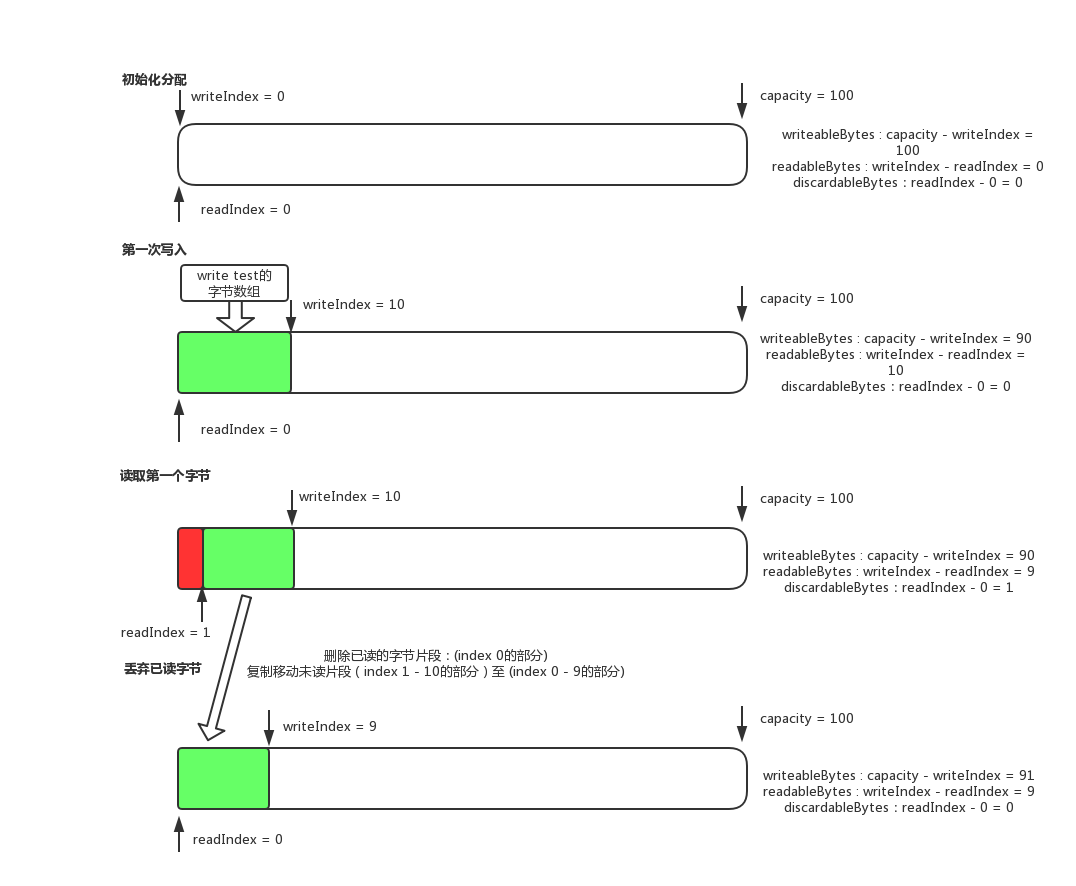
对上述过程用图例直观表示:

 浙公网安备 33010602011771号