
SpringSecurity 小demo
SpringSecurity
- 首先搭建好springboot工程,然后引入springsecurity依赖。
<dependency>
    <groupId>org.springframework.boot</groupId>
    <artifactId>spring-boot-starter-security</artifactId>
</dependency>
<dependency>
    <groupId>org.springframework.boot</groupId>
    <artifactId>spring-boot-starter-web</artifactId>
</dependency>
- 编写前端html页面login.html。
<!DOCTYPE html>
<html lang="en">
<head>
    <meta charset="UTF-8">
    <title>Title</title>
</head>
<body>
<form action="/login" method="post">
    <input type="text" name="username">
    <input type="password" name="password">
    <input type="submit" value="提交">
</form>
</body>
</html>
-
controller
@Controller public class UserController{ @RequestMapping("/toLogin") public String toLogin() { return "login"; } } -
直接运行工程,访问IP+端口:http://localhost:8080/
可以发现,这个请求被springsecurity拦截,会自动跳转到springsecurity的登录界面/login。
所有的请求都会被重定向到它的login页面。
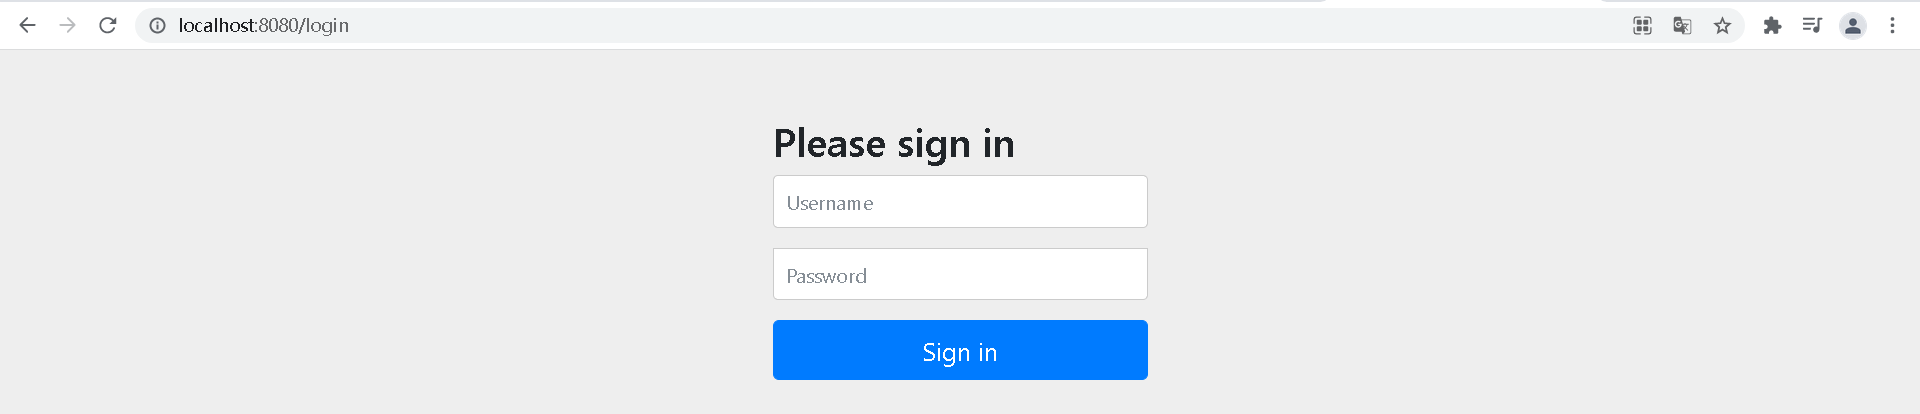
这个springsecurity的登录页面的用户名默认是user,密码则是在控制台上打印的由springsecurity生成的密码:

-
我们输入用户名和密码后,会成功放行上一步中的请求。
-
那么我们如何不使用springsecurity的登录而采用我们自己的登录逻辑呢?
UserDetailService
UserDetailService是一个接口,里面只有一个方法。
UserDetails loadUserByUsername(String var1) throws UsernameNotFoundException;
这个方法就是根据用户名来加载用户。它的入参var1就是username,username为空或者没有匹配到则抛出UsernameNotFoundException。
这个方法的返回值是UserDetails。
UserDetailService还有一些实现类,一般来说是需要自己去实现的,它也一些其他的,比如有基于内存的实现类InMemoryUserDetailsManager等等。

UserDetails
UserDetails也是一个接口,里面有各种方法。
public interface UserDetails extends Serializable {
    //返回权限
    Collection<? extends GrantedAuthority> getAuthorities();

    String getPassword();

    String getUsername();

    //用户是否过期
    boolean isAccountNonExpired();

    //是否被锁定
    boolean isAccountNonLocked();
	//凭证(密码)是否过期
    boolean isCredentialsNonExpired();

    boolean isEnabled();
}
UserDetails就是一个用户详情对象,根据这个用户详情对象我们可以获取到一些用户的详情信息。
User
UserDetails的一个实现类就是User,它容易和项目中自己定义的User类混淆。里面有一些用户的信息。它有俩个构造:
public User(String username, String password, Collection<? extends GrantedAuthority> authorities) {
    this(username, password, true, true, true, true, authorities);
}

public User(String username, String password, boolean enabled, boolean accountNonExpired, boolean credentialsNonExpired, boolean accountNonLocked, Collection<? extends GrantedAuthority> authorities) {
    if (username != null && !"".equals(username) && password != null) {
        this.username = username;
        this.password = password;
        this.enabled = enabled;
        this.accountNonExpired = accountNonExpired;
        this.credentialsNonExpired = credentialsNonExpired;
        this.accountNonLocked = accountNonLocked;
        this.authorities = Collections.unmodifiableSet(sortAuthorities(authorities));
    } else {
        throw new IllegalArgumentException("Cannot pass null or empty values to constructor");
    }
}
一个有3个参数的构造就是用户名、密码和权限。还有一个7个参数的构造,实则3个参数的构造就是调用的7个参数的构造方法。
自定义登录逻辑
创建一个UserService的实现类UserServiceImpl。实现UserDetailsService接口。
@Service
public class UserServiceImpl implements UserDetailsService {

    @Autowired
    private PasswordEncoder passwordEncoder;

    @Override
    public UserDetails loadUserByUsername(String username) throws UsernameNotFoundException {
        //根据username到数据库中查找用户
        if (!"admin".equals(username))
        {
            throw new UsernameNotFoundException("没找到用户");
        }
        //找到用户就做密码匹配
        //这里直接写好密码,方便验证测试。
        String password = passwordEncoder.encode("123456");
        //匹配成功返回用户对象UserDetails
        return new User("admin",password, AuthorityUtils.
                commaSeparatedStringToAuthorityList("admin,normal"));
    }
}
返回值是UserDetails,是一个接口,所以选择new一个实现类User,设置权限的时候有一个工具类AuthorityUtils,里面有一个commaSeparatedStringToAuthorityList,可以把参数中的字符串分割形成不同权限。
重启工程,可以发现控制台并没有生成之前的generate security password。然后我们进入springsecurity的登录页面,就可以输入admin,123456进行登录。
这样虽然完成了自定义的登录逻辑,但是每次都是进入的springsecurity的登录页面,接下来我们需要设置自己的登录页面。
WebSecurityConfigurerAdapter
WebSecurityConfigurerAdapter是一个配置类,里面有很多默认的方法,我们需要继承写一个配置类继承它,然后重写里面的方法,然后根据需求完成相应的功能。
我们可以重写它的configure(HttpSecurity http)方法,这里是重写的HttpSecurity参数的方法。
@Override
protected void configure(HttpSecurity http) throws Exception {
    http.formLogin()
                //自定义登录页面
                .loginPage("/login.html");
}
里面删除父类的configure方法。这样,如果我们再访问页面http://localhost:8080/login.html,就不会存在需要springsecurity的登录页面了。如果我们要设置自己的登录页面,只需要加上http.formLogin().loginPage("/login.html");。但是这样的话我们访问所有的页面,都不会被拦截,我们只是希望没有登录的时候只能访问登录页面。因此,我们还需要加一个http.authorizeRequests().anyRequest().authenticated();
@Override
protected void configure(HttpSecurity http) throws Exception {
    http.formLogin()
            //自定义登录页面
            .loginPage("/login.html");

    http.authorizeRequests()
            //所有网页都需要认证(登录)才能访问
            .anyRequest().authenticated();
}
这样我们再去访问的话会出现页面被重定向太多次从而无法访问的情况,这是因为我们把所有的页面包括登录页面也拦截了,然后又需要认证才能访问,所以会一直重定向。因此需要我们把登录页面除外。
@Override
protected void configure(HttpSecurity http) throws Exception {
    http.formLogin()
            //自定义登录页面
            .loginPage("/login.html");

    http.authorizeRequests()
            .antMatchers("/login.html").permitAll()
            //所有网页都需要认证(登录)才能访问
            .anyRequest().authenticated();
}
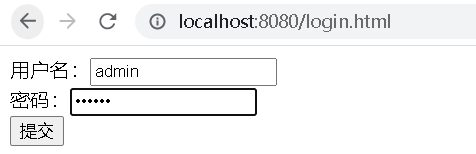
这样我们在没有登录的状态下直接访问登录完成后的首页http://localhost:8080/index.html,它会自动的跳转到http://localhost:8080/login.html。
我们输入之前自定义的登录逻辑 admin 和 123456 点击提交,发现页面不做任何操作。
这是因为我们表单提交时候的action的路径是"/login",我们需要在configure方法中配置登录的自定义登录逻辑。
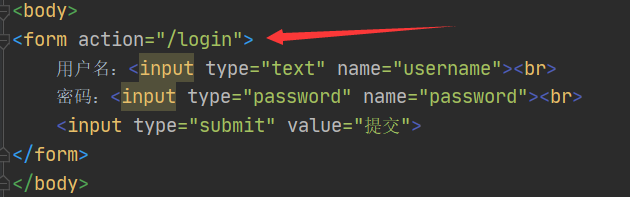
我们需要添加一个.loginProcessingUrl("/login")。这个/login跟Controller中的RequestMapping没有任何的关联。
同时,我们还需要关闭csrf防护。然后设置一个登录成功的跳转页面首页index.html。
@Override
protected void configure(HttpSecurity http) throws Exception {
    http.formLogin()
            //自定义登录页面
            .loginPage("/login.html")
        	//自定义登录逻辑
            .loginProcessingUrl("/login")
        	.successForwardUrl("/index.html");

    http.authorizeRequests()
            .antMatchers("/login.html").permitAll()
            //所有网页都需要认证(登录)才能访问
            .anyRequest().authenticated();

    //关闭csrf防护
    http.csrf().disable();
}
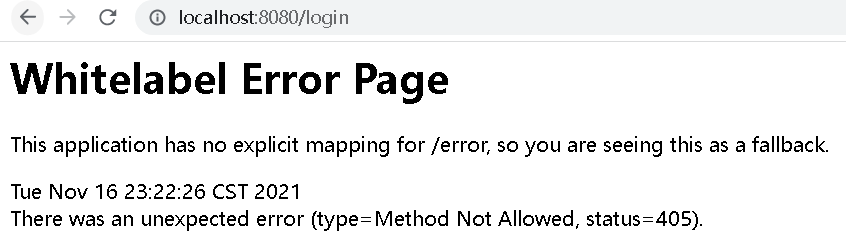
这样,我们再次输入用户名和密码之后,就可以登录了,并且会报一个错误405。说不允许method。这是因为我们.successForwardUrl("/index.html");查看源码是一个请求转发方式的跳转。
public void onAuthenticationSuccess(HttpServletRequest request, HttpServletResponse response, Authentication authentication) throws IOException, ServletException {
    request.getRequestDispatcher(this.forwardUrl).forward(request, response);
}
然而我们表单中是post。所以要修改为post方式。
在Controller中添加一个RequestMapping
@RequestMapping("/toIndex")
public String login()
{
    return "index";
}
然后修改configure方法,让成功后的url到controller中去请求。
@Override
protected void configure(HttpSecurity http) throws Exception {
    http.formLogin()
            //自定义登录页面
            .loginPage("/login.html")
            //自定义登录逻辑
            .loginProcessingUrl("/login")
            .successForwardUrl("/toIndex");

    http.authorizeRequests()
            .antMatchers("/login.html").permitAll()
            //所有网页都需要认证(登录)才能访问
            .anyRequest().authenticated();

    //关闭csrf防护
    http.csrf().disable();
}
此外我们还可以直接用重定向defaultSuccessUrl。
http.formLogin()
        //自定义登录页面
        .loginPage("/login.html")
        //自定义登录逻辑
        .loginProcessingUrl("/login")
        .defaultSuccessUrl("/index.html");

