本地配置nginx的https
前文:因为要用谷歌下的getUserMedia方法,而getUserMedia方法只能在https下才能调用,所以在本地搭建https来测试,现在说说步骤。
步骤1:下载nginx-1.10.3.zip,解压到F:/
步骤2:在nginx根目录(F:/nginx-1.10.3/)新建bat文件:
run.bat : nginx.exe
stop.bat : nginx.exe -s stop
reload.bat : nginx.exe -s reload
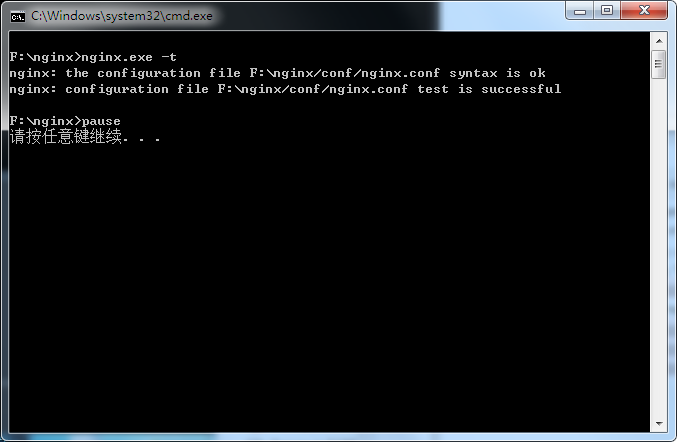
test.bat:nginx.exe -t
步骤3:进入conf文件夹,新建host和cert两个文件夹
步骤4:把申请的证书放到cert文件夹(*.crt和*.key)
步骤5:配置服务器,在host文件夹新建hx.conf,内容如下:
server {
    listen 80;
    listen chen.caidan.win:443 ssl;
    server_name chen.caidan.win;

    ssl_certificate    cert/1_chen.caidan.win_bundle.crt;
    ssl_certificate_key    cert/2_chen.caidan.win.key;
    ssl_session_cache    shared:SSL:1m;
    ssl_session_timeout  5m;
    ssl_ciphers  HIGH:!aNULL:!MD5;
    ssl_prefer_server_ciphers  on;

    #proxy_buffering off;

    location = / {
		root "E:/ftp/johnChen/chen";
		index index.html;
    }

    location / {
		root "E:/ftp/johnChen/chen";
    }
}
步骤6:进入根目录下的conf文件夹,打开nginx.conf,在}前输入include host/*.conf
步骤7:返回到根目录,双击运行test.bat,可以看到下图配置成功,再运行run.bat,打开地址 https://chen.caidan.win可以访问。