Flutter学习:认识CustomPaint组件和Paint对象
Flutter学习:认识CustomPaint组件和Paint对象
Flutter学习:使用CustomPaint绘制路径
Flutter学习:使用CustomPaint绘制图形
Flutter学习:使用CustomPaint绘制文字
Flutter学习:使用CustomPaint绘制图片
CustomPaint
CustomPaint是flutter的一个组件,所以我们可以像其他组件一样使用:
CustomPaint({
  Key? key,
  CustomPainter? painter,  // 绘制在子元素的下层
  CustomPainter? foregroundPainter,  // 绘制在子元素的上层
  Size size = Size.zero,  // 约定的布局大小,有子元素就为子元素大小
  bool isComplex = false,  // 绘制复杂的图形时应为 true
  bool willChange = false,  // 在下一帧时是否会发生改变
  Widget? child,  // 子元素
})
在CustomPaint中,要想自由的绘制内容,需要使用painter或foregroundPainter属性。传入一个自定义继承CustomPainter的类。
在继承CustomPainter后有两个必须重写的方法。在paint方法中进行绘制操作,shouldRepaint方法用来描述绘制的内容什么时候应该更新。
class MyCustomPainter extends CustomPainter {
  @override
  void paint(Canvas canvas, Size size) {
    // TODO: implement paint
  }

  @override
  bool shouldRepaint(covariant CustomPainter oldDelegate) => this != oldDelegate;
}
前提代码:
class HomePage extends StatelessWidget {
const HomePage({Key? key}) : super(key: key);
@override
Widget build(BuildContext context) {
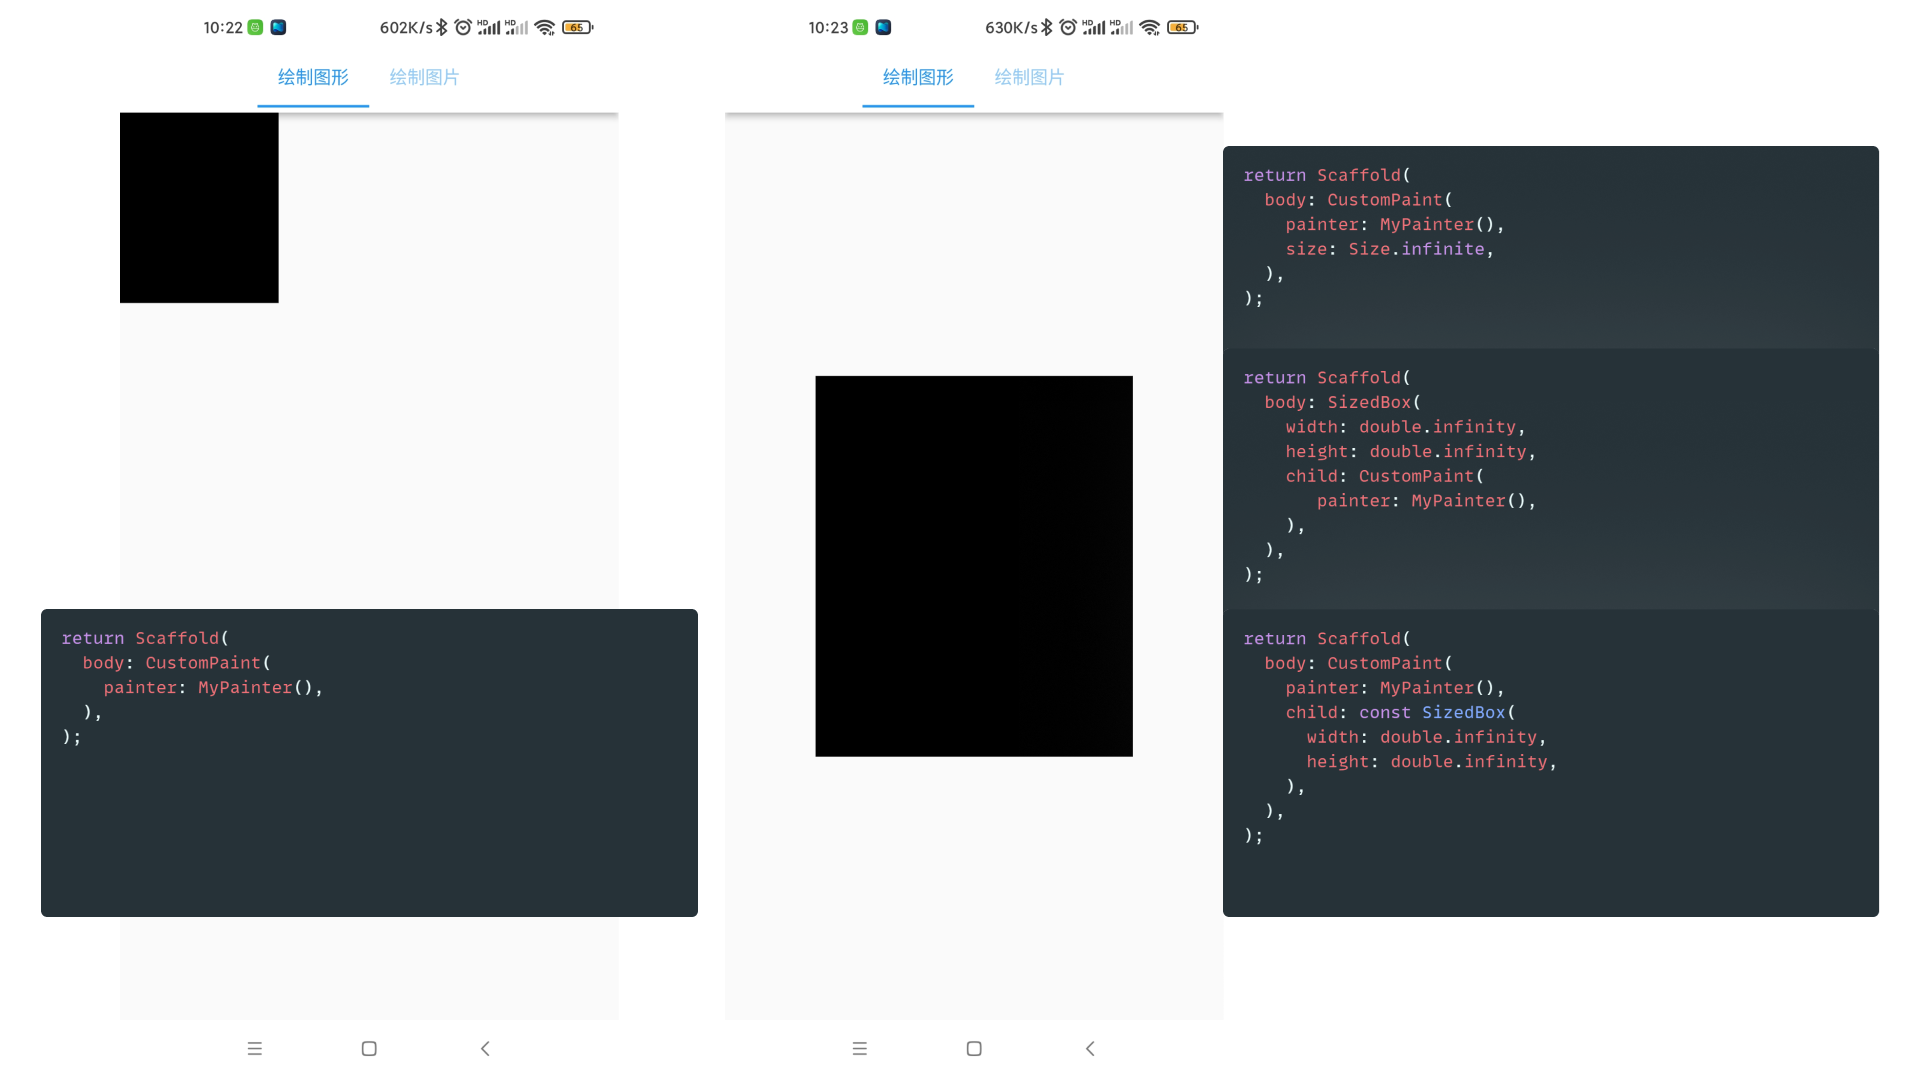
return Scaffold(
body: CustomPaint(
painter: MyCustomPainter(),
// 如果CustomPaint的父元素没有指定大小
// CusotmPaint的子元素没有指定大小
// CustomPaint的size属性没有指定大小
// 绘画出来的显示效果和有指定大小的完全不一样
size: Size.infinite,
),
);
}
}
以下是在页面中绘制一个宽250,高300的矩形:
Paint
Paint相当于一支画笔,可以自定义画笔的颜色、粗细等。首先实例化一个Paint对象:
Paint paint = Paint();
Paint类和绘制内容相关的属性一共有14个:
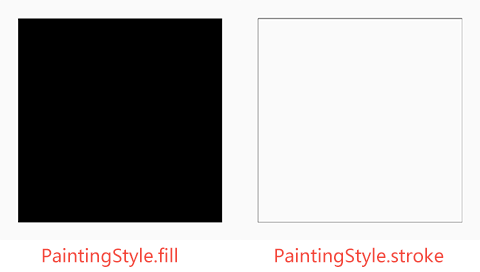
style
style → PaintStyle?,是否绘制内部形状,形状的边缘,或两者都绘制
// 填充(默认)
paint.style = PaintingStyle.fill;
// 描边
paint.style = PaintingStyle.stroke;
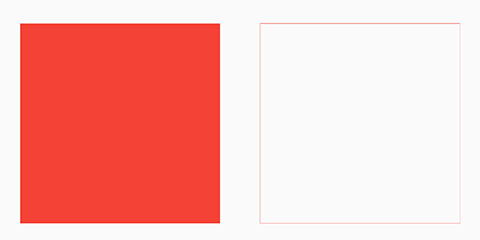
Color
color → Color?,描边或填充形状时使用的颜色。
// 默认为不透明黑色Colors.black
paint.color = Colors.red;
colorFilter
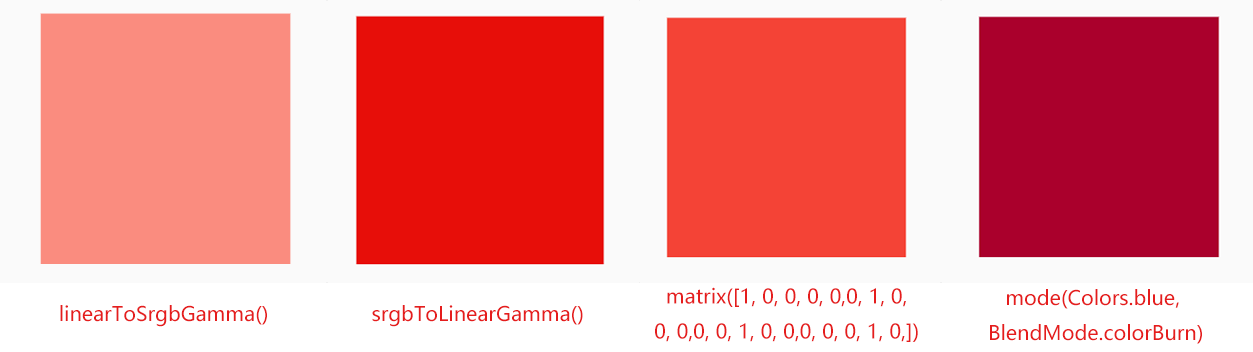
colorFilter → ColorFilter?,绘制形状或合成图层时应用的颜色过滤器,绘制形状时, colorFilter会覆盖color和shader。
// 构造一个将 sRGB 伽马曲线应用于 RGB 通道的滤色器
paint.colorFilter = const ColorFilter.linearToSrgbGamma();
// 创建一个颜色过滤器,将 sRGB 伽马曲线的倒数应用于 RGB 通道
paint.colorFilter = const ColorFilter.srgbToLinearGamma();
// 构造一个通过 5x5 矩阵转换颜色的滤色器,其中第五行隐式添加到标识配置中。
// 每个像素的颜色值,表示为<code>R, G, B, A</code> ,乘以矩阵以创建新颜色:
// | R' |   | a00 a01 a02 a03 a04 |   | R |
// | G' |   | a10 a11 a22 a33 a44 |   | G |
// | B' | = | a20 a21 a22 a33 a44 | * | B |
// | A' |   | a30 a31 a22 a33 a44 |   | A |
// | 1  |   |  0   0   0   0   1  |   | 1 |
// 矩阵按行优先顺序排列,转换列在未归一化的 0...255 空间中指定。
paint.colorFilter = const ColorFilter.matrix([
      1, 0, 0, 0, 0,
      0, 1, 0, 0, 0,
      0, 0, 1, 0, 0,
      0, 0, 0, 1, 0,
]);
// 创建一个颜色过滤器,应用作为第二个参数给出的混合模式
// 源颜色是作为第一个参数给出的颜色,目标颜色是来自正在合成的图层的颜色
paint.colorFilter = const ColorFilter.mode(Colors.blue, BlendMode.colorBurn);
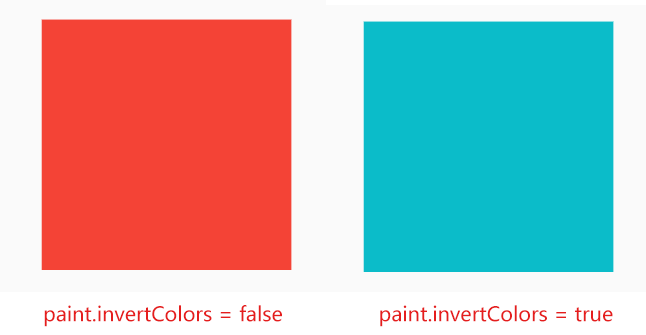
invertColors
invertColors → bool?, 绘制时图像的颜色是否反转。 反转图像的颜色会应用一个新的滤色器,该滤色器将与任何用户提供的滤色器组成。
paint.invertColors = true;
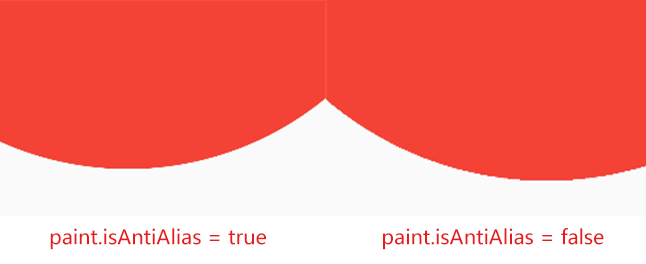
isAntiAlias
isAntiAlias → bool?,是否对画布上绘制的线条和图像应用抗锯齿,使用了抗锯齿边缘更平滑。
// 默认值为true
paint.isAntiAlias = true;
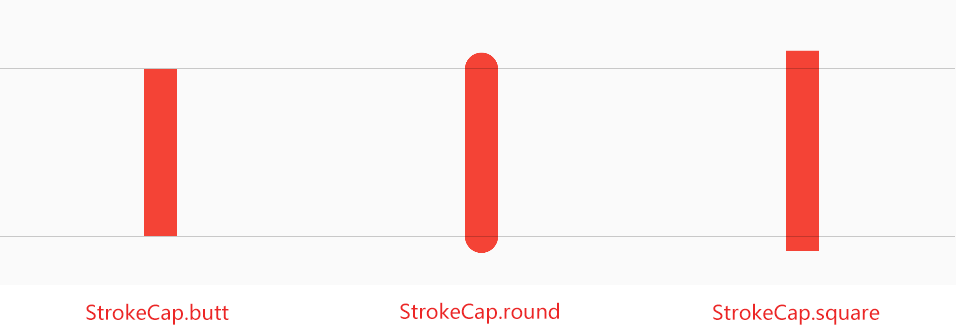
strokeCap
strokeCap → StrokeCap?,当style设置为PaintingStyle.stroke时放置在画线末端的饰面
// 以平坦边缘开始和结束轮廓,没有延伸
paint.strokeCap = StrokeCap.butt;
// 以半圆形延伸开始和结束轮廓
paint.strokeCap = StrokeCap.round;
// 以半方形扩展开始和结束轮廓。这类似于将每个轮廓扩展一半笔画宽度(由Paint.strokeWidth绘制)
paint.strokeCap = StrokeCap.square;
strokeJoin
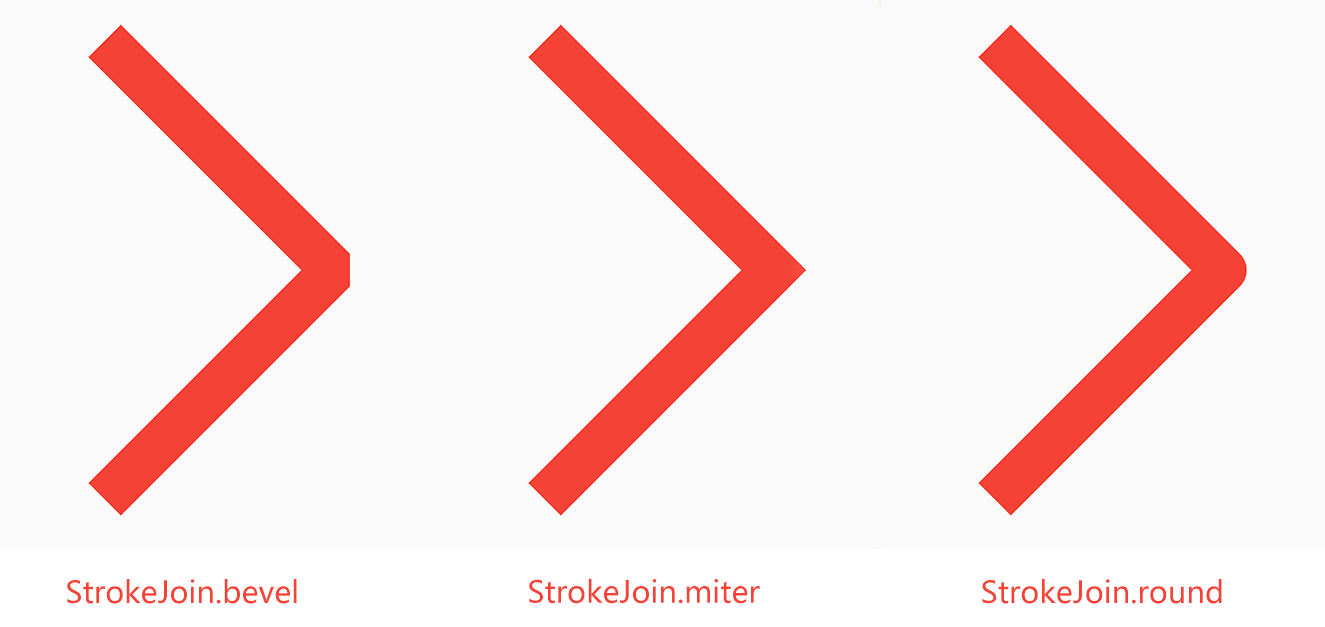
strokeJoin → StrokeJoin?,放置在段之间的连接处的那种饰面,只适用于绘制路径(即PaintingStyle.stroke)。
// 线段之间的连接将线段对接端的角连接起来,以提供斜切外观
paint.strokeJoin = StrokeJoin.bevel;
// 线段之间的连接形成尖角
paint.strokeJoin = StrokeJoin.miter;
// 线段之间的连接是半圆形的
paint.strokeJoin = StrokeJoin.round;
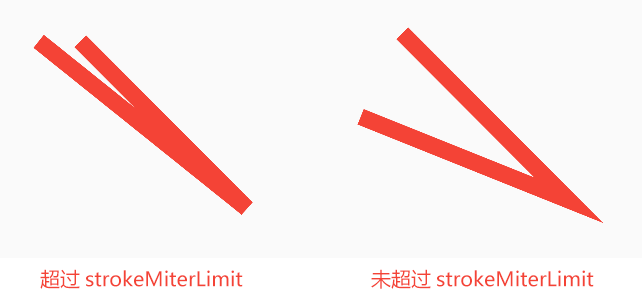
strokeMiterLimit
strokeMiterLimit → double?,当连接设置为StrokeJoin.miter且style设置为PaintingStyle.stroke时,在线段上绘制斜接的限制。如果超出此限制,则会改为绘制StrokeJoin.bevel连接。
关于strokeMiterLimit是什么可以查看以下文章:
// 默认为4.0
paint.strokeWidth = 20;
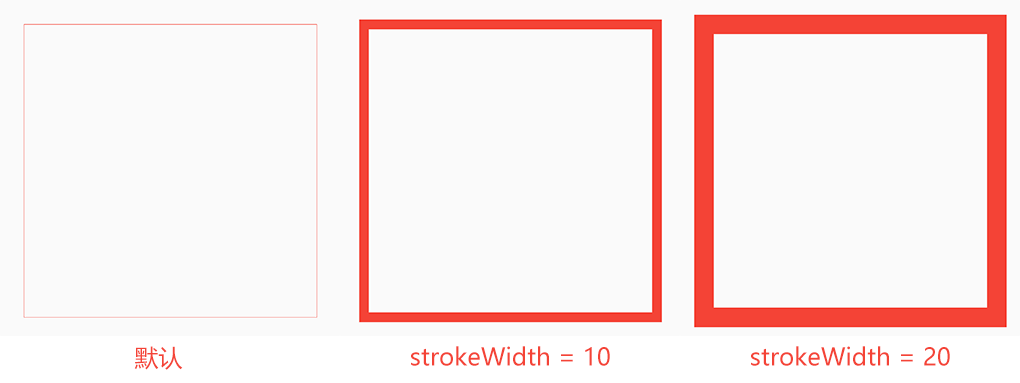
strokeWidth
strokeWidth → double?,当style设置为PaintingStyle.stroke时绘制边缘的宽度。
// 默认值为0.0
paint.strokeWidth = 20;
shader
shader → Shader?,用来描边或填充形状时使用的着色器。当它为空时,将使用color。
shader属性传递的值为 Gradient 或 ImageShader对象。
关于shader的使用方法可以查看以下文章:
blendMode
blendMode → BlendMode?,在画布上绘画时使用的算法。在画布上绘制形状或图像时,可以使用不同的算法来混合像素。
关于BlendMode的相关资料可以查看以下文章:
filterQuality
filterQuality → FilterQuality?
用于对图像进行采样的ImageFilter和Shader对象中的图像采样以及用于渲染图像的Canvas操作的质量级别。
当按比例放大时,质量通常是最低的, low和medium的质量none ,而对于非常大的比例因子(超过 10 倍),质量最高的是high 。
缩小时, medium提供最佳质量,尤其是在将图像缩小到小于其大小的一半或在此类缩小之间为比例因子设置动画时。否则, low和high在 50% 和 100% 之间的减少提供类似的效果,但图像可能会丢失细节并具有低于 50% 的丢失。
为了在放大和缩小图像或比例未知时获得高质量, medium通常是一个很好的平衡选择。
paint.filterQuality = FilterQuality.none;
paint.filterQuality = FilterQuality.low;
paint.filterQuality = FilterQuality.medium;
paint.filterQuality = FilterQuality.high;
imageFilter
imageFilter → ImageFilter?
设置绘制图片时的图像过滤器。imageFilter 一共有3个值用来设置:
ImageFilter.blur
用来设置图片高斯模糊显示效果,可以传入3个参数:
double sigmaX:创建 x 轴的高斯模糊度double sigmaY:创建 y 轴的高斯模糊度TileMode tileMode:这个enum用于定义渐变或图像过滤器应该如何处理定义的内部区域之外的区域
paint.imageFilter = ui.ImageFilter.blur(sigmaX: 50, sigmaY: 50, tileMode: TileMode.clamp);
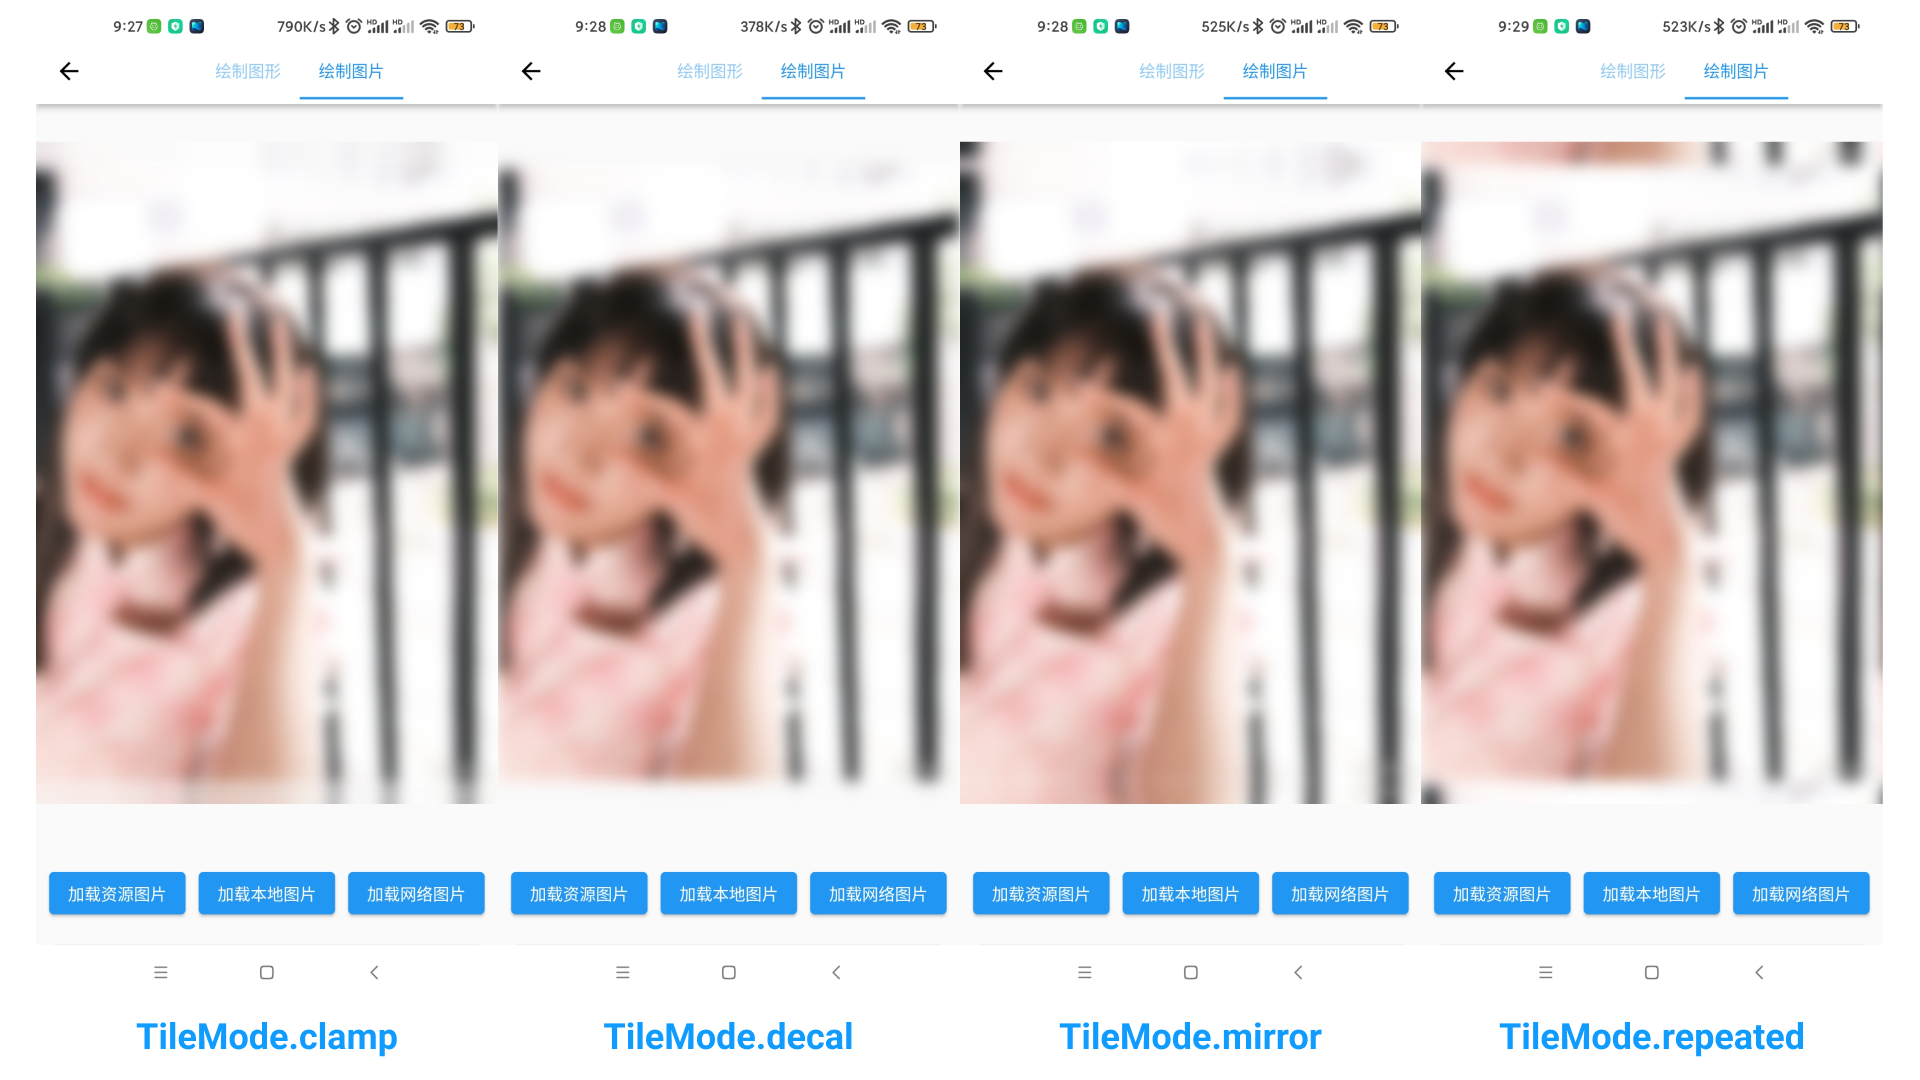
仔细查看图片的边缘,会有不同的效果。
ImageFilter.matrix
用来设置图片变形状。
该属性的用法繁多并且复杂,以后有时间再慢慢研究。要想使用简单的方法实现变形效果,只要在方法后面加上storage即可:
paint.imageFilter = ui.ImageFilter.matrix(Matrix4.skew(.2, .4).storage);

ImageFilter.compose
用来组合实现图片高斯模糊和变形。
ui.ImageFilter outer = ui.ImageFilter.blur(sigmaX: 50, sigmaY: 50, tileMode: TileMode.decal);
ui.ImageFilter inner = ui.ImageFilter.matrix(Matrix4.skew(.2, .4).storage);
paint.imageFilter = ui.ImageFilter.compose(outer: outer, inner: inner);

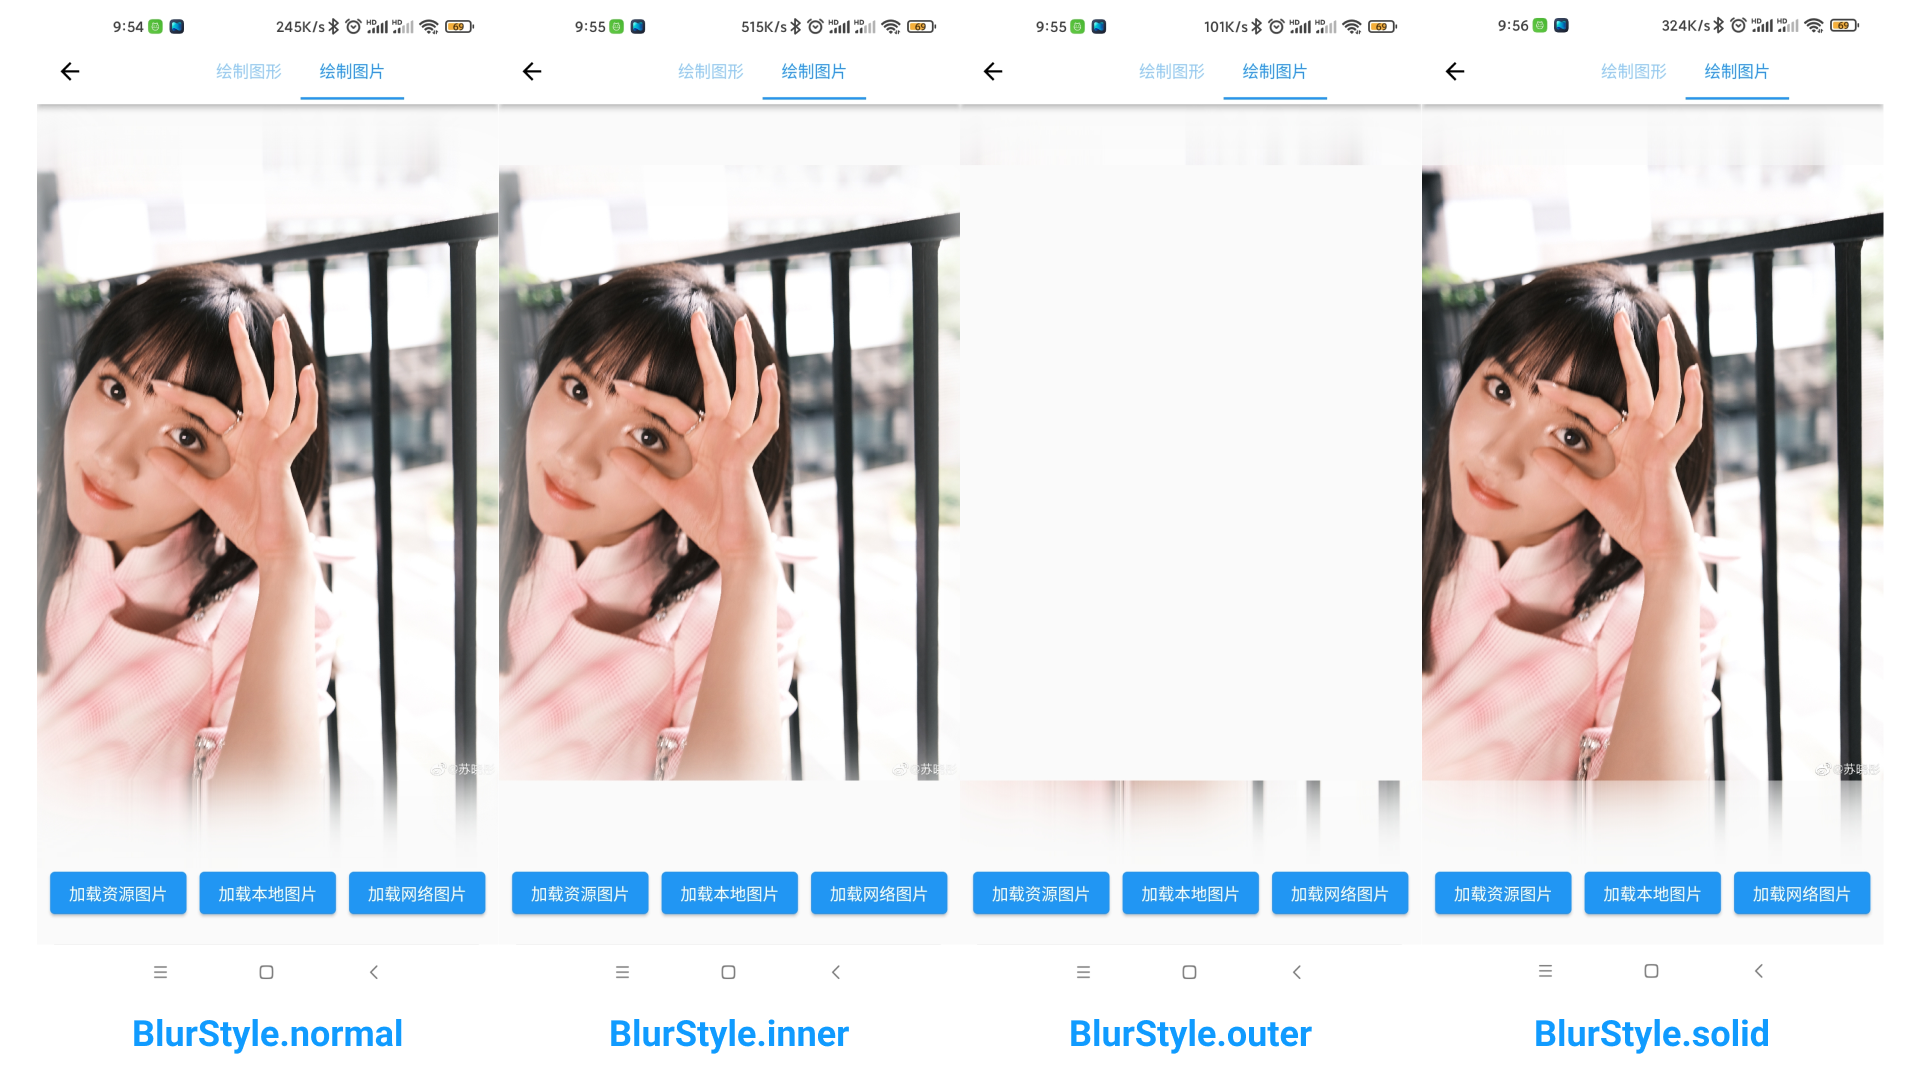
maskFilter
蒙版过滤器(例如,模糊),用于在绘制后但在将其合成到图像之前应用于形状。需要传入2个参数:
BlurStyle _style:MaskFilter对象中用于模糊的样式double _sigma:控制效果的大小。它是要应用的高斯模糊的标准偏差。该值必须大于零。 sigma 大致对应于效果半径的一半(以像素为单位)
paint.maskFilter = MaskFilter.blur(_style, _sigma);