wampserver 配置使用
借鉴 https://blog.csdn.net/qq_35756383/article/details/85249210
一、下载安装wampserver
1.下载要点击SourceForge 处下载。要安装到盘下面的根目录,文件夹不能带空格。一路安装下去就ok了。

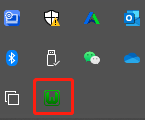
2. 启动Wampserver64, 右下角会出现如下图标,绿色代表成功,输入localhost验证是否成功。
二、自定义网站根目录
1.www目录,这是它的默认目录。
2.新建自己项目的目录,比如D:\Project\web\php_test
3.左键点击选择 “Apache” ,更改 “httpd.conf” 和 “httpd-vhosts.conf” 文件:

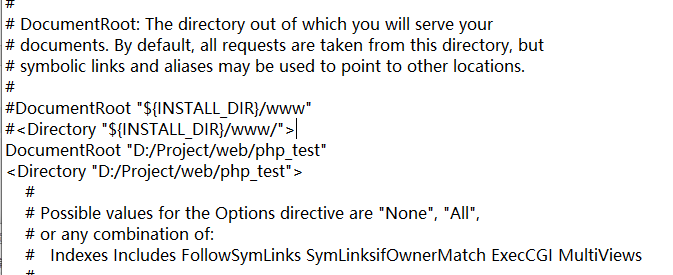
4.进入 “httpd.conf” 文件,快捷键 “Ctrl+F” ,查找 “documentroot”,修改成自己项目路径D:/Project/web/php_test
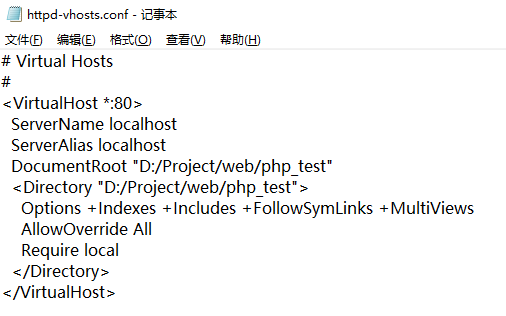
5.进入httpd-vhosts.conf” 文件,修改对应位置:
6.在D:/Project/web/php_test 下新建 test.php文件
<?php
    echo "hello world!";
?>
7. 重新所有服务

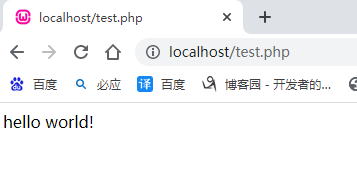
8.在浏览器中输入 “localhost/test.php” ,出现以下说明成功。
9.打开”httpd.conf文件“,以下决定默认打开的,如果此处把"test.php”添加进去,只要
输入localhost就相当于打开”localhost/test.php“
<IfModule dir_module>
    DirectoryIndex index.php index.php3 index.html index.htm
</IfModule>
三、多站点配置
1.在D:\Project\web\php_test 新建两个文件夹 test01 和 test02,.

2.在test01 创建 “index.php” 文件
<?php
    echo "hello world!test01!";
?>
3.在test02 创建 “index.php” 文件
<?php
    echo "hello world!test02!";
?>
4.打开“httpd-vhosts.conf” 文件,加入下列两行:
<VirtualHost *:80>
  ServerName test01.com
  DocumentRoot "D:/Project/web/php_test/test01"
</VirtualHost>
<VirtualHost *:80>
  ServerName test02.com
  DocumentRoot "D:/Project/web/php_test/test02"
</VirtualHost>

5.打开“httpd.conf” 文件,搜索 httpd-vhosts.conf,查看一下 httpd-vhosts.conf文件是否包含,一般来说如果你的WAMPServer是最新版,默认都是包含的。确保上图该行前没有“#”号。

6.在 “httpd.conf” 文件中搜索“DocumentRoot”往下找,把 “Require local” 注释掉,加上“ Require all granted”。

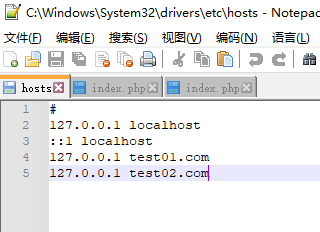
7.修改hosts文件内容,C:\Windows\System32\drivers\etc\hosts ,用notepad++ 修改。
8.重启服务
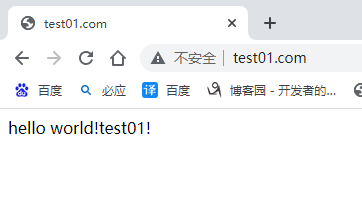
在浏览器输入 “test01.com” 和 “test02.com”,出现以下内容
四、修改端口号
1.打开"httpd.conf" 文件,搜索“Listen”,修改端口号"8080"

2.搜索ServerName,修改端口号"8080“

3.输入
http://localhost:8080/test.php

