用js(javascript)给网页加下雪特效(雪花特效)
今天给大家讲一个实现下雪特效的方法,(我是从别的博主那里借鉴过来的,由于时间久远,忘了原作者的名字,请见谅~),
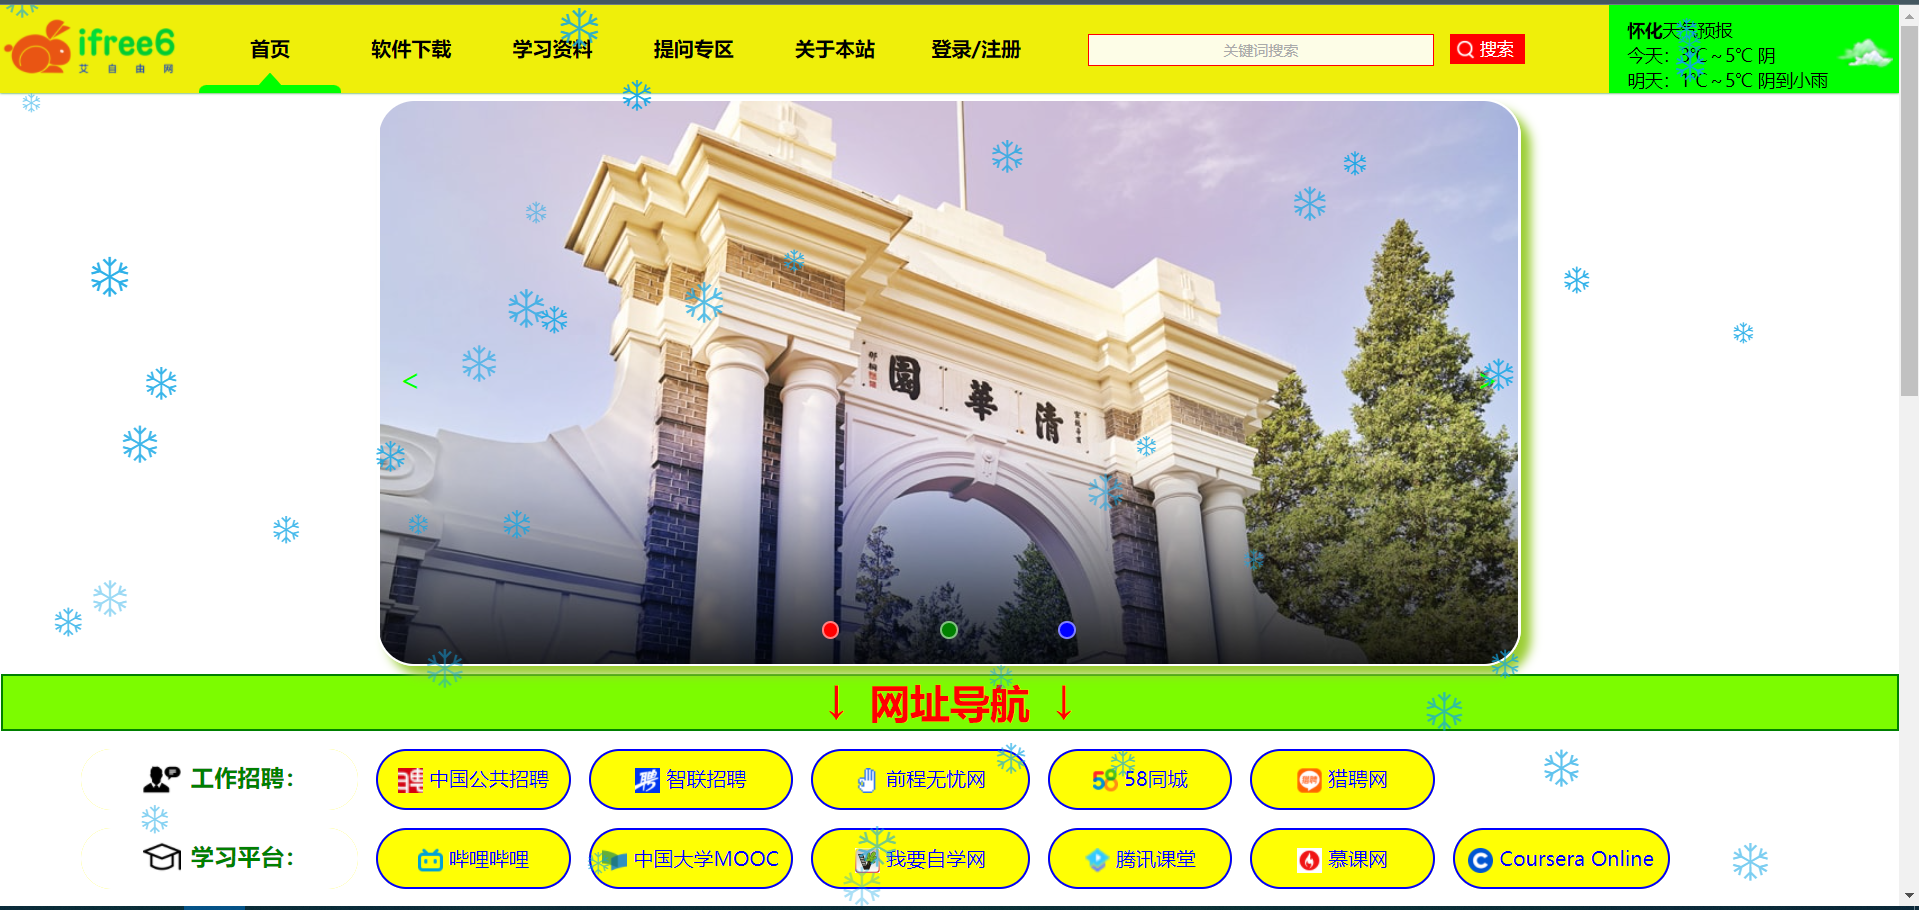
以下是在本人网站(www.ifree6.cn)上面的一个实例:
❤温馨提示:这篇文章需要你有少量的编程基础,否则你会看的很吃力哦~
一、效果图:先给大家过目一下效果
二、html代码:
你只需要在html中引入js脚本即可,不需要写多余的html代码。


<!DOCTYPE html> <html class="no-js" lang="en"> <head> <meta charset="utf-8"> <title>艾自由网 |免费提供优质资源</title> <meta http-equiv="x-ua-compatible" content="ie=edge"> <meta name="viewport" content="width=device-width,initial-scale=0.5,minimum-scale=0.1,maximum-scale=2.0,user-scalable=yes"/> <!-- Favicon(网站标签图标) --> <link rel="shortcut icon" type="image/x-icon" href="assets/imgs/theme/favicon.ico"> <!-- CSS --> <link rel="stylesheet" href="assets/css/main.css"> </head> <body> <header class="header-area"> <!-- 首页顶部导航栏: --> <div class="navbar"> <div class="nav"> <!-- 首页左上角logo: --> <div class="logo"><a href="index.html"><img src="assets/imgs/theme/logo.png" width="150" alt="艾自由网|免费提供优质资源"></a></div> <ul style="list-style:none"> <!-- 去掉 li标签 前面的点或序号(只能去掉第一层) --> <li><a href="index.html" >首页</a></li> <li> <a href="javascript:;">软件下载</a> <ol style="list-style:none "> <li><a href="page_soft/soft-win.html">电脑软件</a></li> <li><a href="page_soft/soft-mobile.html">手机软件</a></li> </ol> </li> <li> <a href="javascript:;">学习资料</a> <ol style="list-style:none"> <li><a href="">医学资料</a></li> <li><a href="">编程资料</a></li> <li><a href="">英语资料</a></li> </ol> </li> <li> <a href="javascript:;">提问专区</a> <ol style="list-style:none"> <li><a href="page_questions/page-question1.html">医学问题</a></li> <li><a href="page_questions/page-question2.html">编程问题</a></li> </ol> </li> <li> <a href="javascript:;">关于本站</a> <ol style="list-style:none"> <li><a href="page-about.html">网站简介</a></li> <li><a href="page-404.html">与我合作</a></li> </ol> </li> <li> <a href="login.html">登录/注册</a> </li> <!-- 这个元素来定义滑动的线条 --> <li class="underline" style="list-style: none"></li> <!-- 去掉 li标签 前面的点或序号 --> </ul> <!--这是顶部的搜索框--> <div class="toolbar_container"> <input id="search_input" type="text" placeholder="关键词搜索" > <button id="btn" type="button" onclick="quanwang_search()"> 搜索</button> <img src="assets/imgs/theme/icons/search1.png"> </div> <!--顶部天气预报 (若要更改城市,请修改下面代码中的“py=后面的城市” , 若要修改背景色,请修改代码bgc后面的“颜色英文”)--> <iframe class="weather-main" width="232" scrolling="no" height="70" frameborder="0" allowtransparency="true" src="https://i.tianqi.com?c=code&id=8&bgc=lime&icon=1&py= &site=14"></iframe> </div> </div> </header> <!--首页图片轮播--> <div class="container1"> <div class="shell"> <ui class="images"> <li class="img"></li> <li class="img"></li> <li class="img"></li> </ui> <ui class="min-images"> <li class="min"></li> <li class="min"></li> <li class="min"></li> </ui> <div class="button"> <div class="button-left"><</div> <div class="button-right">></div> </div> </div> </div> <!-- 中间 常用站点导航 --> <div class="website-dh" align="center"> <h1 style="color: #ff0000">↓ 网址导航 ↓</h1> </div> <div class="menu-dh"> <table> <tbody> <!-- 类别 --> <tr> <td style="background: white;color: green;border: none "><div class="dh-pic-cate"><img src="assets/imgs/theme/icons/duihua2.png" > <h3>工作招聘:</h3></div></td> <td><a href="http://job.mohrss.gov.cn/" target="_blank" title="事业单位招聘,全国公共就业,蓝领招聘,制造业招聘,餐饮业招聘"><img src="http://job.mohrss.gov.cn/r/cms/www/default/images/rone.ico" width="20" align="center"> 中国公共招聘</a></td> <td><a href="https://www.zhaopin.com/" target="_blank" title="智联招聘全国招聘网是全国权威的求职找工作平台,为您提供真实准确的全国求职招聘信息,每天几百万的高薪职位招聘信息供您选择,找工作上智联招聘"><img src="https://www.zhaopin.com/favicon.ico" width="20" align="center"> 智联招聘</a></td> <td><a href="https://www.51job.com/" target="_blank" title="前程无忧人才网面向全国,提供2022准确的招聘网站信息,为企业和求职者提供人才招聘、求职、找工作、培训等在内的全方位的人力资源服务,更多求职找工作信息尽在前程无忧!"><img src="https://www.51job.com/favicon.ico" width="20" align="center"> 前程无忧网</a></td> <td><a href="https://www.58.com/" target="_blank" title="58同城分类信息网,为你提供房产、招聘、黄页、团购、交友、二手、宠物、车辆、周边游等海量分类信息,充分满足您免费查看/发布信息的需求。"><img src="https://www.58.com/favicon.ico" width="20" align="center"> 58同城</a></td> <td><a href="https://www.liepin.com/" target="_blank" title="猎聘是专业高效的招聘求职平台,为求职者提供海量高薪职位,在线沟通,快速反馈!为企业招聘方提供免费招人服务,优质人才,精准推荐,招人找工作就用猎聘聊!"><img src="https://concat.lietou-static.com/fe-www-pc/v6/static/images/favicon.e6edbc00.ico" width="20" align="center"> 猎聘网</a></td> </tr> <!-- 类别 --> <tr class="tab1"> <!-- 网址类名的样式调整 --> <td style="background: white;color: green;border: none "><div class="dh-pic-cate"><img src="assets/imgs/theme/icons/xueshimao.png" > <h3>学习平台:</h3></div></td> <td><a href="https://www.bilibili.com/" target="_blank" title="中国最大的弹幕网站"><img src="https://www.bilibili.com/favicon.ico?v=1" width="20" align="center"> 哔哩哔哩</a></td> <td><a href="https://www.icourse163.org/" target="_blank" title="没有城墙的大学"><img src="https://edu-image.nosdn.127.net/32a8dd2a-b9aa-4ec9-abd5-66cd8751befb.png?imageView&quality=100" width="20" align="center"> 中国大学MOOC</a></td> <td><a href="https://ke.qq.com/" target="_blank" title="优质付费课程"><img src="https://9.idqqimg.com/edu/edu_modules/edu-ui/img/nohash/favicon.ico" width="20" align="center"> 腾讯课堂</a></td> <td><a href="https://www.imooc.com/" target="_blank" title="程序员的梦工厂"><img src="https://www.imooc.com/static/img/common/touch-icon-ipad.png" width="20" align="center"> 慕课网</a></td> <td><a href="https://www.coursera.org/" target="_blank" title="国外版的“中国大学mooc”"><img src="https://www.coursera.org/favicon.ico" width="20" align="center"> Coursera Online</a></td> </tr> </tbody> </table> </div> <!--回到顶部按钮--> <button type="button" id="BackTop" class="toTop-arrow" style="z-index:1;"></button> <!-- 相关 JS --> <script src="assets/js/jquery-3.6.0.min.js"></script> <script src="assets/js/main.js"></script> <!-- 因为调用了jquery,故该js必须放在jQuery后面,否则“回到顶部”按钮不生效(提示:顺序也很重要!) --> <!--下雪特效--> <script src="assets/js/snow-1.js"></script> </body> </html>
三、css代码:(非必需,仅作装饰)
/*****************头部容器******************/
.header-area{
    border: 0 solid #0eea2b;      /*加边框*/
    /*父容器的相对位置*/
    height: 75px;
    position: relative;
    width: 100%;
}

/**顶部logo**/
.logo{
    position: absolute;
    left: 0;
    top: 10px;
    height: 70px;
}

/** 顶部搜索框 **/
.toolbar_container {
    position: absolute;
    width: 300px;
    height: 24px;
    top: 50%;
    transform: translate(0,-50%);
    left: 870px;
}

#search_input{
    width: 275px;
    height:100%;
    background: rgba(255, 255, 255, 0.9);
    font-size:12px;
    position: inherit;
    text-align: center;
    border: 1px solid red;
    margin: 0;
}

/*placeholder字体颜色*/
input::-webkit-input-placeholder {  /*谷歌浏览器*/
    color: #aaa;
    font-size: 12px;
}
input::-webkit-input-placeholder { /* WebKit, Blink, Edge */
    color: #aaa;
}
:-moz-placeholder { /* Mozilla Firefox 4 to 18 */
    color: #aaa;
}
::-moz-placeholder { /* Mozilla Firefox 19+ */
    color: #aaa;
}
input:-ms-input-placeholder { /* Internet Explorer 10-11 */
    color: #aaa;
}

input::-ms-input-placeholder { /* Microsoft Edge */
    color: #aaa;
}

#btn{
    position: inherit;
    display: inline-block;
    left: 290px;
    width:60px ;
    height:24px;
    background: rgb(255, 0, 0);
    border: 1px solid red;
    margin: 0;
    color: white;
}
.toolbar_container img{
    width: 25px;
    position: absolute;
    display: inline-block;
    left: 290px;
    top: 0;
}

/* 关于边框的四个圆角 */
/*border-top-left-radius: 33px;*/
/*border-bottom-left-radius: 33px;*/
/*border-top-right-radius: 16px;*/
/*border-bottom-right-radius: 15px;*/

/** 顶部天气 **/
.weather-main{
    position: absolute;
    right: 0;
    top: 0;
}


/********顶部导航栏(开始)********/
.navbar {
    position:absolute;
    z-index:2000;
    width: 1519px;  /*导航栏的宽度,导航栏宽度*/
    height: 70px;
    background-color: #efef0a;
    /* 盒子阴影 */
    box-shadow: 0 0 2px green;
}
.navbar .nav {
    width: 1200px;
    height: 100%;
    /* 让元素自动水平居中 */
    margin: 0 auto;
}
.navbar .nav ul {
    /* 相对定位 */
    position: relative;
    /* 弹性布局 */
    display: flex;
    /* 让子元素平均分配宽度 */
    justify-content: space-around;
    width: 678px;   /** 调整导航栏文字的间距(不同分区的间距)**/
    height: 70px;
}
.navbar .nav ul > li {
    width: 100%;
    height: 100%;
}
.navbar .nav ul > li > a {
    /* 因为a元素是行内元素 必须将其转为行内块或者块级才能设置宽度和高度 */
    display: block;
    width: 100%;
    height: 100%;
    line-height: 70px;
    font-weight: bold; /*导航栏文字加粗*/
    color: black;
    text-align: center;
    text-decoration: none;  /*去掉导航栏文字的下划线*/

}

/** 导航栏: 鼠标下的文字变色 **/
.navbar .nav ul > li > a:hover{
    color: blue;
}

.navbar .nav ul > li ol {
    width: 100%;
    background-color: white;  /*下拉导航栏 的背景颜色*/
    box-shadow: 1px 1px 3px rgba(0, 0, 0, 0.39);
    /* 让盒子先沿着y轴缩放到0 也就是隐藏了 */
    transform: scaleY(0);
    /* 我们需要将盒子从上面滑动下来 设置一下缩放的中心点即可 设置到最上面的中间位置 */
    transform-origin: 50% 0;
    /* 设置过渡 */
    transition: all 0.5s;
}
.navbar .nav ul > li ol li {
    height: 45px;   /*下拉导航栏的高度*/
    border-bottom: 2px solid gray;    /*下拉导航栏的分隔线颜色*/
}
.navbar .nav ul > li ol li a {
    display: block;
    width: 100%;
    height: 100%;
    line-height: 40px;
    text-align: center;
    text-decoration: none;  /*去掉导航栏文字的下划线*/
    font-weight: bold;
    color: black;
}
.navbar .nav ul > li ol li a:hover{
    color: blue;
}
.navbar .nav ul > li ol li:hover {
    background-color: rgb(239, 239, 10);    /*导航栏-下拉文字的背景色*/
}
.navbar .nav ul > li:hover ol {
    transform: scaleY(1);
}
/* 现在可以设置线条了 */
.navbar .nav ul .underline {
    /* 绝对定位 */
    position: absolute;
    bottom: 0;
    left: 0;
    width: 113px;   /* 动态线条的宽度 */
    height: 6px;
    /* 设置一下盒子的左上角和右上角的圆角 */
    border-top-left-radius: 16px;
    border-top-right-radius: 16px;
    background-color: lime;      /* “首页” 的颜色 */
    /* 加过渡时间-速度 */
    transition: all 0.5s;
    /* 现在有个小问题 我们一起看看 ne
  /* 就是这个问题 这个线条有点影响鼠标移入li这个效果 */
    /* 这个属性就可以解决这个问题 就貌似这个元素你能看见 但是鼠标是点击不到了 现在鼠标放到线条也没事了 */
    pointer-events: none;
}
.navbar .nav ul .underline::before {
    content: "";
    /* 利用::before伪元素设置三角 */
    position: absolute;
    top: -10px;
    /* calc方法自动计算数值 让盒子居中 */
    left: calc(50% - 9px);
    width: 18px;
    height: 10px;
    /* inherit可以继承父元素的属性值 */
    background-color: inherit;
    /* 各位小伙伴可能对着属性比较陌生 我简单说一下这句话如何生成了三角形 这个属性可以绘制图案 polygon这个属性只需要提供最少三个点 就可以将三个点连接到一起
     然后绘制一个图案  两个点的坐标位置(x,y) 0 100% 这个点就是说在x轴上为0px 在y轴是100% 就是盒子的高度 x轴的方向是向右 y轴的方向是向下
     那么我们设置了三个点 然后将三个点连起来刚好绘制出一个三角形 不明白的小伙伴可以在纸上画一下 画出来就理解了 */
    clip-path: polygon(0 100%, 50% 0, 100% 100%);
}
.navbar .nav ul > li:nth-child(2):hover ~ .underline {
    left: 113px;    /*该宽度即 “首页”的宽度(可通过浏览器的F12查看)*/
    background-color: #10a5e5;  /*软件下载-颜色*/
}
/* 重复以上操作 */
.navbar .nav ul > li:nth-child(3):hover ~ .underline {
    left: 226px;    /*该宽度即 上一个条子的宽度 加上“首页”的宽度(可通过浏览器的F12查看)*/
    background-color: orangered;
}
.navbar .nav ul > li:nth-child(4):hover ~ .underline {
    left: 339px;   /*该宽度即 上一个条子的宽度 加上“首页”的宽度(可通过浏览器的F12查看)*/
    background-color: blue;
}
.navbar .nav ul > li:nth-child(5):hover ~ .underline {
    left: 452px;   /*该宽度即 上一个条子的宽度 加上“首页”的宽度(可通过浏览器的F12查看)*/
    background-color: #ff00ea;
}
.navbar .nav ul > li:nth-child(6):hover ~ .underline {
    left: 565px;   /*该宽度即 上一个条子的宽度 加上“首页”的宽度(可通过浏览器的F12查看)*/
    background-color: red;
}

/*********顶部导航栏(结束)*********/


/*****************中间容器******************/


/***首页图片轮播-开始***/
html,body{
    padding: 0;
    margin: 0;
    bottom: 0;
    width: 1518px;
    height: 100%;
    scroll-behavior: smooth;    /*网页平滑滚动*/
    text-decoration: none;
}

.container1{
    display: flex;
    justify-content: center;
    width: 1518px;
    height:450px;
    /*height: 50vh;  !*vh表示 当前屏幕 可见高度的百分之几*!*/
    background-color: rgba(255, 255, 255, 0.8); /*容器1背景*/
}

/*图片轮播相框*/
.shell {
    list-style:none;    /*消除轮换小圆点的黑点*/
    width:60%;
    height:100%;
    position: relative;
    overflow: hidden;
    border-radius: 30px;    /*相框圆角*/
    border: 2px #fff solid;
    box-shadow: 8px 8px 8px yellowgreen;    /* 图片轮播框的阴影 */
}

.images {
    width: 300%;
    height:100%;
    display: flex;
    position: absolute;
    left: 0;
    transition: 0.5s; /*图片切换的过渡时间*/
}
/*图片轮播的图片*/
.shell .images .img{
    width: 90%;
    background-size: cover;
}
.img:nth-child(1){
    background-image: url("../../assets/imgs/sliders/清华研究生录取通知书2.jpg");
}
.img:nth-child(2){
    background-image: url("../../assets/imgs/sliders/清华园2.jpg");
}
.img:nth-child(3){
    background-image: url("../../assets/imgs/sliders/清华教学楼2.jpg");
}

.min-images {
    display: flex;
    justify-content: space-evenly;
    position: absolute;
    bottom: 20px;
    width: 40%;
    z-index: 999;
    right:30%;
}

.min{
    width: 10px;
    height: 10px;
    cursor: pointer;
    border-radius:50%;
    background-size: cover;
    border: solid rgba(255, 255, 255, 0.5) 2px;
    position: center;
    background-position: -20px 0;
}

.min:nth-child(1){
    background-color: red;
}
.min:nth-child(2){
    background-color: green;
}
.min:nth-child(3){
    background-color: blue ;
}

/*图片切换按钮*/
.button {
    color: lime; /*轮播按钮颜色*/
    width: 100%;
    height: 10%;
    top: 200px;
    position:absolute;
    display: flex;
    justify-content: space-between;
    user-select: none;
}

.button-left,
.button-right {
    font-size: 25px;
    padding: 0 15px;
    cursor: pointer;
    line-height: 45px  /*设置成px后,可防止按钮随窗口的大小缩放而改变上下位置*/

}

/***首页图片轮播-结束***/
四、javascript代码如下:(重点来了)
 1 //下雪特效一
 2     (function($){
 3     $.fn.snow = function(options){
 4         var $flake = $('<div id="snowbox" />').css({'position': 'absolute','z-index':'9999', 'top': '-50px', 'cursor': 'pointer'}).html('❄'),
 5             documentHeight  = $(document).height(),
 6             documentWidth   = $(document).width(),
 7             defaults = {
 8                 minSize     : 10,
 9                 maxSize     : 20,
10                 newOn       : 1000,
11                 flakeColor  : "#10a5e5" /* 此处可以定义雪花颜色,若要白色可以改为#FFFFFF */
12             },
13             options = $.extend({}, defaults, options);
14         var interval= setInterval( function(){
15             var startPositionLeft = Math.random() * documentWidth - 100,
16                 startOpacity = 0.5 + Math.random(),
17                 sizeFlake = options.minSize + Math.random() * options.maxSize,
18                 endPositionTop = documentHeight - 200,
19                 endPositionLeft = startPositionLeft - 500 + Math.random() * 500,
20                 durationFall = documentHeight * 10 + Math.random() * 5000;
21             $flake.clone().appendTo('body').css({
22                 left: startPositionLeft,
23                 opacity: startOpacity,
24                 'font-size': sizeFlake,
25                 color: options.flakeColor
26             }).animate({
27                 top: endPositionTop,
28                 left: endPositionLeft,
29                 opacity: 0.2
30             },durationFall,'linear',function(){
31                 $(this).remove()
32             });
33         }, options.newOn);
34     };
35 })(jQuery);
36     $(function(){
37     $.fn.snow({
38         minSize: 20, /* 定义雪花最小尺寸 */
39         maxSize: 25,/* 定义雪花最大尺寸 */
40         newOn: 200  /* 定义密集程度,数字越小越密集 */
41     });
42 });
1. 自己新建一个js,将上面的代码完整复制粘贴,并下载jquery文件(下载地址:www.jb51.net/zt/jquerydown.htm)同时引入,然后在想实现下雪特效的页面中引入下面两行代码即可。
2. 引入方式:在</body>标签内写入以下两行代码(src后面的地址:以你自己文件的位置为准)
<script src="assets/js/jquery-3.6.0.min.js"></script> <!-- 因调用了jquery,故js必须放在jQuery后面,否则不生效! -->
<script src="assets/js/snow-1.js"></script>
文章至此就结束啦,可以点个关注,交个朋友吗~
活鱼会逆流而上,死鱼则会随波逐流。

 浙公网安备 33010602011771号