Jenkins构建、推送、拉取镜像和发布应用
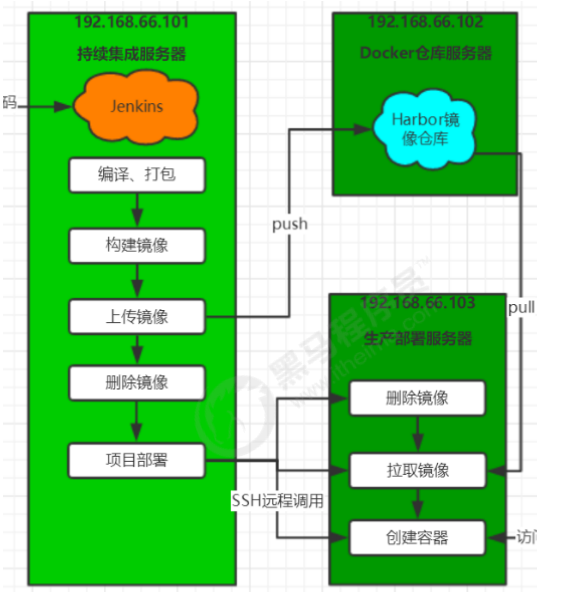
这里本地的环境是
jenkins192.168.2.3
harbor192.168.2.6生产部署服务器 192.168.2.5
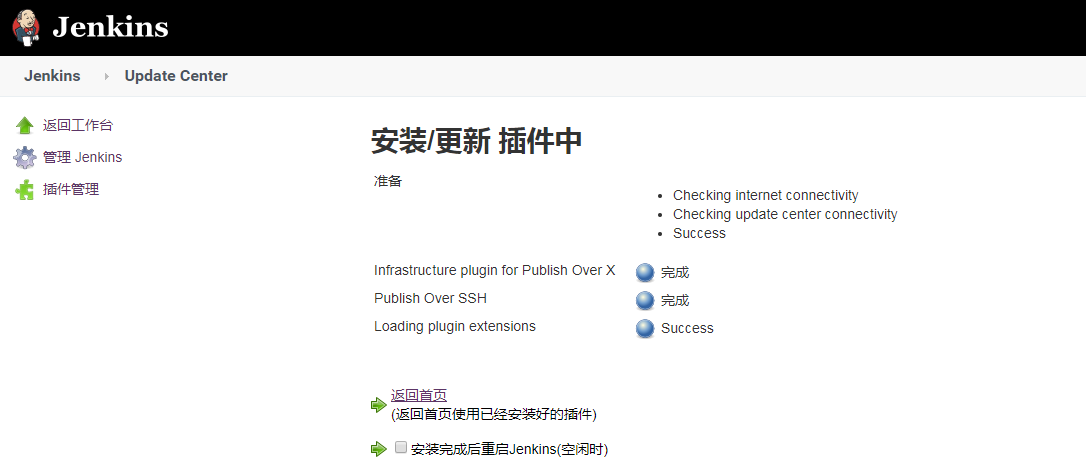
1. 安装 Publish Over SSH 插件
安装以下插件,可以实现远程发送Shell命令
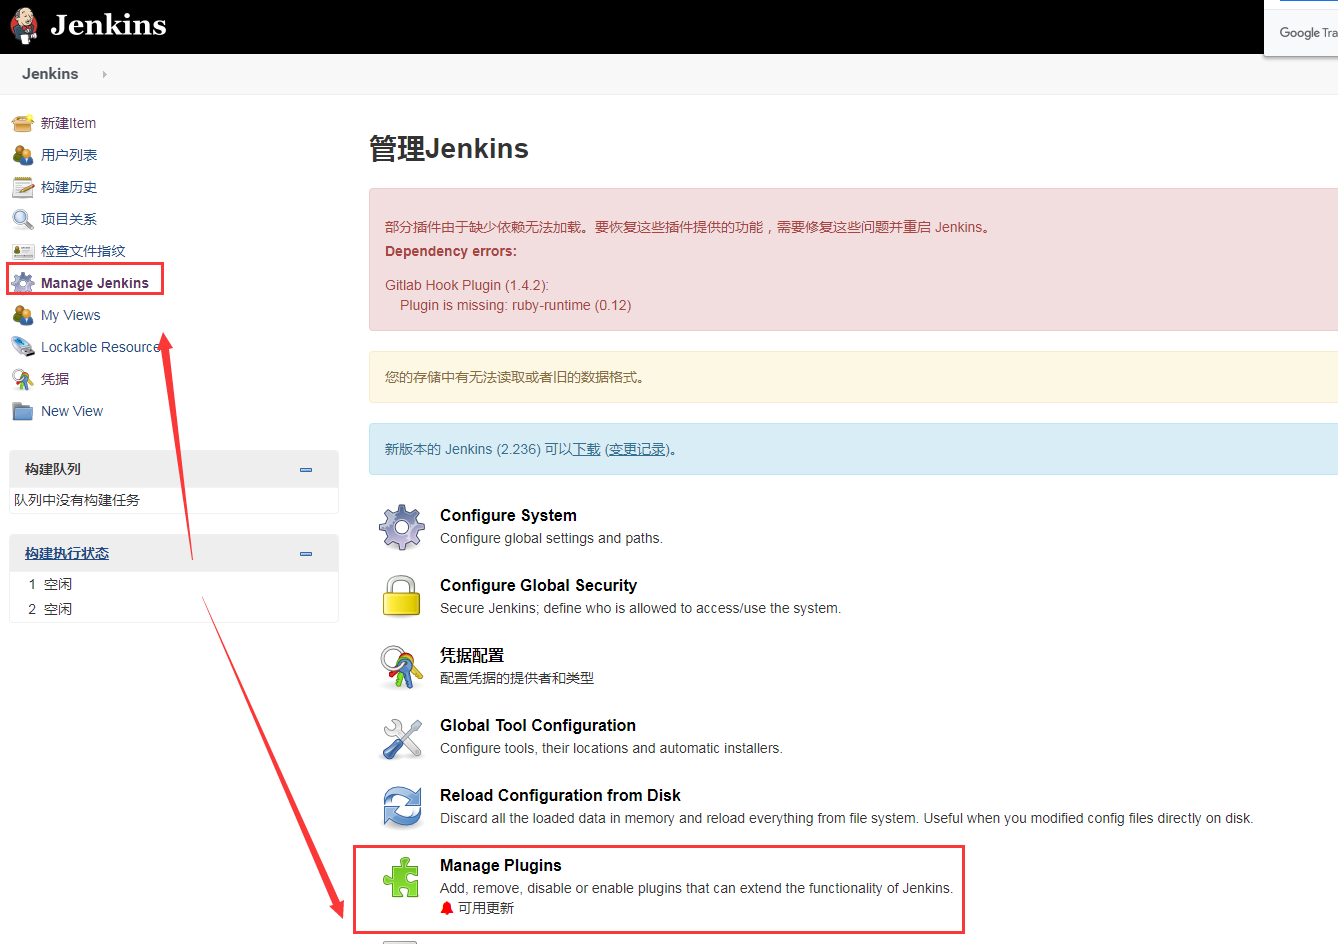
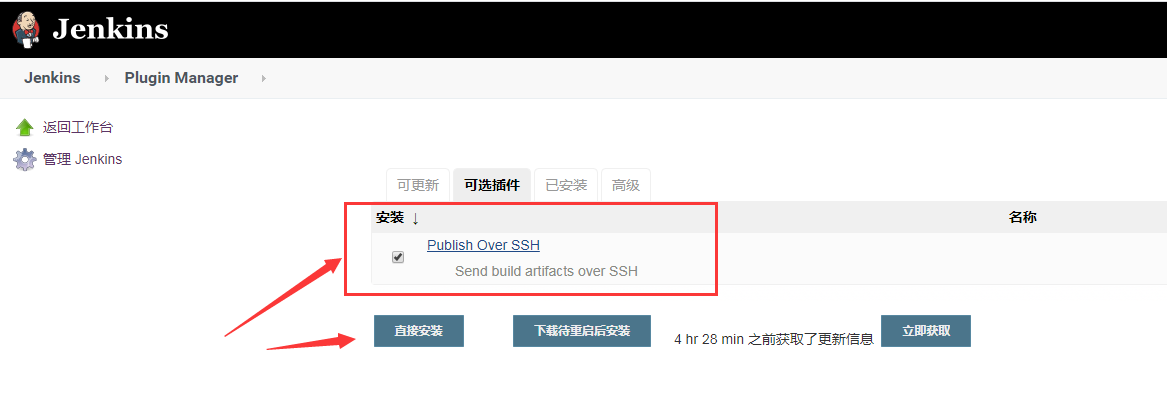
2. 配置远程部署服务器
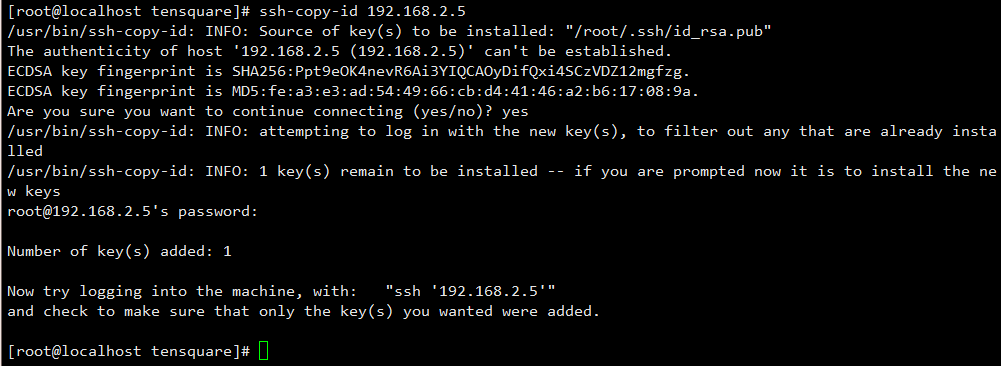
1. 从Jenkins拷贝公钥到发布服务器
ssh-copy-id 192.168.2.5
2. 系统配置->添加远程服务器
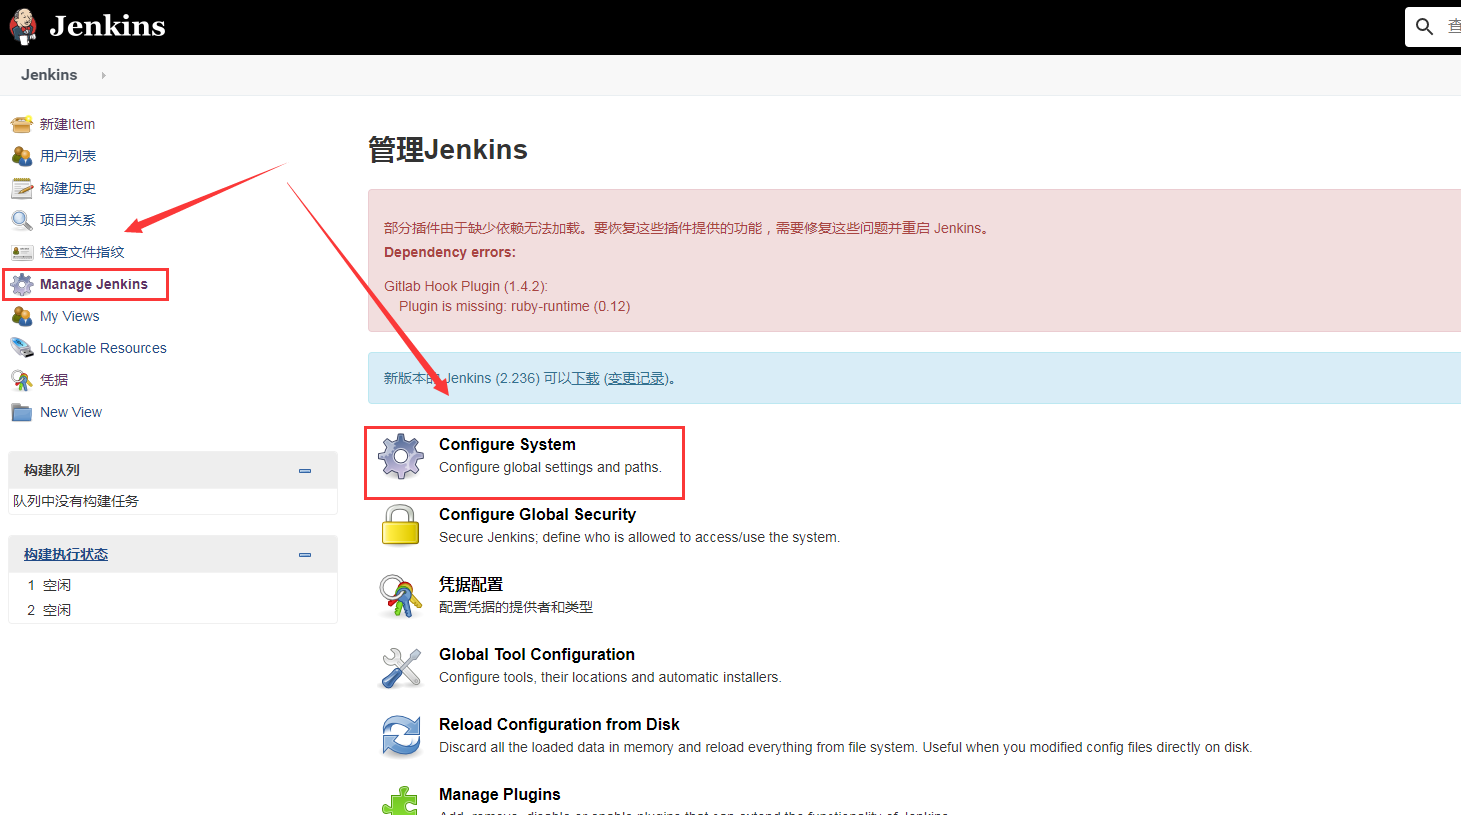
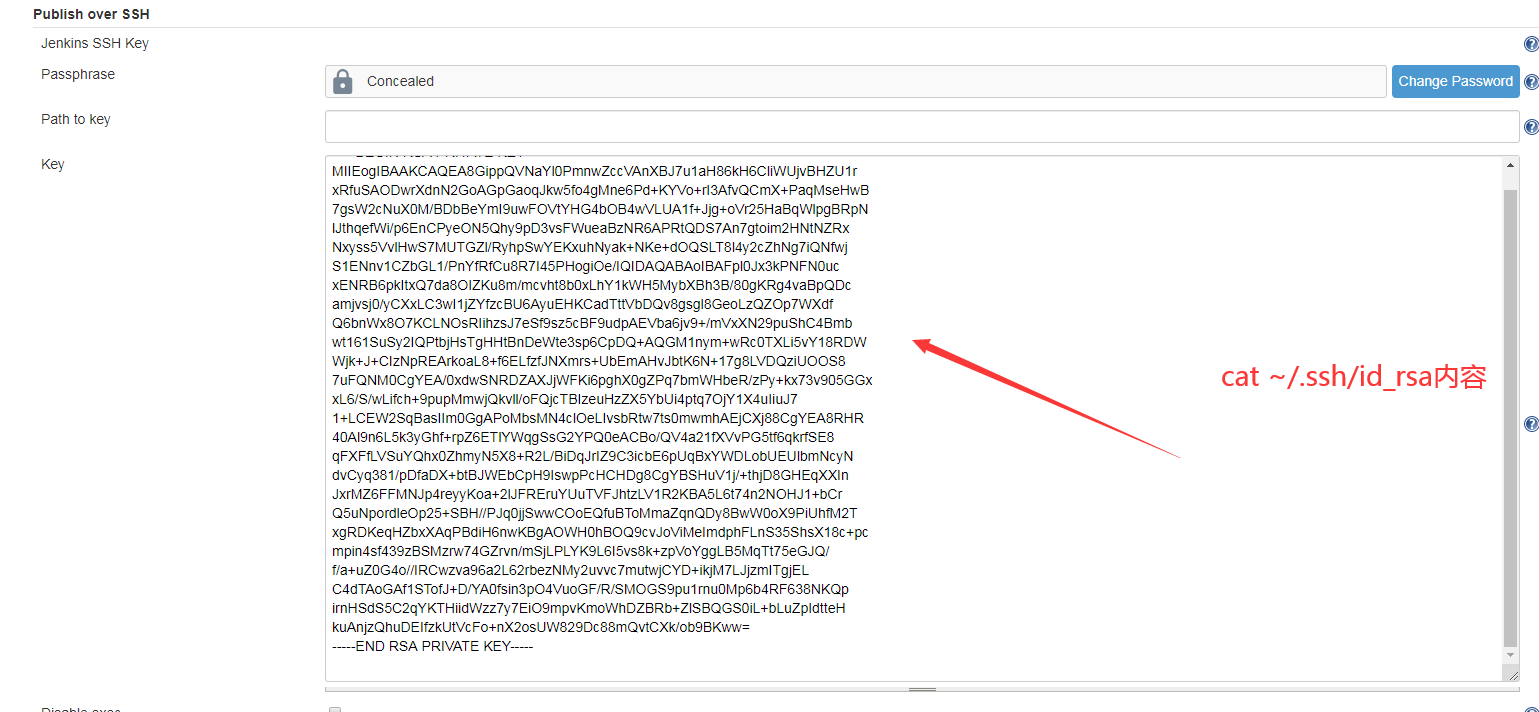

应用,保存
Passphrase:如果自己在本地生成的ssh key没密码的话,这里不需要填写
Path to key:这里填写私钥的地址
key:这里填写私钥的内容(cat ~/.ssh/id_rsa查看)
Name:这里自己填写一个好记的名字
Hostname:部署服务器主机ip或者域名
Username:部署服务器的用户名
Remote Directory:远程的操作目录
3. 修改Jenkinsfile构建脚本
生成远程调用模板代码
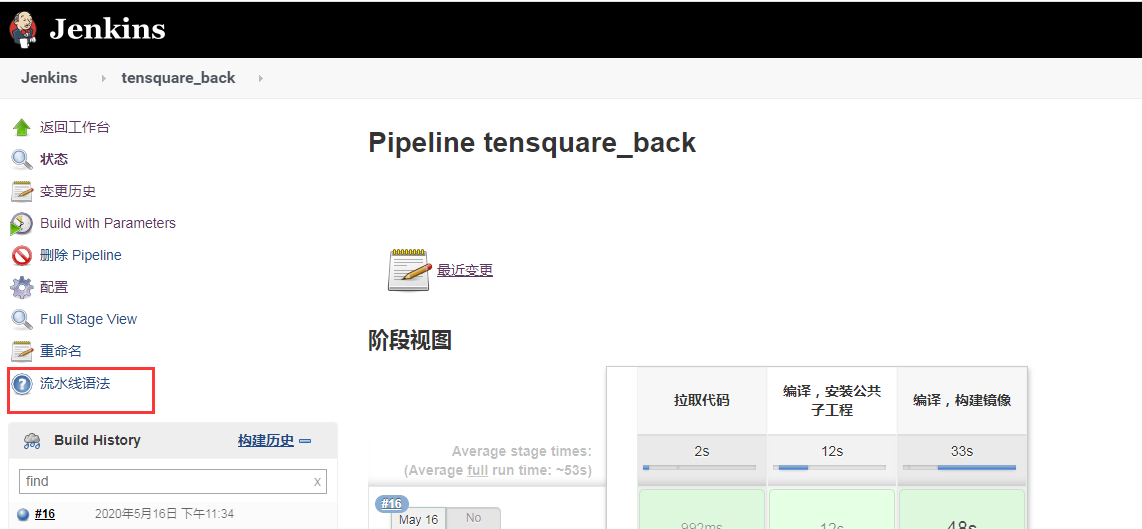
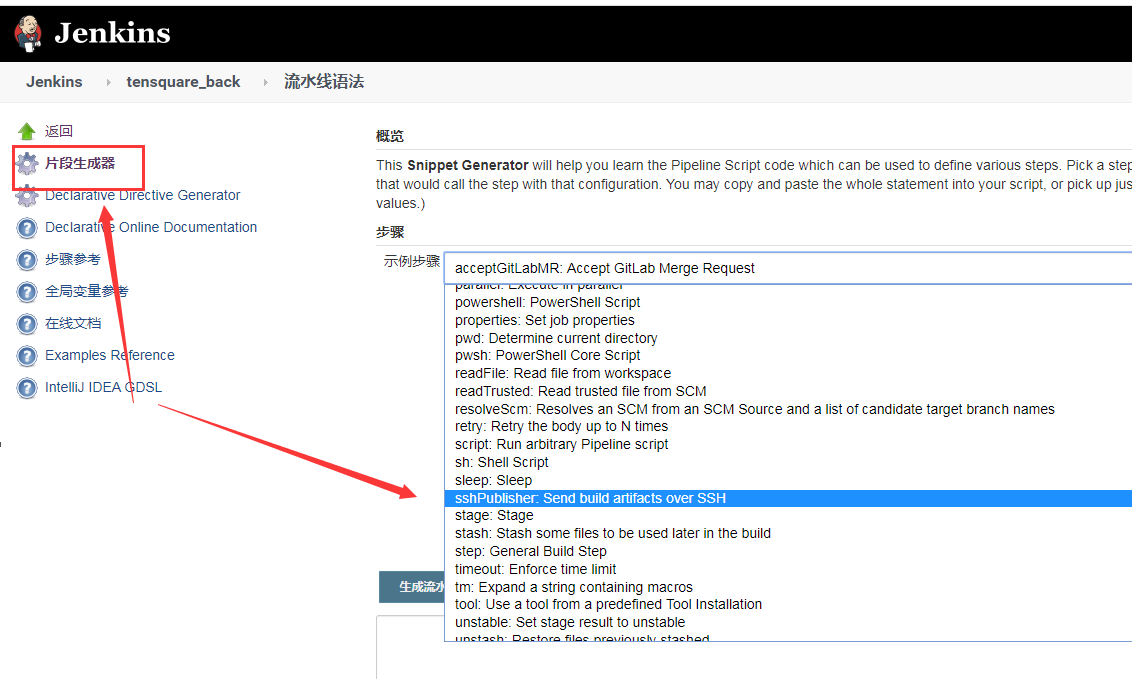

点击生成脚本
sshPublisher(publishers: [sshPublisherDesc(configName: 'deploy_server', transfers: [sshTransfer(cleanRemote: false, excludes: '', execCommand: '', execTimeout: 120000, flatten: false, makeEmptyDirs: false, noDefaultExcludes: false, patternSeparator: '[, ]+', remoteDirectory: '', remoteDirectorySDF: false, removePrefix: '', sourceFiles: '')], usePromotionTimestamp: false, useWorkspaceInPromotion: false, verbose: false)])
完整的Jenkinsfile如下
//git凭证ID
def git_auth = "cce455e2-ba69-459e-93bc-c58ce1e6278f"
//git的url地址
def git_url = "ssh://git@192.168.2.4:23456/itheima_group/tensquare_back.git"
//镜像的版本号
def tag = "latest"
//Harbor的url地址
def harbor_url = "192.168.2.6:85"
//镜像库项目名称
def harbor_project = "tensquare"
//Harbor的登录凭证ID
def harbor_auth = "	d6d9dbe8-f3c2-4cb0-bd79-770ea0b7d751"

node {
    // 从gitlab拉取代码
   stage('拉取代码') {
      checkout([$class: 'GitSCM', branches: [[name: "*/${branch}"]], doGenerateSubmoduleConfigurations: false, extensions: [], submoduleCfg: [], userRemoteConfigs: [[credentialsId: "${git_auth}", url: "${git_url}"]]])
   }
   stage('编译,安装公共子工程') {
      sh "mvn -f tensquare_common clean install"
   }
   stage('编译,构建镜像') {
       sh "mvn -f ${project_name} clean package dockerfile:build"

       //定义镜像名称
       def imageName = "${project_name}:${tag}"

       //对镜像打上标签
       sh "docker tag ${imageName} ${harbor_url}/${harbor_project}/${imageName}"

       //把镜像推送到Harbor
       withCredentials([usernamePassword(credentialsId: "${harbor_auth}", passwordVariable: 'password', usernameVariable: 'username')]) {

           //登录到Harbor
           sh "docker login -u ${username} -p ${password} ${harbor_url}"

           //镜像上传
           sh "docker push ${harbor_url}/${harbor_project}/${imageName}"

           sh "echo 镜像上传成功"
       }

       //部署应用
       sshPublisher(publishers: [sshPublisherDesc(configName: "deploy_server", transfers: [sshTransfer(cleanRemote: false, excludes: '', execCommand: "/opt/jenkins_shell/deploy.sh $harbor_url $harbor_project $project_name $tag $port ", execTimeout: 120000, flatten: false, makeEmptyDirs: false, noDefaultExcludes: false, patternSeparator: '[, ]+', remoteDirectory: '', remoteDirectorySDF: false, removePrefix: '', sourceFiles: '')], usePromotionTimestamp: false, useWorkspaceInPromotion: false, verbose: false)])
   }
}
上面的部署服务器的的deploy.sh如下
#! /bin/sh
#接收外部参数
harbor_url=$1
harbor_project_name=$2
project_name=$3
tag=$4
port=$5

imageName=$harbor_url/$harbor_project_name/$project_name:$tag

echo "$imageName"

#查询容器是否存在,存在则删除
containerId=`docker ps -a | grep -w ${project_name}:${tag}  | awk '{print $1}'`
if [ "$containerId" !=  "" ] ; then
    #停掉容器
    docker stop $containerId

    #删除容器
    docker rm $containerId

	echo "成功删除容器"
fi

#查询镜像是否存在,存在则删除
imageId=`docker images | grep -w $project_name  | awk '{print $3}'`

if [ "$imageId" !=  "" ] ; then

    #删除镜像
    docker rmi -f $imageId

	echo "成功删除镜像"
fi

# 登录Harbor
docker login -u john -p John12345 $harbor_url

# 下载镜像
docker pull $imageName

# 启动容器
docker run -di -p $port:$port $imageName

echo "容器启动成功"
将deploy.sh脚本部署到部署服务器指定位置,并给与执行权限

3. 测试
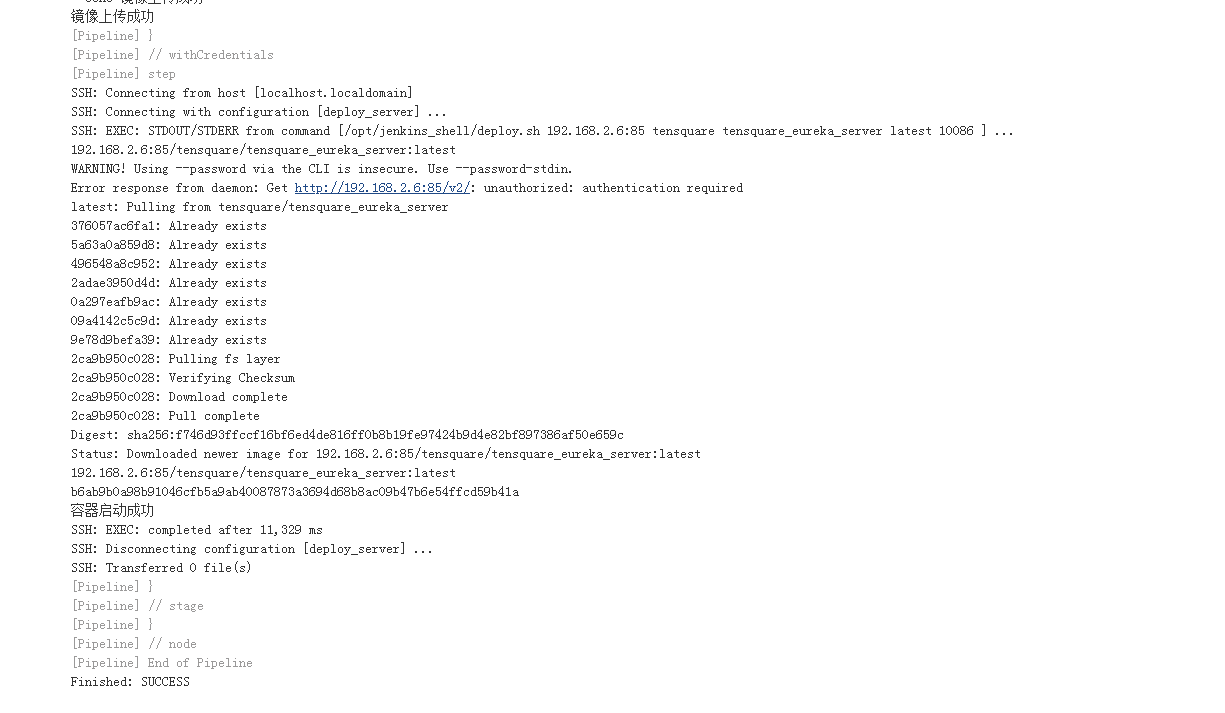
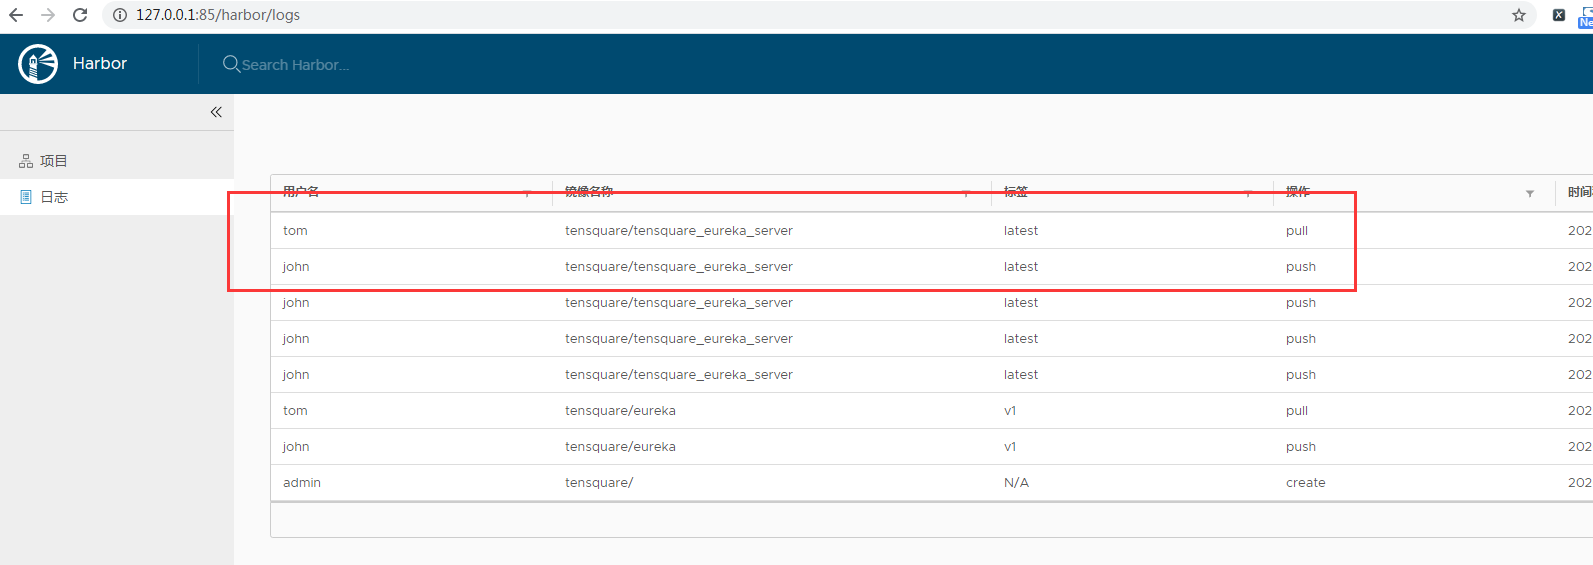

这里做了
nat端口转换,将虚拟机中的192.168.2.5:10086转换到本地的10086端口


 浙公网安备 33010602011771号