封装WebAPI客户端,附赠Nuget打包上传VS拓展工具
一、前言
上篇《 WebAPI使用多个xml文件生成帮助文档 》有提到为什么会出现基于多个xml文件生成帮助文档的解决方案,因为定义的模型可能的用处有:
1:单元测试
2:其他项目引用(可能以Nuget包的形式)
3:WebAPI客户端(封装的HttpClient及WebAPI接口调用,其实包含在第2点内..)
要源码的可以直接拉到最下面,源码一如既往的还在那。
二、为什么要封装WebAPI客户端
1:让WebAPI对于调用者来说“透明”,直接以引用程序集的方式。
2:统一项目内调用入口(当然了,非要绕过直接去请求接口肯定也是可以得,但是这是团队管理的问题)。
3:组合接口调用
4:版本化(通过Nuget,不论是自建还是Nuget.org)
三、封装的WebAPI客户端都包含些什么
这里继续使用 WebAPI2PostMan 项目来演示。
首先,因为将WebAPI的接口以HttpClient来进行封装,那至少需要定义出接口的请求路由,此处仅定义出了两处。
我们在解决方案新建一个类库项目,并将其命名为 WebAPI2PostMan.Client ,接着添加一个名为 WebApi2PostManStatic 的类
using System.Configuration;

namespace WebAPI2PostMan.Client
{
    /// <summary>
    ///     WebApi2PostMan静态资源类
    /// </summary>
    public class WebApi2PostManStatic
    {
        /// <summary>
        ///     服务地址
        /// </summary>
        public static string ServiceUrl = ConfigurationManager.AppSettings["WebAPI2PostManServiceUrl"];
        /// <summary>
        ///     获取所有产品
        /// </summary>
        public static string RouteProductGetAll = "api/Product/All";
        /// <summary>
        ///     添加产品
        /// </summary>
        public static string RouteProductAdd = "api/Product/Add";
    }
}
接口请求无非就是Http的那几个方法,但此处仅认为我们的接口只包含Get和Post两种Http请求方法。
基于此,我们定义出一个WebApiHelper类。
/// <summary>
///     WebAPI帮助类
/// </summary>
public class WebApiHelper
{
    public static T1 CallPostWebApi<T1, T2>(string url, T2 request, string serviceUrl, int? timeOut = 10)


    public static T1 CallGetWebApi<T1>(string url, string serviceUrl, int? timeOut = 10)


    public static List<TResponse> CallWebApiBatch<TRequest, TResponse>(HttpMethod method, string endpoint, List<TRequest> batchRequestModels, string url, string serviceUrl, int? timeOut = 10)


    public static async Task<T1> CallPostWebApiAsync<T1, T2>(string url, T2 request, string serviceUrl, int? timeOut = 10)


    public static async Task<T1> CallGetWebApiAsync<T1>(string url, string serviceUrl, int? timeOut = 10)


    public static async Task<List<TResponse>> CallWebApiBatchAsync<TRequest, TResponse>(HttpMethod method,string endpoint,List<TRequest> batchRequestModels,string url,string serviceUrl,int? timeOut=10)
}
为了节省篇幅和便于观看,将实现都删去了,可以看到定义了6个方法,分为同步和异步一共三类,Get , Post ,Batch(批量接口,有感兴趣的就下篇讲讲)。
然后,再添加一个用于封装的类 WebApi2PostManClient。
using System.Collections.Generic;
using WebAPI2PostMan.WebModel;

namespace WebAPI2PostMan.Client
{
    /// <summary>
    ///     WebApi2PostMan 客户端
    /// </summary>
    public class WebApi2PostManClient
    {
        /// <summary>
        ///     获取所有产品
        /// </summary>
        /// <param name="timeout">超时时间</param>
        /// <returns>产品列表</returns>
        public static IEnumerable<Product> GetAllProduct(int? timeout = 10)
        {
            return WebApiHelper.CallGetWebApi<IEnumerable<Product>>(WebApi2PostManStatic.RouteProductGetAll,WebApi2PostManStatic.ServiceUrl,timeout);
        }
        /// <summary>
        ///     添加产品
        /// </summary>
        /// <param name="request">添加的产品</param>
        /// <param name="timeout">超时时间</param>
        /// <returns>添加结果</returns>
        public static string AddProduct(Product request,int? timeout = 10)
        {
            return WebApiHelper.CallPostWebApi<string, Product>(WebApi2PostManStatic.RouteProductAdd, request,WebApi2PostManStatic.ServiceUrl, timeout);
        }
    }
}
四、使用Nuget包管理器来发布WebAPI2PostMan.Client
怎么搭建NugetServer就不赘述了,新建一个空的web项目接着程序包控制台输入
PM> Install-Package NuGet.Server然后该有的都会有了,直接发布到IIS即可。
此时,本地已经有一个NugetServer了,浏览如下。
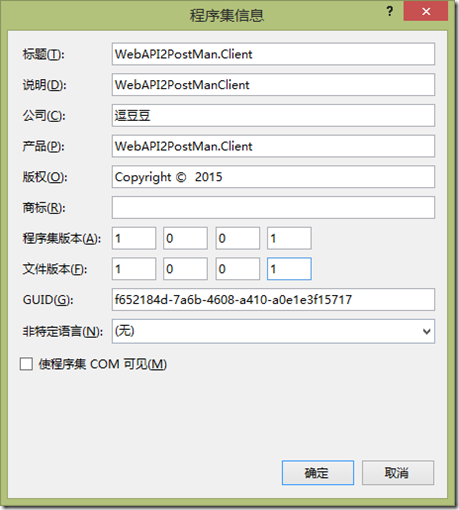
右键项目 WebAPI2PostMan.Client => 属性 => 应用程序 => 程序集信息,补全一些信息。
运行命令行并定位到当前项目目录,执行
nuget pack WebAPI2PostMan.Client.csproj -s http://localhost:88 123此处的nuget是配的环境变量,也可以替换成( 路径/NuGet.exe ),若启用了 NuGet 程序包还原的话,解决方案目录下的文件夹.nuget内会有NuGet.exe及其配置。
http://localhost:88 即为server地址,此处切不可加/nuget,否则会报403. 后面是密码,默认没设置的话会有警告并提示使用nuget setApiKey 设置。
那么其实一直以来都是做一个批处理脚本来打包并上传我们的包。
或者是dudu很久以前发的《用Nuget管理好自家的包包i》以及 http://www.cnblogs.com/lzrabbit/tag/NuGet/ 讲的都很详细。
还有《将nuget与VS直接集成,实现一键上传等功能》,只不过是需要手动设置的。
为了不想这么麻烦,顺手写了一个VS的拓展工具 Push2NuGet 来简化这些操作。
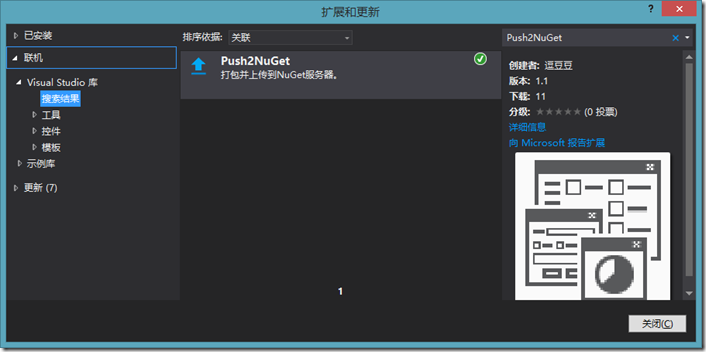
首先在 工具=》拓展和更新=》联机=》Visual Studio库 =》输入 Push2NuGet 安装,重启解决方案。
因为是一口气写出来的,没想好 一些服务参数放哪,就暂时扔到.nuget文件夹下,因此,需要在.nuget文件夹下 新建一个NuGet.xml的文件并完善信息。
<?xml version="1.0" encoding="utf-8"?>
<SelfServer>
  <Url>http://localhost:88</Url>
  <ApiKey>123</ApiKey>
</SelfServer>
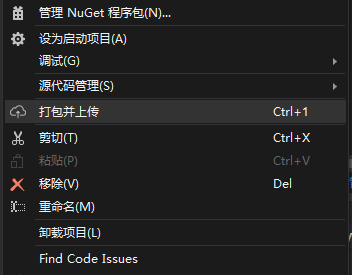
然后右键项目点击【打包并上传】即可。
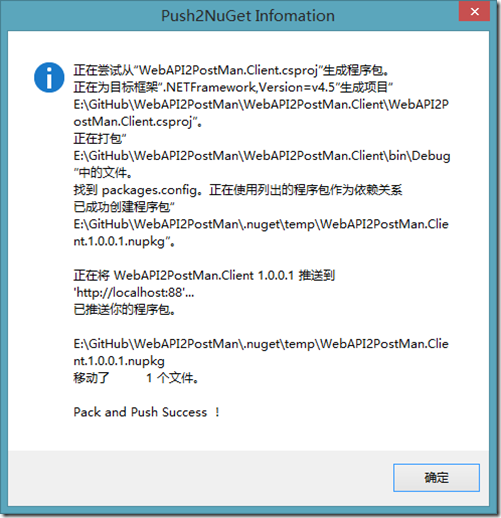
成功后显示。
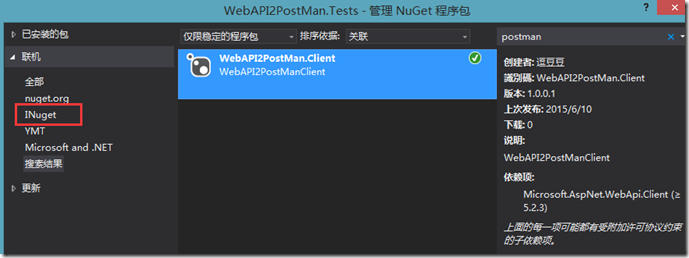
新建一个 单元测试项目 WebAPI2PostMan.Tests 并在Nuget里设置Nuget源。
安装刚才上传的 WebAPI2PostMan.Client
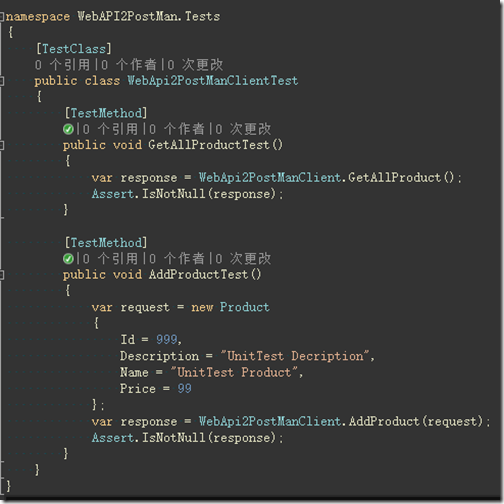
添加两个单元测试方法
五、源码
示例源码:https://github.com/yanghongjie/WebAPI2PostMan
拓展工具:https://github.com/yanghongjie/Push2NugetServer
既然都看到这了,顺手评价再赏个推荐呗!


