17.prometheus
prometheus部署
由服务端和节点组成,随着k8s流行起来之后的一个监控系统,有点像zabbix,但是拥有独特的查询语句PromQL,每个节点都有自治能力
开源的监控系统,都可以在GitHub上找到,通过http周期性抓取被监控主机状态,自己有个时序数据库,每秒可达千万
服务端使用:https://github.com/prometheus/prometheus/releases/download/v2.37.0/prometheus-2.37.0.linux-amd64.tar.gz
节点使用:https://github.com/prometheus/node_exporter/releases/download/v1.3.1/node_exporter-1.3.1.linux-amd64.tar.gz
服务端部署(192.168.157.136)
关闭SELinux和防火墙
setenforce 0
systemctl stop firewalld
通过FTP将压缩包放到/usr/src下,然后解压到usr/local中
cd /usr/src
tar -zxvf prometheus-2.37.0.linux-amd64.tar.gz -C /usr/local/
改个文件名
cd /usr/local
mv prometheus-2.37.0.linux-amd64 prometheus
查看prometheus版本
cd prometheus/
	./prometheus --version
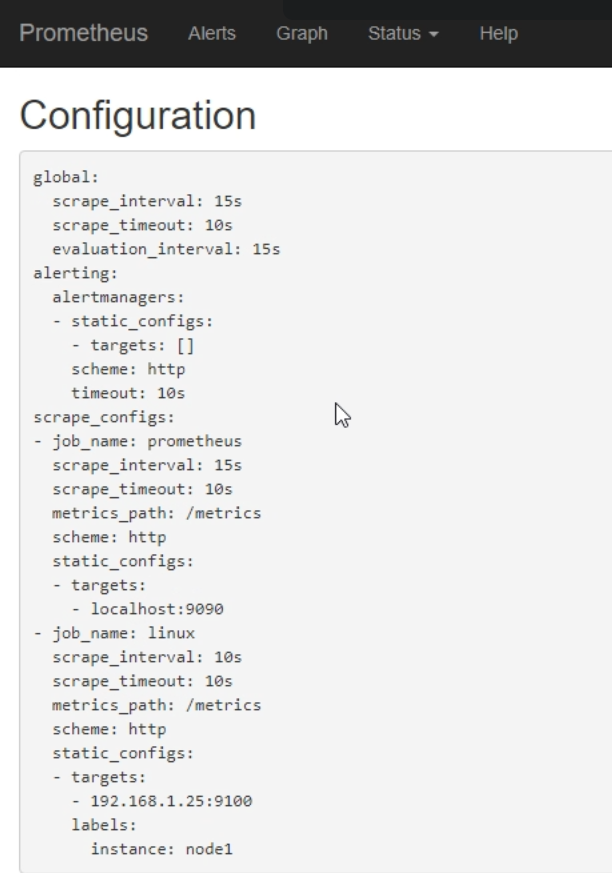
修改配置文件
# my global config
global:   # 全局配置
  scrape_interval: 15s # Set the scrape interval to every 15 seconds. Default is every 1 minute.  # 抓取时间每次间隔15s,默认1min
  evaluation_interval: 15s # Evaluate rules every 15 seconds. The default is every 1 minute.  # 评估时间每次间隔15s,默认1min
  # scrape_timeout is set to the global default (10s).

# Alertmanager configuration   # 警告管理
alerting:
  alertmanagers:
    - static_configs:
        - targets:
          # - alertmanager:9093

# Load rules once and periodically evaluate them according to the global 'evaluation_interval'.  # 根据评估规则进行评估
rule_files:
  # - "first_rules.yml"
  # - "second_rules.yml"

# A scrape configuration containing exactly one endpoint to scrape:   # 监控目标配置,默认只抓取本地9090端口
# Here it's Prometheus itself.
scrape_configs:
  # The job name is added as a label `job=<job_name>` to any timeseries scraped from this config.
  - job_name: "prometheus"

    # metrics_path defaults to '/metrics'
    # scheme defaults to 'http'.

    static_configs:
      - targets: ["localhost:9090"]

# 添加新的监控节点
  - job_name: 'linux'
    scrape_interval: 10s
    scrape_timeout: 10s
    metrics_path: /metrics
    scheme: http
    static_configs:
    - targets:
      - 192.168.157.137:9100   # 节点部署在9100端口
      labels:
        instance: node1   # 将节点名设置为node1
增加用户
groupadd prometheus
useradd -g prometheus -s /sbin/nologin prometheus   # 禁止他登录
赋予权限
cd ~
chown -R prometheus:prometheus /usr/local/prometheus
创建prometheus的运行数据目录
mkdir -p /var/lib/prometheus
chown -R prometheus:prometheus /var/lib/prometheus
设置开机启动,并给service权限
touch /usr/lib/systemd/system/prometheus.service
chown prometheus:prometheus /usr/lib/systemd/system/prometheus.service
编辑service,按照如下内容进行配置
vi /usr/lib/systemd/system/prometheus.service

[Unit]
Description=Prometheus
Documentation=https://prometheus.io/
After=network.target

[Service]
Type=simple
User=prometheus
ExecStart=/usr/local/prometheus/prometheus --config.file=/usr/local/prometheus/prometheus.yml --storage.tsdb.path=var/lib/prometheus
Restart=on-failure

[Install]
WantedBy=multi-user.target
设置开机启动
systemctl enable prometheus
systemctl start prometheus
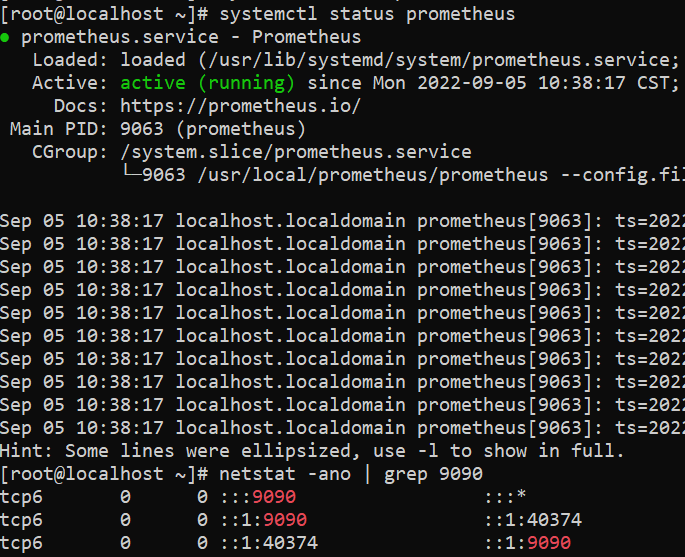
查看开启状态
systemctl status prometheus
netstat -ano | grep 9090

管理界面解读
服务端IP:9090 # web管理界面
在Status的Configuration中查看之前的配置是否成功

之前设置的节点node1在Status的Targets中可以看到

服务端请求节点的matrics,服务端也有matrics,相当于通过系统的matrics生成可视化图表
节点部署(192.168.157.137)
关闭SELinux和防火墙
setenforce 0
systemctl stop firewalld
解压node_exporter到/usr/local
node_exporter相当于节点本地情况汇报工具
cd /usr/src
tar -zxvf node_exporter-1.3.1.linux-amd64.tar.gz -C /usr/local/
改名字
cd /usr/local
mv node_exporter-1.3.1.linux-amd64 node_exporter
添加用户
groupadd prometheus
useradd -g prometheus -s /sbin/nologin prometheus
chown -R prometheus:prometheus /usr/local/node_exporter/
编辑service,按照如下内容进行配置
vi /usr/lib/systemd/system/node_exporter.service

[Unit]
Description=node_exporter
Documentation=https://prometheus.io/
After=network.target

[Service]
Type=simple
User=prometheus
ExecStart=/usr/local/node_exporter/node_exporter
Restart=on-failure

[Install]
WantedBy=multi-user.target
设置node_exporter开机启动
systemctl enable node_exporter
systemctl start node_exporter
此时在Status的Targets中可以看到node1上线

grafana的安装和使用
需要将其装到服务端,配合prometheus进行使用,图形化管理软件,配置较为简单
wget直接远程下载安装
wget https://dl.grafana.com/enterprise/release/grafana-enterprise-9.1.2-1.x86_64.rpm
sudo yum install grafana-enterprise-9.1.2-1.x86_64.rpm
如果不行就将grafana的rpm文件保存到/usr/src下,然后本地安装
cd /usr/src
yum localinstall grafana-enterprise-9.1.2-1.x86_64.rpm
配置文件:
/etc/grafana/grafana.ini
启动服务并设置为开机启动
systemctl enable grafana-server
systemctl start grafana-server
通过端口查看发现grafana开了3000端口,并通过IP:3000进入web管理界面
netstat -ano | more
192.168.157.136:3000
默认用户名和密码为admin
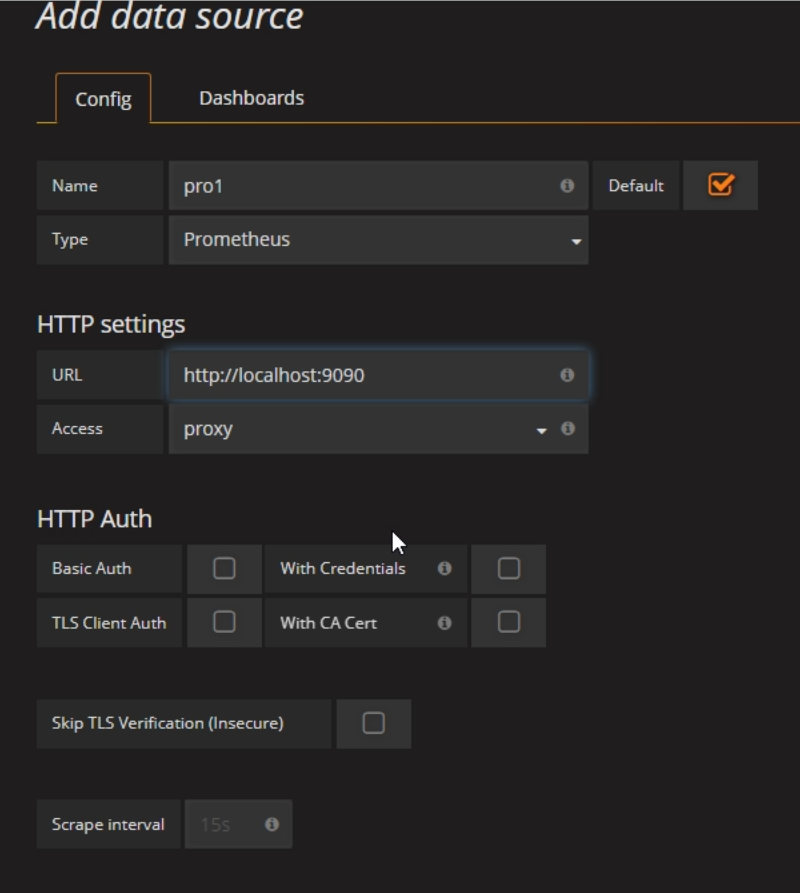
在首页Add data source中按照如下方式添加服务端的prometheus,也可以添加客户端的node_reporter,Type都选择prometheus

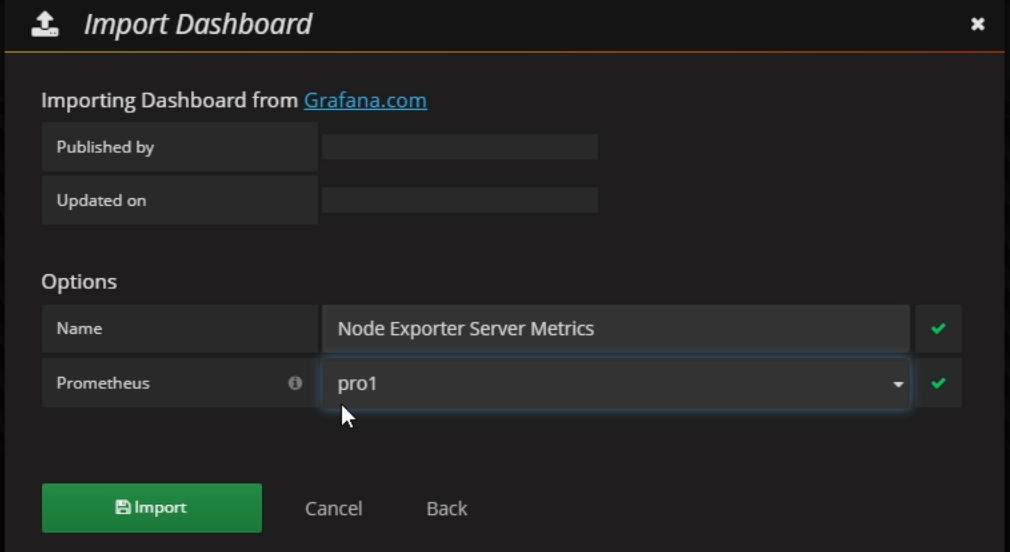
在Dashboards中可以Import一个json文件,如果没有通过https://grafana.com/dashboards/405下载案例文件

导入后可以看到效果如下

本文来自博客园,作者:icui4cu,转载请注明原文链接:https://www.cnblogs.com/icui4cu/p/16658239.html


