16.zabbix部署
管理大批量服务器/网站出问题后快速处理的高可用性的系统,拥有php制作的web界面管理,lamp环境
HA(high available):高可用性,分为6个等级,统称为6个9,分别为(1-90%)365,(1-99%)365,(1-99.9%)*365,以此类推
监控
硬件监控:机房内,包括路由器、交换机等
软件监控:CPU、内存、硬盘使用率、系统负载、进程
服务监控:apache、nginx、php、tcp连接数
性能监控:服务器性能、数据库存储、网站的负载
日志监控:入侵后定位攻击者
安全性监控:用户非法登录,黑客提权
网络监控:流量是否出现异常、带宽是否正常
# Linux的查看性能命令
lscpu     # 查看cpu使用情况
free -h   # 查看内存使用情况
df -h     # 查看硬盘使用情况
配置
ser1作为服务端(192.168.1.153),ser2(192.168.1.25)作为客户端
服务器端配置
关闭SELinux防火墙
setenforce 0
systemctl stop firewalld
选择阿里源
curl -o /etc/yum.repos.d/CentOS-Base.repo http://mirrors.aliyun.com/repo/Centos-7.repo
curl -o /etc/yum.repos.d/epel.repo http://mirrors.aliyun.com/repo/epel-7.repo
rpm -ivh http://repo.zabbix.com/zabbix/3.0/rhel/7/x86_64/zabbix-realease-3.0-1.e17.noarch.rpm
安装zabbix
yum install -y zabbix-server-mysql zabbix-web-mysql
安装mysql数据库
yum install -y mariadb-server
systemctl start mariadb.service
创建数据库
mysql -e 'create database zabbix character set utf8 collate utf8_bin;'   # 创建名为zabbix的数据库并用utf-8编码
mysql -e 'grant all privileges on zabbix.* to zabbix@localhost identified by "zabbix";'   # 在该数据库上新建一个用户,用户名密码都是zabbix
导入默认数据
cd /usr/share/doc/zabbix-server-mysql-3.0.32/
zcat create.sql.gz | mysql -uzabbix -pzabbix zabbix   # 用户名、密码、数据库名都是zabbix
配置zabbix连接mysql
sed -i.ori '115a DBPassword=zabbix' /etc/zabbix/zabbix_server.conf
添加时区
sed -i.ori '18a php_value date.timezone Asia/Shanghai' /etc/httpd/conf.d/zabbix.conf
解决中文乱码问题
yum -y install wqy-microhei-fonts   # 安装字体
cp /usr/share/fonts/wqy-microhei/wqy-microhei.ttc /usr/share/fonts/dejavu/DejaVuSans.ttf   # 复制字体
启动服务
systemctl start zabbix-server
systemctl start httpd
输出信息
echo "浏览器访问 http://'hostname -I|awk '{print $1}'`/zabbix"
此时使用浏览器访问
ser1的IP/zabbix即可在web界面安装zabbix
客户端配置
关闭SELinux防火墙
setenforce 0
systemctl stop firewalld
选择阿里源
curl -o /etc/yum.repos.d/CentOS-Base.repo http://mirrors.aliyun.com/repo/Centos-7.repo
curl -o /etc/yum.repos.d/epel.repo http://mirrors.aliyun.com/repo/epel-7.repo
rpm -ivh http://repo.zabbix.com/zabbix/3.0/rhel/7/x86_64/zabbix-realease-3.0-1.e17.noarch.rpm
安装zabbix客户端(代理)
yum install zabbix-agent -y
设置服务端的IP
sed -i.ori 's#Server=127.0.0.1#Server=192.168.1.153#' /etc/zabbix/zabbix_agentd.conf   # 将配置文件中的127.0.0.1换成服务端的IP
vi /etc/zabbix/zabbix_agent.conf,ServerActive=192.168.1.153,Hostname=ser2   # 进入配置文件,修改ServerActive=服务器端IP,修改hostname为客户端的主机名(ser2)
启动服务
systemctl start zabbix-agent.service
服务端安装检测工具
yum -y install zabbix-get
zabbix_get -s 192.168.1.25 -p 10050 -k "system.cpu.load[all,avg1]"   # 对客户端进行检测
服务端web界面安装zabbix
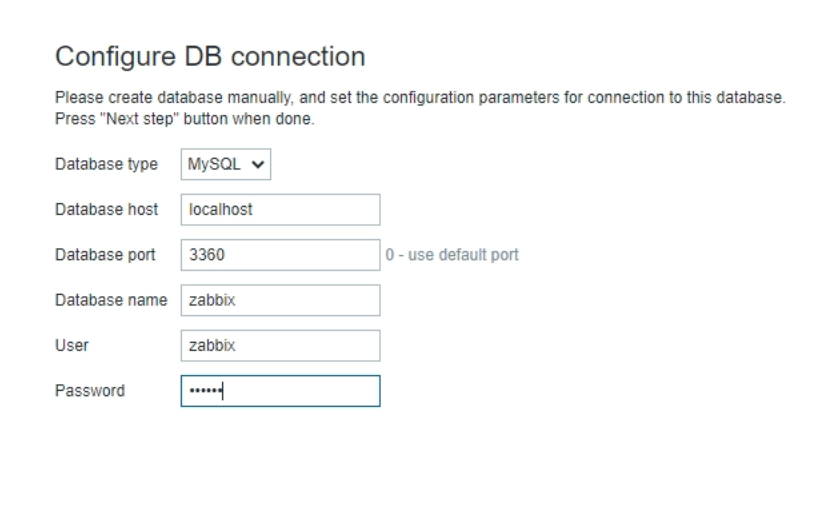
一直下一步,到DB connection配置,按照之前配置,用户名、密码、数据库名都是zabbix

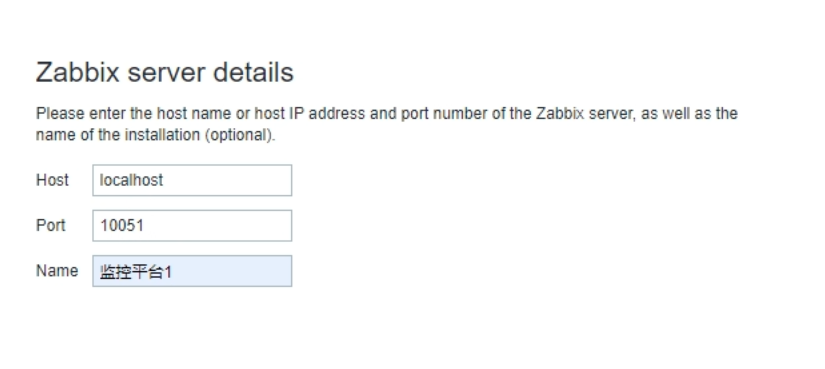
服务端起个名字

Configuration(主要监控配置)
进入Hosts界面,点击Name,修改其中的信息为客户端信息,Host name修改为Target1(名字不能为中文),Agent interfaces为客户端IP,下面勾选Enable,最后点击Update

可以在Lastest data中选择客户端的Hosts,点击Filter后可以看到监控的客户端信息

在Events中可以看到事件日志

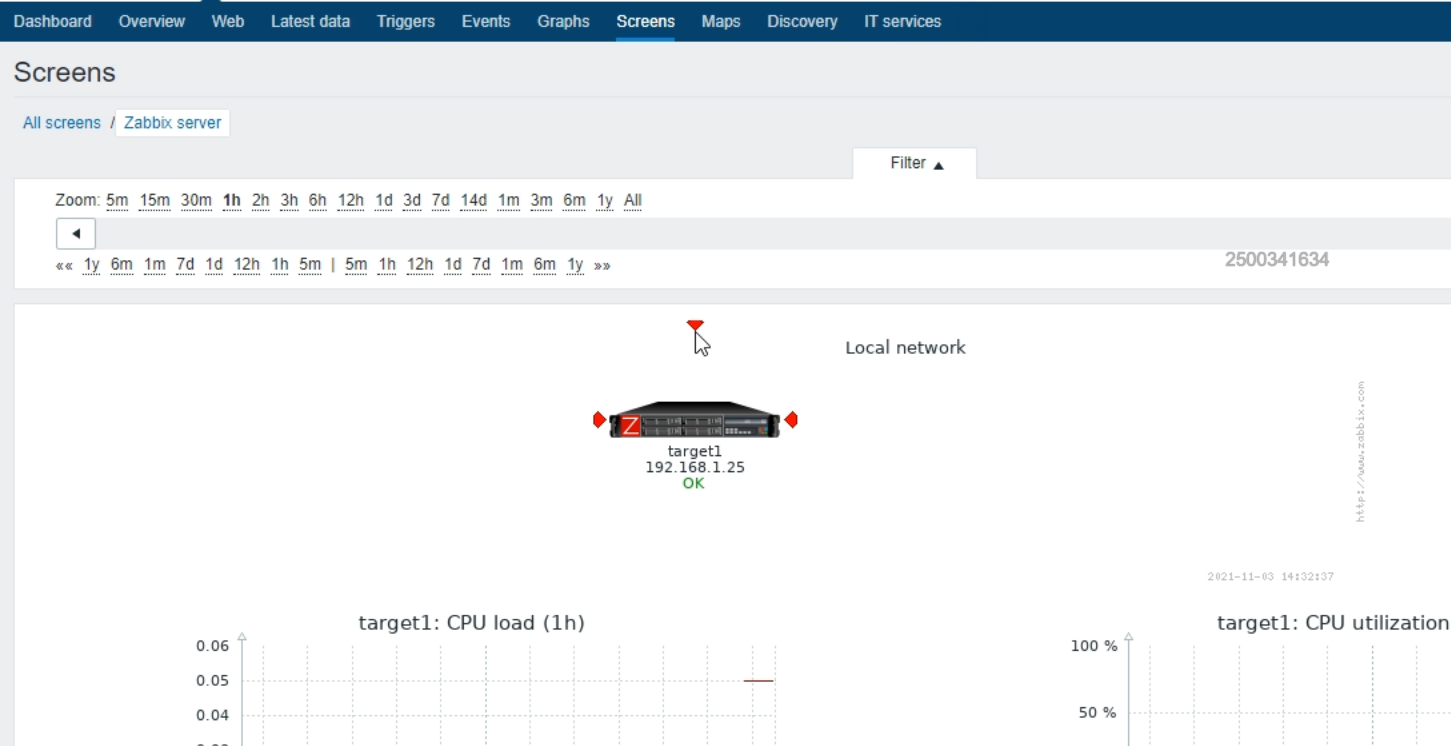
Screens中看到管辖的客户端的直观信息

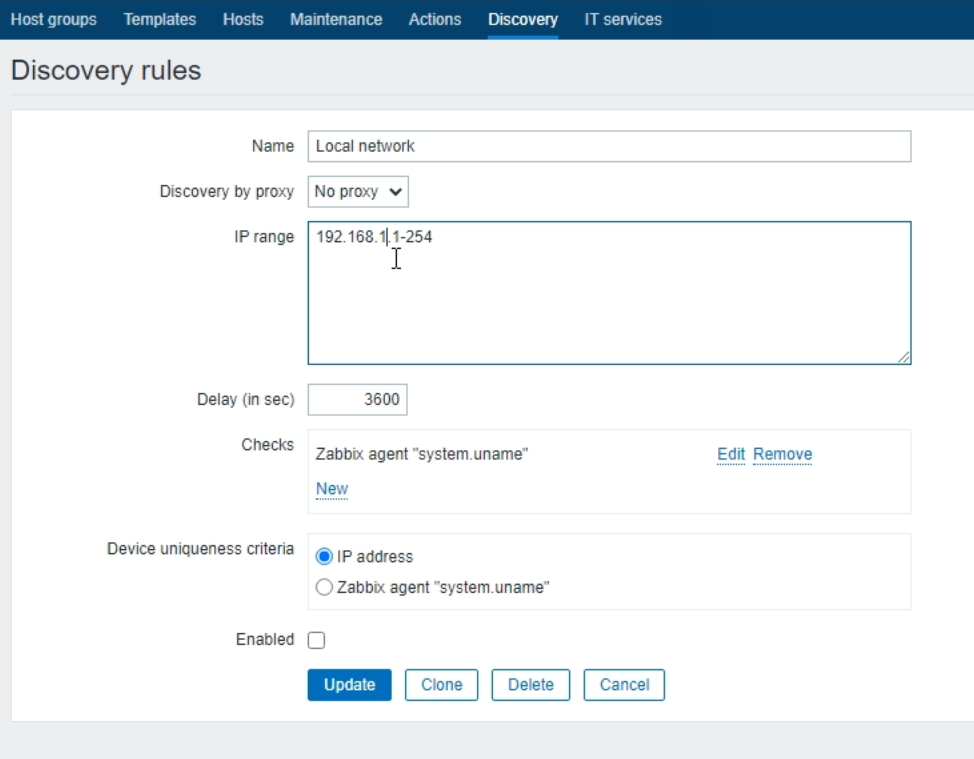
Discovery可以在内网环境中探测客户端

本文来自博客园,作者:icui4cu,转载请注明原文链接:https://www.cnblogs.com/icui4cu/p/16648896.html

