day104:MoFang:个人中心页面&flask-admin&基于faker生成仿真数据
目录
2.flask-Admin构建和配置后台运营站点管理用户信息
BUG:
// 登录成功页面跳转
api.confirm({
    title: '磨方提示',
    msg: '注册成功',
    buttons: ['返回首页', '个人中心']
}, (ret, err)=>{
    if(ret.buttonIndex == 1){
        // 跳转到首页
        this.game.outWin("user");
    }else{
        // 跳转到个人中心
        this.game.goFrame("user","user.html", this.current);
    }
});
}
}).catch(error=>{
}
         });
}
});
captcha1.show(); // 显示验证码

},
       goto_register(){
        // 去注册
            this.game.goFrame("user","register.html",this.current);
    },
        goto_index(){
            // 返回首页
            this.game.outWin("user");
        }
}
})
}
2.首页页面
gohome(){
    if(this.game.get("access_token") || this.game.fget("access_token")){
        this.game.goWin("user","user.html", this.current);
    }else{
        this.game.goWin("user","login.html", this.current);
    }
}
}
})
}
3.注册页面
// 注册成功!
api.confirm({
    title: '磨方提示',
    msg: '注册成功',
    buttons: ['返回首页', '个人中心']
}, (ret, err)=>{
    if(ret.buttonIndex == 1){
        // 跳转到首页
        this.game.outWin("user");
    }else{
        // 跳转到个人中心
        this.game.goFrame("user","user.html", this.current);
    }
});

}

}).catch(error=>{
});

},
    // 返回键
    back(){
        this.game.goGroup("user",0);
    }
}
})
}
1.前端显示个人中心页面
1.个人中心页面初始化


<!DOCTYPE html>
<html>
<head>
    <title>用户中心</title>
    <meta name="viewport" content="width=device-width,minimum-scale=1.0,maximum-scale=1.0,user-scalable=no">
    <meta charset="utf-8">
    <link rel="stylesheet" href="../static/css/main.css">
    <script src="../static/js/vue.js"></script>
    <script src="../static/js/axios.js"></script>
    <script src="../static/js/main.js"></script>
    <script src="../static/js/uuid.js"></script>
    <script src="../static/js/settings.js"></script>
</head>
<body>
    <div class="app user" id="app">
        <div class="bg">
      <img src="../static/images/bg0.jpg">
    </div>
        <img class="back" @click="goto_index" src="../static/images/user_back.png" alt="">
        <img class="setting" src="../static/images/setting.png" alt="">
        <div class="header">
            <div class="info">
                <div class="avatar">
                    <img class="avatar_bf" src="../static/images/avatar_bf.png" alt="">
                    <img class="user_avatar" src="../static/images/avatar.png" alt="">
                    <img class="avatar_border" src="../static/images/avatar_border.png" alt="">
                </div>
                <p class="user_name">清蒸小帅锅</p>
            </div>
            <div class="wallet">
                <div class="balance">
                    <p class="title"><img src="../static/images/money.png" alt="">钱包</p>
                    <p class="num">99,999.00</p>
                </div>
                <div class="balance">
                    <p class="title"><img src="../static/images/integral.png" alt="">果子</p>
                    <p class="num">99,999.00</p>
                </div>
            </div>
            <div class="invite">
                <img class="invite_btn" src="../static/images/invite.png" alt="">
            </div>
        </div>
        <div class="menu">
                <div class="item">
                    <span class="title">我的主页</span>
                    <span class="value">查看</span>
                </div>
                <div class="item">
                    <span class="title">任务列表</span>
                    <span class="value">75%</span>
                </div>
                <div class="item">
                    <span class="title">收益明细</span>
                    <span class="value">查看</span>
                </div>
                <div class="item">
                    <span class="title">实名认证</span>
                    <span class="value">未认证</span>
                </div>
                <div class="item">
                    <span class="title">问题反馈</span>
                    <span class="value">去反馈</span>
                </div>
            </ul>
        </div>
    </div>
    <script>
    apiready = function(){
        init();
        new Vue({
            el:"#app",
            data(){
                return {
                    prev:{name:"",url:"",params:{}},
                    current:{name:"user",url:"user.html",params:{}},
                }
            },
            methods:{
                  goto_index(){
            // 返回首页
            this.game.outWin("user");
          },
            }
        });
    }
    </script>
</body>
</html>
2.个人中心页面CSS样式
.user .header{
  position: absolute;
  top: 1.22rem;
  left: 0;
  right: 0;
  margin: auto;
  width: 32rem;
  height: 19.28rem;
  background: url("../images/ucenter.png") no-repeat 0 0;
  background-size: 100%;
}
.user .back{
  position: absolute;
  width: 3.83rem;
  height: 3.89rem;
  z-index: 1;
  top: 2.72rem;
  left: 3rem;
}
.user .setting{
  position: absolute;
  z-index: 1;
  top: 4.2rem;
  right: 3.8rem;
  width: 3.06rem;
  height: 3.06rem;
}
.user .info{
  position: absolute;
  z-index: 1;
  top: 6.94rem;
  left: 3.89rem;
  width: 6.39rem;
  height: 9.17rem;
}
.user .info .avatar{
  width: 6.39rem;
  height: 6.39rem;
  position: relative;
}
.user .info .avatar_bf{
  position: absolute;
  z-index: 1;
  margin: auto;
  width: 4.56rem;
  height: 4.56rem;
  top: 0;
  bottom: 0;
  left: 0;
  right: 0;
}
.user .info .user_avatar{
  position: absolute;
  z-index: 1;
  width: 4.56rem;
  height: 4.56rem;
  margin: auto;
  top: 0;
  bottom: 0;
  left: 0;
  right: 0;
}
.user .info .avatar_border{
  position: absolute;
  z-index: 1;
  margin: auto;
  top: 0;
  bottom: 0;
  left: 0;
  right: 0;
  width: 6.2rem;
  height: 6.2rem;
}
.user .info .user_name{
  text-align: center;
}
.user .wallet{
  position: absolute;
  top: 5.56rem;
  right: 1.94rem;
  width: 16rem;
  height: 10rem;
}
.user .wallet .balance{
  margin-top: 1.4rem;
  float: left;
  margin-right: 1rem;
}
.user .wallet .title{
  color: #300;
  font-size: 1.2rem;
  width: 6.4rem;
  text-align: center;
}
.user .wallet .title img{
  width: 1.4rem;
  margin-right: 0.2rem;
  vertical-align: sub;
  height: 1.4rem;
}
.user .wallet .num{
  background: url("../images/btn3.png") no-repeat 0 0;
  background-size: 100%;
  width: 6.4rem;
  font-size: 0.8rem;
  color: #fff;
  height: 2rem;
  line-height: 1.8rem;
  text-indent: 1rem;
}
.user .invite{
  position: absolute;
  top: 11.6rem;
  right: 6.4rem;
}
.user .invite .invite_btn{
  width: 9.39rem;
  height: 3.67rem;
}
.user .menu{
  position: absolute;
  top: 22rem;
  padding-top: 4.6rem;
  right: 0;
  left: 0;
  margin: auto;
  width: 28.44rem;
  height: 33.89rem;
  background: url("../images/bg10.png") no-repeat 0 0;
  background-size: 100%;
}
.user .menu .item{
  margin-left: 2.6rem;
  margin-bottom: 0.5rem;
  width: 23.06rem;
  height: 4.22rem;
  line-height: 4.22rem;
  overflow: hidden;
  background: url("../images/title.png") no-repeat 0 0;
  background-size: 100%;
  text-indent: 2rem;
  color: #fff;
  font-size: 1.33rem;
}
.user .menu .item .title{
  float: left;
}
.user .menu .item .value{
  float: right;
  padding-right: 2rem;
}
pip install flask-admin
application/__init__.py,代码:
from flask_admin import Admin

# flask-admin模块初始化
admin = Admin()

def init_app(config_path):
    """全局初始化"""

    # admin站点
    admin.init_app(app)

    return manager
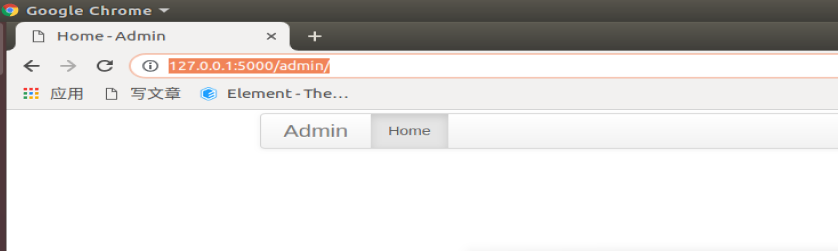
可以发现上面什么都没有,就一个Home首页导航.
from flask import Blueprint
from importlib import import_module

def init_blueprint(app):
    """自动注册蓝图"""
        .....
        # 加载蓝图内部的admin站点配置
        try:
            import_module(blueprint_path+".admin")
        except:
            pass
class InitConfig():
    """项目默认初始化配置"""
    # admin站点配置
    ADMIN_PATH = "application.backend" # 默认admin总配置
    FLASK_ADMIN_SWATCH = 'cerulean' # 站点主题
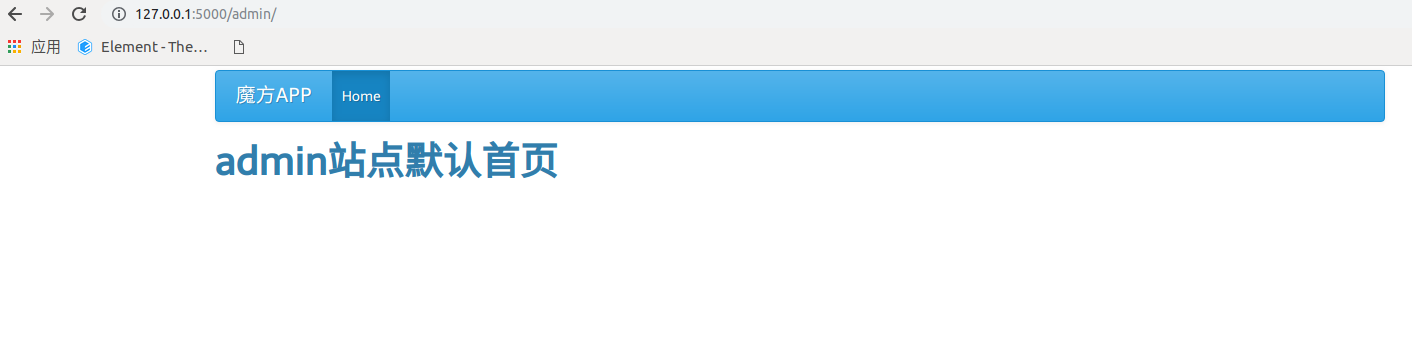
{% extends 'admin/master.html' %}
{% block body %}
    <h1>admin站点默认首页</h1>
{% endblock %}
from application import admin
from flask_admin import AdminIndexView
# 修改admin站点标题
admin.name = "魔方APP"

# admin站点的默认首页信息
admin._set_admin_index_view(index_view=AdminIndexView(
    name="Home",
    template="admin/home.html",
))
访问效果:
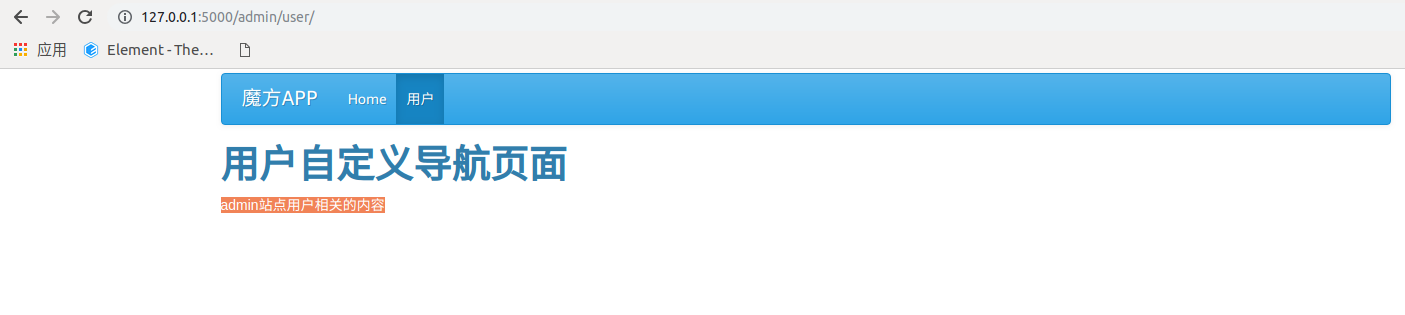
{% extends 'admin/master.html' %}
{% block body %}
    <h1>用户自定义导航页面</h1>
    <p>{{title}}</p>
{% endblock %}
from flask_admin import BaseView,expose
from application import admin

# 自定义一个导航页面
class UserAdmin(BaseView):
    @expose("/")
    def index(self):
        title = "admin站点用户相关的内容"

        data = locals()
        data.pop("self") # ?????
        return self.render(template="admin/user/index.html",**data)

admin.add_view(UserAdmin(name='用户',url="user"))
重新运行项目,效果如下:

可以点击用户,查看内容如下:
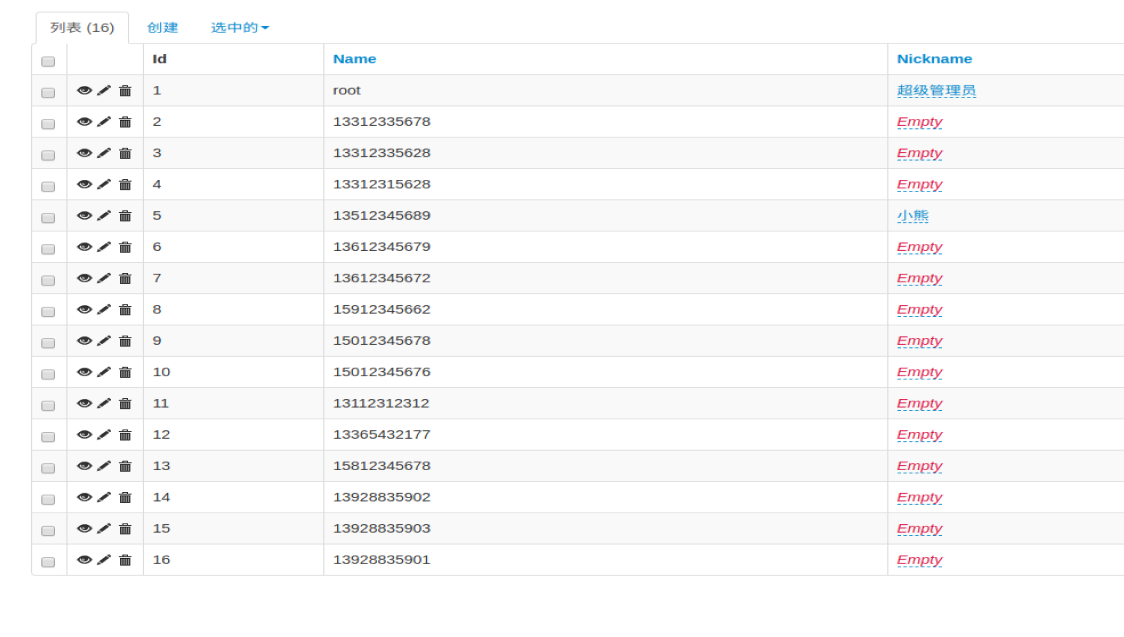
from flask_admin import BaseView,expose
from application import admin,db

# 根据模型自动生成页面
from .models import User
from flask_admin.contrib.sqla import ModelView
class UserAdminModel(ModelView):
    # 列表页显示字段列表
    column_list = ["id","name","nickname"]
    # 列表页显示排除字段列表
    # column_exclude_list = ["is_delete"]
    # 列表页可以直接编辑的字段列表
    column_editable_list = ["nickname"]
    # 是否允许查看详情
    can_view_details = True
    # 列表页显示直接可以搜索数据的字典
    column_searchable_list = ['nickname','name', 'email']
    # 过滤器
    column_filters = ['sex']
    # 单页显示数据量
    page_size = 10


# admin.add_view(UserAdminModel(User,db.session,name="用户")) # 把当前页面作为顶级导航进行显示
admin.add_view(UserAdminModel(User,db.session,name="用户", category="用户管理")) # 把当前页面添加到顶级导航下,category来设置,如果导航不存在,则自动创建 # ????

# 添加子导航还有种方式: 添加超链接作为导航
from flask_admin.menu import MenuLink
admin.add_link(MenuLink(name='老男孩', url='http://www.oldboyedu.com', category='用户管理')) # 把超链接作为子导航加载到顶级导航中
安装模块:
pip install flask-babelex
from flask_admin import Admin
from flask_babelex import Babel

# flask-admin模块初始化
admin = Admin()

babel = Babel()

def init_app(config_path):
    """全局初始化"""
    # admin站点
    from flask_admin import AdminIndexView
    admin.init_app(app)

    # 项目语言
    babel.init_app(app)

    return manager
    # 国际化与本地化
    LANGUAGE = "zh_CN"
    TIMEZONE = "Asia/Shanghai"

    # 针对babel模块的语言和设置
    BABEL_DEFAULT_LOCALE = LANGUAGE
    BABEL_DEFAULT_TIMEZONE = TIMEZONE
访问效果:
1.faker的安装
pip install Faker
2.faker的初始化
from faker import Faker

def init_app(config_path):
    """全局初始化"""

    # 数据种子生成器[faker]
    app.faker = Faker(app.config.get("LANGUAGE"))

    return manager
3.faker的基本使用
# 随机IP地址
from faker import Faker
from faker.providers import internet

fake = Faker()
fake.add_provider(internet)

print(fake.ipv4_private())

# 产生随机手机号
print(fake.phone_number())
# 产生随机姓名
print(fake.name())
# 产生随机地址
print(fake.address())
# 随机产生国家名
print(fake.country())
# 随机产生国家代码
print(fake.country_code())
# 随机产生城市名
print(fake.city_name())
# 随机产生城市
print(fake.city())
# 随机产生省份
print(fake.province())
# 产生随机email
print(fake.email())
# 产生随机IPV4地址
print(fake.ipv4())
# 产生长度在最大值与最小值之间的随机字符串
print(faker.pystr(min_chars=0, max_chars=8))

# 随机产生车牌号
print(fake.license_plate())

# 随机产生颜色
print(fake.rgb_color())  # rgb
print(fake.safe_hex_color())  # 16进制
print(fake.color_name())  # 颜色名字
print(fake.hex_color()) # 16进制

# 随机产生公司名
print(fake.company())

# 随机产生工作岗位
print(fake.job())
# 随机生成密码
print(fake.password(length=10, special_chars=True, digits=True, upper_case=True, lower_case=True))
# 随机生成uuid
print(fake.uuid4())
# 随机生成sha1
print(fake.sha1(raw_output=False))
# 随机生成md5
print(fake.md5(raw_output=False))

# 随机生成女性名字
print(fake.name_female())
# 男性名字
print(fake.name_male())
# 随机生成名字
print(fake.name())

# 生成基本信息
print(fake.profile(fields=None, sex=None))
print(fake.simple_profile(sex=None))

# 随机生成浏览器头user_agent
print(fake.user_agent())

# 随机产生时间 月份
print(fake.month_name())
# 'May'
print(fake.date_time_this_century(before_now=True, after_now=False, tzinfo=None))
# 207-09-18 12:21:32
print(fake.time_object(end_datetime=None))
# 16:51:21
print(fake.date_time_between(start_date="-10y", end_date="now", tzinfo=None))
# 2015-11-15 21:07:38
print(fake.future_date(end_date="+30d", tzinfo=None))
# 2020-04-25
print(fake.date_time(tzinfo=None, end_datetime=None))
# 2002-09-01 18:27:45
print(fake.date(pattern="%Y-%m-%d", end_datetime=None))
# '1998-08-02'
print(fake.date_time_this_month(before_now=True, after_now=False, tzinfo=None))
# 2020-04-03 16:03:21
print(fake.date_time_this_decade(before_now=True, after_now=False, tzinfo=None))
# 2020-01-09 01:15:08
print(fake.month())
# '11'
print(fake.day_of_week())
# 'Sunday'
print(fake.date_object(end_datetime=None))
# 2017-06-26
print(fake.date_this_decade(before_today=True, after_today=False))
# 2020-03-30
fake.date_this_century(before_today=True, after_today=False)
# datetime.date(2000, 6, 1)
fake.date_this_month(before_today=True, after_today=False)
# datetime.date(2018, 6, 13)
fake.past_datetime(start_date="-30d", tzinfo=None)
# datetime.datetime(2018, 6, 25, 7, 41, 34)
fake.date_this_year(before_today=True, after_today=False)
# datetime.date(2018, 2, 24)
fake.date_time_between_dates(datetime_start=None, datetime_end=None, tzinfo=None)
# datetime.datetime(2018, 6, 26, 14, 40, 5)
fake.date_time_ad(tzinfo=None, end_datetime=None)
# datetime.datetime(673, 1, 28, 18, 17, 55)
fake.date_between_dates(date_start=None, date_end=None)
# datetime.date(2018, 6, 26)
fake.future_datetime(end_date="+30d", tzinfo=None)
# datetime.datetime(2018, 7, 4, 10, 53, 6)
fake.past_date(start_date="-30d", tzinfo=None)
# datetime.date(2018, 5, 30)
fake.time(pattern="%H:%M:%S", end_datetime=None)
# '01:32:14'
fake.day_of_month()
# '19'
fake.unix_time(end_datetime=None, start_datetime=None)

fake.date_time_this_year(before_now=True, after_now=False, tzinfo=None)
# datetime.datetime(2018, 5, 24, 11, 25, 25)
fake.date_between(start_date="-30y", end_date="today")
# datetime.date(2003, 1, 11)
fake.year()
# '1993'
4.利用faker在项目中生成指定数量的测试用户
import os
from importlib import import_module
from flask_script import Command, Option
import inspect


from flask import current_app
import random
from faker.providers import internet
class CreateUserCommand(Command):
    """生成自定义数量的用户信息"""
    name = "faker"
    option_list = [
        Option('--num', '-n', dest='num'),
    ]
    def run(self, num):
        with current_app.app_context():
            from application.apps.users.models import User,UserProfile
            current_app.faker.add_provider(internet)
            faker = current_app.faker

            try:
                num = int(num)
            except:
                num = 1
            user_list = []
            password = "123456"
            for _ in range(0,num):
                sex = bool( random.randint(0,2) )
                if sex == 0:
                    # 性别保密的用户
                    nickname = faker.name()
                elif sex == 1:
                    # 性别为男的用户
                    nickname = faker.name_male()
                else:
                    # 性别为女的用户
                    nickname = faker.name_female()
                name = faker.pystr(min_chars=6, max_chars=16)
                # 生成指定范围的时间对象
                age = random.randint(13,50)
                birthday = faker.date_time_between(start_date="-%sy" % age, end_date="-12y", tzinfo=None)
                hometown_province = faker.province()
                hometown_city = faker.city()
                hometown_area = faker.district()
                living_province = faker.province()
                living_city = faker.city()
                living_area = faker.district()

                user = User(
                    nickname=nickname,
                    sex=sex,
                    name=name,
                    password=name,
                    money=random.randint(100,99999),
                    ip_address=faker.ipv4_public(),
                    email=faker.ascii_free_email(),
                    mobile=faker.phone_number(),
                    unique_id=faker.uuid4(),
                    province=faker.province(),
                    city=faker.city(),
                    area=faker.district(),
                    info=UserProfile(
                        birthday=birthday,
                        hometown_province=hometown_province,
                        hometown_city=hometown_city,
                        hometown_area=hometown_area,
                        hometown_address=hometown_province+hometown_city+hometown_area+faker.street_address(),
                        living_province=living_province,
                        living_city=living_city,
                        living_area=living_area,
                        living_address=living_province+living_city+living_area+faker.street_address()
                    )
                )

                user_list.append(user)

            current_app.db.session.add_all(user_list)
            current_app.db.session.commit()
