第三章 Selenide测试框架(二)
3.3 Selenide启动多浏览器测试
Selenide上面已经讲过,我们添加Selenide在搭建好的maven工程中
Add these lines to file pom.xml:
<dependency>
<groupId>com.codeborne</groupId>
<artifactId>selenide</artifactId>
<version>4.5.1</version>
<scope>test</scope>
</dependency>
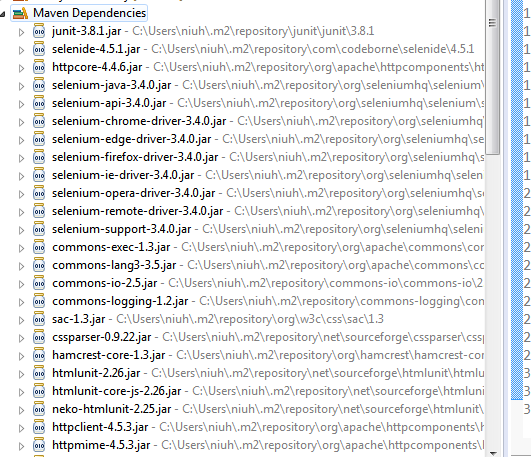
等待jar包全部下载完成后,点击maven Dependencies查看已经增加了Seleide环境所需的所有依赖jar包
Selenide安装完成后,接下来尝试启动浏览器,目前最常见的浏览器为Chrom/IE/firefox, Selenide默认启动为Firefox浏览器,不需要依赖浏览器驱动,并且每次启动的浏览器都是没有任何插件和cookies信息的浏览器。因为Selenide不需要实例化对象,所有都需要静态导入import static com.codeborne.selenide.Selenide.* 来调用提供常用的api
启动Firefox浏览器
package StartDriver;
import static com.codeborne.selenide.Selenide.* ;
import org.testng.annotations.Test;
public class TestStartDriver {
@Test
public void testFirefox(){
open("https://www.baidu.com/");
}
}
启动Chrome/IE等其他的浏览器时需要驱动支持,下载驱动可以自行百度下载,选择对应的版本以及操作系统环境,已chrome为例:
https://sites.google.com/a/chromium.org/chromedriver/
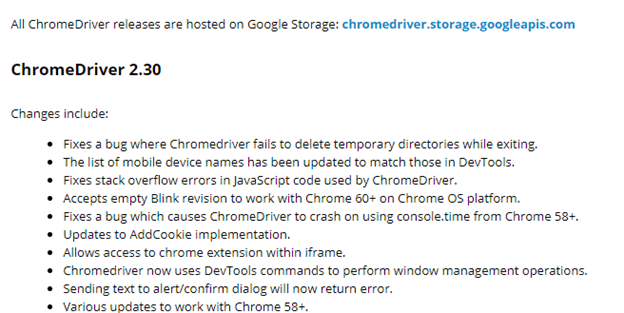
注意Chrome Driver与Chrome版本需要对应起来,按照所需下载对应的driver驱动
启动Chrome浏览器
package StartDriver;
import static com.codeborne.selenide.Selenide.* ;
import org.testng.annotations.Test;
public class TestStartDriver {
@Test
public void testFirefox(){
open("https://www.baidu.com/");
}
@Test void testChrome(){
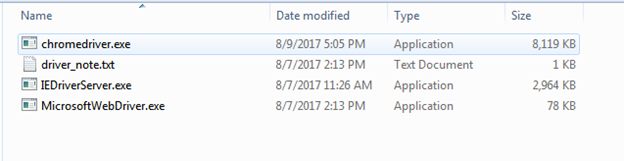
//指定Driver 的存放目录
System.setProperty("webdriver.chrome.driver","c:/driver/chromedriver.exe");
//指定需要启动的浏览器类型
System.setProperty("selenide.browser", "Chrome");
open("https://www.baidu.com/");
}
}
启动IE浏览器
这里注意的是IE驱动区分32/64位操作系统
http://selenium-release.storage.googleapis.com/index.html
@Test void testIE(){
//指定Driver 的存放目录
System.setProperty("webdriver.chrome.driver","c:/driver/IEDriverServer.exe");
//指定需要启动的浏览器类型
System.setProperty("selenide.browser", "Ie");
open("https://www.baidu.com/");
}
带插件的启动Chrome
在真实测试场景中,我们可能对测试有不同需求,我看你需要在测试中需要对测试结果做一些处理,比如抓包,解析,截图等等,而chrome提供了很多好好用的插件,所以带插件启动也是一种比较常用测试手段
@Test
public void testChromeExt(){
//指定Driver 的存放目录
System.setProperty("webdriver.chrome.driver","c:/driver/chromedriver.exe");
//指定创建的安装位置
ChromeOptions options = new ChromeOptions();
options.addExtensions(new File("c:/driver/jsonview.crx"));
WebDriver webDriver = new ChromeDriver(options);
setWebDriver(webDriver);
open("https://www.baidu.com/");
}
带配置的启动Chrome
@Test
public void testChromeProfile(){
//指定Driver 的存放目录
System.setProperty("webdriver.chrome.driver","c:/driver/chromedriver.exe");
//指定创建的安装位置
ChromeOptions options = new ChromeOptions();
options.addArguments("--test-type");
WebDriver webDriver = new ChromeDriver(options);
setWebDriver(webDriver);
open("https://www.baidu.com/");
}
当然启动浏览器的方式在我遇到的测试场景还有更多中,情况。比如代理,浏览器模式,浏览器大小等,后面我会在再补充。
任务目标:
下载并不同浏览器插件并自己完成上述所有不同的启动方式

 浙公网安备 33010602011771号