django【第二篇】部署django项目到服务器
准备Linux系统
安装deepin
这里选择deepin,桌面Linux系统推荐这款,特别是装在vmware下
可以采用本地部署和服务器部署,其实一样,我这里就在虚拟机里部署
这里采用虚拟机是vmware(你也可以用virtualbox等),由于Linux安装不是本文重点,因此不做重点介绍,请参考
本文采用vmware12 / deepin15.3(其它搭配可能安装不成功)
https://blog.csdn.net/daerzei/article/details/82919344
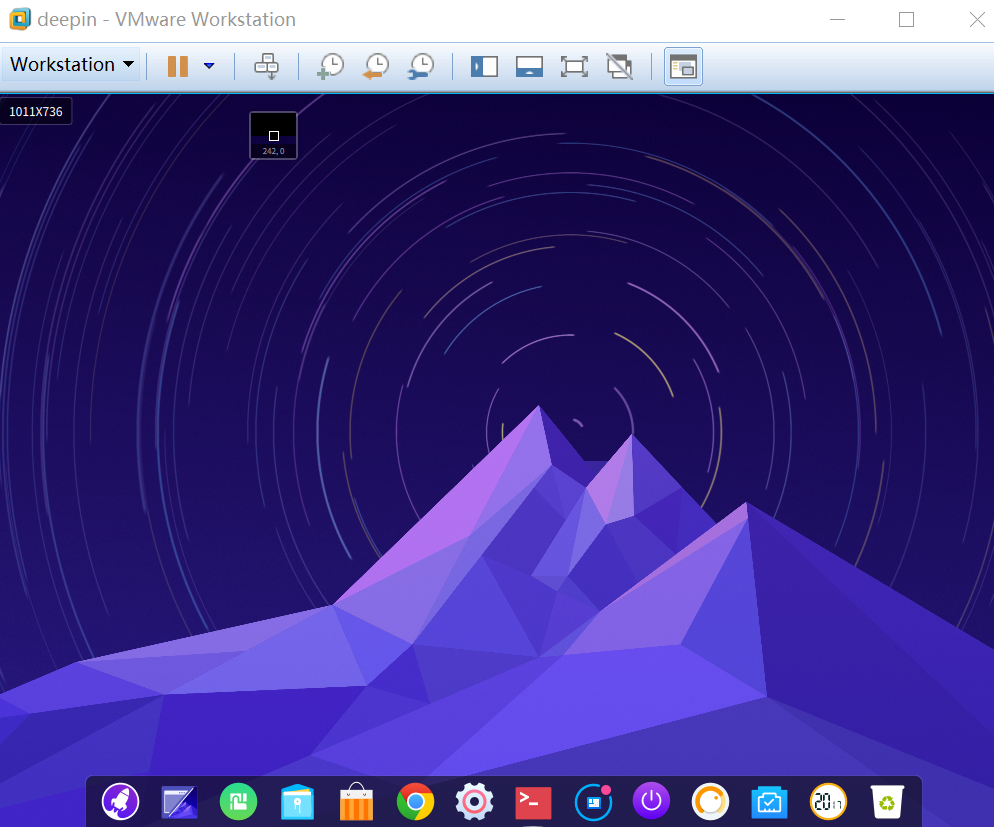
安装成功后的效果如下,deepin命令和ubuntu类似
linux共享windows文件
安装后,为了方便使用linux,https://blog.csdn.net/yhf19881015/article/details/7546685
使用Anaconda
deepin15.3自带python2.7 和3.5,需要单独再安装python3.6
https://blog.csdn.net/u013069552/article/details/78349716
准备部署环境
更换apt pip源
https://www.cnblogs.com/hcl1991/p/7894958.html
https://blog.csdn.net/qq_30163461/article/details/80401353
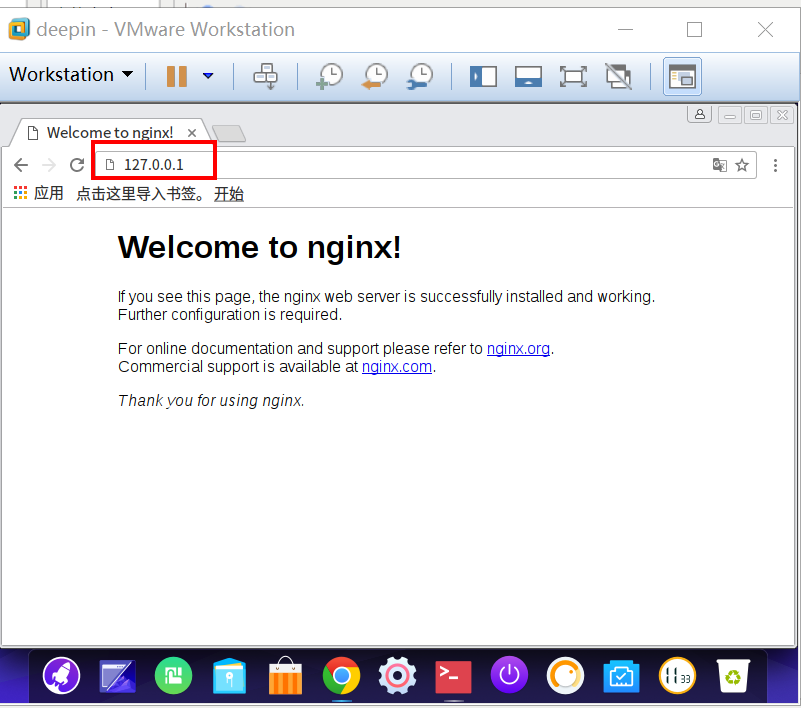
安装nginx
sudo apt-get install nginx
安装mysql
sudo apt-get install mysql-server
https://blog.csdn.net/fmwind/article/details/81941790
https://www.cnblogs.com/hxl77/p/8556178.html
1.重置密码
sudo vi /etc/mysql/mysql.conf.d/mysqld.cnf #在[mysqld]下增加一行
--skip-grant-tables
重启mysql
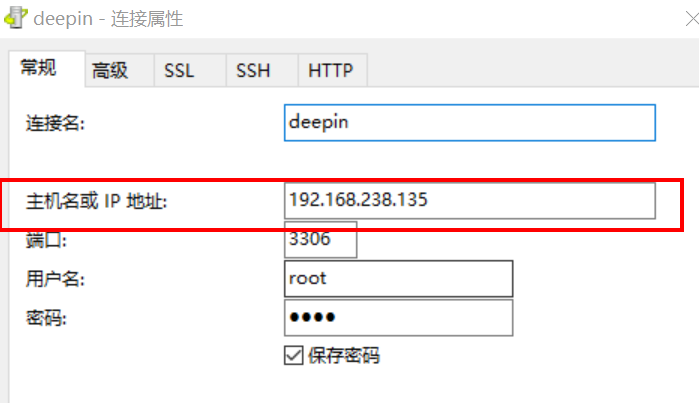
2.让windows能够连接deepin的mysql
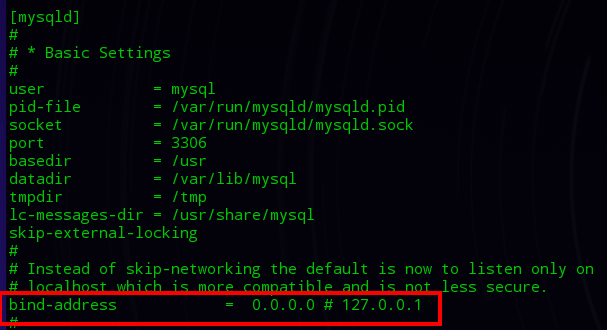
GRANT ALL PRIVILEGES ON *.* TO 'root'@'%' IDENTIFIED BY 'root' WITH GRANT OPTION;

安装虚拟环境
pip install virtualenv
pip install virtualenvwrapper
vi .bashrc
export WORKON_HOME=$HOME/.virtualenvs
export PROJECT_HOME=$HOME/workspace
source /home/hy/anaconda3/bin/virtualenvwrapper.sh
source .bashrc
mkvirtualenv mingren01
pip install django==1.11
pip install uwsgi https://www.jianshu.com/p/9ef03f8dcc34
sudo ln -s /home/hy/anaconda3/lib/libpcre.so.1 /lib
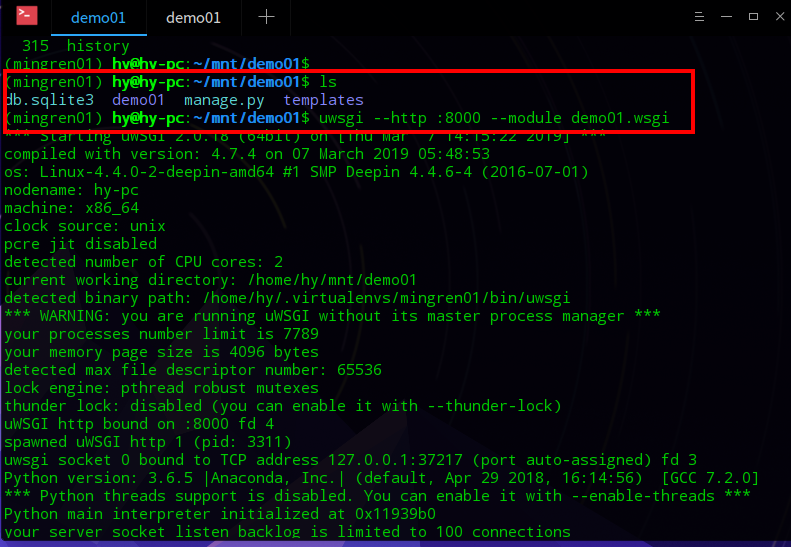
uwsgi启动django
测试uwsgi是否正常
workon mingren01
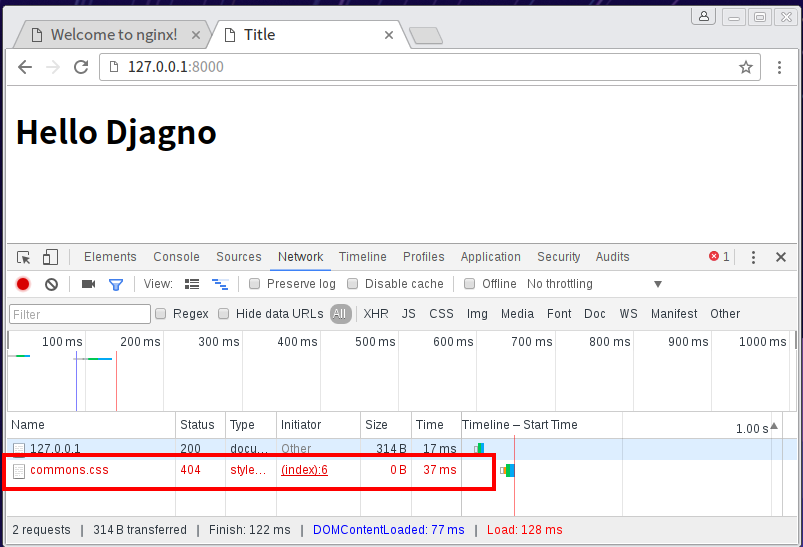
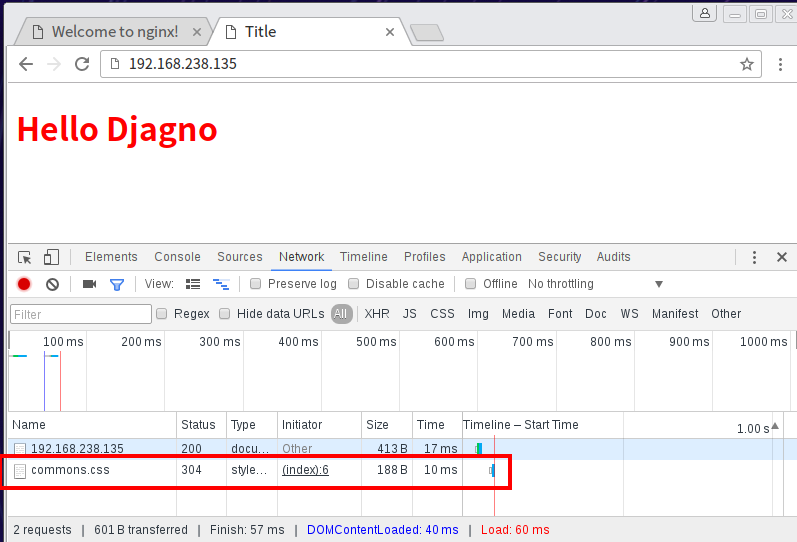
页面能加载html标签,说明uwsgi配置正常;但是css没加载成功,需要再配置nginx
正式部署djagno
配置nginx
新建uc_nginx.conf
cd /etc/nginx/conf.d
vi uc_nginx.conf


# the upstream component nginx needs to connect to
upstream django {
# server unix:///path/to/your/mysite/mysite.sock; # for a file socket
server 127.0.0.1:8000; # for a web port socket (we'll use this first)
}
# configuration of the server

server {
# the port your site will be served on
listen      80;
# the domain name it will serve for
server_name 192.168.238.135 ; # substitute your machine's IP address or FQDN
charset     utf-8;

# max upload size
client_max_body_size 75M;   # adjust to taste

# Django media
#location /media {
    # alias 你的目录/Mxonline/media;  # 指向django的media目录
#}

location /static {
    # alias 你的目录/Mxonline/static; # 指向django的static目录
    alias /home/hy/mnt/demo01/static;
}

# Finally, send all non-media requests to the Django server.
location / {
    uwsgi_pass  django;
    include     uwsgi_params; # the uwsgi_params file you installed
}
}

# sudo ln -s /home/hy/mnt/demo01/conf/nginx/uc_nginx.conf /etc/nginx/conf.d/
"""
Django settings for demo01 project.

Generated by 'django-admin startproject' using Django 1.11.

For more information on this file, see
https://docs.djangoproject.com/en/1.11/topics/settings/

For the full list of settings and their values, see
https://docs.djangoproject.com/en/1.11/ref/settings/
"""

import os

# Build paths inside the project like this: os.path.join(BASE_DIR, ...)
BASE_DIR = os.path.dirname(os.path.dirname(os.path.abspath(__file__)))


# Quick-start development settings - unsuitable for production
# See https://docs.djangoproject.com/en/1.11/howto/deployment/checklist/

# SECURITY WARNING: keep the secret key used in production secret!
SECRET_KEY = '6n3r2=-nh8zi*0_r0py$89cau+xeiv8365uza$b+n^m&vc$9&^'

# SECURITY WARNING: don't run with debug turned on in production!
DEBUG = True

ALLOWED_HOSTS = []


# Application definition

INSTALLED_APPS = [
    'django.contrib.admin',
    'django.contrib.auth',
    'django.contrib.contenttypes',
    'django.contrib.sessions',
    'django.contrib.messages',
    'django.contrib.staticfiles',
]

MIDDLEWARE = [
    'django.middleware.security.SecurityMiddleware',
    'django.contrib.sessions.middleware.SessionMiddleware',
    'django.middleware.common.CommonMiddleware',
    'django.middleware.csrf.CsrfViewMiddleware',
    'django.contrib.auth.middleware.AuthenticationMiddleware',
    'django.contrib.messages.middleware.MessageMiddleware',
    'django.middleware.clickjacking.XFrameOptionsMiddleware',
]

ROOT_URLCONF = 'demo01.urls'

TEMPLATES = [
    {
        'BACKEND': 'django.template.backends.django.DjangoTemplates',
        'DIRS': [os.path.join(BASE_DIR, 'templates')]
        ,
        'APP_DIRS': True,
        'OPTIONS': {
            'context_processors': [
                'django.template.context_processors.debug',
                'django.template.context_processors.request',
                'django.contrib.auth.context_processors.auth',
                'django.contrib.messages.context_processors.messages',
            ],
        },
    },
]

WSGI_APPLICATION = 'demo01.wsgi.application'


# Database
# https://docs.djangoproject.com/en/1.11/ref/settings/#databases

DATABASES = {
    'default': {
        'ENGINE': 'django.db.backends.sqlite3',
        'NAME': os.path.join(BASE_DIR, 'db.sqlite3'),
    }
}


# Password validation
# https://docs.djangoproject.com/en/1.11/ref/settings/#auth-password-validators

AUTH_PASSWORD_VALIDATORS = [
    {
        'NAME': 'django.contrib.auth.password_validation.UserAttributeSimilarityValidator',
    },
    {
        'NAME': 'django.contrib.auth.password_validation.MinimumLengthValidator',
    },
    {
        'NAME': 'django.contrib.auth.password_validation.CommonPasswordValidator',
    },
    {
        'NAME': 'django.contrib.auth.password_validation.NumericPasswordValidator',
    },
]


# Internationalization
# https://docs.djangoproject.com/en/1.11/topics/i18n/

LANGUAGE_CODE = 'en-us'

TIME_ZONE = 'UTC'

USE_I18N = True

USE_L10N = True

USE_TZ = True


# Static files (CSS, JavaScript, Images)
# https://docs.djangoproject.com/en/1.11/howto/static-files/


# STATIC_URL是TATICFILES_DIRS的别名
STATIC_URL = '/static/'
#STATICFILES_DIRS = (
#    os.path.join(BASE_DIR, 'static'),
#)

STATIC_ROOT = os.path.join(BASE_DIR, "static/")

ALLOWED_HOSTS = ['*']
拉取所有需要的static file 到同一个目录
python manage.py collectstatic
sudo /usr/sbin/nginx
配置uwsgi
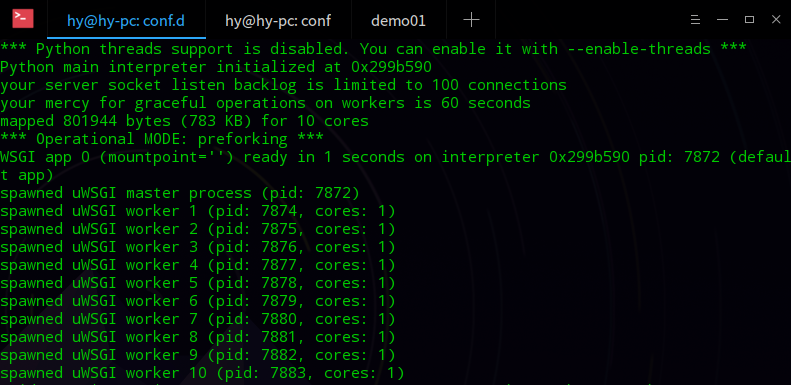
# mysite_uwsgi.ini file
[uwsgi]

# Django-related settings
# the base directory (full path)
chdir           = /home/hy/mnt/demo01
# Django's wsgi file
module          = demo01.wsgi
# the virtualenv (full path)

# process-related settings
# master
master          = true
# maximum number of worker processes
processes       = 10
# the socket (use the full path to be safe
socket          = 127.0.0.1:8000
# ... with appropriate permissions - may be needed
# chmod-socket    = 664
# clear environment on exit
vacuum          = true
virtualenv = /home/hy/.virtualenvs/mingren01

logto = /tmp/mylog.log
启动django
uwsgi -i uwsgi.ini
注:如果还有数据库,media资源,可把相应配置打开,数据入库(后续课程会继续介绍)

 浙公网安备 33010602011771号