Android学习之探究Fragment
•碎片是什么
Fragment是一种可以嵌入在活动中的UI片段,能够让程序更加合理和充分地利用大屏幕的空间;
出现的初衷是为了适应大屏幕的平板电脑,可以将其看成一个小型Activity,又称作Activity片段。
使用Fragment可以把屏幕划分成几块,然后进行分组,进行一个模块化管理。
Fragment不能够单独使用,需要嵌套在Activity中使用,其生命周期也受到宿主Activity的生命周期的影响
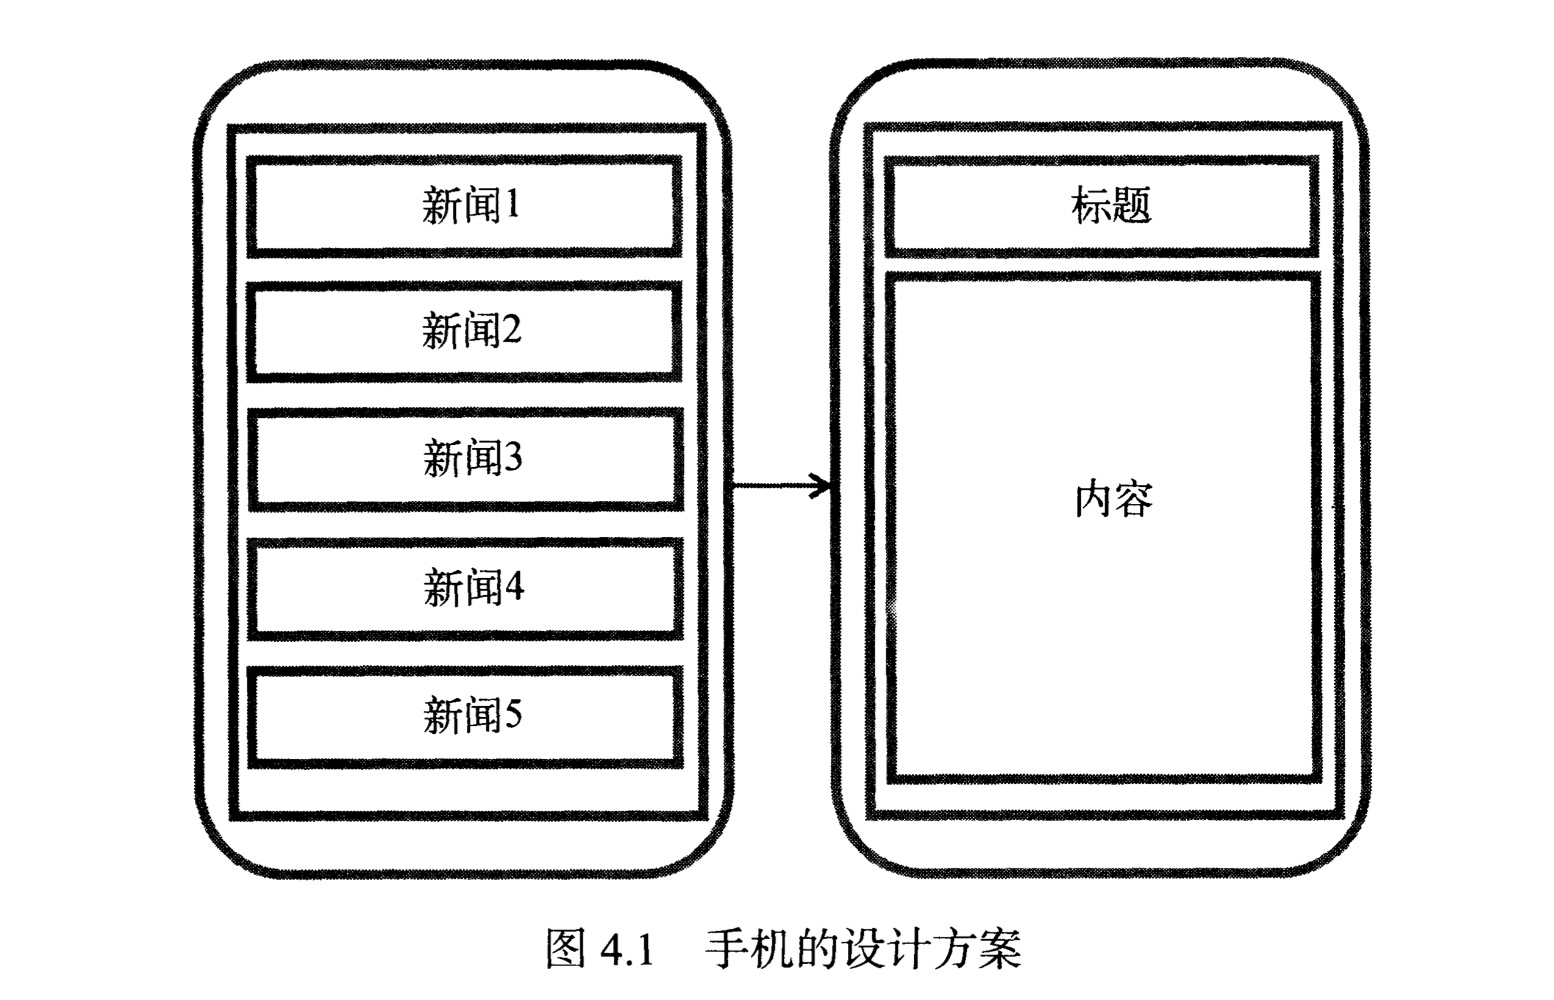
想象我们正在开发一个新闻应用,其中一个界面使用 RecyclerView 展示了一组新闻的标题;
当点击其中一个标题时,就打开另一个界面显示新闻的详细内容。
如果是在手机中设计,我们可以将新闻标题列表放在一个活动中,将新闻的详细内容放到另一个活动中。
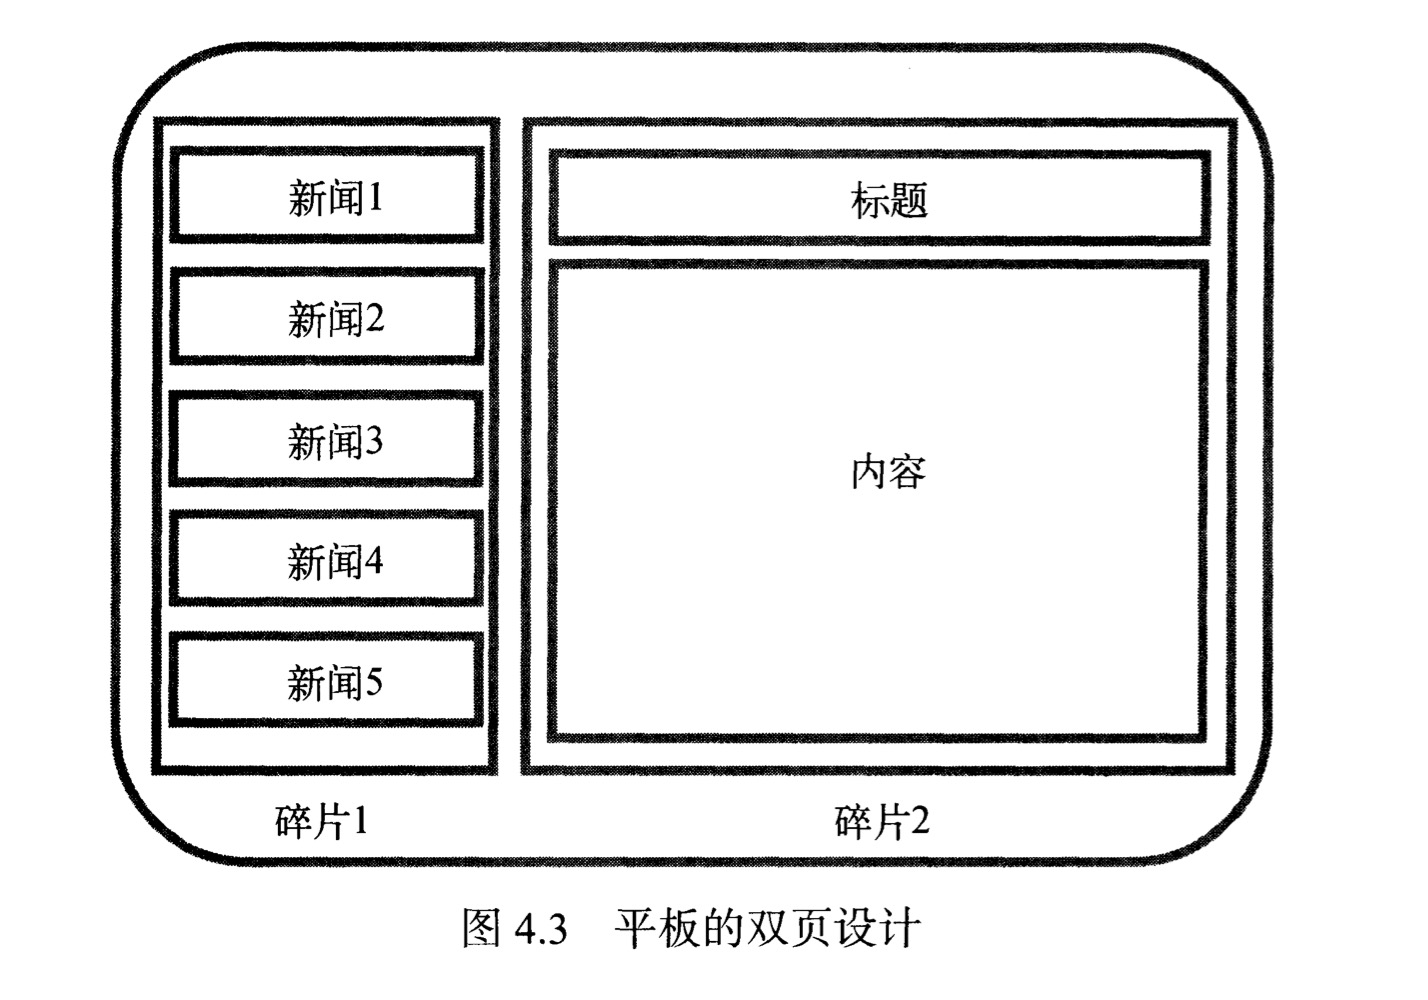
可如果在平板上也这么设计,那么新闻标题列表将会被拉长至填充整个平板的屏幕;
而新闻标题一般都不会太长,这将导致界面上有大量的空白区域。
因此,更好的设计方案是将新闻列表界面和新闻详细内容界面分别放在两个碎片中;
然后在同一个活动里引入这两个碎片,这样就可以将屏幕空间充分地利用起来了。

新建一个左侧碎片布局 left_fragment.xml;•碎片的简单用法——静态加载
准备工作
首先新建一个项目,选择 Empty Activity 选项;
这样系统为我们自动生成了 MainActivity.java 和 activity_main.xml 文件;
left_fragment.xml
<?xml version="1.0" encoding="utf-8"?>
<LinearLayout xmlns:android="http://schemas.android.com/apk/res/android"
    android:layout_width="match_parent"
    android:layout_height="match_parent"
    android:orientation="vertical"
    android:gravity="center">

    <Button
        android:id="@+id/btn"
        android:layout_width="wrap_content"
        android:layout_height="wrap_content"
        android:text="Button"
        android:textSize="30sp"
        android:textAllCaps="false"
        />
</LinearLayout>
这个布局非常的简单,只放置了一个按钮,并让它居中显示。
然后新建右侧布局 right_fragment.xml;
right_fragment.xml
<?xml version="1.0" encoding="utf-8"?>
<LinearLayout xmlns:android="http://schemas.android.com/apk/res/android"
    android:layout_width="match_parent"
    android:layout_height="match_parent"
    android:orientation="vertical"
    android:background="@color/green">

    <TextView
        android:id="@+id/tv"
        android:layout_width="wrap_content"
        android:layout_height="wrap_content"
        android:layout_gravity="center_horizontal"
        android:text="this is right fragment!"
        android:textSize="30sp"
        />
</LinearLayout>
可以看到,我们将这个布局的背景设置成了绿色,并放置了一个 TextView 用于显示一段文本;
接着新建一个 LeftFragment 类,并让它继承自 Fragment;
不论是看《第一行代码》,还是网上查阅资料;
有关 Fragment 导入包的问题,他们都推荐导入 support-v4 中的 android.support.v4.app.Fragment 包;
并且还都做了解释,令人信服;
——来自某博客的解释
——来自《第一行代码》的解释
使用的目的,大概是为了兼容不同的 Android 版本;
但作为初学者,目前还不需要考虑版本兼容的问题;
我们的首要任务就是先学会如何使用,所以直接使用 Android Studio 推荐的包即可;
不要浪费太多的精力放在包的问题上;
为什么这么说呢?
因为本着刨根问底的态度,我尝试了如何使用 support.v4 包,然后,引发了一些列问题;
又是百度,于是添加包,浪费时间不说,还学不到什么知识;
好了,废话暂且说这么多,接着步入正题;
LeftFragment.java
//在这里,我用的 Android Studio 提供的  import androidx.fragment.app.Fragment; 包;
import androidx.fragment.app.Fragment;

public class LeftFragment extends Fragment {

    @Nullable
    @Override
    public View onCreateView(@NonNull LayoutInflater inflater, @Nullable ViewGroup container, @Nullable Bundle savedInstanceState) {
        View  view = inflater.inflate(R.layout.left_fragment,container,false);
        return view;
    }
}
这里仅仅是重写了 Fragment 的 onCreateView() 方法;
然后在这个方法中通过 LayoutInflater 的 inflate() 方法将刚定义的 left_fragment.xml 布局动态加载进来;
接着,我们用同样的方法新建一个 RightFragment 类;
RightFragment.java
public class RightFragment extends Fragment {

    @Nullable
    @Override
    public View onCreateView(@NonNull LayoutInflater inflater, @Nullable ViewGroup container, @Nullable Bundle savedInstanceState) {
        View  view = inflater.inflate(R.layout.right_fragment,container,false);
        return view;
    }
}
接下来修改 activity_main.xml 中的代码;
activity_main.xml
<?xml version="1.0" encoding="utf-8"?>
<LinearLayout xmlns:android="http://schemas.android.com/apk/res/android"
    android:layout_width="match_parent"
    android:layout_height="match_parent"
    android:orientation="horizontal">

    <fragment
        android:id="@+id/left_fragment"
        android:name="com.example.testfragment.LeftFragment"
        android:layout_width="0dp"
        android:layout_height="match_parent"
        android:layout_weight="1"
        />

    <fragment
        android:id="@+id/right_fragment"
        android:name="com.example.testfragment.RightFragment"
        android:layout_width="0dp"
        android:layout_height="match_parent"
        android:layout_weight="2"
        />

</LinearLayout>
在该布局中,通过 <fragment> 标签添加碎片,并通过 android:name 属性来显示指明要添加的碎片类名;
注意一定要将类的包名也加上;
这样,一个简单的碎片示例就写好了;
关于静态加载的流程如下
定义Fragment的xml布局文件
自定义Fragment类,继承自 Fragment类 或其子类
- 同时实现 onCreateView() 方法
- 在方法中,通过 LayoutInflater.inflate() 方法加载布局文件,接着返回其 View
在需要加载 Fragment 的 Activity 对应布局文件中,将 <fragment>的 name 属性设为全限定类名,即包名.fragment
最后在 MainActivity 中调用 setContentView() 加载布局文件即可


•运行效果
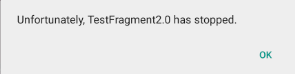
此处有坑
activity_main.xml 中添加的 <fragment> 标签一定要设置 android:id 属性;
不然,调试的时候,会出 bug;

•进阶用法——动态加载
在静态加载的基础上继续完善,新建 another_right_fragment.xml 文件;another_right_fragment.xml
<?xml version="1.0" encoding="utf-8"?>
<LinearLayout xmlns:android="http://schemas.android.com/apk/res/android"
    android:layout_width="match_parent"
    android:layout_height="match_parent"
    android:orientation="vertical"
    android:background="@color/yello">

    <TextView
        android:id="@+id/tv"
        android:layout_width="wrap_content"
        android:layout_height="wrap_content"
        android:layout_gravity="center_horizontal"
        android:text="this is another right fragment!"
        android:textSize="30sp"
        />
</LinearLayout>
这个布局文件的代码和 right_fragment.xml 中的代码基本相同,只是将背景色改成了黄色;
并将显示的文字改了改。
然后新建 AnotherRightFragment 类作为另一个右侧碎片;
AnotherRightFragment.java
public class AnotherRightFragment extends Fragment {

    @Nullable
    @Override
    public View onCreateView(@NonNull LayoutInflater inflater, @Nullable ViewGroup container, @Nullable Bundle savedInstanceState) {
        View  view = inflater.inflate(R.layout.another_right_fragment,container,false);
        return view;
    }
}
修改 activity_main.xml 中的代码;
activity_main.xml
<?xml version="1.0" encoding="utf-8"?>
<LinearLayout xmlns:android="http://schemas.android.com/apk/res/android"
    android:layout_width="match_parent"
    android:layout_height="match_parent"
    android:orientation="horizontal">

    <fragment
        android:id="@+id/left_fragment"
        android:name="com.example.testfragment.LeftFragment"
        android:layout_width="0dp"
        android:layout_height="match_parent"
        android:layout_weight="1"
        />

    <LinearLayout
        android:id="@+id/right_layout"
        android:layout_width="0dp"
        android:layout_height="match_parent"
        android:layout_weight="2"
        android:orientation="vertical">

    </LinearLayout>

</LinearLayout>
可以看到,现在将右侧的 <fragment>控件 替换成了 <LinearLayout>布局;
下面,我们将在代码中向 <LinearLayout> 里添加内容,从而实现动态添加碎片的功能;
MainActivity.java
public class MainActivity extends AppCompatActivity implements View.OnClickListener{

    private Button btn;
    @Override
    protected void onCreate(Bundle savedInstanceState) {
        super.onCreate(savedInstanceState);
        setContentView(R.layout.activity_main);

        btn = findViewById(R.id.btn);
        btn.setOnClickListener(this);
        replaceFragment(new RightFragment());
    }

    @Override
    public void onClick(View v) {
        switch(v.getId()){
            case R.id.btn:
                replaceFragment(new AnotherRightFragment());
                break;
        }
    }
    private void replaceFragment(Fragment fragment) {
        FragmentManager fragmentManager = getSupportFragmentManager();
        FragmentTransaction transaction = fragmentManager.beginTransaction();   // 开启一个事务
        transaction.replace(R.id.right_layout, fragment);
        transaction.commit();
    }
}
可以看到,首先我们给左侧碎片中的按钮注册了一个点击事件,然后调用 replaceFragment() 方法动态添加了 RightFragment 碎片;
当点击按钮时,又会调用 replaceFragment() 方法将右侧碎片替换成 AnotherRightFragment。
结合 replaceFragment() 方法中的代码可以看出,动态添加碎片主要分为 5 步;
动态加载Fragment的流程如下
- 创建待添加的碎片实例
- 通过 getSupportFragmentManager() 方法获得 FragmentManager 对象
- 通过 FragmentManager.beginTransaction() 方法开启一个事务
- 通过 add() 方法向容器内添加碎片或者通过 repalce() 方法替换碎片
- 一般使用 replace() 方法实现,需要传入容器的 id 和待添加的碎片实例
- 最后调用 commit() 方法提交事务
•运行效果
•回退栈
在动态加载碎片的运行效果中,通过点击 Button,添加了一个新的碎片;
在最后,我按下了 Back 键,你会发现,程序直接退出了;
如果这里想模拟类似于返回栈的效果,按下 Back 键后可以回到上一个碎片,该如何实现呢?
其实很简单,FragmentTransaction 中提供了一个 addToBackStack() 方法,可以用于将一个事务添加到返回栈;
添加一个Fragment事务到回退栈
FragmentTransaction.addToBackStack(String)
简单示例
private void replaceFragment(Fragment fragment) {
    FragmentManager fragmentManager = getSupportFragmentManager();
    FragmentTransaction transaction = fragmentManager.beginTransaction();
    transaction.replace(R.id.right_layout, fragment);
    transaction.addToBackStack(null);   //添加进回退栈
    transaction.commit();
}
replace 是 remove 和 add 的合体,并且如果不添加事务到回退栈,前一个 Fragment 实例会被销毁。这里,我们假设前一个 Fragment 实例为 A,替换后的 Fragment 实例为 B;这里很明显,我们调用transaction.addToBackStack(null); 将事务 A 添加到了回退栈;所以被替换的 A 不会被销毁,但是视图层次依然会被销毁,即会调用 onDestoryView和onCreateView;修改 MainActivity 中的代码;
MainActivity.java
public class MainActivity extends AppCompatActivity implements View.OnClickListener{

    private Button btn;
    @Override
    protected void onCreate(Bundle savedInstanceState) {
        super.onCreate(savedInstanceState);
        setContentView(R.layout.activity_main);

        btn = findViewById(R.id.btn);
        btn.setOnClickListener(this);
        replaceFragment(new RightFragment());
    }

    @Override
    public void onClick(View v) {
        switch(v.getId()){
            case R.id.btn:
                replaceFragment(new AnotherRightFragment());
                break;
        }
    }
    private void replaceFragment(Fragment fragment) {
        FragmentManager fragmentManager = getSupportFragmentManager();
        FragmentTransaction transaction = fragmentManager.beginTransaction();   // 开启一个事务
        transaction.replace(R.id.right_layout, fragment);
        transaction.addToBackStack(null);
        transaction.commit();
    }
}
这里我们在事务提交之前调用了 FragmentTransaction.addToBackStack() 方法;
它可以接受一个名字用于描述返回栈的状态,一般传入 null 即可;
•运行效果
•小结
Fragment的 onCreateView() 方法返回 Fragment 的 UI 布局
- 需要注意的是inflate()的第三个参数是false
- 因为在Fragment内部实现中,会把该布局添加到 container 中
- 如果设为true,那么就会重复做两次添加,则会抛如下异常
- Caused by: java.lang.IllegalStateException: The specified child already has a parent. You must call removeView() on the child’s parent first.
动态加载 Fragment 中,FragmentTransaction 类提供了方法完成增删等操作,完成后调用FragmentTransaction.commit()方法提交修改
- transaction.add():往Activity里面添加一个片段
- transaction.remove():从Activity中移除一个Fragment,如果被移除的 Fragment 没有添加到回退栈,这个Fragment实例将会被销毁
- transaction.replace():使用另一个 Fragment 替换当前的,实际上是remove()然后add()的合体
- transaction.hide() :隐藏当前Fragment,仅不可见,不会销毁
- transaction.show() :显示之前隐藏的Fragment
FragmentManager 拥有回退栈(BackStack),类似于Activity的任务栈
- 如果添加了该语句,就把该事务加入回退栈,当用户点击返回按钮,会回退该事务
- 回退指的是如果事务是 add(frag1),那么回退操作就是remove(frag1)
- 如果没添加该语句,用户点击返回按钮会直接销毁Activity
•声明
参考链接:【Fragment基本使用】

 浙公网安备 33010602011771号