ssm整合实现CRUD及分页
目录
前言
感谢尚硅谷提供的免费的课程资源,让我们一起进入ssm整合的课程学习中吧。
增删改操作(Rest风格)
| 功能 | 地址 | 请求方式 |
|---|---|---|
| 删除 | /emp/{empId}/{pageNo} | DELETE |
| 前往新增页面 | /emp/add | view-controller |
| 提交新增表单 | /emp | POST |
| 前往更新页面 | /emp/{empId}/{pageNo} | GET |
| 提交更新表单 | /emp | PUT |
1 实现分页功能
我们可以利用mybatis中的分页插件功能来实现快速分页。
1. 1 配置文件操作步骤
①导入依赖
<!-- https://mvnrepository.com/artifact/com.github.pagehelper/pagehelper -->
<dependency>
    <groupId>com.github.pagehelper</groupId>
    <artifactId>pagehelper</artifactId>
    <version>5.2.0</version>
</dependency>
②配置
<!-- 配置 SqlSessionFactoryBean -->
<bean id="sqlSessionFactory" class="org.mybatis.spring.SqlSessionFactoryBean">

    ……

    <!-- 在 plugins 属性中配置 Mybatis 插件 -->
    <property name="plugins">
        <array>
            <bean class="com.github.pagehelper.PageInterceptor">
                <property name="properties">
                    <props>
                        <!-- 设置 reasonable 为 true 表示将页码进行合理化修正。页码的有效范围:1~总页数 -->
                        <prop key="reasonable">true</prop>

                        <!-- 数据库方言:同样都是 SQL 语句,拿到不同数据库中,在语法上会有差异 -->
                        <!-- 默认情况下,按照 MySQL 作为数据库方言来运行 -->
                        <prop key="helperDialect">mysql</prop>
                    </props>
                </property>
            </bean>
        </array>
    </property>

</bean>
③PageHelper 非侵入式的体现
PageHelper.startPage(pageNo, pageSize);
开启分页功能,就在 SQL 语句后面附加 LIMIT 子句并查询总记录数;不开启就还是按照原样查询。分页功能对原有的 Mapper 接口、SQL 语句没有任何影响。这个效果可以称之为是非侵入式,也可以说是可插拔的。
1.2 案例实现
① 首页超链接
<a th:href="@{/get/page/1}">显示分页数据</a>
② handler方法
使用 @PathVariable 注解修饰一个形参,SpringMVC 就会将匹配到的值从形参这里传
@RequestMapping("/get/page/{pageNo}")
public String getPage(
        @PathVariable("pageNo") Integer pageNo,
        Model model) {

    // PageInfo 对象封装了和分页相关的所有信息
    PageInfo<Emp> pageInfo = empService.getPageInfo(pageNo);

    // 将 PageInfo 对象存入模型
    model.addAttribute("pageInfo", pageInfo);

    return "emp-page";
}
③ Service及实现类
PageInfo<Emp> getPageInfo(Integer pageNo);
@Override
public PageInfo<Emp> getPageInfo(Integer pageNo) {

    // 1、确定每页显示数据的条数
    int pageSize = 5;

    // 2、设定分页数据:开启分页功能。开启后,后面执行的 SELECT 语句会自动被附加 LIMIT 子句,
    // 而且会自动查询总记录数
    PageHelper.startPage(pageNo, pageSize);

    // 3、正常执行查询
    List<Emp> empList = empMapper.selectAll();

    // 4、封装为 PageInfo 对象返回
    return new PageInfo<>(empList);
}
④ mapper及mapper.xml配置文件
List<Emp> selectAll();
<!--    List<Emp> selectAll();-->
    <select id="selectAll" resultType="Emp">
        select  emp_id,emp_name,emp_salary from t_emp
    </select>
⑤ 页面展示(emp-page.html)
1)显示数据
<!DOCTYPE html>
<html lang="en" xmlns:th="http://www.thymeleaf.org">
<head>
    <meta charset="UTF-8">
    <title>Title</title>
  <style type="text/css">
    table{
      border-collapse: collapse;
      margin: 0px auto 0px auto;
    }
    table th,td {
      border: 1px solid black;
      text-align: center;
    }
  </style>
</head>
<body>
<table>
  <tr>
    <th>ID</th>
    <th>NAME</th>
    <th>SALARY</th>

  </tr>
  <tbody th:if="${#lists.isEmpty(pageInfo.list)}">
    <tr>
      <td colspan="3">抱歉,没有查询到数据!</td>
    </tr>
  </tbody>
  <tbody th:if="${not #lists.isEmpty(pageInfo.list)}">
    <tr th:each="emp : ${pageInfo.list}">
      <td th:text="${emp.empId}">这里显示员工ID</td>
      <td th:text="${emp.empName}">这里显示员工Name</td>
      <td th:text="${emp.empSalary}">这里显示员工Salary</td>
    </tr>
  <tr>
    <td colspan="3">
<!--      判断是否是上一页-->
      <span th:if="${pageInfo.hasPreviousPage}">
        <a th:href="@{/get/page/1}">首页</a>
        <!-- 不能是@{/get/page/prePage},如果这样写就变成路径了。-->
      <a th:href="@{/get/page/}+${pageInfo.prePage}">上一页</a>
      </span>

<!--      判断是否是当前页,如果不是,则显示超链接-->
      <span th:each="navigator:${pageInfo.navigatepageNums}">
        <a th:if="${navigator != pageInfo.pageNum}"
           th:href="@{/get/page/}+${navigator}"
           th:text="'['+${navigator}+']'"></a>
<!--判断是否是当前页,如果是,则显示页码-->
        <span th:if="${navigator==pageInfo.pageNum}"
              th:text="'['+${navigator}+']'"></span>
      </span>

      <span th:if="${pageInfo.hasNextPage}">
        <a th:href="@{/get/page/}+${pageInfo.nextPage}">下一页</a>
      <a th:href="@{/get/page/}+${pageInfo.pages}">最后一页</a>
      </span>

      <span th:text="${pageInfo.pageNum} + '/' +${pageInfo.pages}"></span>

    </td>
  </tr>

  </tbody>
</table>
<a th:href="@{/}">首页</a>
</body>
</html>
⑥为什么是PageInfo而不是Page
1)List接口的具体实现
当我们开启了分页功能后,查询一个 List 集合,实际返回的是:com.github.pagehelper.Page 类型。这个 Page 类继承了 ArrayList,所以也兼容 List 接口类型。
2)提出问题
如果我们将 Page 类型的对象存入模型,转发到视图模板上显示数据,会存在一个问题:视图模板技术只承认这个对象是一个 List 集合,不识别 List 集合之外的其它属性。
这一点在其他场合也需要注意:我们开发时尽量不要继承 ArrayList、HashMap 等类似的集合实现类。如果继承了,那么页面视图模板技术或其他表达式往往只能识别我们的对象是一个集合,而无法访问额外封装的其他属性。
所以 Page 对象需要封装为 PageInfo,让 list、pageNum 等等数据作为 PageInfo 对象的属性;PageInfo 本身并不是一个 List 类型的集合。
2 实现删除功能
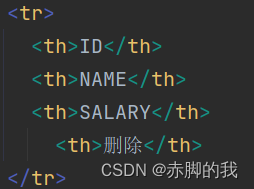
在emp-page.html页面
2.1 编写删除超链接并绑定点击事件

我们最终要实现的被解析出来的超链接是/emp/{empId}/{pageNo} .
onclick="convertMethod(this)" 表示点击这个超链接时,调用 convertMethod() 函数
- this 代表当前超链接对象
- event 是代表当前事件的事件对象
请求用@{},取值用${}

2.2 编写通用表单
思路:
超链接 ----GET请求
表单-------POST请求
先借助表单将超连接的GET请求转换为POST请求,然后使用rest语法将DELETE请求。
<!--组件名称:通用表单-->
<!--作用:将删除超链接的GET请求转换为POST,并携带_method请求参数-->
    <form id="covertFrom" method="post">

    <!-- 请求参数作用:告诉服务器端 hiddenHttpMethodFilter 要转换的目标请求方式 -->
    <!-- 请求参数名:_method,这是 hiddenHttpMethodFilter 中规定的 -->
    <!-- 请求参数值:delete,这是因为我们希望服务器端将请求方式最终转换为 delete -->
        <input type="hidden" name="_method" value="delete"/>
    </form>
2.3 编写单击响应函数
<!--编辑点击响应函数-->
    <script type="text/javascript">
        function convertMethod(anchorElement,event) {
           // 获取超链接原本要访问的目标地址
            var targetURL = anchorElement.href;

			// 获取表单对象
            var formEle = document.getElementById("covertFrom");

			// 把超链接原本要访问的地址设置给表单的 action 属性
            formEle.action = targetURL;

			// 提交表单
            formEle.submit();

             // 取消控件的默认行为:让超链接不会跳转
            event.preventDefault();

        }
</script>
2.4 mapper方法
void deleteByPrimaryKey(Integer empId);
2.5 mapper.xml
<!--    void deleteByPrimaryKey(Integer empId);-->
<delete id="deleteByPrimaryKey" >
    delete from t_emp where emp_id=#{empId}
</delete>
2.6 service和serviceImpl
service
void doRemove(Integer empId);
serviceImpl
//propagation:事务传播机制--不管是否存在事务,
						//都创建一个新的事务,原来的挂起,新的执行完毕,继续执行老的事务
    //rollbackFor:用来指明回滚的条件是哪些异常类或者异常类名。
    @Transactional(
            propagation = Propagation.REQUIRES_NEW,
            rollbackFor = Exception.class
    )
    @Override
    public void doRemove(Integer empId) {

        empMapper.deleteByPrimaryKey(empId);
    }
2.7 handler方法
@RequestMapping(value="/emp/{empId}/{pageNo}",method = RequestMethod.DELETE)
    public String doRemove(
           @PathVariable("empId")Integer empId,
           @PathVariable("pageNo")Integer pageNo
    ){
        empService.doRemove(empId);

        return "redirect:/get/page/" + pageNo;

    }
3 前往表单页面(emp-add.html)

3.1 编写超链接
我们创建一个跳转页面,当点击添加数据的时候就跳转到emp.add.html页面。
<a th:href="@{/emp/add}">添加数据</a><br>
3.2 在spring-mvc.xml配置view-controller
<mvc:view-controller path="/emp/add" view-name="emp-add"/>
3.3 创建视图模板页面
action属性规定当提交表单时,向何处发送表单数据
<!DOCTYPE html>
<html lang="en" xmlns:th="http://www.thymeleaf.org">
<head>
    <meta charset="UTF-8">
    <title>添加数据</title>
</head>
<body>
<form th:action="@{/emp}" method="post">
    姓名:<input type="text" name="empName"/><br/>
    工资:<input type="text" name="empSalary"/><br/>
    <button type="submit">保存</button>

</form>
</body>
</html>
4 保存表单
4.1 mapper
void insert(Emp emp);
4.2 mapper.xml配置文件
<!--    void  insert(Emp emp);-->
<insert id="insert" >
<!--写法1-->
   <!--insert into t_emp(emp_name,emp_salary) values(#{empName},#{empSalary})-->
<!--写法2-->
   insert  into t_emp values(null,#{empName},#{empSalary})
</insert>
4.3 service和实现类
service
void save(Emp emp);
serviceImpl
 @Transactional(
            propagation = Propagation.REQUIRES_NEW,
            rollbackFor = Exception.class
    )
    @Override
    public void save(Emp emp) {
        empMapper.insert(emp);
    }
4.4 handler方法
注意:
此处获取参数我们使用的是实体类,这个要求参数和数据库中的表要一样,属性对应。
   @RequestMapping(value="/emp",method = RequestMethod.POST)
   public String doSave(
           //使用实体类接收发送过来的请求参数
           Emp emp ){
       empService.save(emp);
       //跳转到最后一页,Integer.MAX_VALUE---为了确保直接前往最后一页
       return "redirect:/get/page/"+Integer.MAX_VALUE;
   }
5 更新:表单回显(其实就是查询你点击要更新的数据,显示在页面上)
5.1 编写超连接
<td>
           <a th:href="@{/emp/}+${emp.empId}+'/'+${pageInfo.pageNum}">更新</a>
       </td>
5.2 mapper接口
Emp selectByPrimaryKey(Integer empId);
5.3 mapper配置文件
<!--    Emp selectByPrimaryKey(Integer empId);-->
<select id="selectByPrimaryKey" resultType="emp">
select emp_id,emp_name,emp_salary from t_emp where emp_id = #{empId}
</select>
5.4 service及实现类
serviceImpl
@Override
    public Emp getEmpById(Integer empId) {

        return empMapper.selectByPrimaryKey(empId);
    }
service
Emp getEmpById(Integer empId);
5.5 handler
@RequestMapping(value="/emp/{empId}/{pageNo}",method = RequestMethod.GET)
    public String  doFormResisPlayer(
            @PathVariable("empId") Integer empId,
            @PathVariable("pageNo") Integer pageNo,
            Model model
    ){
        Emp emp = empService.getEmpById(empId);
        //将实体类对象存入模型
        model.addAttribute("emp",emp);
        return "emp-edit";
    }
为什么要用Model模型,是因为我们要将查询到的数据存入模型中。
返回到更新页面,意味着我们要创建一个emp-edit.html页面。
5.6 编辑emp-edit.html
<!DOCTYPE html>
<html lang="en" xmlns:th="http://www.thymeleaf.org">
<head>
    <meta charset="UTF-8">
    <title>更新</title>
</head>
<body>
<form th:action="@{/emp}" method="post">
  <input type="hidden" name="_method" value="put"/>
  <input type="hidden" name="empId" th:value="${emp.empId}"/>
  <input type="hidden" name="pageNo" th:value="${pageNo}"/>

  姓名:<input type="text" name="empName" th:value="${emp.empName}"/><br/>
  工资:<input type="text" name="empSalary" th:value="${emp.empSalary}"/><br/>
  <button type="submit">更新</button>

</form>
</body>
</html>

6 提交表单
6.1 mapper接口方法
void updateByPrimaryKey(Emp emp);
6.2 mapper配置文件
<!--    void updateByPrimaryKey(Emp emp);-->
    <update id="updateByPrimaryKey">
        update t_emp  set emp_name=#{empName},emp_salary=#{empSalary}
        where emp_id = #{empId}
    </update>
6.3 service及serviceImpl方法
  @Transactional(
           propagation = Propagation.REQUIRES_NEW,
           rollbackFor = Exception.class
   )
   @Override
   public void doUpdate(Emp emp) {
       empMapper.updateByPrimaryKey(emp);
   }
void doUpdate(Emp emp);
6.4 handler方法
   @RequestMapping(value = "/emp",method = RequestMethod.PUT)
   public String doUpdate(
           Emp emp,
           @PathVariable("pageNo") Integer pageNo
   ){
       empService.doUpdate(emp);

       return "redirect:/get/page"+pageNo;
   }

