
apollo安装部署
环境:
OS:Centos 7
apollo:2.4
1.安装mysql
参考安装连接
https://www.cnblogs.com/hxlasky/p/12346365.html
2.安装好java环境
[root@node2 conf]# java -version
java version "21.0.6" 2025-01-21 LTS
Java(TM) SE Runtime Environment (build 21.0.6+8-LTS-188)
Java HotSpot(TM) 64-Bit Server VM (build 21.0.6+8-LTS-188, mixed mode, sharing)
3.安装好git
[root@node2 apoll]# git version
git version 1.8.3.1
4.下载安装包
wget https://github.com/apolloconfig/apollo/releases/download/v2.4.0/apollo-configservice-2.4.0-github.zip
wget https://github.com/apolloconfig/apollo/releases/download/v2.4.0/apollo-adminservice-2.4.0-github.zip
wget https://github.com/apolloconfig/apollo/releases/download/v2.4.0/apollo-portal-2.4.0-github.zip
wget https://github.com/apolloconfig/apollo/archive/refs/tags/v2.4.0.zip
5.创建目录解压部署包
mkdir -p /opt/{apollo-adminservice,apollo-configservice,apollo-portal,apollo-source}
6.解压安装包
[root@node2 apoll]# cd /soft/apoll
[root@node2 apoll]#unzip apollo-2.4.0.zip -d /opt/apollo-source/
[root@node2 apoll]#unzip apollo-adminservice-2.4.0-github.zip -d /opt/apollo-adminservice/
[root@node2 apoll]#unzip apollo-configservice-2.4.0-github.zip -d /opt/apollo-configservice/
[root@node2 apoll]#unzip apollo-portal-2.4.0-github.zip -d /opt/apollo-portal/
7.修改apollo配置文件
说明:
apollo-adminservice和apollo-configservice使用同一个数据库:apolloconfigdb
apollo-portal使用另外一个库:apolloportaldb
Portal 服务只需要部署一个即可(数据库只需要一个),一个Portal可以管理多个环境.
每一个环境对应一套AdminService和ConfigService,每个环境需要对应一个数据库.
7.1 修改apollo-adminservice配置文件
cd /opt/apollo-adminservice/config
[root@node2 config]# ls
application-github.properties application.properties
vi application-github.properties
原来的
spring.datasource.url = jdbc:mysql://fill-in-the-correct-server:3306/ApolloConfigDB?characterEncoding=utf8
spring.datasource.username = FillInCorrectUser
spring.datasource.password = FillInCorrectPassword
修改为
spring.datasource.url = jdbc:mysql://192.168.1.106:3306/ApolloConfigDB?characterEncoding=utf8
spring.datasource.username = root
spring.datasource.password = mysql
7.2 修改apollo-configservice配置文件
[root@node2 config]#cd /opt/apollo-configservice/config
[root@node2 config]# vi application-github.properties
原来的:
# DataSource
spring.datasource.url = jdbc:mysql://fill-in-the-correct-server:3306/ApolloConfigDB?characterEncoding=utf8
spring.datasource.username = FillInCorrectUser
spring.datasource.password = FillInCorrectPassword
修改为
# DataSource
spring.datasource.url = jdbc:mysql://192.168.1.106:3306/ApolloConfigDB?characterEncoding=utf8
spring.datasource.username = root
spring.datasource.password = mysql
7.3 修改apollo-portal配置文件
[root@node2 config]# cd /opt/apollo-portal/config
vi application-github.properties
原来的:
# DataSource
spring.datasource.url = jdbc:mysql://fill-in-the-correct-server:3306/ApolloPortalDB?characterEncoding=utf8
spring.datasource.username = FillInCorrectUser
spring.datasource.password = FillInCorrectPassword
修改为:
# DataSource
spring.datasource.url = jdbc:mysql://192.168.1.106:3306/ApolloPortalDB?characterEncoding=utf8
spring.datasource.username = root
spring.datasource.password = mysql
8.创建数据库
/opt/mysql57/bin/mysql -h 192.168.1.106 -uroot -pmysql
create database ApolloPortalDB;
create database ApolloConfigDB;
9.apollo基础数据导入
/opt/mysql57/bin/mysql -h 192.168.1.106 -uroot -pmysql

use ApolloPortalDB;
source /opt/apollo-source/apollo-2.4.0/scripts/sql/src/apolloportaldb.sql;

use ApolloConfigDB;
source /opt/apollo-source/apollo-2.4.0/scripts/sql/src/apolloconfigdb.sql;
10.apollo启停命令
需要先启动mysql
/opt/mysql57/bin/mysqld_safe --defaults-file=/opt/mysql57/conf/my.cnf --user=mysql &
#启动服务
sh /opt/apollo-configservice/scripts/startup.sh
sh /opt/apollo-adminservice/scripts/startup.sh
sh /opt/apollo-portal/scripts/startup.sh


#停止服务
sh /opt/apollo-configservice/scripts/shutdown.sh
sh /opt/apollo-adminservice/scripts/shutdown.sh
sh /opt/apollo-portal/scripts/shutdown.sh
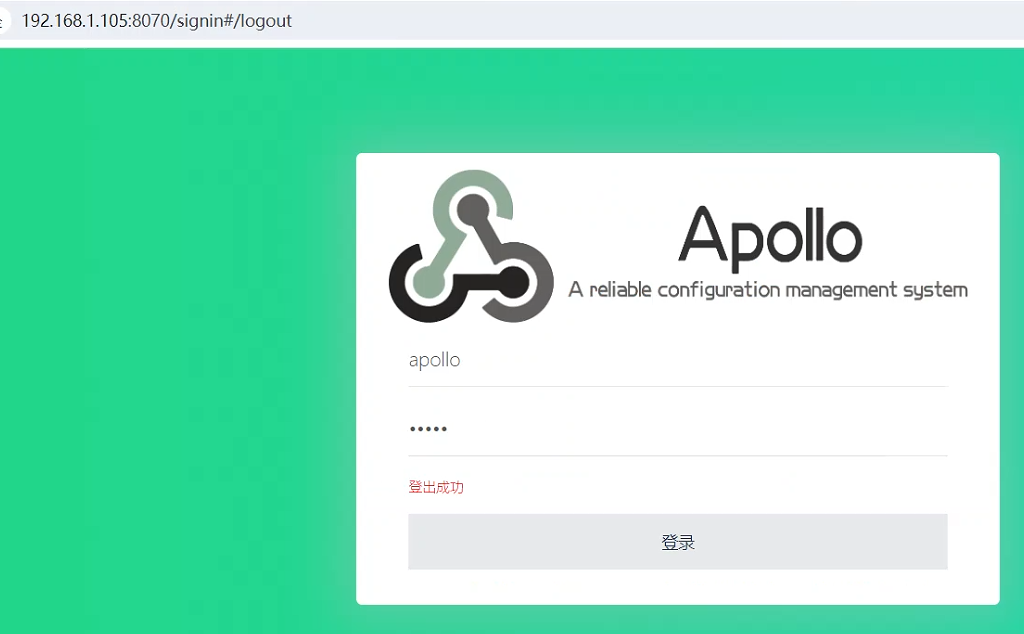
10.浏览器访问
http://192.168.1.105:8070
默认的账号密码是:
apollo/admin
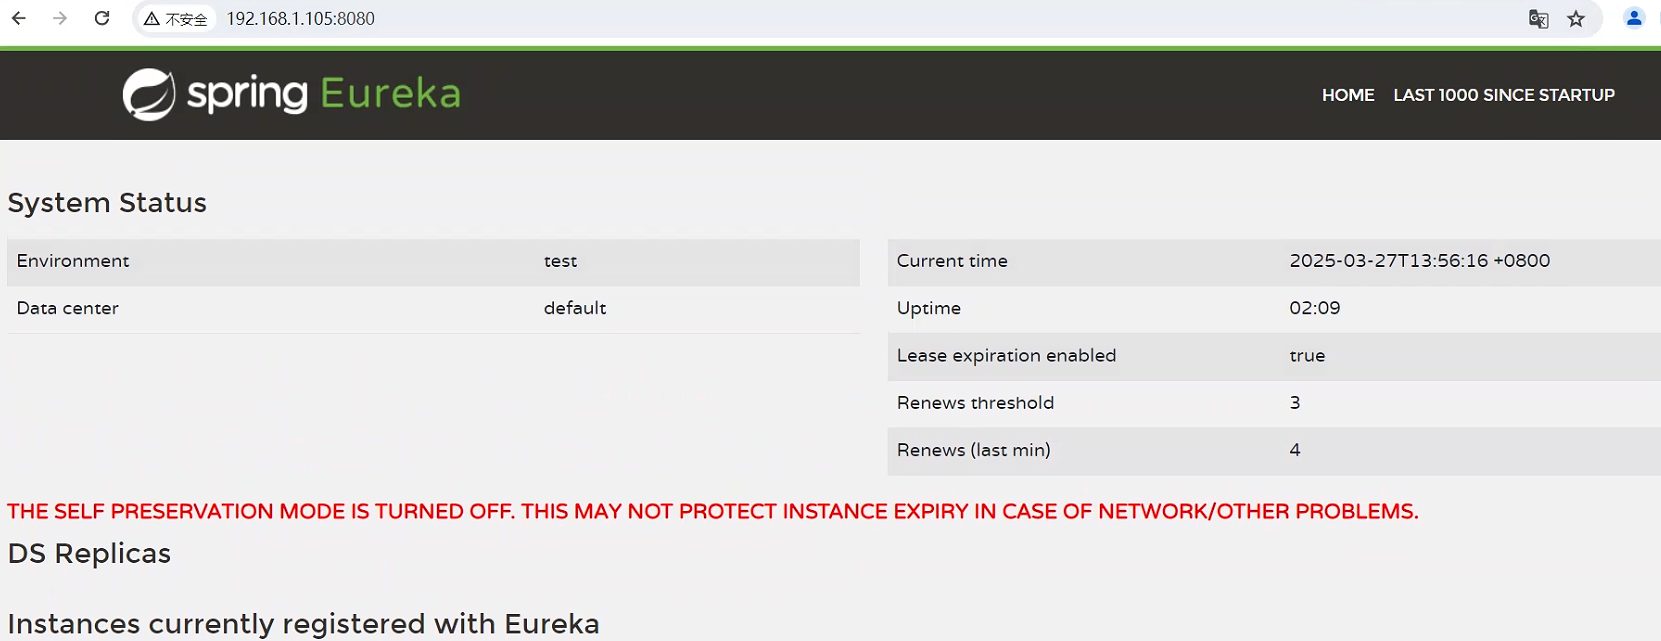
输入 http://192.168.1.105:8080 如果出现eureka 的管理界面,说明服务启动正常。
12.日志目录
日志目录存在如下目录
/opt/logs
13.遇到的错误
界面提示:系统出错,请联系系统管理员
解决办法:
/opt/mysql57/bin/mysql -h 192.168.1.106 -uroot -pmysql

mysql> use apolloconfigdb

mysql> select Id,`Key`,`Value` from serverconfig;
+----+------------------------------+-------------------------------+
| Id | Key                          | Value                         |
+----+------------------------------+-------------------------------+
|  1 | eureka.service.url           | http://localhost:8080/eureka/ |
|  2 | namespace.lock.switch        | false                         |
|  3 | item.key.length.limit        | 128                           |
|  4 | item.value.length.limit      | 20000                         |
|  5 | config-service.cache.enabled | false                         |
+----+------------------------------+-------------------------------+
5 rows in set (0.00 sec)
修改 eureka.service.url的localhost为服务器的ip地址
update serverconfig
  set `Value`='http://192.168.1.105:8080/eureka/'
where Id=1;
重启动
#停止服务
sh /opt/apollo-configservice/scripts/shutdown.sh
sh /opt/apollo-adminservice/scripts/shutdown.sh
sh /opt/apollo-portal/scripts/shutdown.sh

#启动服务
sh /opt/apollo-configservice/scripts/startup.sh
sh /opt/apollo-adminservice/scripts/startup.sh
sh /opt/apollo-portal/scripts/startup.sh
继续修改
vi /opt/apollo-portal/config/apollo-env.properties
原来的:
local.meta=http://localhost:8080
dev.meta=http://fill-in-dev-meta-server:8080
fat.meta=http://fill-in-fat-meta-server:8080
uat.meta=http://fill-in-uat-meta-server:8080
lpt.meta=${lpt_meta}
pro.meta=http://fill-in-pro-meta-server:8080
修改为:
local.meta=http://localhost:8080
dev.meta=http://192.168.1.105:8080
fat.meta=http://192.168.1.105:8080
uat.meta=http://192.168.1.105:8080
lpt.meta=${lpt_meta}
pro.meta=http://192.168.1.105:8080
重启动
#停止服务
sh /opt/apollo-configservice/scripts/shutdown.sh
sh /opt/apollo-adminservice/scripts/shutdown.sh
sh /opt/apollo-portal/scripts/shutdown.sh

#启动服务
sh /opt/apollo-configservice/scripts/startup.sh
sh /opt/apollo-adminservice/scripts/startup.sh
sh /opt/apollo-portal/scripts/startup.sh
14.添加uat环境
默认只有dev环境,通过修改数据库配置添加多个环境
待补充

 浙公网安备 33010602011771号