dotnet core nginx负载均衡
使用: dotnet core 3.1
创建项目
dotnet new webapi --name WebApi
创建valueController
using Microsoft.AspNetCore.Mvc;
using Microsoft.Extensions.Configuration;

namespace WebApi.Controllers
{
    [ApiController]
    [Route("api/[controller]")]
    public class ValueController : ControllerBase
    {
        public IConfiguration _configuration { get; }

        public ValueController(IConfiguration  Configuration)
        {
            _configuration = Configuration;
        }


        [HttpGet]
        public string get()
        {
            return _configuration["ip"] + ":" + _configuration["port"];
        }
    }
}
在ubuntu上运行
然后dotnet build编译,压缩成.zip,使用xshell把文件传到linux
输入rz(需安装),选择压缩包上传
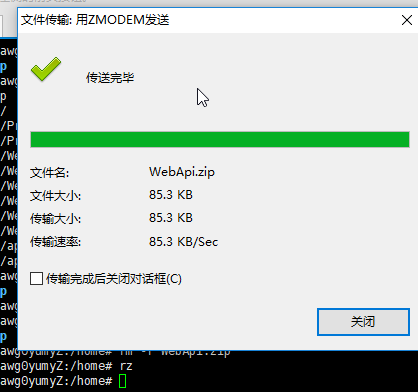
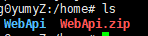
解压unzip WebApi.zip,删除rm -r WebApi.zip
如dotnet sdk没安装,请参考官网:https://docs.microsoft.com/zh-tw/dotnet/core/install/linux-package-manager-ubuntu-1604
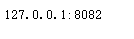
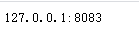
进入WebApi目录,运行启动以下代码(开启3个进程):
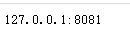
dotnet WebApi.dll --urls="http://*:8081" --ip="127.0.0.1" --port=8081 &
dotnet WebApi.dll --urls="http://*:8082" --ip="127.0.0.1" --port=8082 &
dotnet WebApi.dll --urls="http://*:8083" --ip="127.0.0.1" --port=8083 &
访问 api 地址
配置nginx文件
创建/etc/nginx/conf.d/WebApi.conf文件:
upstream webapi{
server localhost:8081;
server localhost:8082;
server localhost:8083;
}
server{
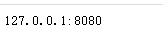
listen 8080;
server_name localhost;
location / {
proxy_pass http://webapi;
}
}
输入sudo nginx -t -c /etc/nginx/nginx.conf,测试nginx配置文件是否正确
然后输入sudo nginx -s reload -c /etc/nginx/nginx.conf重新加载配置
访问
使用8080端口访问,nginx会轮询切换

 浙公网安备 33010602011771号