Hazel引擎学习(一)
Project Setup
1.SetUp项目,生成的文件在bin目录下,生成的intermediate文件在bin-int目录下,大概是这么个目录结构
bin/Debug-x64/ProjectName/
bin-int/Debug-64x/ProjectName/
注意这里的当前路径都是取的该vxproj文件所在的路径,所以如下图所示,我这么写目录结构

各自对应的bin和bin-int都会在对应的项目文件夹里,如下图所示:

如果要想统一生成在同一个文件夹,能不能这么写:

然而这样VS会警告你,因为把不同的Project里生成的东西放在了同一个文件夹下,这样是不好的,所以最终应该这么写:

2.两个工程,一个叫Hazel,作为引擎,一个叫SandboxApp,作为实际使用的例子, 一个是dll,一个是exe
3.可能要编辑solution的顺序,让sandboxApp在最上面,最为setup project
4.只保留64位平台
5.Hazel相关内容应该放在对应的namespace里面
Entry Point
主要是以下几个任务
- 建立宏,来实现dllimport和dllexport,这次的import的内容不再是函数了,而是类Application,宏HZ_BUILD_DLL用来区分是否是dll项目,宏HAZEL_API用来表示dllexport或dllimport,最后加一个平台宏HZ_PLATFORM_WINDOWS,确保只在64位下进行
- 建立Apllication文件,然后在exe里实现public继承
- 定义extern Application* CreateApplication接口,然后这个接口由exe具体实现
- main函数放在Hazel引擎下的EntryPoint的头文件里,记得加宏
- Application作为基类,其析构函数为虚函数
目录结构如下,Core.h用来存放宏的定义,Application用来定义基类

创建EntryPoint
从上面的步骤可知,如果要使用Engine的内容,需要包含Core.h、Application.h,以后还可能会有更多内容,所以为了避免这个情况,添加一个EntryPoint头文件,把所有需要的都放在里面,这样Sandbox就只需要Include一个文件了,在这里,这个EntryPoint文件,叫做Hazel.h
为什么这么设计
这节课的主要目的是创建一个dll对应的Main函数,进行Engine对应的操作,同时,封装一个接口函数,用于创建对应的Application,具体创建Application对象的任务交给了对象,对象需要new出自己的应用对象,继承于Engine里的Application基类,然后把这个指针传过来,之后的内存释放就交给引擎来处理了,因为实际上执行的只有Sandbox.cpp文件,把该cpp包含的#include "Hazel.h"给展开,大致代码如下
#include "Log.h"

	//_declspec(dllexport) class Application
	class HAZEL_API Application
	{
	public:
		Application() {};
		virtual ~Application()
		{

		}

		void Run();
	};
	// extern表面这个函数是外部实现的
	extern Hazel::Application *CreateApplication();

	int main()
	{
		Hazel::Log::Init();
		auto app = CreateApplication();
		app->Run();
		delete app;

		LOG("My Engine Log Msg");
		LOG_WARNING("My Engine Warnning Msg");
		LOG_ERROR("My Engine Error Msg");
	}

// 把main函数放在头文件里,然后这里再具体实现Hazel::Application的create函数
class Sandbox : public Hazel::Application
{
public:
	Sandbox() {};
	~Sandbox() {};
private:
};

Hazel::Application* CreateApplication()
{
	Sandbox *s = new Sandbox();
	return s;
}
碰到的小问题
使用dllexport来导出类的时候,发现对应的dll能生成,但是lib文件不会生成了,而且提示这个报错:
__declspec(dllexport)': "ignored on left of when no variable is declared"\
仔细阅读代码后,发现是_delcspec(dllexport)应该写在class的左边:
_delcspec(dllexport) class MyClass // 错误的写法
class _delcspec(dllexport) MyClass // 正确的写法
LogSystem
主要是以下几个任务
- 创建Log类,然后有s_CoreLogger和s_ClientLogger,分别处理引擎的log和client的log
- 使用spdlog,具体主要是怎么利用git submodule使用该库
- 使用宏来封装对应的log函数,使用宏可以更好的方便不同平台的应用
游戏引擎少不了LogStystem,这里使用了别人做好的Github项目,叫做spdlog,Cherno使用这个Molude的方式很特别,用到了Github的submodule的特性,这样的好处是,可以直接update该module,而不用再从网上Copy和Paste这个项目,具体操作如下,在对应的Git Bash界面,输入
//git submodule add 对应GitHub项目的url 对应的文件夹路径
git submodule add https://github.com/gabime/spdlog.git Hazel/vendor/spdlog
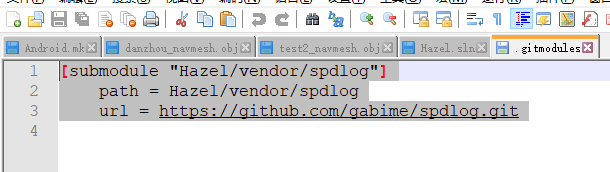
就一行命令,就能创建对应的文件夹,clone该仓库,而且会在当前目录生成一个类似于.gitignore的.submodule文件,具体内容如下图所示:
关于git submodule add操作,如果网不好的下载速度很慢,如果失败了再add可能会出问题,如果出问题了,可以去把.git文件的modules下对应的文件夹删除,再进行add,我就是这样弄成功的
对于这个LogSystem,底层使用的是spdlog,上层当然得封装一层Hazel的Log类,以下是核心代码:
	void Log::Init()
	{
		spdlog::set_pattern("%^[%T] %n: %v%$");

		s_CoreLogger = spdlog::stdout_color_mt("Hazel");// mt means multi threaded
		s_CoreLogger->set_level(spdlog::level::trace);

		s_ClientLogger = spdlog::stdout_color_mt("Console");
		s_ClientLogger->set_level(spdlog::level::trace);
	}

	std::shared_ptr<spdlog::logger>Log::s_ClientLogger = nullptr;
	std::shared_ptr<spdlog::logger>Log::s_CoreLogger = nullptr;
这里报了个错,记得C++Class内的static对象,需要在类外进行定义,不能只进行声明。
额外的宏操作,这里的宏的写法可以实现函数的宏,代码如下所示:
#define LOG(...)      ::Hazel::Log::GetClientLogger()->info(__VA_ARGS__)
#define LOG_WARNING(...)   ::Hazel::Log::GetClientLogger()->warn(__VA_ARGS__)
#define LOG_ERROR(...)     ::Hazel::Log::GetClientLogger()->error(__VA_ARGS__)
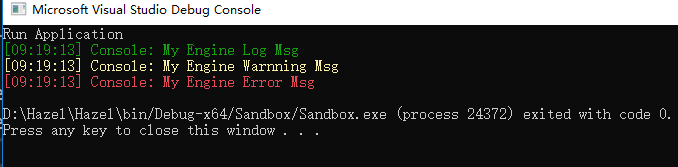
最后效果如图,还挺好看的
有意思的是 spdlog库的核心内容都是在头文件里通过内联函数使用的,所以只需要包含其头文件就可以,文件里的其他所有文件都被设置为了Excluded From Project,如下图所示,然后我做了个测试,删除了所有的cpp文件,一样能够成功build:

编写Premake5.lua管理项目
官方给了个简单的模板:
-- premake5.lua
workspace "HelloWorld"
   configurations { "Debug", "Release" }

project "HelloWorld"
   kind "ConsoleApp"
   language "C"
   targetdir "bin/%{cfg.buildcfg}"

   files { "**.h", "**.c" }

   --这里面写附加库的头文件目录,对应的VS项目属性里的Additional Include Directories
   include {}
   --filter后面一般加特定平台的Configurations,其范围会一直持续到碰到下一个filter或project
   filter "configurations:Debug"
      defines { "DEBUG" }
      symbols "On"
   --到这,碰到fitler,上面的filter对应Debug平台下的filter范围结束
   filter "configurations:Release"
      defines { "NDEBUG" }
      optimize "On"
这里的filter一般限定了范围,比如说特定的Windows平台,如下所示:
--比如说windows平台下的filter
filter "system:windows"
   cppdialect "C++17"
   staticruntime "On"   --表示会Link对应的dll
   systemversion "latest" --使用最新的windows sdk版本,否则会默认选择8.1的版本

filter "configurations:Release"
   defines { "NDEBUG" }
   optimize "On"
如上所示,filter相当于筛选器,上述写法,如果是安卓平台的Release模式,则下面的filter还是会执行,如果想限定两个,比如只生在windows的Release情况下的filter,则应该这么写
filter {"system:windows", "configurations:Release"}
   cppdialect "C++17"
   staticruntime "On"   --表示会Link对应的dll
   systemversion "latest" --使用最新的windows sdk版本,否则会默认选择8.1的版本
   defines { "NDEBUG" }
   optimize "On"
如果想取消对应filter的限定,则在后面加上这一行即可:
-- Reset the filter for other settings
	filter { }
学到了一个单词,叫做token,我原本以为叫做Macro,token表示一些代表符号,比如VS里的$(SolutionDir),而Premake的宏大概是这么写:
%{wks.name}
%{prj.location}
%{cfg.targetdir}
在Github上Premake的Wiki界面搜索Token可以找到对应的一些符号,如下所示:
wks.name
wks.location -- (location where the workspace/solution is written, not the premake-wks.lua file)

prj.name
prj.location -- (location where the project is written, not the premake-prj.lua file)
prj.language
prj.group

cfg.longname
cfg.shortname
cfg.kind
cfg.architecture
cfg.platform
cfg.system
cfg.buildcfg
cfg.buildtarget -- (see [target], below)
cfg.linktarget -- (see [target], below)
cfg.objdir

file.path
file.abspath
file.relpath
file.directory
file.reldirectory
file.name
file.basename -- (file part without extension)
file.extension -- (including '.'; eg ".cpp")

-- These values are available on build and link targets
-- Replace [target] with one of "cfg.buildtarget" or "cfg.linktarget"
--   Eg: %{cfg.buildtarget.abspath}
[target].abspath
[target].relpath
[target].directory
[target].name
[target].basename -- (file part without extension)
[target].extension -- (including '.'; eg ".cpp")
[target].bundlename
[target].bundlepath
[target].prefix
[target].suffix
还可以使用postbuildcommand来实现build完成之后的文件拷贝和复制工作,如下所示:
postbuildcommand
{
    -- %{cfg.buildtarget.relpath}是生成文件,相较于当前premake5.lua文件的相对路径
    {"COPY" %{cfg.buildtarget.relpath} ../.. output../Sandbox"}-- ..是一种语法,output相当于之前声明的一个string变量
}
编写Premake5.lua文件的一点疑惑
由于Sanbox是使用了Hazel的文件的,所以我这么写是对的:
	files { "%{prj.name}/Src/**.h", "%{prj.name}/Src/**.cpp" }
    includedirs
	{
		"Hazel/vendor/spdlog/include",
		"Hazel/Src"
	}
但为什么不可以像下面这么写呢:
	files { "%{prj.name}/Src/**.h", "%{prj.name}/Src/**.cpp", "Hazel/Src/**.h" } -- 直接把所有的.h文件加进来,而不是include
    includedirs
	{
		"Hazel/vendor/spdlog/include",
		--"Hazel/Src"
	}
具体原因涉及到了VS寻找Header文件的方式了, Visual Studio looks for headers in this order:
- In the current source directory.
- In the Additional Include Directories in the project properties (Project -> [project name] Properties, under C/C++ | General).
- In the Visual Studio C++ Include directories under Tools → Options → Projects and Solutions → VC++ Directories.
- In new versions of Visual Studio (2015+) the above option is deprecated and a list of default include directories is available at Project Properties → Configuration → VC++ Directories
如下图所示,红色方框里显示Sandbox加入了Hazel的相关文件,但实际上Visual Studio并不能找到对应的头文件的内容,因为VS会先去寻找sandbox所在的目录,然后找附加include目录,肯定是找不到对应的头文件的,因为这些头文件在Hazel对应项目的文件夹下,如下图所示:

如果在SandboxApp.cpp所在的文件夹加入Hazel.h等相关的所有头文件,则会开始编译Hazel.h了,但是这样就产生了一个问题,在Hazel项目和SandboxApp项目下都各有一个Hazel.h文件,而且这俩文件是一模一样的。
总结: 对于每一个cpp,VS都会先针对其cpp所在的目录,寻找头文件(头文件里包含的头文件的路径也是基于该CPP),然后再去Additional Include Directory里找,注意这个Additional Include Directory里也是只找该目录,并不是该目录里面的所有内容(所以要注意相对路径的问题),最后才会去VC++ Directories里找。所以,在premake5.lua里,不应该直接把Hazel的头文件加入Sandbox的files列表里。而且从逻辑上讲,files里应该放的是该项目的文件,而不应该包括外来的函数声明。
EventSystem
思路是由Application创建自己的窗口window,对应的window类不应该知道任何Application的信息,所以Application在创建自己的window时,还要同时创建一个callback
这一块是难啃的骨头,首先学习一个C++的名词,叫做std::function
std::function
Class template std::function is a general-purpose polymorphic function wrapper. Instances of std::function can store, copy, and invoke any Callable target – functions, lambda expressions, bind expressions, or other function objects, as well as pointers to member functions and pointers to data members.
The stored callable object is called the target of std::function. If a std::function contains no target, it is called empty. Invoking the target of an empty std::function results in std::bad_function_call exception being thrown.
std::function satisfies the requirements of CopyConstructible and CopyAssignable.
std::function可以用来存储callable object,后者也叫做 target of std::function,callable object可以是函数、lambda表达式或者其他的可调用函数对象,比如函数指针或可调用的函数成员。
#include <iostream>
#include <functional>
void print(int n)
{
	std::cout << n << "\n";
}

int main()
{
	std::function <void(int)> a = print; // 存储函数指针
	a(2);
}
不过需要注意的是,std::function不能像一般的函数重载那样,如果我下面这么写,会报错
#include <iostream>
#include <functional>

void print()
{
	std::cout << 0 << "\n";
}

void print(int n)
{
	std::cout << n << "\n";
}

int main()
{
	std::function <void()> a = print;
	std::function <void(int)> b = print;
	a();
	b(2);
}
如下图所示,大意是不知道print到底是什么类型

要写,得这么写,用static_cast进行转换,具体原因我也不理解,以后再深入把,总之std::funtion是一个容器,用来存储callable object
int main()
{
	typedef void(*fun_ptr_a)();
	typedef void(*fun_ptr_b)(int);

	std::function <void()> a = static_cast<fun_ptr_a>(print);
	std::function <void(int)> b = static_cast<fun_ptr_b>(print);

	a();
	b(1);
}
再介绍一个Hazel代码里涉及到的问题,C++中的enum和enum class
C++中的enum和enum class
C++11中引入了enum class,旨在解决原来的enum的各种缺点,在这里介绍一下之前的Enum类型的三大缺点:
- C++原本的enum值会被隐式转换(implicitly convert)为int类型,这跟C#就不一样,也很不科学
- C++里的enum好像是一个全局的范围,类似于全局变量,而且没有前缀,这很容易造成命名冲突和理解错误。如下图所示:

- C++的enum,无法规定用多少位的数据结构去存储它,存储的类型可能是char、short、int等类型,选择一个够用的数据结构就行,举个例子:
// 尽管选只用8位,但并不可以保证
enum E_MY_FAVOURITE_FRUITS
{
    E_APPLE      = 0x01,
    E_WATERMELON = 0x02,
    E_COCONUT    = 0x04,
    E_STRAWBERRY = 0x08,
    E_CHERRY     = 0x10,
    E_PINEAPPLE  = 0x20,
    E_BANANA     = 0x40,
    E_MANGO      = 0x80,
    E_MY_FAVOURITE_FRUITS_FORCE8 = 0xFF // 'Force' 8bits, how can you tell?
};
如果加一行下列语句,编译器并不会报错,而是会换另一个更大的数据结构,可能是short,去存储
E_DEVIL_FRUIT = 0x100, // New fruit, with value greater than 8bits
本来想用8位数保存enum,这种enum就很不安全。而C++11就可以这么写:
enum class E_MY_FAVOURITE_FRUITS : unsigned char
{
    E_APPLE        = 0x01,
    E_WATERMELON   = 0x02,
    E_COCONUT      = 0x04,
    E_STRAWBERRY   = 0x08,
    E_CHERRY       = 0x10,
    E_PINEAPPLE    = 0x20,
    E_BANANA       = 0x40,
    E_MANGO        = 0x80,
    E_DEVIL_FRUIT  = 0x100, // Warning!: constant value truncated
};
所以,enum class 比enum好,好在以下三点:
- They don’t convert implicitly to int.
- They don’t pollute the surrounding namespace.
- They can be forward-declared.
使用#和##来实现宏操作
在C++的宏中,使用#,可以把#后面的内容加上""符号,当作字符串处理,如下所示:
#include <iostream>

// 碰到ToString(x)这种东西,就把x转换为字符串代替原来的部分
#define ToString(s) #s

int main(int argc, char *argv[])
{
	std::cout << ToString(3413SF345人sss) << std::endl;
	return 0;
}
输出:3413SF345人sss
前面说的#符号是将其转换成字符串,那么##符号就是单纯的字母替换,举个例子:
#include <iostream>

// 碰到print(s, f)这种东西,就把x转换为字符串代替原来的部分
#define print(s, f) {std::cout << "输出字符s:" << #s << std::endl;\
std::cout << "输出乘积" << ints##f << std::endl;\
}\

int main(int argc, char *argv[])
{
	int ints8 = 3;
	print(hehe, 8);
	return 0;
}
输出如下,其实就是一些文字代替的简单东西,看习惯了就好了:
输出字符s:hehe
输出乘积3
C++虚函数的override关键字
关于基类,其虚函数要声明为virtual这是自然是,在C++里对于子类复写的函数,需不需要加virtual呢?而且在C++11中,提出了新的关键字override,这个关键字又有什么用呢?
首先看这么个例子,下面四种写法都可以成功编译:
class Base
{
public:
	virtual void print() const = 0;
	virtual void printVirtual() const = 0;
	virtual void printOverride() const = 0;
	virtual void printBoth() const = 0;
};

class inhert : public Base
{
public:
	// only virtual keyword for overriding.
	void print() const {}	// 什么都不加

	virtual void printVirtual() const {}	// 只加virtual

	// only override keyword for overriding.
	void printOverride() const override {} // 只加override

	// using both virtual and override keywords for overriding.
	virtual void printBoth() const override {} // 既加virtual,也加override
};
直接说重点,对于override的函数,加不加virtual都无所谓,只要基类的虚函数加了virtual就可以了,但override关键字就重要一点了,它可以避免一些bug,因为我们写函数,如果不加override的时候,一旦函数类型写错了,这个函数其实就是一个新的函数,并没有override原来的虚函数,但是编译器不会提示这个错误,这就很蛋疼了,比如下面这个例子:
class Base
{
public:
	virtual void print1(int a, unsigned char c) const = 0;
	virtual void print2(int a, unsigned char c) const = 0;
	virtual void print3(int a, unsigned char c) const = 0;
};

class inhert : public Base
{
public:
	void print1(int a, char c) const
	{
		// Do Something
	}

	virtual void print2(int a, char c) const
	{
		// Do Something
	}

	void print3(int a, char c) const override //注意override关键字放在const后面
	{
		// Do Something
	}
};
看看结果,发现写了override的时候才会报错,否则能正常编译,完全不会进行提示:

结论: 以后在定义任何虚函数的时候,都要在声明的最后一句加上关键字override,这是一个代码规范的好习惯
顺便提一个有意思的东西,就是const关键字与函数重载的关系
const与函数重载
函数重载与三个东西有关,参数类型,参数个数和参数之间的顺序有关,但是与返回值无关,那么先提两个问题:
- 在类中 void A(){} 和 void A() const{} 是一个函数还是两个函数
- 在类中 void A(int){} 和 void A(const int){} 是一个函数还是两个函数
首先看第一个问题,可以举一个例子:
#include<iostream>
using namespace std;

class Test
{
protected:
	int x;
public:
	Test(int i) :x(i) { }
	void fun() const
	{
		cout << "fun() const called " << endl;
	}
	void fun()
	{
		cout << "fun() called " << endl;
	}
};

int main()
{
	Test t1(10);
	const Test t2(20);
	t1.fun();
	t2.fun();
	return 0;
}
输出结果:
fun() called
fun() const called
结果能成功运行,且调用了不同的函数,这说明类的成员函数,后面加const和不加const,是两个函数,这是函数重载(C++ allows member methods to be overloaded on the basis of const type)
再看第二种问题,在类中 void A(int){} 和 void A(const int){} 是一个函数还是两个函数,这个问题可以换成,参数里加不加const,构不构成函数重载?
先直接说结论,如果参数是pointer类型或Reference,那么加const属于函数重载,但是其他类型就不属于函数重载了,看下面的代码,这种情况会报错:
#include<iostream>
using namespace std;

void fun(const int i)
{
    cout << "fun(const int) called ";
}
void fun(int i)
{
    cout << "fun(int ) called " ;
}
int main()
{
    const int i = 10;
    fun(i);
    return 0;
}
输出:
Compiler Error: redefinition of 'void fun(int)'
也很好理解,传一个int类型,传递的是值,这个int又不会改变什么东西,所以值类型,加不加const都一样,但是如果用引用,那就完全不一样了,所以这么写是可以的:
#include<iostream>
using namespace std;

void fun(const int& i)
{
	cout << "fun(const int) called \n";
}
void fun(int& i)
{
	cout << "fun(int ) called \n";
}

int main()
{
	const int i1 = 10;
	int i2 = 10;
	fun(i1);
	fun(i2);
	return 0;
}
输出:
fun(const int) called
fun(int ) called
Event代码编写
OK,介绍完了这个,可以正式开始Event的设计了,首先需要定义的就是Event和EventType类,这里把Event作为基类,EventType是enum class,包含了基本的外设事件,如下所示:
	enum class EventType
	{
		None = 0,
		WindowClose, WindowResize, WindowFocus, WindowLostFocus, WindowMoved,//窗口的五种操作,0x001,0x010,0x011,0x100,0x
		AppTick, AppUpdate, AppRender,//APP的操作,暂时先不计较这个
		KeyPressed, KeyReleased,//键盘的两种操作
		MouseButtonPressed, MouseButtonReleased, MouseMoved, MouseScrolled//鼠标的四种操作
	};
对于Event类型,作为基类,那么最基本的两个接口应该为:
- 获取该事件的类型
- 获取该事件的名字
作为基类,这都是最基本的API,再者,为了方便使用,仿照C#的方式,C#语言里所有的Object都有一个ToString函数,方便我们打印一些消息,所以这个API我们也把它加入到Event基类里,如下所示:
	class HAZEL_API Event
	{
	public:
		virtual EventType GetEventType() const = 0;
		virtual const char* GetName() const = 0;
		virtual const char* ToString() const = 0;
	};
目前就是这样,然后我们还需要一个EventTypeFlag枚举,以后用flag来快速筛选特定的Event:
#define BIT(x) (1 << x)
	// events filter
	enum EventCategory
	{
		None = 0,
		EventCategoryApplication    = BIT(0),
		EventCategoryInput          = BIT(1),
		EventCategoryKeyboard       = BIT(2),
		EventCategoryMouse          = BIT(3),
		EventCategoryMouseButton    = BIT(4)
	};
定义Event这个基类,就可以着手创建对应的子类的,拿鼠标事件举例,一共有MouseMoved、MouseButtonPressed、MouseButtonReleased、MouseButtonScrolled四种,那么我就建立四个子类,全放在MouseEvent.h文件下,拿MouseMoved举例,其类型为之前枚举定义的MouseMovedEvent,其ToString应该是打印出鼠标移动的offset值,由于该类的所有Event类型都是一样的,所以我们可以用一个stati变量去存储该类型就够了:
class MouseMovedEvent : public Event
{
public:
	static EventType GetStaticType() { return EventType::MouseMoved; }
	const EventType GetEventType() const override { return GetStaticType(); }
	const char* GetName() const override { return "MouseMoved"; }
	std::string ToString()
	{
		// Create a string with represents
		std::string a = "MouseMovedEvent: xOffset = " + GetXOffset() + ", yOffset = " + GetYOffset();
		return a;
	}

	inline float GetXOffset() const { return m_xOffset; }
	inline float GetYOffset() const { return m_yOffset; }
private:
	float m_xOffset, m_yOffset;
};
对于string这种拼接,想象的很美好,可惜C++并不能像C#这样简单的组成一个字符串,所以我们需要通过stringstream来完成这个功能,写法如下:
std::string ToString() const override
{
	std::stringstream a;
	a << "MouseMovedEvent: xOffset = " << GetXOffset() << ", yOffset = " << GetYOffset();
	return a.str();
}
OK,写完了这个类,就可以继续写类似的鼠标事件的类了,但是我发现有一些代码都是非常类似的,写起来很麻烦,也很影响阅读:
class MouseMovedEvent : public Event
{
public:
	static EventType GetStaticType() { return EventType::MouseMoved; }
    const EventType GetEventType() const override { return GetStaticType(); }
	const char* GetName() const override { return "MouseMoved"; }
	...
}
class MouseButtonPressedEvent: public Event
{
public:
	static EventType GetStaticType() { return EventType::MouseButtonPressed; }
	const EventType GetEventType() const override { return GetStaticType(); }
	const char* GetName() const override { return "MouseButtonPressed"; }
	...
}

class MouseButtonReleasedEvent: public Event
{
public:
	static EventType GetStaticType() { return EventType::MouseButtonReleased; }
	const EventType GetEventType() const override { return GetStaticType(); }
	const char* GetName() const override { return "MouseButtonReleased"; }
	...
}
所以我学到了一个方法,用宏去代替我们编写这么长的语句,这个宏名就叫做EVENT_CLASS_TYPE(typename),来为我们生成对应的函数,通过#和##符号,可以达到这种效果,别记反了,一个#是转换成字符串,两个#是原语句替换,所以就是这么简化:
#define EVENT_CLASS_TYPE(type) \
static EventType GetStaticType() { return EventType::##type; }\
const EventType GetEventType() const override { return GetStaticType(); }\
const char* GetName() const override { return #type; }

class MouseMovedEvent : public Event
{
public:
	EVENT_CLASS_TYPE(MouseMoved)
	...
}
就像这样,我们可以把所有鼠标事件的类定义好,接下来还需要的定义的输入类就是Window Event、ApplicationEvent和KeyEvent,先说前两种Event,
最后着重提一下KeyEvent,键盘事件的输入处理并不像点击鼠标那么简单,通常(简单的事件系统里)我们是没有长按鼠标的操作的,但是却有长按键盘的操作,当我们按键盘时,会先打印一个字母,然后停顿一下,如果这个时候还按着按钮,就继续打印剩余的字母。
所以说,按键的时候,第一次会立马打印第一个字母,然后需要记录我按的次数(或者记录按的时间),当记录的值达到一定阈值(或时间)时,才会继续不停打印接下来的字母,这里我们不用时间记录,而是用一个int值,记录按相同键的次数。
设计KeyEvent类的时候,可以发现,KeyPressedEvent会比KeyReleasedEvent的数据多一个,前者会额外记录按下Key时,key走过的Loop的总数,所以这个时候可以设计一个基类叫做KeyEvent,这里放通用的数据,就是Key的keycode,用于存放Key类型共有的内容,设计思路如下所示:
class HAZEL_API KeyEvent : public Event
{
public:
   inline int GetKeycode() const { return keycode;}

protected:
	// 构造函数设为Protected,意味着只有其派生类能够调用此函数
	KeyEvent(int code): keycode(code){}
	int keycode;
};
然后再写对应的子类
class HAZEL_API KeyPressedEvent : public KeyEvent
{
public:
	KeyPressedEvent(int keycode, int repeatCount)
		: KeyEvent(keycode), m_RepeatCount(repeatCount) {}

	inline int GetRepeatCount() const { return m_RepeatCount; }

	std::string ToString() const override
	{
		std::stringstream ss;
		ss << "KeyPressedEvent: " << m_KeyCode << " (" << m_RepeatCount << " repeats)";
		return ss.str();
	}

	EVENT_CLASS_TYPE(KeyPressed)
private:
	int m_RepeatCount;
};