


Spring学习
入门案例
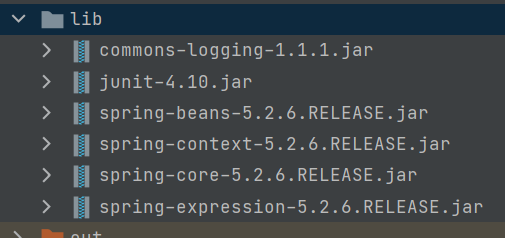
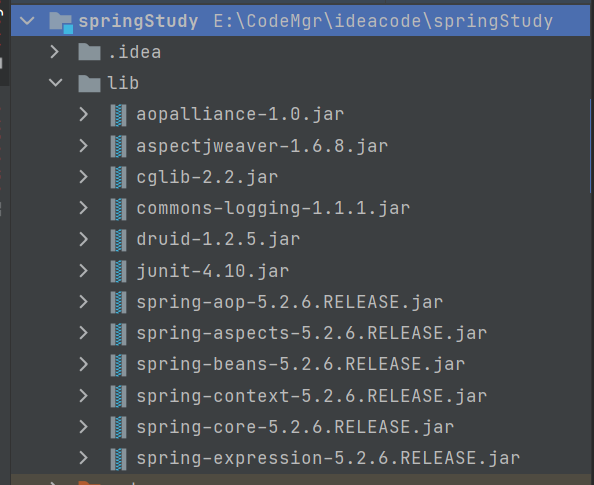
建立Java工程,导入如下Java包。
创建User类
public class User {
    public void add(){
        System.out.println("add....");
    }
}
在src目录下编写xml配置文件
<?xml version="1.0" encoding="UTF-8"?>
<beans xmlns="http://www.springframework.org/schema/beans"
       xmlns:xsi="http://www.w3.org/2001/XMLSchema-instance"
       xsi:schemaLocation="http://www.springframework.org/schema/beans http://www.springframework.org/schema/beans/spring-beans.xsd">

    <!--配置User对象-->
    <bean id="user" class="com.hyq.User"/>
</beans>
编写测试类
@Test
    public void test1(){
        //1.读取配置文件 在src下可以用这个方法
        ApplicationContext context =
                new ClassPathXmlApplicationContext("bean1.xml");
        //2.获取对象
        User user = context.getBean("user", User.class);
        //3.拿对象操作值
        System.out.println(user);  //com.hyq.User@33f88ab
        user.add();
    }
IOC 控制反转
两个核心接口BeanFactory,ApplicationContext
1、IOC思想基于IOC容器完成,IOC容器底层就是对象工厂
2、Spring 提供IOC容器实现两种方式:(两个接口)
(1)BeanFactory:IOC容器基本实现,是Spring内部的使用接口,不提供开发人员进行使用。加载配置文件时候不会创建对象,在获取对象(使用)才去创建对象
(2)ApplicationContext它是BeanFactory接口的子接口,提供更多更强大的功能,一般由开发人员进行使用加载配置文件时候就会把在配置文件对象进行创建
ApplicationContext 继承关系

这里
ClassPathXmlApplicationContext和FileSystemXmlApplicationContext都是加载xml文件的类
其中当xml位于src目录或者子目录下时,可以使用ClassPathXmlApplicationContext来加载xml文件,当xml位于磁盘某个位置,如C盘下时可以使用FileSystemXmlApplicationContext(要写全路径,即绝对路径)来加载xml文件.
Bean管理
主要是两个操作:① spring创建对象 ② spring注入属性 就是类中set操作
主要实现:① 基于配置文件xml方式实现 ② 基于注解实现
<!--配置User对象 默认是无参构造,如果User类中存在有参构造,但是没有无参构造,会报错-->
    <bean id="user" class="com.hyq.User"/>
DI依赖注入
作用:注入属性。方式:① 通过set注入 ② 通过有参构造器注入 ③ 通过spring配置文件注入
创建User类
package com.hyq;

public class User {
    private String name;
    private String author;

    public void setName(String name) {
        this.name = name;
    }

    public void setAuthor(String author) {
        this.author = author;
    }
}
配置xml文件.要想通过xml注入,User类必须有set方法
<?xml version="1.0" encoding="UTF-8"?>
<beans xmlns="http://www.springframework.org/schema/beans"
       xmlns:xsi="http://www.w3.org/2001/XMLSchema-instance"
       xsi:schemaLocation="http://www.springframework.org/schema/beans http://www.springframework.org/schema/beans/spring-beans.xsd">

    <!--配置User对象-->
    <bean id="user" class="com.hyq.User">
        <!--属性注入-->
        <property name="name" value="hyq" />
        <property name="author" value="hyq" />
    </bean>
</beans>
P注入
首先在xml中需要这样的操作:

编写web.xml配置文件,仍然用上面的测试类
<?xml version="1.0" encoding="UTF-8"?>
<beans xmlns="http://www.springframework.org/schema/beans"
       xmlns:xsi="http://www.w3.org/2001/XMLSchema-instance"
       xmlns:p="http://www.springframework.org/schema/p"
       xsi:schemaLocation="http://www.springframework.org/schema/beans http://www.springframework.org/schema/beans/spring-beans.xsd">
    <!--配置User对象-->
    <bean id="user" class="com.hyq.User" p:name="莫言" p:author="moyan">
    </bean>
</beans>
注入空值和特殊值
编写xml配置文件,并测试
<?xml version="1.0" encoding="UTF-8"?>
<beans xmlns="http://www.springframework.org/schema/beans"
xmlns:xsi="http://www.w3.org/2001/XMLSchema-instance"
xsi:schemaLocation="http://www.springframework.org/schema/beans http://www.springframework.org/schema/beans/spring-beans.xsd">
<!--配置User对象-->
<bean id="user" class="com.hyq.User">
<!--<property name="name" value="hyq">-->
<!--</property>-->
<!--①注入空值;②如果不写默认也是注入的空值-->
<property name="name">
<null></null>
</property>
<!--法一:注入特殊值-->
<!--<property name="author" value="<你好!>">-->
<!--</property>-->
<!--法二:注入特殊值 语法:<![CDATA[ 填写你要注入的内容 ]]-->
<property name="author">
<value><![CDATA[ <你好!> ]]></value>
</property>
</bean>
</beans>
内/外部bean的注入
编写Dept类和Employee类
// Dept类
public class Dept {
    private String dname;

    public void setDname(String dname) {
        this.dname = dname;
    }

    @Override
    public String toString() {
        return "Dept{" +
                "name='" + dname + '\'' +
                '}';
    }
}
//Employee类
public class Employee {
    private String name;
    private int age;
    private Dept dept;

    public void setName(String name) {
        this.name = name;
    }

    public void setAge(int age) {
        this.age = age;
    }

    public void setDept(Dept dept) {
        this.dept = dept;
    }

    @Override
    public String toString() {
        return "Employee{" +
                "name='" + name + '\'' +
                ", age=" + age +
                ", dept=" + dept +
                '}';
    }
}
配置xml 这里的dept和employee没有重名属性
<?xml version="1.0" encoding="UTF-8"?>
<beans xmlns="http://www.springframework.org/schema/beans"
       xmlns:xsi="http://www.w3.org/2001/XMLSchema-instance"
       xsi:schemaLocation="http://www.springframework.org/schema/beans http://www.springframework.org/schema/beans/spring-beans.xsd">

    <!--内部bean的注入-->
    <bean id="employee" class="com.hyq.entity.Employee">
        <property name="name" value="hyq"/>
        <property name="age" value="3"/>
        <property name="dept">
            <bean id="dept" class="com.hyq.entity.Dept">
                <property name="dname" value="人事部"/>
            </bean>
        </property>
    </bean>
</beans>
编写测试类

结果输出Employee{name='hyq', age=3, dept=Dept{name='人事部'}}
集合注入
编写实体类
/**
 * 集合的注入
 */
public class MyCollection {
    private String[] course;
    private List<String> list;
    private Map<String,String> map;
    private Set set;

    public void setCourse(String[] course) {
        this.course = course;
    }

    public void setList(List<String> list) {
        this.list = list;
    }

    public void setMap(Map<String, String> map) {
        this.map = map;
    }

    public void setSet(Set set) {
        this.set = set;
    }

    @Override
    public String toString() {
        return "MyCollection{" +
                "course=" + Arrays.toString(course) +
                ", list=" + list +
                ", map=" + map +
                ", set=" + set +
                '}';
    }
}
编写xml配置文件
<?xml version="1.0" encoding="UTF-8"?>
<beans xmlns="http://www.springframework.org/schema/beans"
       xmlns:xsi="http://www.w3.org/2001/XMLSchema-instance"
       xsi:schemaLocation="http://www.springframework.org/schema/beans http://www.springframework.org/schema/beans/spring-beans.xsd">

    <!--集合的注入-->
    <bean id="myCollection" class="com.testDemo.collections.MyCollection">
        <!--数组的注入-->
        <property name="course">
            <array>
                <value>语文</value>
                <value>数学</value>
            </array>
        </property>
        <!--list注入-->
        <property name="list">
            <list>
                <value>Chinese</value>
                <value>USA</value>
            </list>
        </property>
        <!--map注入-->
        <property name="map">
            <map>
                <entry key="key1" value="value1"></entry>
                <entry key="key2" value="value2"></entry>
            </map>
        </property>
        <!--set注入-->
        <property name="set">
            <set>
                <value>set1</value>
                <value>set2</value>
            </set>
        </property>
    </bean>

</beans>
编写测试类

结果输出:MyCollection{course=[语文, 数学], list=[Chinese, USA], map={key1=value1, key2=value2}, set=[set1, set2]}
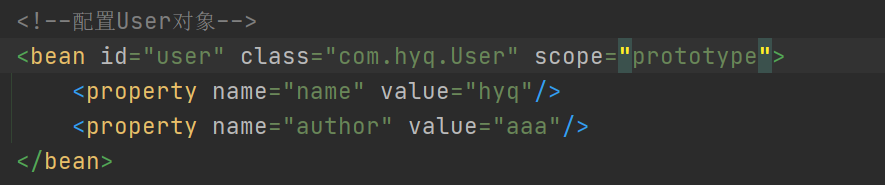
单例和原型模式
spring中设置创建的bean默认是单例模式。【单例模式:加载spring配置文件时,对象已经创建好了】
例如:配置user的属性值后

测试:

结果输出的地址相同:

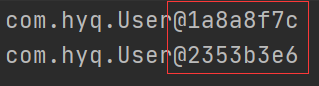
spring中可以通过scope设置它的设计模式,可以设为原型模式(prototype)【原型模式:在调用getBean方法时创建了多实例对象】
再次测试 地址不同
Bean的生命周期
① 通过构造器创建bean实例
② 为bean的属性设置值以及对其它bean的引用(调用set方法)
③ 把bean实例传递给bean后置处理器方法 postProcessBeforeInitialization
④ 调用bean初始化方法(需要配置)
⑤ 把bean实例传递给bean后置处理器方法 postProcessAfterInitialization
⑥ 使用bean进行操作
⑦ 当容器关闭时,调用bean的销毁方法(需要配置)
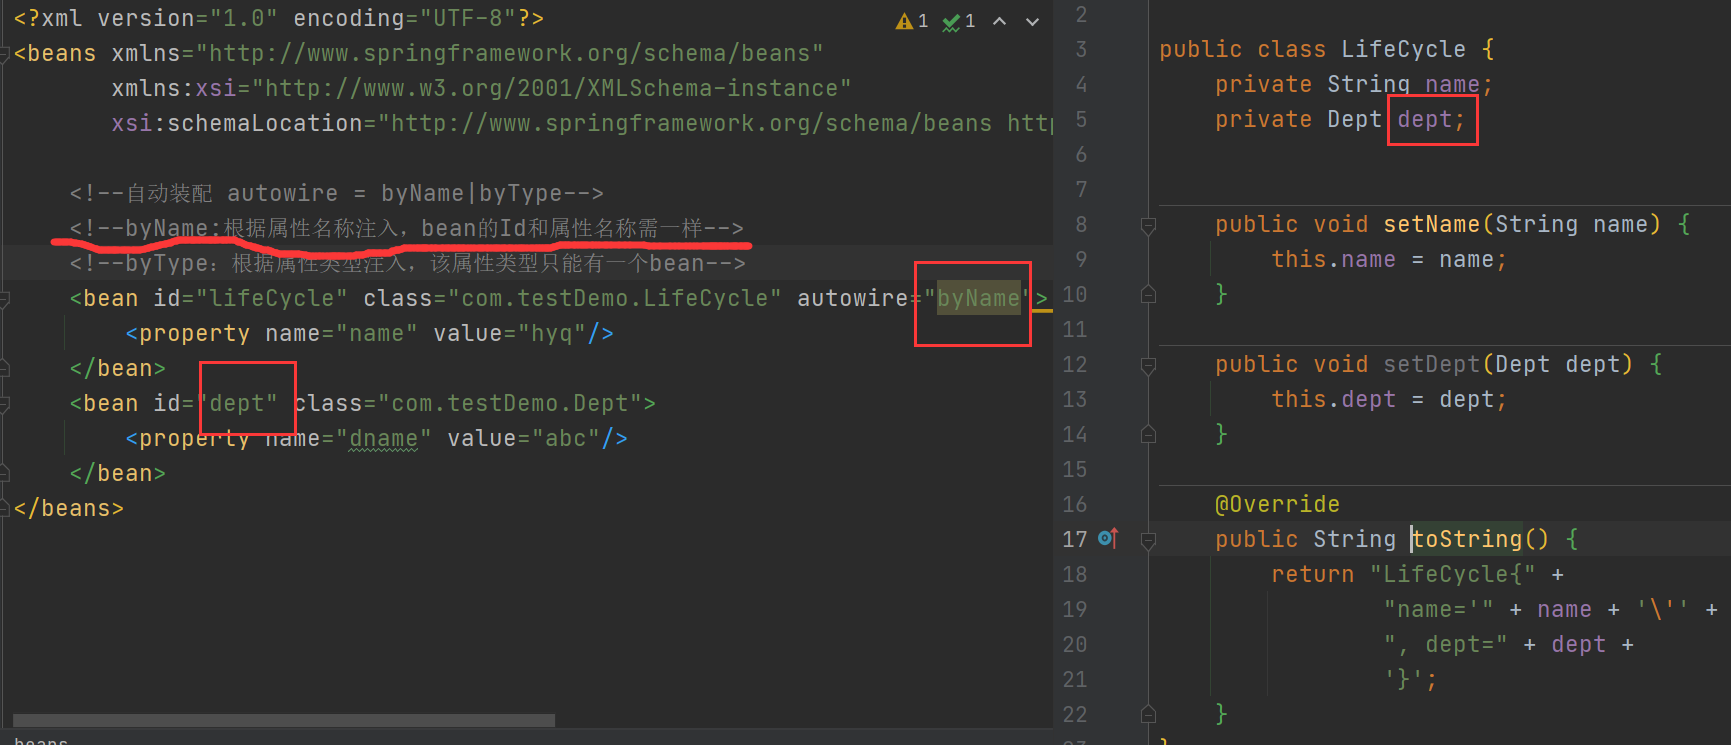
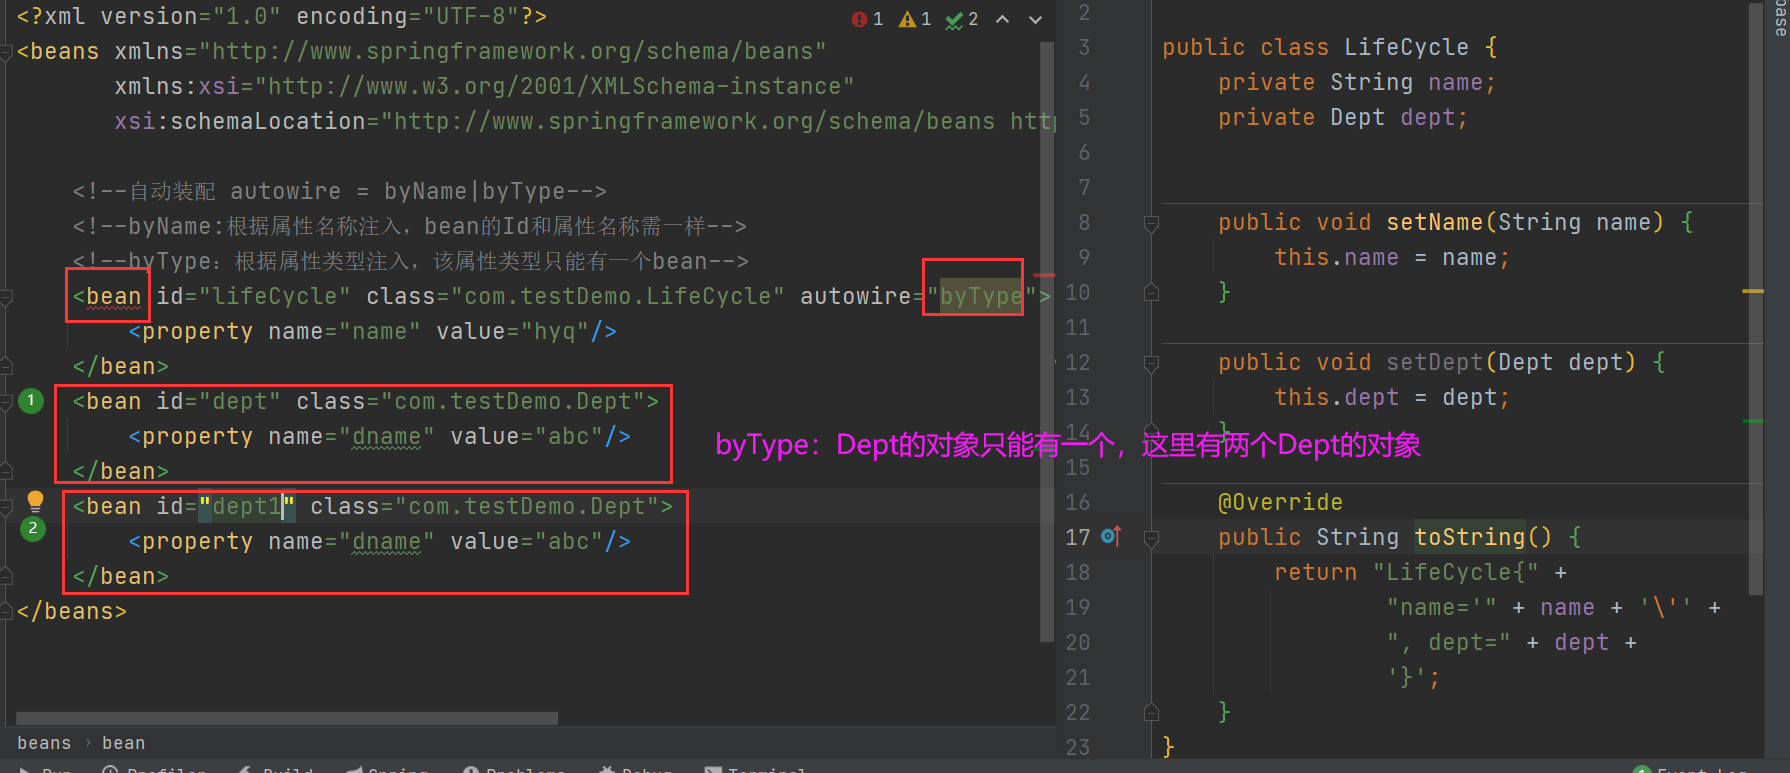
自动装配
定义一个类

原始写法:手动注入

自动注入 byName
自动注入:byType
引入外部文件进行属性的注入
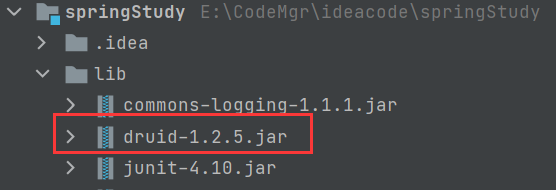
例如数据库的配置
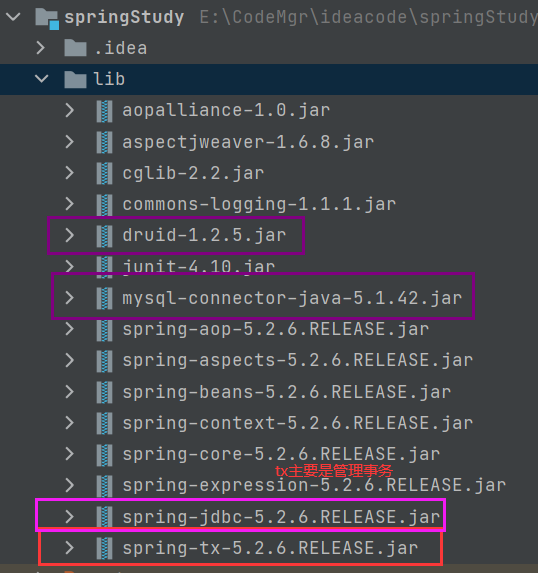
首先引入Druid的jar包
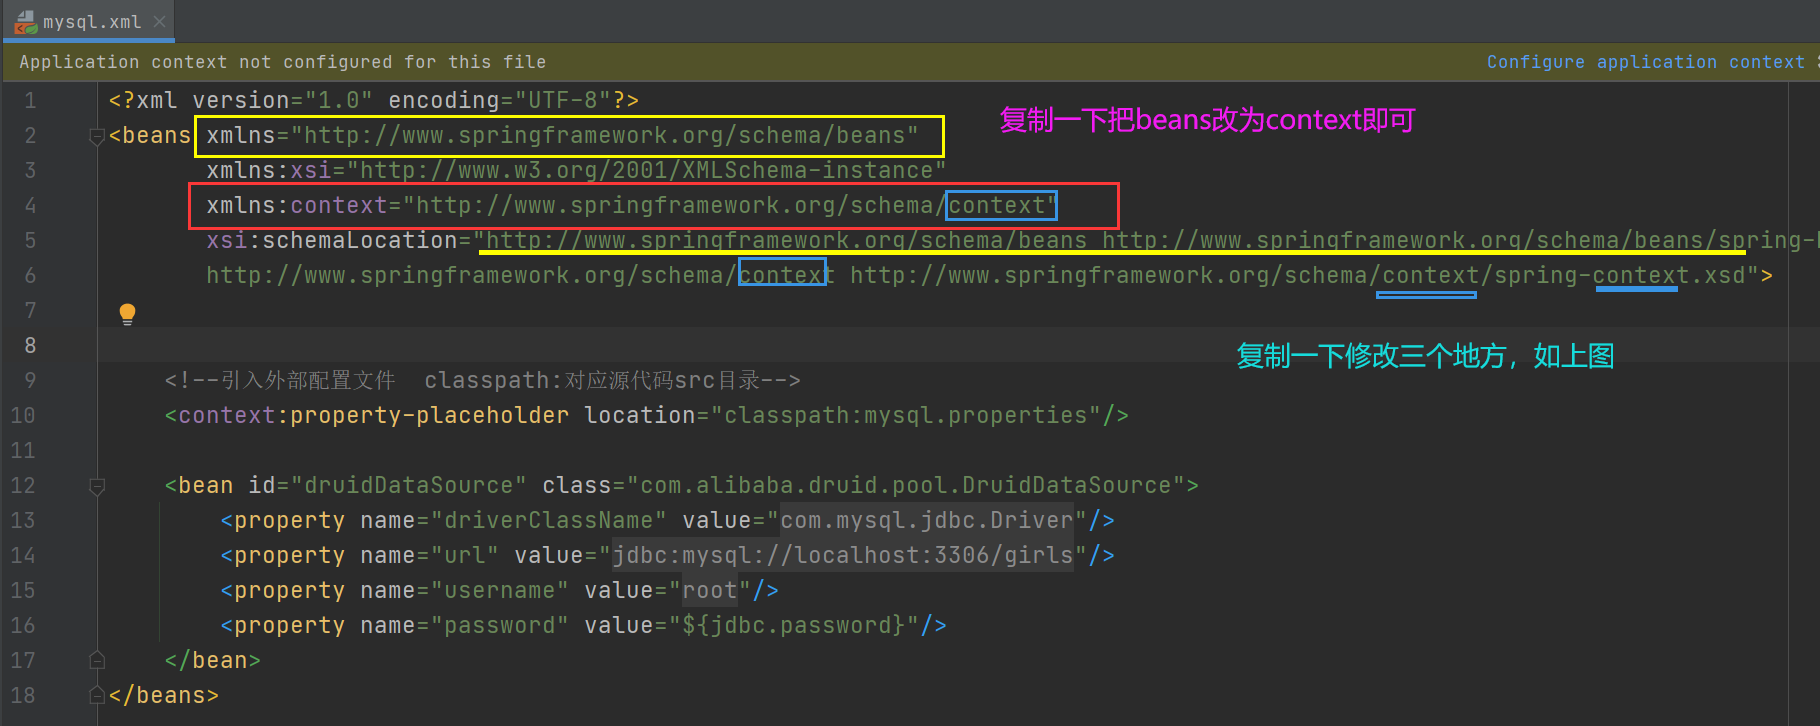
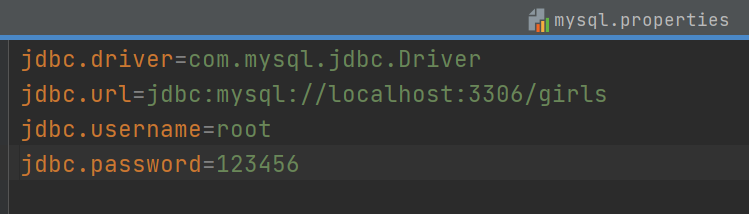
编写外部配置文件mysql.properties

编写xml配置文件
基于注解的对象配置
/**
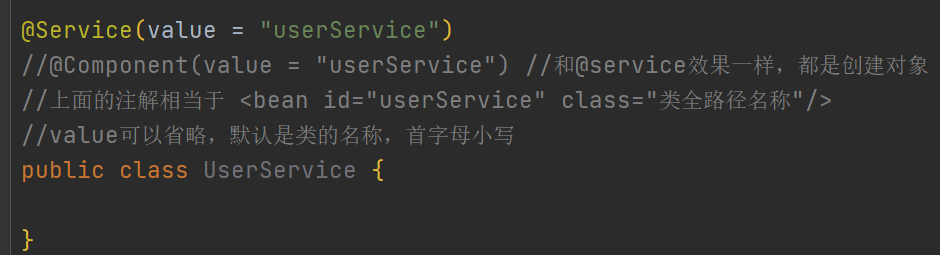
spring中针对bean管理**创建对象**提供的注解:@Component,@Service,@@ontroller,@Reposity
这几个注解都是让spring来创建对象用的
在类上配置此属性相当于 xml中的 <bean id="" class=""/>
*/
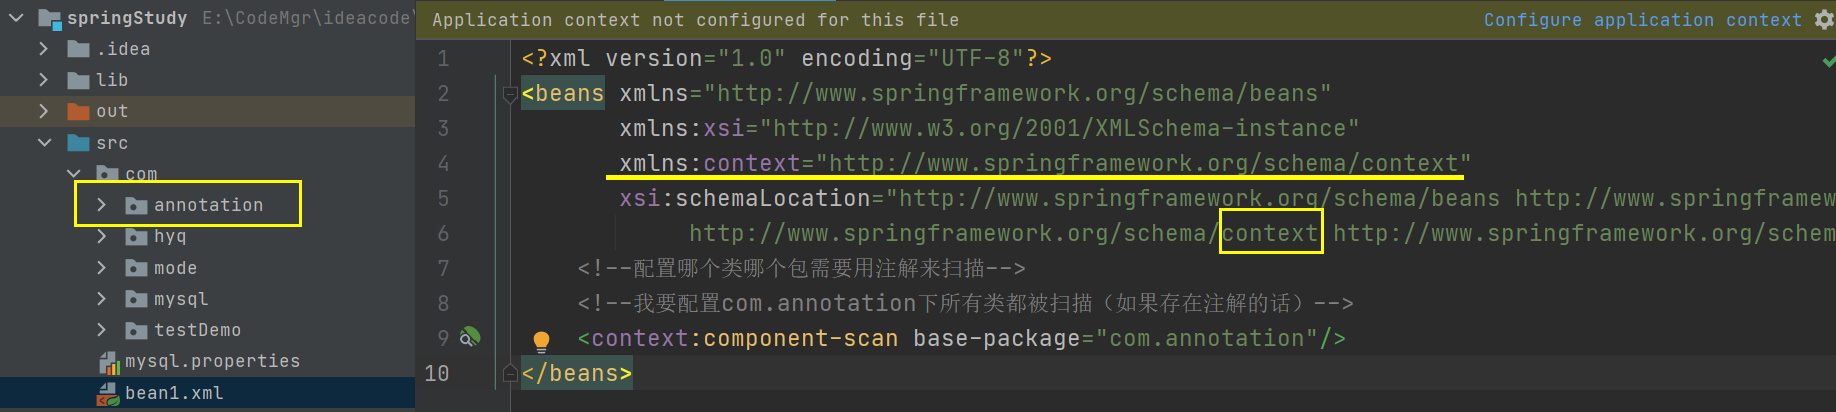
1. 引入spring的aop的包,只有引入了此包,注解才能生效

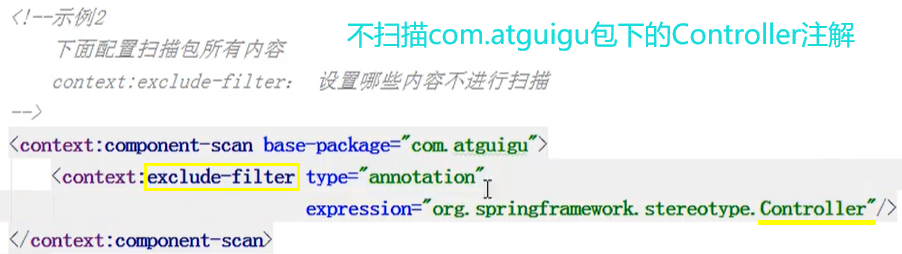
2. 在xml中配置要扫描的注解
编写UserService一个类
编写测试类

注解扫描的其他问题

基于注解的属性注入
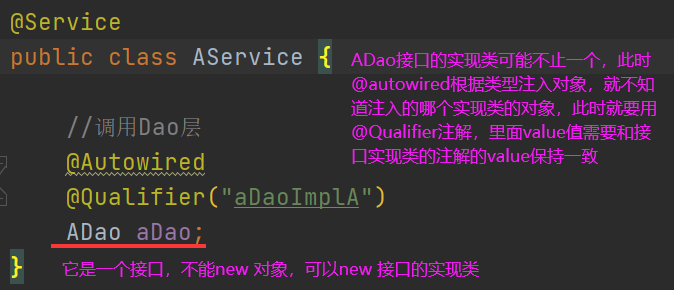
① @Autowired: 根据属性类型进行自动装配
② @Qualifier(限定符/修饰符): 根据属性名进行注入,需要配合@Autowired使用
③ @Resource: 既可以根据类型注入,也可以根据名称注入 该注解位于 javax.annotation包下
④ @Value: 注入普通类型的属性
编写ADao接口

编写ADao的实现类

现在要在Service层要调用Dao层
value注解的使用,只能注入基本数据类型

完全注解开发

AOP面向切面编程
AOP的术语
① 连接点:类里面有哪些方法可以被增强,这些方法叫做连接点
② 切入点:实际被真正增强的方法,叫切入点。 有时一个类中有多个方法,但是只需要增强一个方法,那么该方法就称之为切入点。
③ 通知(增强):(1)实际增强的逻辑部分称为通知
(2)通知有多种类型:前置通知,后置通知,环绕通知,异常通知,最终通知
④ 切面:把通知应用到切入点
引入aspectj所需要的包
基于注解实现AOP
切入点表达式
execution(权限修饰符【可选】 返回值类型【必填】 类全路径名称【可选】 方法名称【必填】(参数列表【没有参数可不填】))
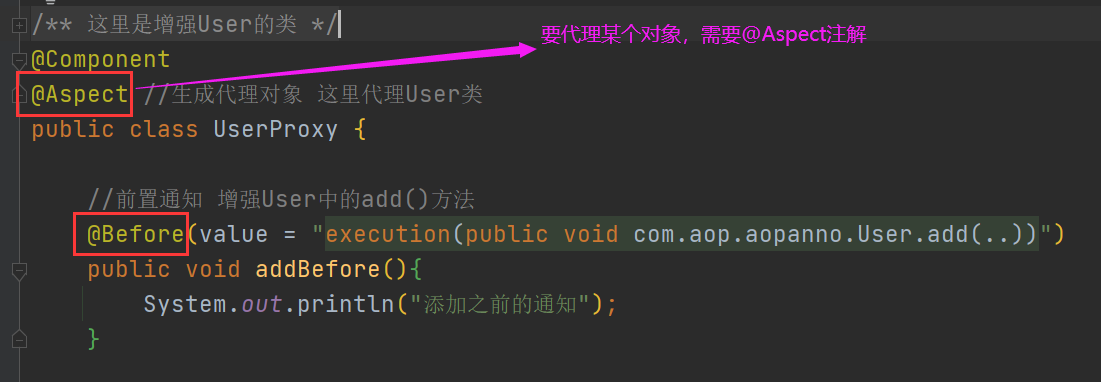
1.编写User类和需要增强的UserProxy类

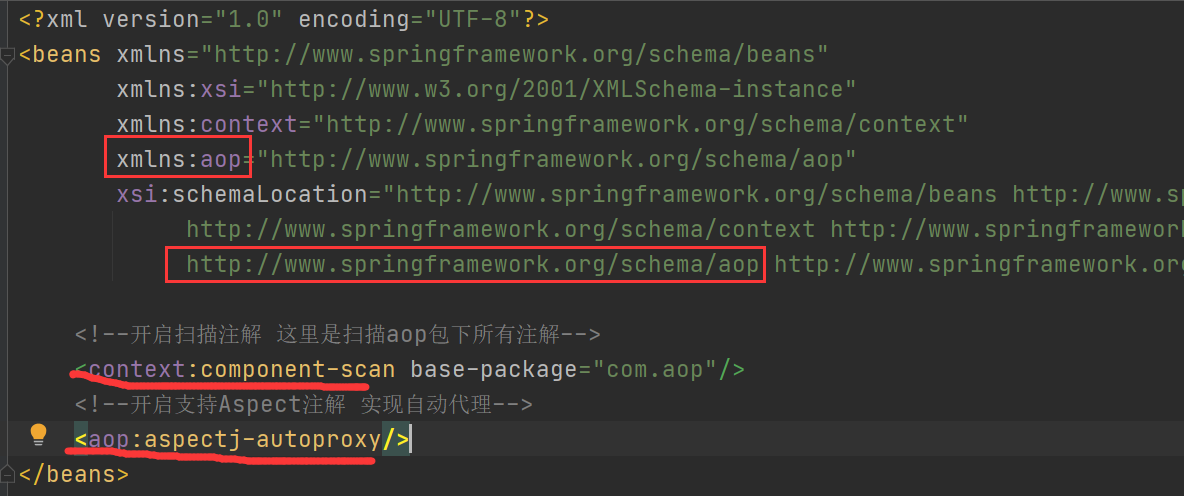
2.编写xml配置文件
编写测试类

测试结果

现在测试四种通知的顺序;编写代理类
package com.aop.aopanno;
import org.aspectj.lang.ProceedingJoinPoint;
import org.aspectj.lang.annotation.*;
import org.springframework.stereotype.Component;
/**
* 这里是增强User的类
*/
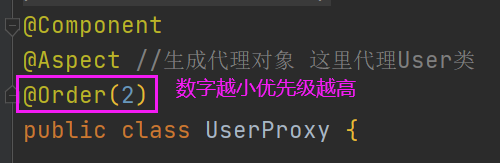
@Component
@Aspect //生成代理对象 这里代理User类
public class UserProxy {
//前置通知 增强User中的add()方法
@Before(value = "execution(public void com.aop.aopanno.User.add(..))")
public void addBefore(){
System.out.println("添加之前的通知");
}
@After(value = "execution(* com.aop.aopanno.User.add(..))")
public void addAfter(){
System.out.println("添加之后的通知");
}
@Around(value = "execution(* com.aop.aopanno.User.add(..))")
public void addAround(ProceedingJoinPoint proceedingJoinPoint) throws Throwable {
System.out.println("环绕之前");
//让增强的那个方法执行
proceedingJoinPoint.proceed();
System.out.println("环绕之后");
}
@AfterReturning(value = "execution(* com.aop.aopanno.User.add(..))")
public void addAfterReturning(){
System.out.println("afterReturning..");
}
}
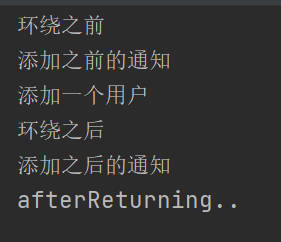
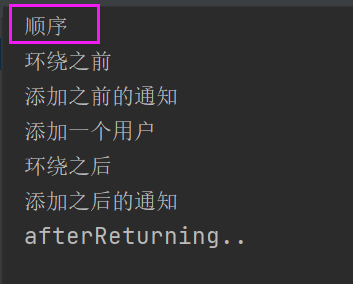
仍然用上面的测试方法,输入结果为:(要知道执行顺序)
@AfterThrowing只有在抛出异常才会执行
相同切入点抽取

多个增强类要对同一个方法进行增强,可以设置优先级
现在多了一个UserProxy1类,也要对add()方法进行增强,我们可以设置让谁先实现add方法
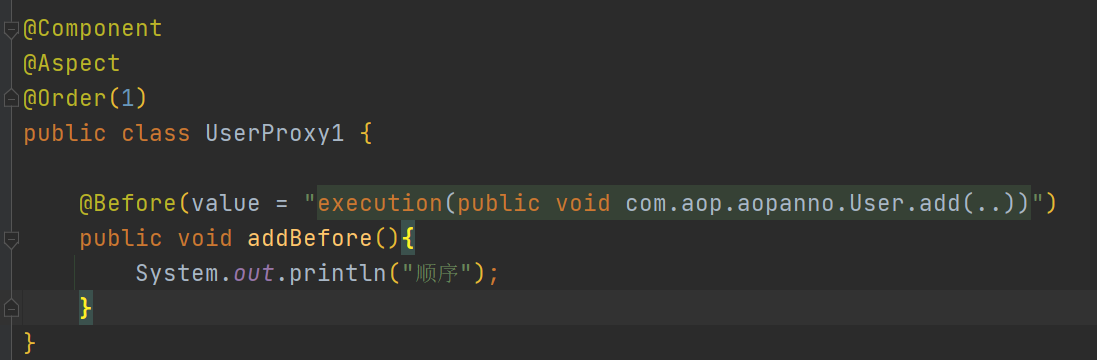
执行结果:
基于配置文件实现AOP
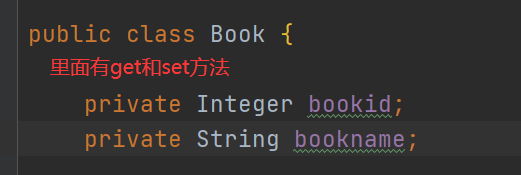
编写Book类和BookProxy类


编写book.xml配置文件
<?xml version="1.0" encoding="UTF-8"?>
<beans xmlns="http://www.springframework.org/schema/beans"
       xmlns:xsi="http://www.w3.org/2001/XMLSchema-instance"
       xmlns:aop="http://www.springframework.org/schema/aop"
       xsi:schemaLocation=
               "http://www.springframework.org/schema/beans http://www.springframework.org/schema/beans/spring-beans.xsd
               http://www.springframework.org/schema/aop http://www.springframework.org/schema/aop/spring-aop.xsd">

    <!--创建对象-->
    <bean id="book" class="com.aop.aopxml.Book"/>
    <bean id="bookProxy" class="com.aop.aopxml.BookProxy"/>
    <!--配置AOP增强-->
    <aop:config>
        <!--配置切入点-->
        <aop:pointcut id="p" expression="execution(* com.aop.aopxml.Book.buy())"/>
        <!--配置切面-->
        <aop:aspect ref="bookProxy">
            <aop:before method="before" pointcut-ref="p"/>
        </aop:aspect>
    </aop:config>
</beans>


jdbcTemplate
1.首先引入Java包
2.编写Book实体类
3. 编写Book Dao接口类
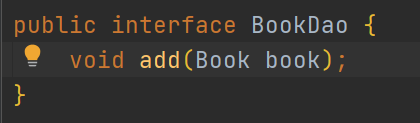
4. 编写BooKDaoImpl的实现类

5. 编写bookService类

外部数据文件mysql.properties
6. 开启扫描注解和配置jdbcTemplate对象,数据源等
<?xml version="1.0" encoding="UTF-8"?>
<beans xmlns="http://www.springframework.org/schema/beans"
       xmlns:xsi="http://www.w3.org/2001/XMLSchema-instance"
       xmlns:context="http://www.springframework.org/schema/context"
       xsi:schemaLocation=
               "http://www.springframework.org/schema/beans http://www.springframework.org/schema/beans/spring-beans.xsd
               http://www.springframework.org/schema/context http://www.springframework.org/schema/context/spring-context.xsd">
    <!--配置引入外部文件的属性值-->
    <context:property-placeholder location="classpath:mysql.properties"/>
    <!--配置扫描包下的注解-->
    <context:component-scan base-package="com.jdbcTemplate"/>
    <!--数据库连接池-->
    <bean id="druidDataSource" class="com.alibaba.druid.pool.DruidDataSource">
        <property name="driverClassName" value="${jdbc.driver}"/>
        <property name="url" value="${jdbc.url}"/>
        <property name="username" value="${jdbc.username}"/>
        <property name="password" value="${jdbc.password}"/>
     </bean>
    <!--配置jdbcTemplate对象 同时将数据源注入-->
    <bean id="jdbcTemplate" class="org.springframework.jdbc.core.JdbcTemplate">
        <property name="dataSource" ref="druidDataSource"/>
    </bean>
</beans>
事务(PlatformTransactionManager)
事务的特性(ACID)
① 原子性:要么都成功,要么都失败
② 一致性:总量不变,A有100元,B有100元,A,B一共有200元,A给B转钱,最后的总量还是200
③ 隔离性:多事务 操作不会产生影响.要解决三个问题:脏读,不可重复读,幻读
脏读:一个未提交事务读取到另一个未提交事务的数据
不可重复读:一个未提交事务读取到另一提交事务修改的数据。
幻读:一个未提交事务读取到另一提交事务添加的数据
④ 持久性:提交存入数据库后不可变。
总结:①事务一般加到业务层
声明式事务管理(底层用AOP原理)分为:基于注解,基于xml配置文件
- 1.基于注解
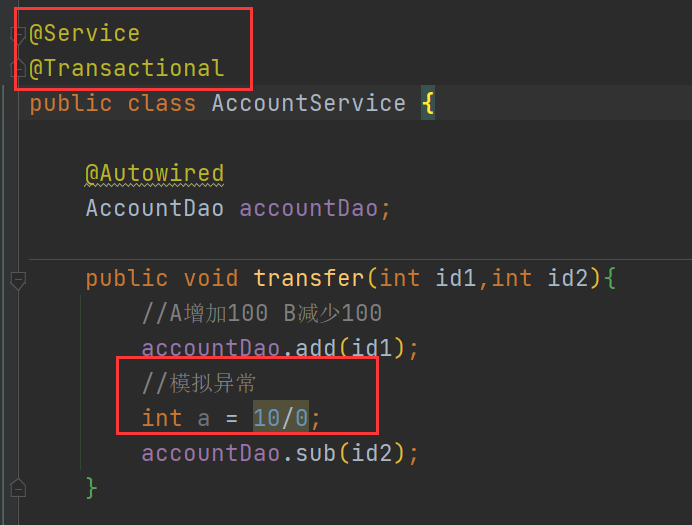
步骤:xml中需要如下配置:① 创建事务对象 ② 开启事务注解 ③ 在需要的类上或者方法上加上@Transactional,这里在Service类上加该注解。如下例子
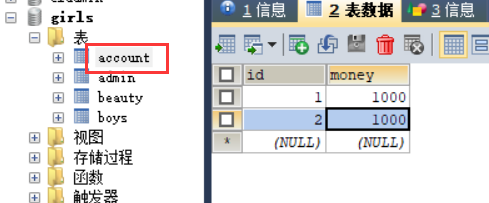
所用数据库表
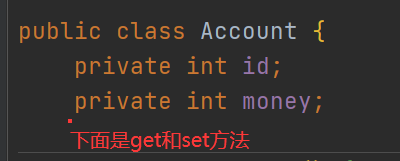
编写Account类
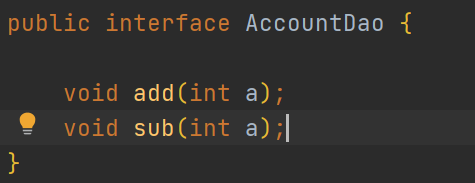
编写AccountDao接口
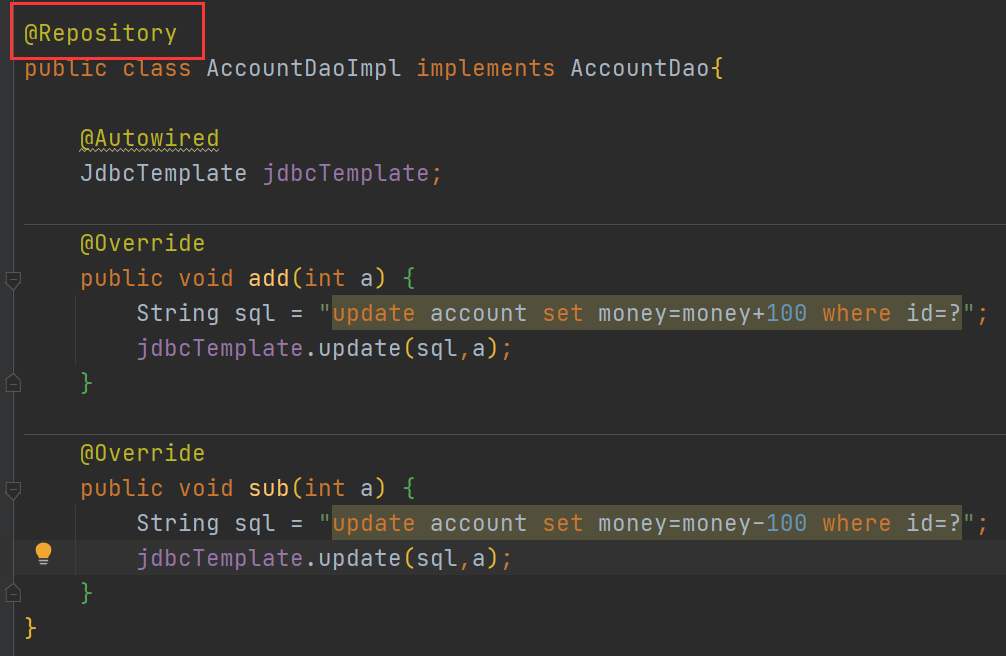
编写AccountDaoImpl的实现类
编写Service类
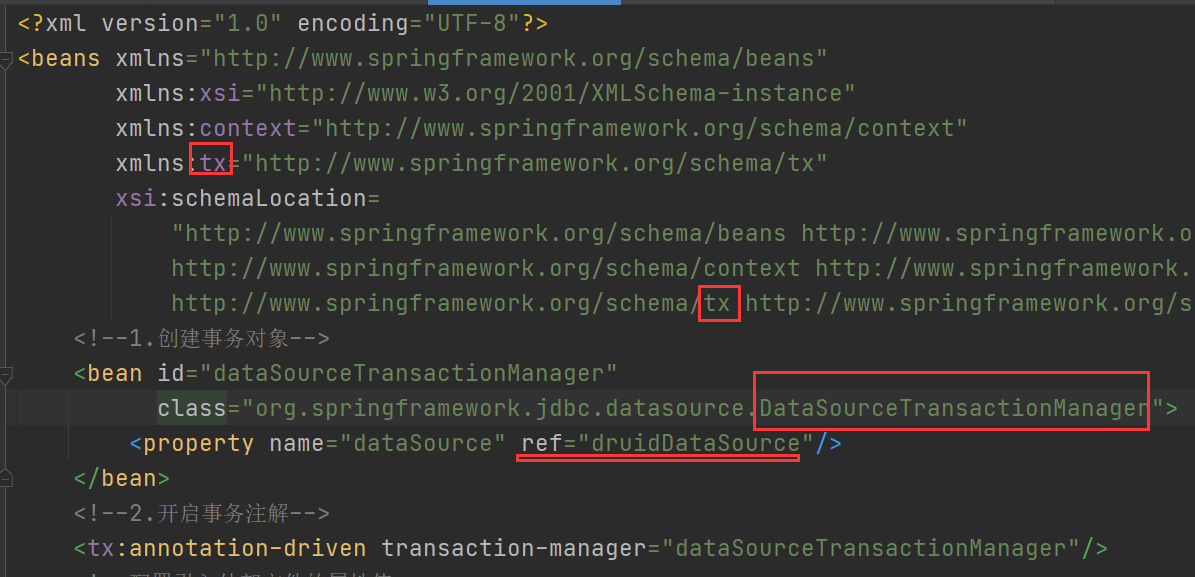
编写xml配置文件
<?xml version="1.0" encoding="UTF-8"?>
<beans xmlns="http://www.springframework.org/schema/beans"
       xmlns:xsi="http://www.w3.org/2001/XMLSchema-instance"
       xmlns:context="http://www.springframework.org/schema/context"
       xmlns:tx="http://www.springframework.org/schema/tx"
       xsi:schemaLocation=
           "http://www.springframework.org/schema/beans http://www.springframework.org/schema/beans/spring-beans.xsd
           http://www.springframework.org/schema/context http://www.springframework.org/schema/context/spring-context.xsd
           http://www.springframework.org/schema/tx http://www.springframework.org/schema/tx/spring-tx.xsd">
    <!--1.创建事务对象-->
    <bean id="dataSourceTransactionManager" class="org.springframework.jdbc.datasource.DataSourceTransactionManager">
        <property name="dataSource" ref="druidDataSource"/>
    </bean>
    <!--2.开启事务注解-->
    <tx:annotation-driven transaction-manager="dataSourceTransactionManager"/>
    <!--配置引入外部文件的属性值-->
    <context:property-placeholder location="classpath:mysql.properties"/>
    <!--配置扫描包下的注解-->
    <context:component-scan base-package="com.jdbcTemplate"/>
    <!--数据库连接池-->
    <bean id="druidDataSource" class="com.alibaba.druid.pool.DruidDataSource">
        <property name="driverClassName" value="${jdbc.driver}"/>
        <property name="url" value="${jdbc.url}"/>
        <property name="username" value="${jdbc.username}"/>
        <property name="password" value="${jdbc.password}"/>
     </bean>
    <!--配置jdbcTemplate对象 同时将数据源注入-->
    <bean id="jdbcTemplate" class="org.springframework.jdbc.core.JdbcTemplate">
        <property name="dataSource" ref="druidDataSource"/>
    </bean>
</beans>
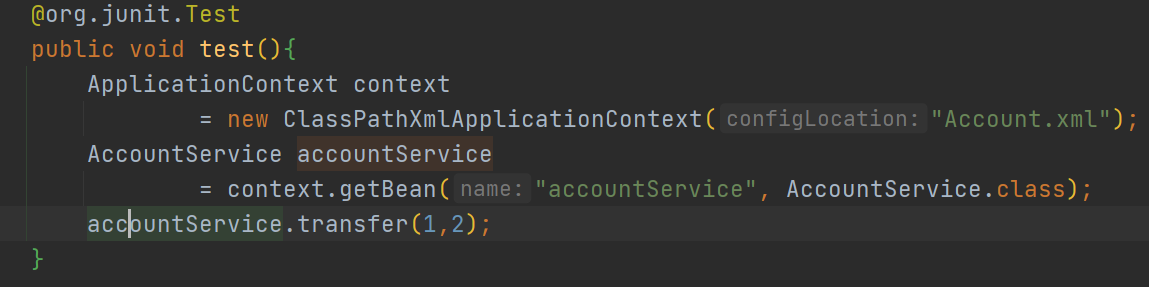
编写测试类
-
- 基于xml配置文件
步骤:① 创建事务对象 ② 配置通知tx:advice ③ 配置切入点
xml配置文件如下
<?xml version="1.0" encoding="UTF-8"?>
<beans xmlns="http://www.springframework.org/schema/beans"
xmlns:xsi="http://www.w3.org/2001/XMLSchema-instance"
xmlns:context="http://www.springframework.org/schema/context"
xmlns:aop="http://www.springframework.org/schema/aop"
xmlns:tx="http://www.springframework.org/schema/tx"
xsi:schemaLocation=
"http://www.springframework.org/schema/beans http://www.springframework.org/schema/beans/spring-beans.xsd
http://www.springframework.org/schema/context http://www.springframework.org/schema/context/spring-context.xsd
http://www.springframework.org/schema/aop http://www.springframework.org/schema/aop/spring-aop.xsd
http://www.springframework.org/schema/tx http://www.springframework.org/schema/tx/spring-tx.xsd">
<!--1.创建事务对象-->
<bean id="transactionManager"
class="org.springframework.jdbc.datasource.DataSourceTransactionManager">
<property name="dataSource" ref="druidDataSource"/>
</bean>
<!--2. 配置通知-->
<tx:advice id="myAdvice">
<tx:attributes>
<tx:method name="transfer"/>
</tx:attributes>
</tx:advice>
<!--配置切入点和切面-->
<aop:config>
<aop:pointcut id="pt"
expression="execution(* com.jdbcTemplate.service.AccountService.transfer(..))"/>
<aop:advisor advice-ref="myAdvice" pointcut-ref="pt"/>
</aop:config>
<!--<!–2.开启事务注解–>-->
<!--<tx:annotation-driven transaction-manager="transactionManager"/>-->
<!--配置引入外部文件的属性值-->
<context:property-placeholder location="classpath:mysql.properties"/>
<!--配置扫描包下的注解-->
<context:component-scan base-package="com.jdbcTemplate"/>
<!--数据库连接池-->
<bean id="druidDataSource" class="com.alibaba.druid.pool.DruidDataSource">
<property name="driverClassName" value="${jdbc.driver}"/>
<property name="url" value="${jdbc.url}"/>
<property name="username" value="${jdbc.username}"/>
<property name="password" value="${jdbc.password}"/>
</bean>
<!--配置jdbcTemplate对象 同时将数据源注入-->
<bean id="jdbcTemplate" class="org.springframework.jdbc.core.JdbcTemplate">
<property name="dataSource" ref="druidDataSource"/>
</bean>
</beans>
将Service中的@Transactional注解去掉


