提取图像里面的红色灯笼(一)
图像的分割:RGB空间图像的分割:
/**************************************************************
函数功能:对图像rgb空间红色灯笼的提取
输入参数:源图像src;目标图像des;图像参数width,height,nChannels;
输出参数:目标图像
**************************************************************/
void rgb_seg(unsigned char* des, const unsigned char* src, int width, int height, int nChannels)
{
         printf("%d,%d,%d,",nChannels,width,height);
         unsigned char* ocl = new unsigned char[width * height * nChannels];
         for(int y = 0; y < height; y++)
             {
                       for(int x = 0; x < width; x++)
                       {
                            int img_B= src[y * width * nChannels + x * nChannels ] ;
                            int img_G= src[y * width * nChannels + x * nChannels + 1] ;
                            int img_R= src[y * width * nChannels + x * nChannels + 2] ;
                                if((img_R>140)&&(img_G<70)&&(img_B<70))                 //简单的阈值提取
                                         for(int n=0;n<nChannels;n++)
                                    des[y * width * nChannels + x * nChannels + n] = src[y * width * nChannels + x * nChannels + n] ;
                                else
                                        for(int n=0;n<nChannels;n++)
                                        des[y * width * nChannels + x * nChannels + n] =255;
                       }
             }
             ImageDilation(ocl, des,  width, height, nChannels,7);//用7*7的模板进行膨胀
             ImageErosion(des, ocl, width, height, nChannels,13); //用13*13的模板进行腐蚀
             ImageDilation(ocl, des, width, height, nChannels,13);//用13*13的模板进行膨胀
             ImageReturn(des,ocl,src, width, height, nChannels,10);//用10*10的模板还原灯笼
}
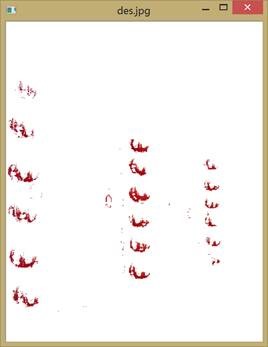
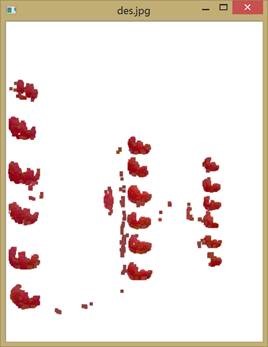
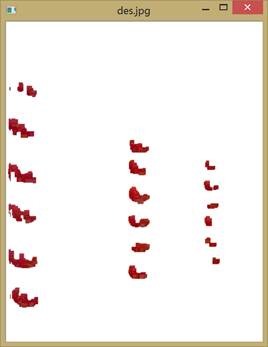
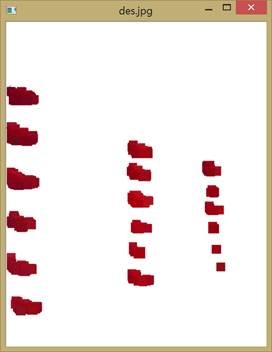
下图第一幅为简单的红色分量阈值分割,第二幅为对前一副图像7*7的模板的膨胀。
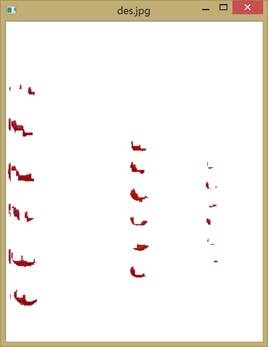
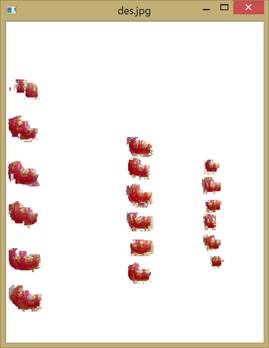
下图第一幅为用13*13的模板进行腐蚀,第二幅用13*13的模板再次进行膨胀:
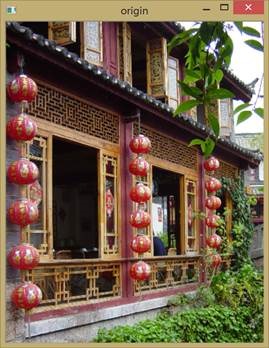
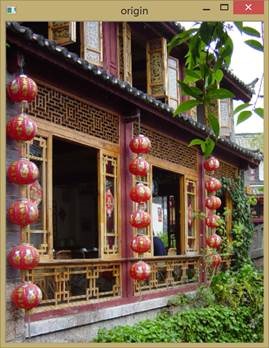
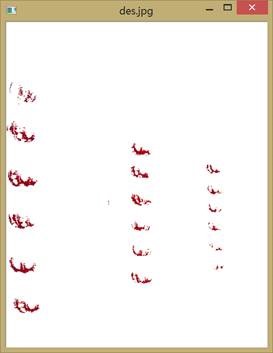
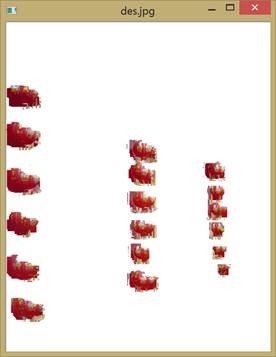
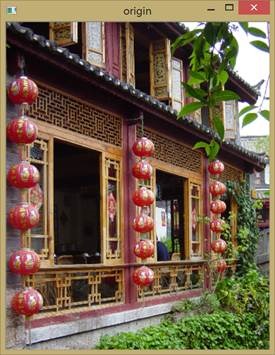
可见再次膨胀后的图像消除了所有的噪点,我们对这幅图像进行还原,还原的基本原理就是对图像有红色区域的部分用源图像进行相对应位置的填充。如下所示,对比原图可见其较好的找出了灯笼的轮廓。
图像的分割:HSI空间图像的分割:
/**************************************************************
函数功能:对图像hsi空间红色灯笼的提取
输入参数:源图像src;目标图像des;图像参数width,height,nChannels;
输出参数:目标图像
**************************************************************/
void hsi_seg(unsigned char* des, const unsigned char* src, int width, int height, int nChannels)
{
         printf("%d,%d,%d,",nChannels,width,height);
         unsigned char* ocl = new unsigned char[width * height * nChannels];
         unsigned char* hsi = new unsigned char[width * height * nChannels];
         rgb_hsi(hsi,src, width,  height,  nChannels);    //hsi分量提取
         for(int y = 0; y < height; y++)
             {
                       for(int x = 0; x < width; x++)
                       {
                            int img_H= hsi[y * width * nChannels + x * nChannels ] ;
                            int img_S= hsi[y * width * nChannels + x * nChannels + 1] ;
                            int img_I= hsi[y * width * nChannels + x * nChannels + 2] ;
                                if(((img_H<104)&&(img_H>102))&&(img_I>40)&&(img_S>160))
                                     {
                                               //printf("%d, ",img_S);
                                         for(int n=0;n<nChannels;n++)
                                    des[y * width * nChannels + x * nChannels + n] = src[y * width * nChannels + x * nChannels + n] ;
                                     }
                                else
                                        for(int n=0;n<nChannels;n++)
                                        des[y * width * nChannels + x * nChannels + n] =255;

                       }
             }
             ImageErosion(ocl, des, width, height, nChannels,2);       //进行2*2的模板腐蚀
                   ImageDilation(des, ocl,  width, height, nChannels,18);//进行18*18的模板膨胀
                   memcpy(ocl, des, nChannels*width*height);
             ImageReturn(des,ocl,src, width, height, nChannels,10);//进行10*10的模板还原
}
下图第一幅图像为HIS空间对图像进行的简单的阈值分割,分割条件:
((img_H<104)&&(img_H>102))&&(img_I>40)&&(img_S>160)
可见其噪点很少,对其进行2*2的模板腐蚀再进行18*18的模板膨胀,如下右图所示:
可见右图已经比较好的找出了灯笼的位置,我们用进行10*10的模板还原得到下面的图,和原图比较,也得到了比较好的效果。
下面是图像腐蚀、膨胀、还原的代码:
/**************************************************************
函数功能:对图像进行M*M模板的腐蚀
输入参数:源图像src;目标图像des;图像参数width,height,nChannels;腐蚀边长M
输出参数:目标图像
**************************************************************/
void ImageErosion(unsigned char* des, const unsigned char* src, int width, int height, int nChannels,int M)
{
         memcpy(des, src, nChannels*width*height);
         int m,p,k=0,q=0;
         for(int y = 20; y < height-20; y++)
             {
                       for(int x = 20; x < width-20; x++)
                {
                    if((src[y * width * nChannels + x * nChannels + 2]!=255))
                    {
                                                        k=k+1;
                                                        for(m=-M;m<=M;m++)
                        {
                        for(p=-M;p<=M;p++)
                            {
                                                                 if((src[(y+m) * width * nChannels + (x+p) * nChannels + 2])==255)
                                                                 {
                                                                   for(int n=0;n<nChannels;n++)
                              des[y * width * nChannels + x * nChannels + n]=255;
                                                                 }
                             }
                        }
                                               }
                                               else
                                               {
                                                        q=q+1;
                                               }
             }
       }
         //printf("E%d   %d",k,q);
}

/**************************************************************
函数功能:对图像进行M*M模板的膨胀
输入参数:源图像src;目标图像des;图像参数width,height,nChannels;膨胀边长M
输出参数:目标图像
**************************************************************/
void ImageDilation(unsigned char* des, const unsigned char* src, int width, int height,int nChannels,int M)
{
             int m,p,k=0,q=0;
                   memcpy(des, src, nChannels*width*height);
         for(int y = 20; y < height-20; y++)
             {
                       for(int x = 20; x < width-20; x++)
                {
                    if((src[y * width * nChannels + x * nChannels + 2]!=255))
                    {
                                                        k=k+1;
                                                        for(m=-M;m<=M;m++)
                        {
                        for(p=-M;p<=M;p++)
                            {
                                                                   for(int n=0;n<nChannels;n++)
                              des[(y+m) * width * nChannels + (x+p) * nChannels + n]=src[y * width * nChannels + x * nChannels + n];
                             }
                        }
                                               }
                                               else
                                               {
                                                        q=q+1;
                                               }
             }
       }
         //printf("D%d  %d",k,q);
}
/**************************************************************
函数功能:对图像进行M*M模板的原图像还原
输入参数:源图像src;目标图像des;图像参数width,height,nChannels;还原边长M
输出参数:目标图像
**************************************************************/
void ImageReturn(unsigned char* des, const unsigned char* ocl, const unsigned char* src, int width, int height, int nChannels,int M)
{
         memcpy(des, ocl, nChannels*width*height);
         int m,p,k=0,q=0;
         for(int y = 30; y < height-30; y++)
             {
                       for(int x = 30; x < width-30; x++)
                {
                    if((ocl[y * width * nChannels + x * nChannels + 2]!=255))
                    {
                                                        k=k+1;
                                                        for(m=-M;m<=M;m++)
                        {
                        for(p=-M;p<=M;p++)
                            {
                                                                 int B= src[(y+m) * width * nChannels + (x+p) * nChannels ] ;
                                            int G= src[(y+m) * width * nChannels + (x+p) * nChannels + 1] ;
                                            int R= src[(y+m) * width * nChannels + (x+p) * nChannels + 2] ;
                                             if(R>130)
                                                                  {
                                                                   for(int n=0;n<nChannels;n++)
                              des[(y+m) * width * nChannels + (x+p) * nChannels + n]=src[(y+m) * width * nChannels + (x+p) * nChannels + n];
                                                                  //将还原区域用源图像进行填充
                                                                  }
                             }
                        }
                                               }
             }
       }
}



 浙公网安备 33010602011771号