基于Windows 机器学习(Machine Learning)的图像分类(Image classification)实现
今天看到一篇文章 Google’s Image Classification Model is now Free to Learn

说是狗狗的机器学习速成课程(Machine Learning Crash Course)现在可以免费学习啦,因为一开始年初的时候是内部使用的,后来开放给大众了。大家有谁对不作恶家的机器学习感兴趣的话,可以点击连接去看看。
但是以上不是我说的重点。

说狗狗的原因,是为了引出我大微软的机器学习。
在2018年3月7日,在Windows开发者日活动中,微软宣布推出Windows人工智能平台Windows ML。
ML means machine learning, not make love. Understand???
在Windows ML平台下,开发人员能够将不同的AI平台导入现有的学习模型,并在安装了Windows10系统的PC设备上使用预先培训的ML模型,并利用CPU和GPU(AMD,Intel,NVIDIA、Qualcomm)硬件进行加速,而非云端。从而加快对本地图像及视频数据的实时分析,甚至是后台任务的改进。
此外该技术支持ONNX格式的ML模型行业标准,开发者能够添加ONNX文件至UWP应用中,在并项目中生成模型界面。
目前微软已将自家的AI技术融入进了Office 365、Windows 10 照片中,甚至还使用了Windows Hello面部识别技术,来替换传统的开机密码。
看看你看,这么牛B的技术,我们怎么不来尝鲜呢。不过也不鲜了,已经过去仨月了。但是哪一家的技术不是先画一个饼,过很久你才能看到样品。哈哈。
现在学习ML还来得及。
在操作之前,先来说一下需要什么配置吧。
1. Windows 10 1803 或者更高
2. Visual Studio 15.7.1或更高
3. Microsoft Visual Studio Tools for AI,在工具——扩展和更新 里面搜索AI即可找到。
OK,大体说一下流程。
1. 创建和训练机器学习的模型
要实现对某一张图像的辨别,首先我们需要用一些数据来训练机器,告诉它这个是啥。也就是加标签tag.
比如,之前微软的小冰识狗,那你得首先找很多狗的照片吧,你要是拿猫的照片来训练机器,告诉它这是狗,也不是不可以。因为历史上也有指鹿为马的故事呢。当然在一个很大数据下,比如你拿了10万张狗的图片,里面有那么几张是猫的,鸡的图片,这样训练出来也没事。因为机器会在训练之后给你一个数据让你参考。在数据很大的前提下,允许小错的。
2. 代码实战
用代码来实现一下,并且随机挑一张照片,叫机器辨别它是个啥。因为机器刚才学习了啊,如果他认识,那么就会给出相应的可能性大小。
1. 创建和训练机器学习的模型
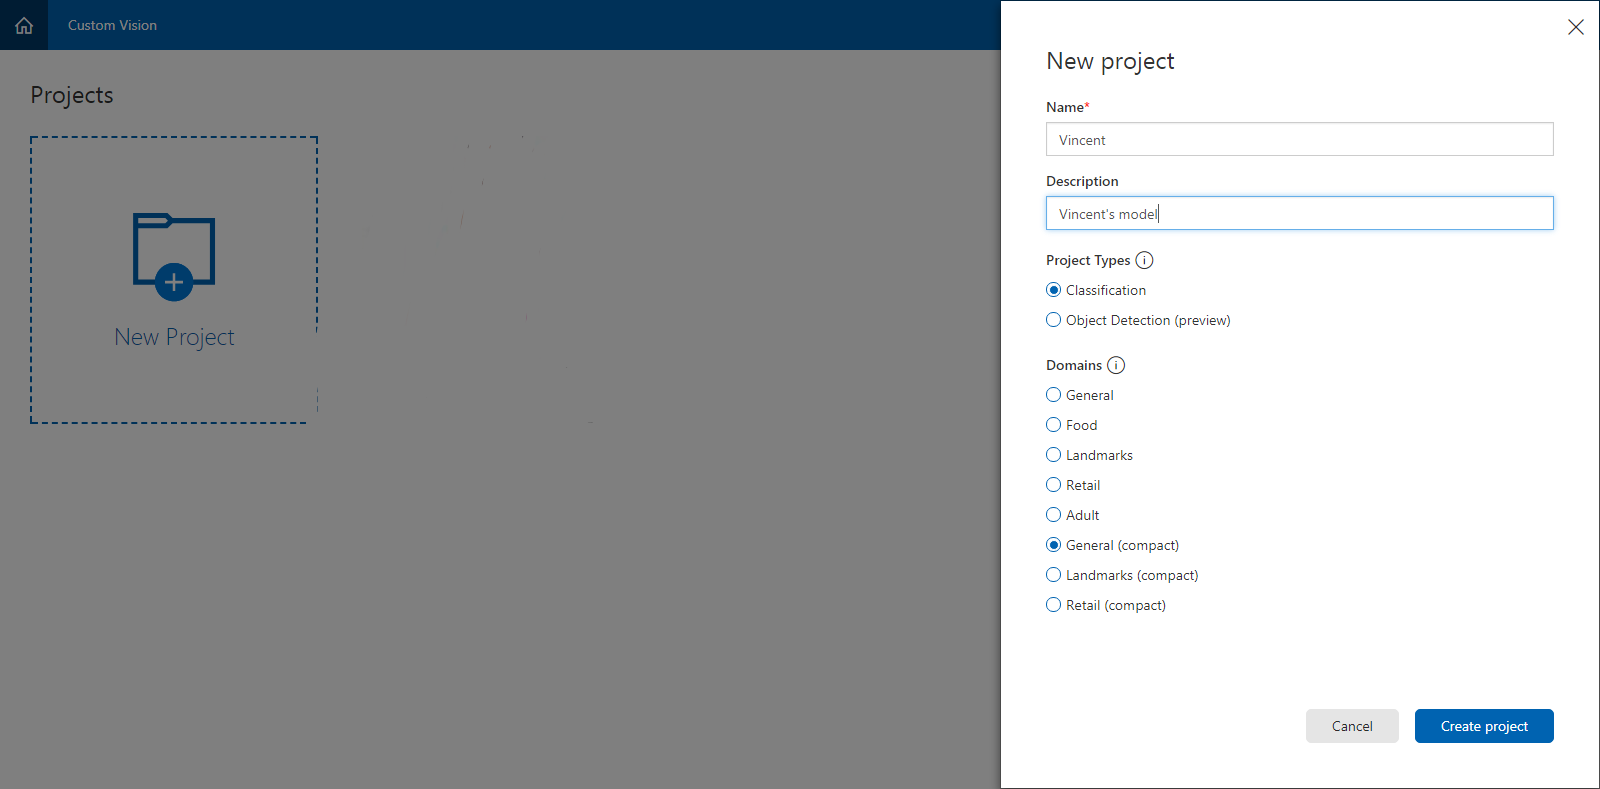
用你的Microsoft账号登陆 https://www.customvision.ai/projects, ,创建项目,类型就选择图像分类,Domains领域选择了General(Compact),带Compact是可以到处到Android和ios上用模型
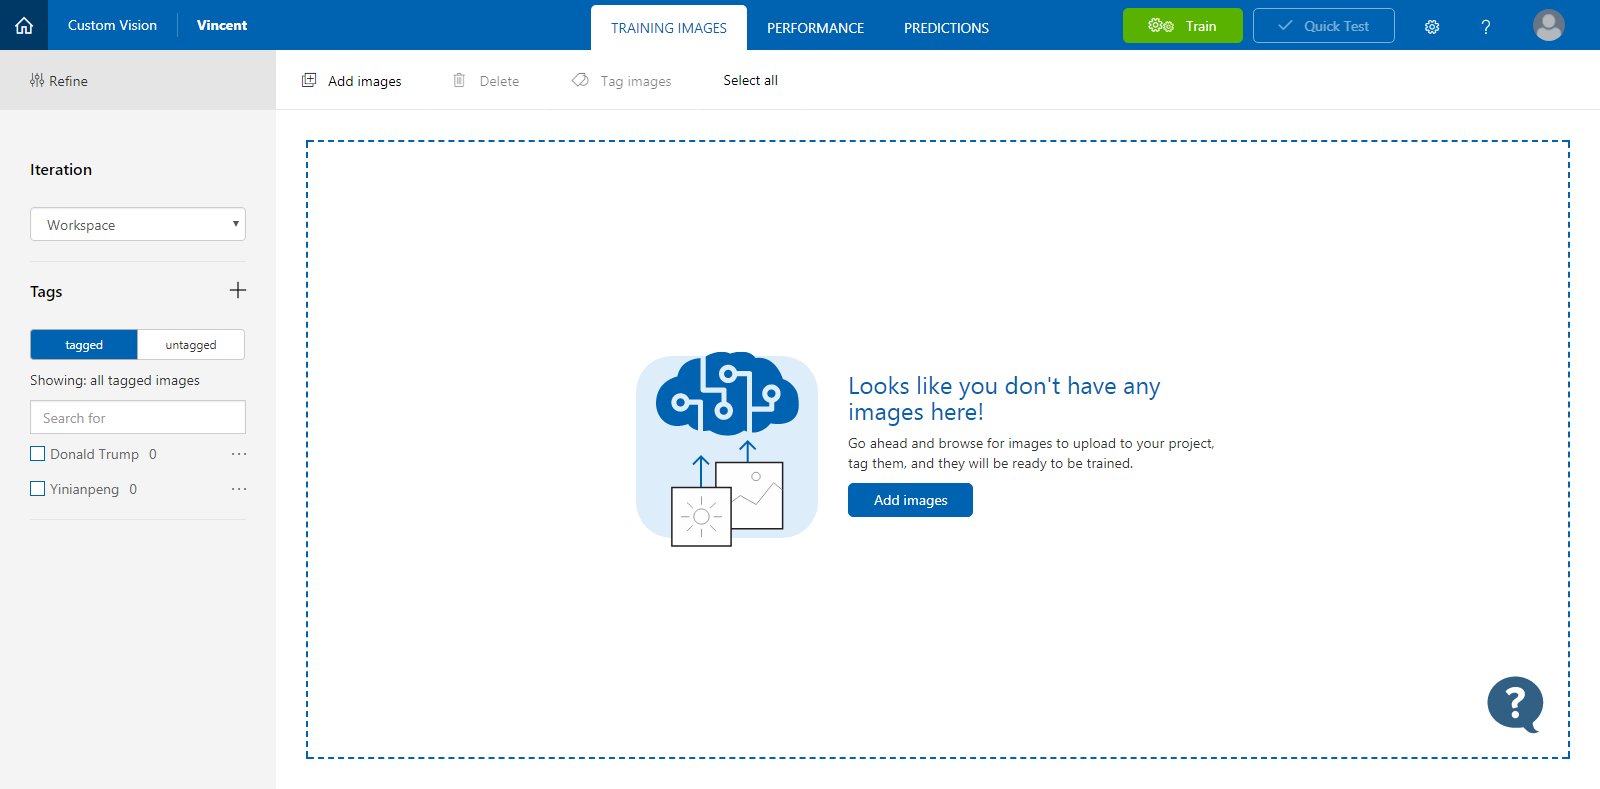
接下来你会看到下图,你可以先加标签tag,在给标签添加相应的图像。也可以先加图像,然后新加标签的。
我先训练一个川普出来试试,
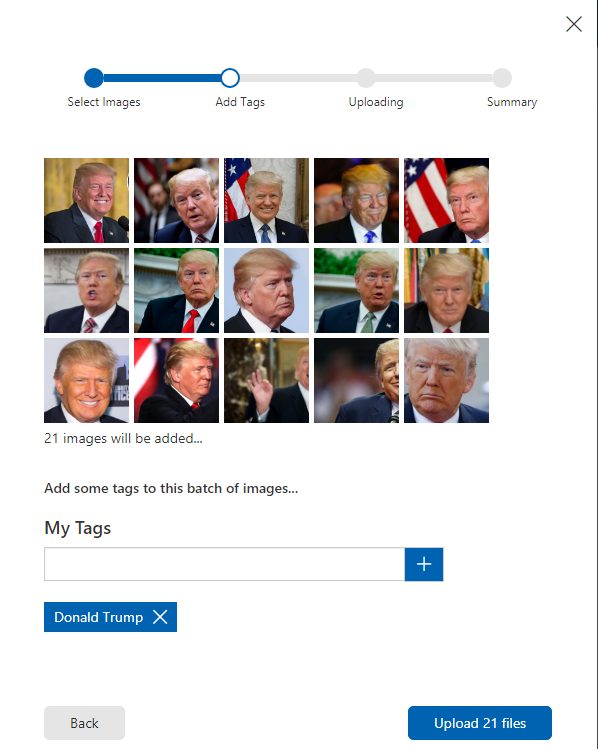
你可以多加几个标签。我一共做了两个。一个是川普,一个是一种花,一年蓬。
等把标签和对应的图像都上传完毕后,点击上面的【训练】

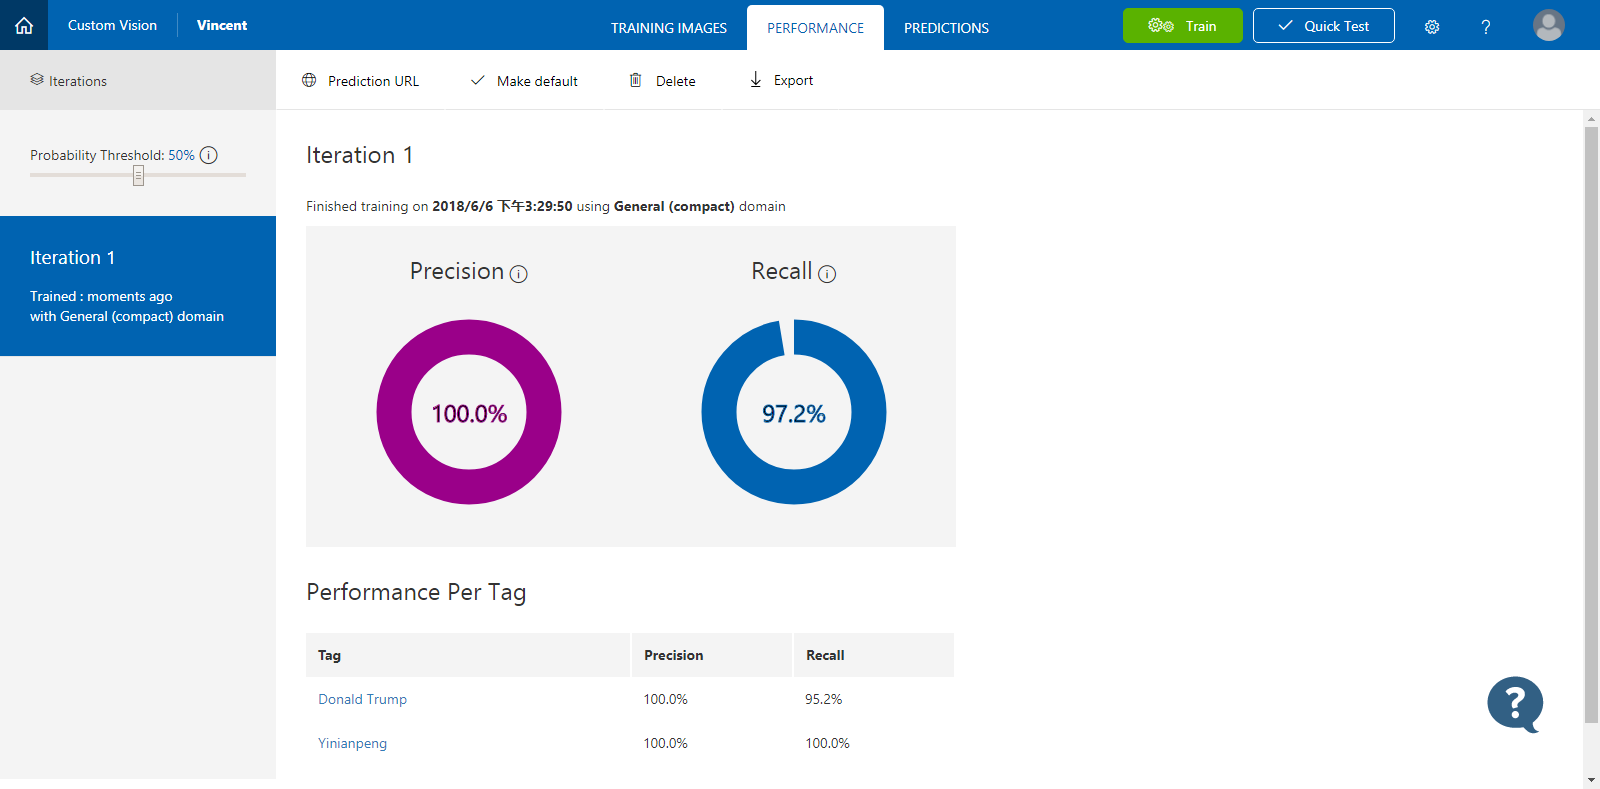
然后训练结果马上就出来了。
第一个Precision,表示模型包含的标签预测的精度,越大越好。
第一个Recall,模型标签外的预测精度,也是越大越好。
当然,你也可以现在试验一下。点击右上方的Quick Test,即可测试。。
然后,点击正上方的Export,导出模型。支持4种格式,Android,Ios,ONNX,DockFile。我们选择WIndows标准的ONNX。好了。第一步基本结束。很简单,都是点几下就搞定。
如果你好奇ONNX里面是啥样子,那么恭喜你,你很好学。去 https://github.com/lutzroeder/Netron 下载一个软件,看看吧。
2. 代码实战
模型做好了,就该写代码了。代码也不多,很简单滴。
新建一个UWP 程序,在Assets资产文件夹里面,添加刚才下载的ONNX文件(该文件可以随意重命名,也最好Rename一下,不然文件名字太长了),设置它的生成操作为【Content 内容】。
这是你会发现,多了一个.cs类。
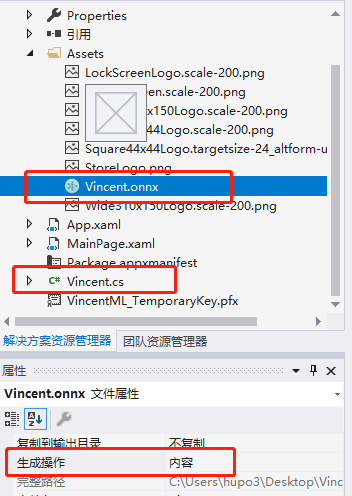
打开Vincent.cs看看啊,没错,又是有点乱。改一下咯
using System;
using System.Collections.Generic;
using System.Threading.Tasks;
using Windows.Media;
using Windows.Storage;
using Windows.AI.MachineLearning.Preview;

// e6c82f6e-c60f-422a-97b6-e0406cba82da_6ed0259c-001e-4895-be7a-4a930321a307

namespace VincentML
{
    public sealed class ModelInput
    {
        public VideoFrame data { get; set; }
    }

    public sealed class ModelOutput
    {
        public IList<string> classLabel { get; set; }
        public IDictionary<string, float> loss { get; set; }
        public ModelOutput()
        {
            this.classLabel = new List<string>();
            this.loss = new Dictionary<string, float>()
            {
                { "Donald Trump", float.NaN },
                { "Yinianpeng", float.NaN },
            };
        }
    }

    public sealed class Model
    {
        private LearningModelPreview learningModel;
        public static async Task<Model> CreateModel(StorageFile file)
        {
            LearningModelPreview learningModel = await LearningModelPreview.LoadModelFromStorageFileAsync(file);
            Model model = new Model();
            model.learningModel = learningModel;
            return model;
        }
        public async Task<ModelOutput> EvaluateAsync(ModelInput input) {
            ModelOutput output = new ModelOutput();
            LearningModelBindingPreview binding = new LearningModelBindingPreview(learningModel);
            binding.Bind("data", input.data);
            binding.Bind("classLabel", output.classLabel);
            binding.Bind("loss", output.loss);
            LearningModelEvaluationResultPreview evalResult = await learningModel.EvaluateAsync(binding, string.Empty);
            return output;
        }
    }
}
好,接下来写一个简单的界面,一个图像Image和一个按钮Button,一个文本TextBlock
    <Grid>
        <Grid>
            <Grid.RowDefinitions>
                <RowDefinition/>
                <RowDefinition Height="Auto"/>
                <RowDefinition Height="Auto"/>
            </Grid.RowDefinitions>

            <Image x:Name="image"/>
            <TextBlock Grid.Row="1" x:Name="tbResult" HorizontalAlignment="Center"/>
            <Button Grid.Row="2" Content="Choose a picture" HorizontalAlignment="Center" Click="ChooseImage"/>
        </Grid>
    </Grid>
主要看后台代码ChooseImage。
龙宫分四步:
1. 加载模型
2. 选择一个图片
3. 设置模型的输入数据
4. 输出结果
            //1. 加载模型
            StorageFile modelDile = await StorageFile.GetFileFromApplicationUriAsync(new Uri($"ms-appx:///Assets/Vincent.onnx"));
            Model model = await Model.CreateModel(modelDile);

            //2. 选择一个图片
            FileOpenPicker picker = new FileOpenPicker();
            picker.FileTypeFilter.Add(".jpg");
            picker.FileTypeFilter.Add(".jpeg");
            picker.FileTypeFilter.Add(".png");
            picker.FileTypeFilter.Add(".bmp");
            picker.SuggestedStartLocation = PickerLocationId.PicturesLibrary;

            var file = await picker.PickSingleFileAsync();
            if (file != null)
            {
BitmapImage src = new BitmapImage();
using (IRandomAccessStream stream = await file.OpenAsync(FileAccessMode.Read))
{
await src.SetSourceAsync(stream);
stream.Dispose();
};
image.Source = src;
                //3. 设置模型的输入数据
                ModelInput modelInput = new ModelInput();
                modelInput.data = await GetVideoFrame(file);

                //4. 输出结果
                ModelOutput modelOutput = await model.EvaluateAsync(modelInput);
                var topCategory = modelOutput.loss.OrderByDescending(kvp => kvp.Value).FirstOrDefault().Key;
            }
注意一下,ModelInput的输如数据类型是VideoFrame,所以需要将图片转换一下。
        private async Task<VideoFrame> GetVideoFrame(StorageFile file)
        {
            SoftwareBitmap softwareBitmap;
            using (IRandomAccessStream stream = await file.OpenAsync(FileAccessMode.Read))
            {
                // Create the decoder from the stream
                BitmapDecoder decoder = await BitmapDecoder.CreateAsync(stream);

                // Get the SoftwareBitmap representation of the file in BGRA8 format
                softwareBitmap = await decoder.GetSoftwareBitmapAsync();
                softwareBitmap = SoftwareBitmap.Convert(softwareBitmap, BitmapPixelFormat.Bgra8, BitmapAlphaMode.Premultiplied);

                return VideoFrame.CreateWithSoftwareBitmap(softwareBitmap);
            }
        }
好了,看一下咋样,运行一下。
我还特地找了一张川总很酷的发型图
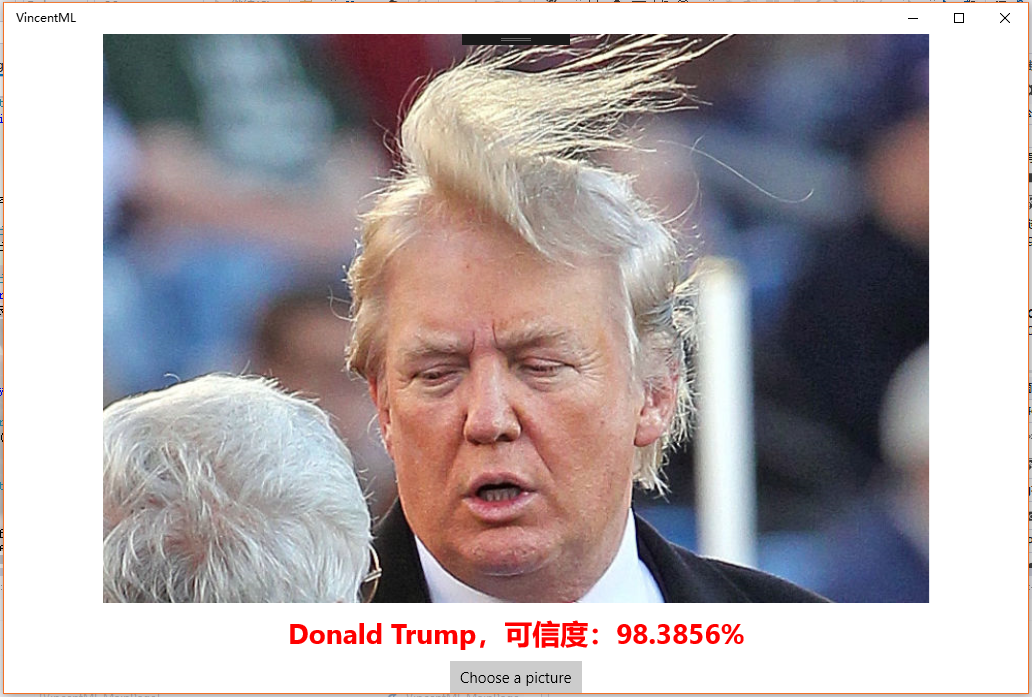
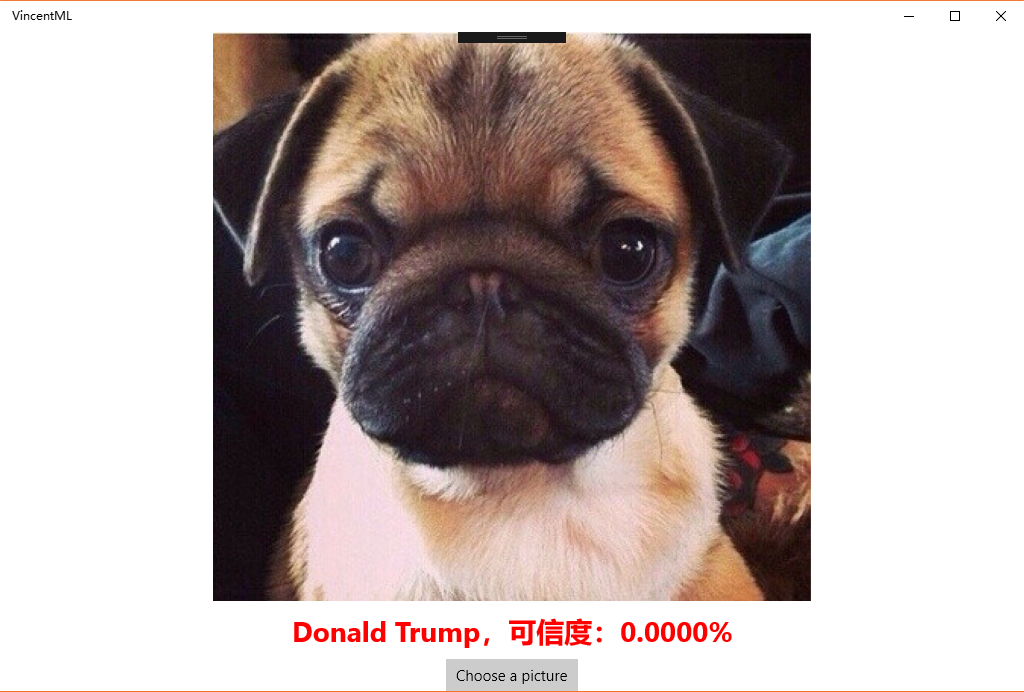
如果你选择了一个别的照片,比如狗,会得到这样的。
但是你非要说这条狗就叫Donald Trump,那我无F*ck可说了。
最后,欢迎大家去全球最大的同性恋交友平台Fork/Star我的项目:https://github.com/hupo376787/MachineLearningOnUWP



【推荐】国内首个AI IDE,深度理解中文开发场景,立即下载体验Trae
【推荐】编程新体验,更懂你的AI,立即体验豆包MarsCode编程助手
【推荐】抖音旗下AI助手豆包,你的智能百科全书,全免费不限次数
【推荐】轻量又高性能的 SSH 工具 IShell:AI 加持,快人一步
· AI与.NET技术实操系列:向量存储与相似性搜索在 .NET 中的实现
· 基于Microsoft.Extensions.AI核心库实现RAG应用
· Linux系列:如何用heaptrack跟踪.NET程序的非托管内存泄露
· 开发者必知的日志记录最佳实践
· SQL Server 2025 AI相关能力初探
· 震惊!C++程序真的从main开始吗?99%的程序员都答错了
· winform 绘制太阳,地球,月球 运作规律
· 【硬核科普】Trae如何「偷看」你的代码?零基础破解AI编程运行原理
· 上周热点回顾(3.3-3.9)
· 超详细:普通电脑也行Windows部署deepseek R1训练数据并当服务器共享给他人