istio服务治理
一 istio系统组件和部署
1.1 控制平面
istiod:
pilot 控制平台核心组件
galley 负责向istio控制平面的其他组件提供支撑功能,它核验进入网格的配置信息的格式和内容的正确性,并将这些配置信息提供给Pilot和Mixer
citedal 身份和凭据管理
部署方法:istioctl, istio operator, helm
1.2 数据平面
    Gateway:
        istio-ingressgateway
        istio-egressgateway
        istio-eastwestgateway
    Sidecar:
        istio-proxy:二次开发的envoy
        手工注入:istioctl kube-inject
        自动注入:在目标namespace上设定label
            istio-injection=enabled
1.3 部署和卸载
stioctl提供了内置配置文件(配置档案)用于快速部署
◼ default:根据IstioOperator API的默认设置启用相关的组件,适用于生产环境;
◼ demo:会部署较多的组件,旨在演示istio的功能,适合运行Bookinfo一类的应用程序
◼ minimal:类似于default profile,但仅部署控制平台组件
◼ remote:用于配置共享Control Plane的多集群环境
◼ empty:不部署任何组件,通常帮助用户在自定义profile时生成基础配置信息
◼ preview:包含预览性配置的profile,用于探索Istio的新功能,但不保证稳定性、安全性和性能
部署
istioctl apply/install --set profile=<PROFILE>    例如:istioctl install --set profile=demo -y
istioctl profile dump <NAME>  > /path/to/profile.yaml    #打印指定命名空间下的档案的资源配置信息  --config-path选项可用于仅打印指定的配置段
istioctl profile dump demo > /tmp/demo.yaml  #编辑demo配置文件
istioctl apply/install -f /path/to/profile.yaml  #部署指定的文件
istioctl verify-install -f $HOME/demo.yaml  #验证部署是否成功

卸载
istioctl x uninstall --purge    #卸载控制平面组件
二 流量治理
2.1 Virtual Services和Destination Rules是Istio流量路由功能的核心组件
Virtual Services用于将分类流量并将其路由到指定的目的地(Destination),而Destination Rules则用于配置那个指定Destination如何处理流量
VirtualService定义虚拟主机及相关的路由规则,包括路由至哪个目标(集群或子集)
DestinationRule定义集群或子集内部的流量分发机制
◼ Virtual Services
◆用于在Istio及其底层平台(例如Kubernetes)的基础上配置如何将请求路由到网格中的各Service之上
◆通常由一组路由规则(routing rules )组成,这些路由规则按顺序进行评估,从而使Istio能够将那些对Virtual Service的每个给定请求匹配到网格内特定的目标之上
◆事实上,其定义的是分发给网格内各Envoy的VirtualHost和Route的相关配置


◼ Destination Rules
◆定义流量在“目标”内部的各端点之间的分发机制,例如将各端点进行分组,分组内端点间的流量均衡机制,异常
探测等
◆事实上,其定义的是分发给网格内各Envoy的Cluster的相关配置
外部服务访问集群内部的流量走向
网格外部的流量:
流量必须经由某个IngressGateway进入,因而,接入流量的前提是在某个IngressGateway上自行开启一个Listener,开启Listener的方法,就是在该IngressGateway定义一个Gateway CRD资源;
在该Listener基于目标Host匹配流量
匹配到的流量,需要经由VirtualService定义其路由目标(网格内的某个服务);
External Client --> IngressGateway Service --> IngressGateway Pod(Listener(由Gateway定义) --> Route(由VirtualService定义)--> Cluster(可由控制平面通过发现的的Service自动配置) --> endpoint )
网格内部的通信:
将任何一个Service自动配置为每个Sidecar Envoy上的:
Listener:由Service Port指定;80会被自动处理为8080;
额外生成一个VirtualHost的定义,主机头的名称为该Service的名称;
Route:由一个Service的Listener进入的所有流量(match /*)全部路由给该Service的各Pod生成的Cluster
Cluster:由Service基于其名称生成,并通过EDS下发给每个Sidecar,所有集群名称同Service的名称;
Endpoint:由Service基于其Label Selector发现的各Pod的IP生成
Client --> Envoy Sidecar (outbound:egress listener --> route --> cluster --> endpoint (由目标生生成)) --> Server Pod Envoy Sidecar (inbound: ingress listener --> route --> local cluster --> localhost(业务容器)(自由所属的服务生成))
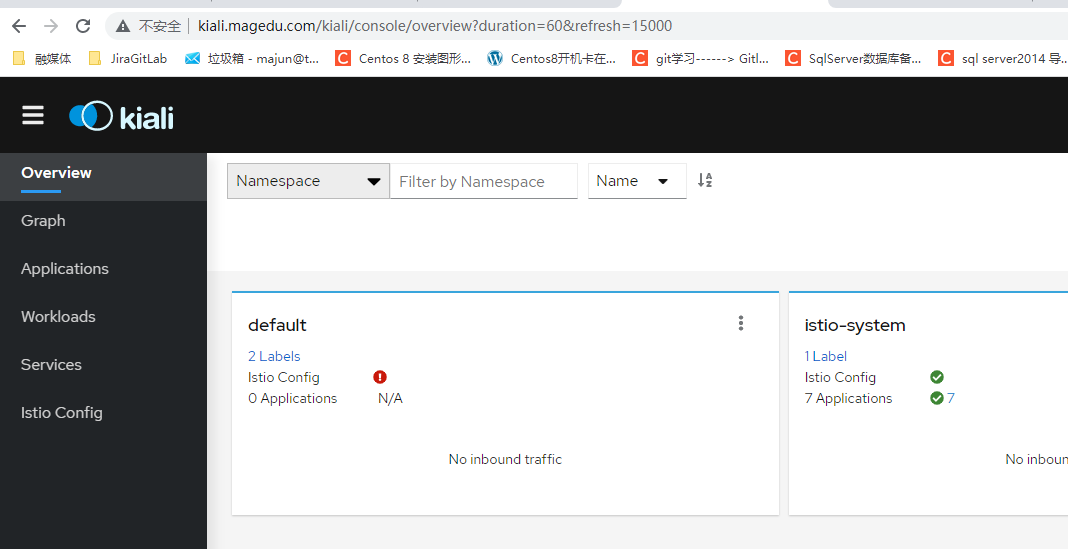
2.2 kiali开放外部网格服务
开放网格服务首先必须 在istio-ingressgateway 这个里面添加一个没用的Ip,这个ip,我是用keepalived生成的一个虚拟ip,效果如下,下面的域名也都解析到了这个ip之上。
如图所示:


https://github.com/iKubernetes/istio-in-practise/tree/main/Traffic-Management-Basics #代码地址
2.2.1 创建kiali-gateway资源
apiVersion: networking.istio.io/v1beta1
kind: Gateway
metadata:
  name: kiali-gateway
  namespace: istio-system
spec:
  selector:
    app: istio-ingressgateway
  servers:
  - port:
      number: 80
      name: http-kiali
      protocol: HTTP
    hosts:
    - "kiali.magedu.com"
2.2.2 使用“istioctl proxy-config”命令获取相关的配置
 InGW_POD=$(kubectl get pods -l app=istio-ingressgateway -n istio-system -o jsonpath={.items[0].metadata.name})

root@k8s-master1:~/ istioctl proxy-config listener $InGW_POD -n istio-system --port 20001
ADDRESS PORT  MATCH DESTINATION
0.0.0.0 20001 ALL   Route: http.20001

istioctl proxy-config listener $InGW_POD -n istio-system --port 8080
ADDRESS PORT MATCH DESTINATION
0.0.0.0 8080 ALL   Route: http.8080


root@k8s-master1:~/# istioctl proxy-config route $InGW_POD -n istio-system
NAME           DOMAINS              MATCH                  VIRTUAL SERVICE
http.8080      *                    /productpage           bookinfo.default
http.8080      *                    /static*               bookinfo.default
http.8080      *                    /login                 bookinfo.default
http.8080      *                    /logout                bookinfo.default
http.8080      *                    /api/v1/products*      bookinfo.default
http.20001     kiali.magedu.com     /*                     kiali-virtualservice.istio-system
               *                    /stats/prometheus*
               *                    /healthz/ready*
2.2.3 创建kiali-virtualservice资源
apiVersion: networking.istio.io/v1beta1
kind: VirtualService
metadata:
  name: kiali-virtualservice
  namespace: istio-system
spec:
  hosts:
  - "kiali.magedu.com"
  gateways:
  - kiali-gateway  # 名字查看方法 kubectl get gw -n istio-system
  http:
  - match:
    - port: 80   #要和gateway里的端口一致
    route:
    - destination:
        host: kiali
        port:
          number: 20001  #后端pod的真实端口
root@k8s-master1:~/istio-in-practise/kiali# istioctl proxy-config route $InGW_POD -n istio-system --name http.20001
NAME           DOMAINS              MATCH     VIRTUAL SERVICE
http.20001     kiali.magedu.com     /*        kiali-virtualservice.istio-system


root@k8s-master1:~/istio-in-practise/Traffic-Management-Basics/kiali# istioctl proxy-config endpoint $InGW_POD -n istio-system --port 20001
ENDPOINT                STATUS      OUTLIER CHECK     CLUSTER
10.100.36.123:20001     HEALTHY     OK                outbound|20001||kiali.istio-system.svc.cluster.local
2.2.4使用DestinationRule资源,为特定的路由“目标”自定义相关的配置
root@k8s-master1:~/istio-in-practise/Traffic-Management-Basics/kiali#  istioctl proxy-config endpoint $InGW_POD -n istio-system --port 20001
ENDPOINT                STATUS      OUTLIER CHECK     CLUSTER
10.100.36.123:20001     HEALTHY     OK                outbound|20001||kiali.istio-system.svc.cluster.local
root@k8s-master1:~/istio-in-practise/Traffic-Management-Basics/kiali#  kubectl get destinationrules -n istio-system
NAME    HOST    AGE
kiali   kiali   11d
访问kiali域名
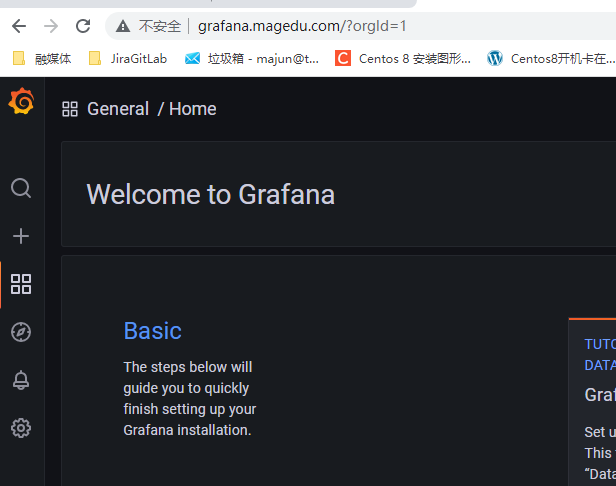
2.3 grafana开放网格外部
2.3.1 创建gateway
apiVersion: networking.istio.io/v1beta1
kind: Gateway
metadata:
  name: grafana-gateway
  namespace: istio-system
spec:
  selector:
    app: istio-ingressgateway
  servers:
  - port:
      number: 80
      name: http
      protocol: HTTP
    hosts:
    - "grafana.magedu.com"
2.3.2 创建virtualservice
apiVersion: networking.istio.io/v1beta1
kind: VirtualService
metadata:
  name: grafana-virtualservice
  namespace: istio-system
spec:
  hosts:
  - "grafana.magedu.com"
  gateways:
  - grafana-gateway
  http:
  - match:
    - uri:
        prefix: /
    route:
    - destination:
        host: grafana
        port:
          number: 3000
2.3.3 创建destinationrule
apiVersion: networking.istio.io/v1beta1
kind: DestinationRule
metadata:
  name: grafana
  namespace: istio-system
spec:
  host: grafana
  trafficPolicy:
    tls:
      mode: DISABLE
2.3.4访问域名
三 、基于demoapp一个服务,能够简单编写其相关的Gateway、VS和DR资源;
3.1 创建一个服务
cat deploy-demoapp.yaml
---
apiVersion: apps/v1
kind: Deployment
metadata:
  labels:
    app: demoappv10
    version: v1.0
  name: demoappv10
spec:
  progressDeadlineSeconds: 600
  replicas: 3
  selector:
    matchLabels:
      app: demoapp
      version: v1.0
  template:
    metadata:
      labels:
        app: demoapp
        version: v1.0
    spec:
      containers:
      - image: ikubernetes/demoapp:v1.0
        imagePullPolicy: IfNotPresent
        name: demoapp
        env:
        - name: "PORT"
          value: "8080"
        ports:
        - containerPort: 8080
          name: web
          protocol: TCP
        resources:
          limits:
            cpu: 50m
---
apiVersion: v1
kind: Service
metadata:
  name: demoappv10
spec:
  ports:
    - name: http
      port: 8080
      protocol: TCP
      targetPort: 8080
  selector:
    app: demoapp
    version: v1.0
  type: ClusterIP
---
3.2 创建完gateway之后,查看gw
cat gateway-proxy.yaml

apiVersion: networking.istio.io/v1beta1
kind: Gateway
metadata:
  name: proxy-gateway
  namespace: istio-system   # 要指定为ingress gateway pod所在名称空间
spec:
  selector:
    app: istio-ingressgateway
  servers:
  - port:
      number: 80
      name: http
      protocol: HTTP
    hosts:
    - "demo.magedu.com"


3.3 创建virtualservice-proxy.yaml
apiVersion: networking.istio.io/v1beta1
kind: VirtualService
metadata:
  name: proxy
spec:
  hosts:
  - "demo.magedu.com"                     # 对应于gateways/proxy-gateway
  gateways:
  - istio-system/proxy-gateway       # 相关定义仅应用于Ingress Gateway上
  #- mesh
  http:
  - name: istio-system
    route:
    - destination:
            host: demoappv10    # kubectl get svc  就是svc的名字
查看VirtualService
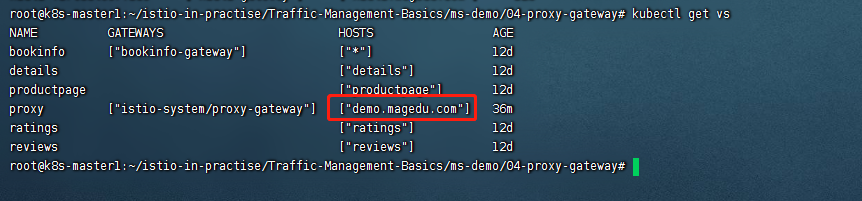
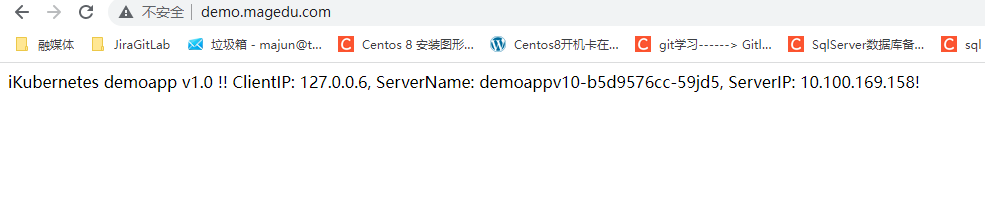
3.4 最终效果访问域名
四 扩展istiod和ingressgateway配置三个实例
4.1 导出demo模式的yaml文件,然后进行编辑
istioctl profile dump demo > /tmp/demo.yaml #编辑demo配置文件
需要更改的如下所示:更改egressgateways和ingressGateways的副本数即可
replicaCount: 2
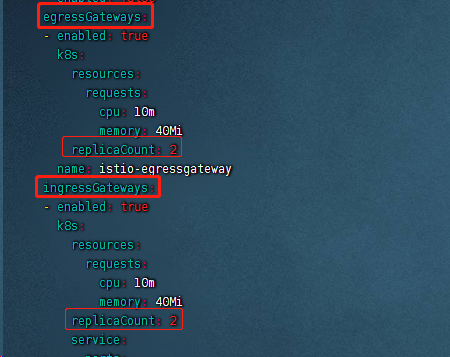
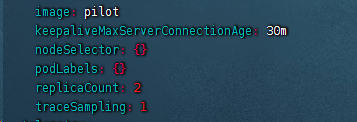
下面这个是控制istio的副本数量的。
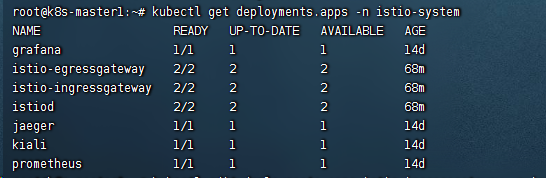
4.2 运行这个文件,就是部署istio
istioctl apply -f /tmp/demo.yaml #部署指定的文件
最后查看效果,发现副本数都是2


 浙公网安备 33010602011771号