Jumpserver安装及使用
一、jumpserver简介
JumpServer 是全球首款完全开源的堡垒机, 使用 GNU GPL v2.0 开源协议, 是符合 4A 的专业运维审计系统。
JumpServer 使用 Python / Django 进行开发, 遵循 Web 2.0 规范, 配备了业界领先的 Web Terminal 解决方案, 交互界面美观、用户体验好。
JumpServer 采纳分布式架构, 支持多机房跨区域部署, 中心节点提供 API, 各机房部署登录节点, 可横向扩展、无并发访问限制。
JumpServer 现已支持管理 SSH、 Telnet、 RDP、 VNC 协议资产。
官网:https://docs.jumpserver.org/zh/master/
二、jumpserver安装
2.1、极速安装
采用极速安装的方式
https://docs.jumpserver.org/zh/master/install/setup_by_fast/
[root@cloud01 ~]# curl -sSL https://github.com/jumpserver/jumpserver/releases/download/v2.1.1/quick_start.sh
#!/bin/bash
#

which wget >/dev/null 2>&1
if [ $? -ne 0 ];then
    yum install -y wget
fi

which git >/dev/null 2>&1
    if [ $? -ne 0 ];then
        yum install -y git
    fi

if [ ! -d "/opt/setuptools" ]; then
    wget -qO /opt/setuptools.tar.gz http://demo.jumpserver.org/download/setuptools.tar.gz
    tar -xf /opt/setuptools.tar.gz -C /opt
    rm -rf /opt/setuptools.tar.gz
fi

cd /opt/setuptools
git pull

if [ ! -f "/opt/setuptools/config.conf" ]; then
    cp config_example.conf config.conf
fi

./jmsctl.sh install
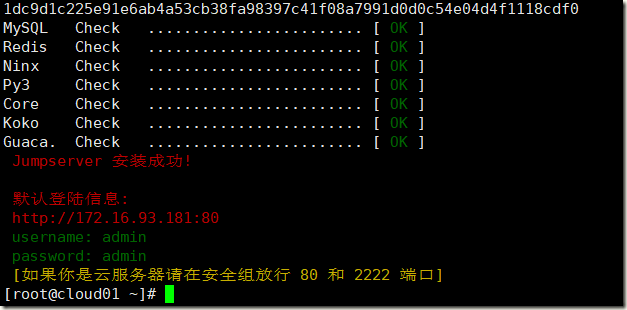
[root@cloud01 ~]# curl -sSL https://github.com/jumpserver/jumpserver/releases/download/v2.1.1/quick_start.sh | sh可以通过http://ip:port访问
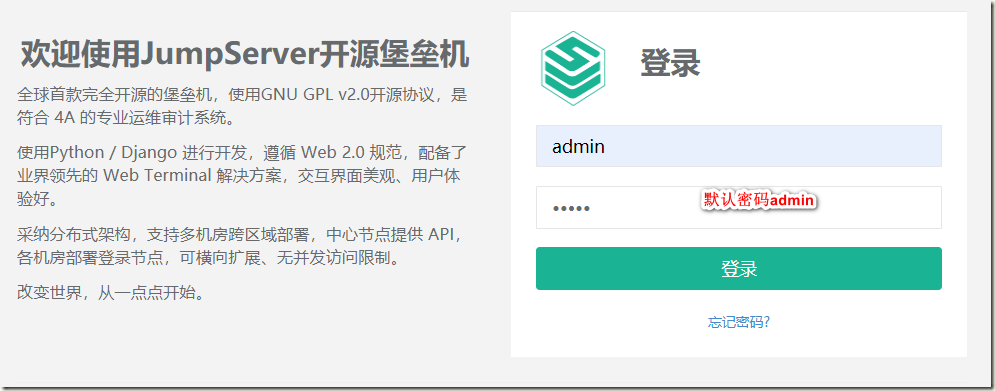
2.2、修改密码
2.3、相关命令
jumpserver默认安装在/opt目录下
[root@cloud01 opt]# ls
containerd  jumpserver  lina  luna  py3  setuptools
[root@cloud01 opt]# cd setuptools/
[root@cloud01 setuptools]# ll
total 44
-rw-r--r-- 1 root root   989 Aug 11 11:49 config.conf
-rw-r--r-- 1 root root   875 Aug  9 15:07 config_example.conf
-rwxr-xr-x 1 root root  1961 Aug  9 15:07 jmsctl.sh
-rw-r--r-- 1 root root 18046 Aug  9 15:07 LICENSE
-rw-r--r-- 1 root root   623 Aug  9 15:07 README.md
drwxr-xr-x 6 root root  4096 Aug  9 15:07 scripts
drwxr-xr-x 2 root root  4096 Aug 11 11:46 v2.1.1
[root@cloud01 setuptools]# tree
.
├── config.conf
├── config_example.conf
├── jmsctl.sh
├── LICENSE
├── README.md
├── scripts
│   ├── check_install_env.sh
│   ├── docker
│   │   └── daemon.json
│   ├── install_core.sh
│   ├── install_docker.sh
│   ├── install_guacamole.sh
│   ├── install_koko.sh
│   ├── install_mariadb.sh
│   ├── install_nginx.sh
│   ├── install_py3.sh
│   ├── install_redis.sh
│   ├── install.sh
│   ├── install_status.sh
│   ├── nginx
│   │   ├── jumpserver.conf
│   │   ├── nginx-1.18.0-1.el7.ngx.x86_64.rpm
│   │   └── nginx.repo
│   ├── pypi
│   │   └── pip.conf
│   ├── reset.sh
│   ├── service
│   │   └── jms_core.service
│   ├── set_firewall.sh
│   ├── start.sh
│   ├── stop.sh
│   ├── uninstall.sh
│   └── upgrade.sh
└── v2.1.1
    ├── jumpserver-v2.1.1.tar.gz
    ├── lina-v2.1.1.tar.gz
    └── luna-v2.1.1.tar.gz

6 directories, 31 files
[root@cloud01 setuptools]# cat jmsctl.sh #启停脚本
#!/usr/bin/env bash
#

BASE_DIR=$(cd "$(dirname "$0")";pwd)
PROJECT_DIR=${BASE_DIR}
SCRIPT_DIR=${BASE_DIR}/scripts
action=$1
target=$2

if [ ! -f "$PROJECT_DIR/config.conf" ]; then
    echo -e "Error: No config file found."
    echo -e "You can run 'cp config_example.conf config.conf', and edit it."
    exit 1
fi

source ${PROJECT_DIR}/config.conf

function usage() {
   echo "JumpServer 部署安装脚本"
   echo
   echo "Usage: "
   echo "  jmsctl [COMMAND] ..."
   echo "  jmsctl --help"
   echo
   echo "Commands: "
   echo "  install      安装 JumpServer"
   echo "  start        启动 JumpServer"
   echo "  stop         停止 JumpServer"
   echo "  restart      重启 JumpServer"
   echo "  status       检查 JumpServer"
   echo "  uninstall    卸载 JumpServer"
   echo "  upgrade      升级 JumpServer"
   echo "  reset        重置组件"
}

function main() {
   case "${action}" in
      install)
         bash ${SCRIPT_DIR}/install.sh
         ;;
      uninstall)
         bash ${SCRIPT_DIR}/uninstall.sh
         ;;
      upgrade)
         bash ${SCRIPT_DIR}/upgrade.sh
         ;;
      start)
         bash ${SCRIPT_DIR}/start.sh
         ;;
      stop)
         bash ${SCRIPT_DIR}/stop.sh
         ;;
      restart)
         bash ${SCRIPT_DIR}/stop.sh
         bash ${SCRIPT_DIR}/start.sh
         ;;
      status)
         bash ${SCRIPT_DIR}/install_status.sh
         ;;
      reset)
         if [ ! $target ]; then
             echo -e "Usage: jmsctl reset COMMAND\n"
             echo -e "Commands:"
             echo -e "  koko         重置 koko"
             echo -e "  guacamole    重置 guacamole"
             exit 1
         else
             bash ${SCRIPT_DIR}/reset.sh $target
         fi
         ;;
      --help)
         usage
         ;;
      -h)
         usage
         ;;
      *)
         echo -e "jmsctl: unknown COMMAND: '$action'"
         echo -e "See 'jmsctl --help' \n"
         usage
    esac
}

main

#配置文件
[root@cloud01 setuptools]# cat config.conf
# 以下设置默认情况下不需要修改, 系统会自动生成随机字符串填入

# 需要安装的版本
Version=v2.1.1

# Jms 加密配置
SECRET_KEY=Hak96I6o80uvcN7JhziR1OE6zpPrtBUfYJFXlE0THCy9kG0mZT
BOOTSTRAP_TOKEN=D8yzPUwX3z9PrLcf

# 数据库 配置, 如果 数据库 安装在其他的服务器, 请修改下面设置
DB_HOST=127.0.0.1
DB_PORT=3306
DB_USER=jumpserver
DB_PASSWORD=pnWq6QqkbIyFuSuF1rwU5
DB_NAME=jumpserver

# Redis 配置, 如果 Redis 安装在其他的服务器, 请修改下面设置
REDIS_HOST=127.0.0.1
REDIS_PORT=6379
REDIS_PASSWORD=uvfIlbIyNDnErhNfp

# 服务端口设置, 如果云服务器未备案请修改 http_port 端口为其他端口
http_port=80
ssh_port=2222

# 服务安装目录
install_dir=/opt

Server_IP=`ip addr | grep 'state UP' -A2 | grep inet | egrep -v '(127.0.0.1|inet6|docker)' | awk '{print $2}' | tr -d "addr:" | head -n 1 | cut -d / -f1`
Docker_IP=`ip addr | grep docker.* | grep inet | awk '{print $2}' | head -n 1`

[root@cloud01 setuptools]# ./jmsctl.sh --help
JumpServer 部署安装脚本

Usage:
  jmsctl [COMMAND] ...
  jmsctl --help

Commands:
  install      安装 JumpServer
  start        启动 JumpServer
  stop         停止 JumpServer
  restart      重启 JumpServer
  status       检查 JumpServer
  uninstall    卸载 JumpServer
  upgrade      升级 JumpServer
  reset        重置组件

[root@cloud01 setuptools]# docker ps -a
CONTAINER ID        IMAGE                             COMMAND             CREATED             STATUS              PORTS                                              NAMES
1dc9d1c225e9        jumpserver/jms_guacamole:v2.1.1   "./entrypoint.sh"   2 hours ago         Up 2 hours          127.0.0.1:8081->8080/tcp                           jms_guacamole
64ca610406c5        jumpserver/jms_koko:v2.1.1        "./entrypoint.sh"   2 hours ago         Up 2 hours          0.0.0.0:2222->2222/tcp, 127.0.0.1:5000->5000/tcp   jms_koko
三、jumpserver使用
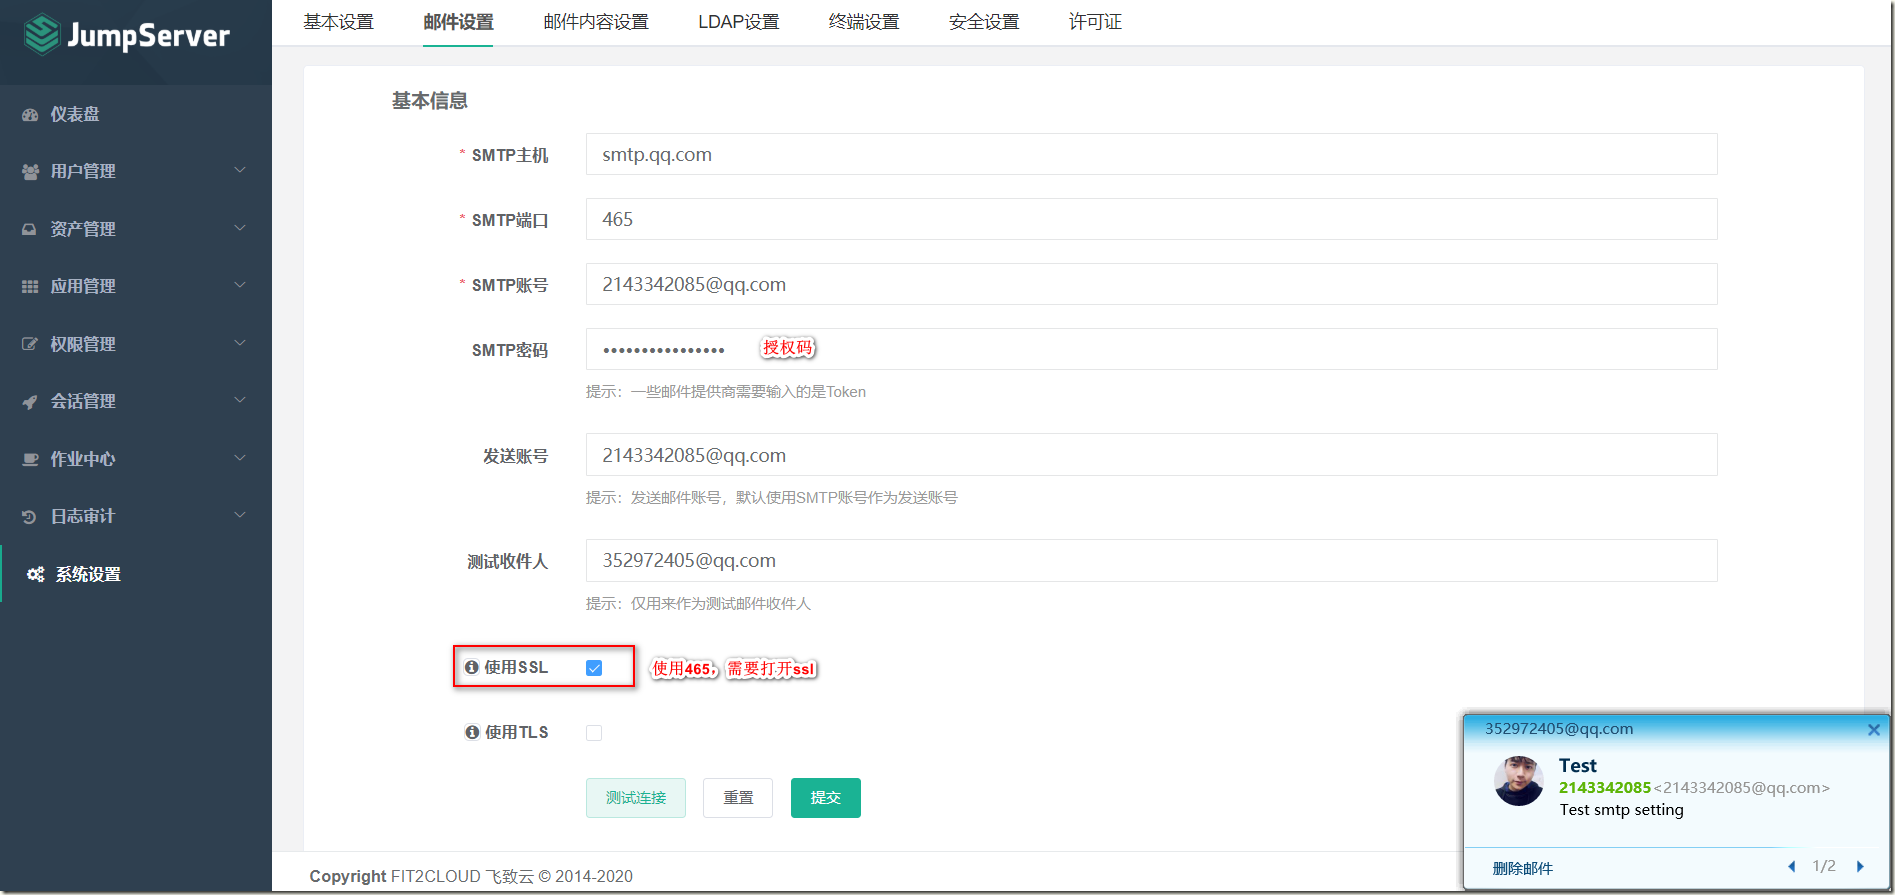
3.1、邮件配置
3.2、用户管理
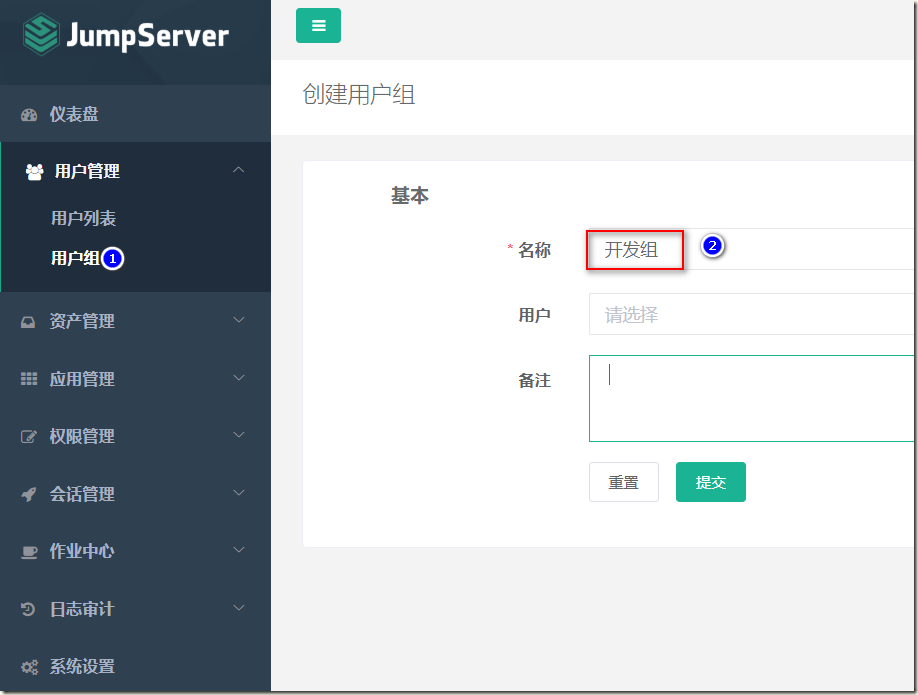
1)创建用户组
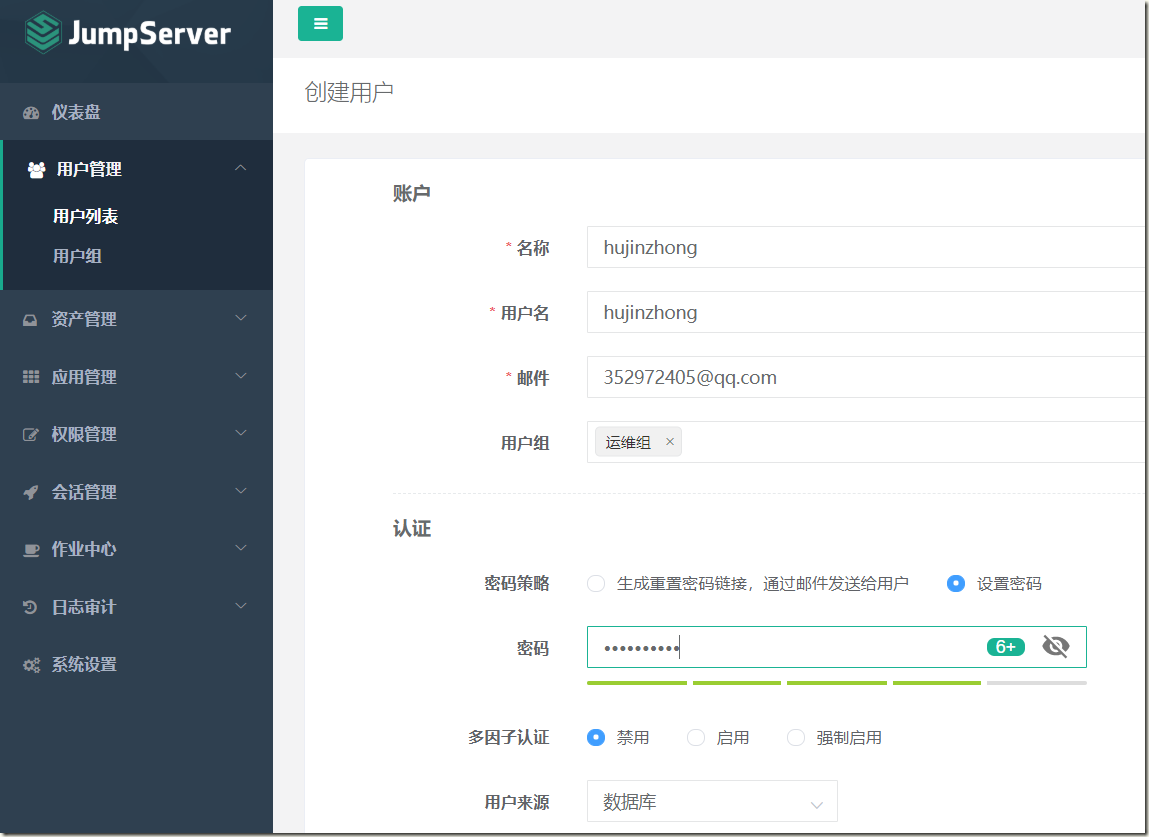
2)创建用户
3.3、资产管理
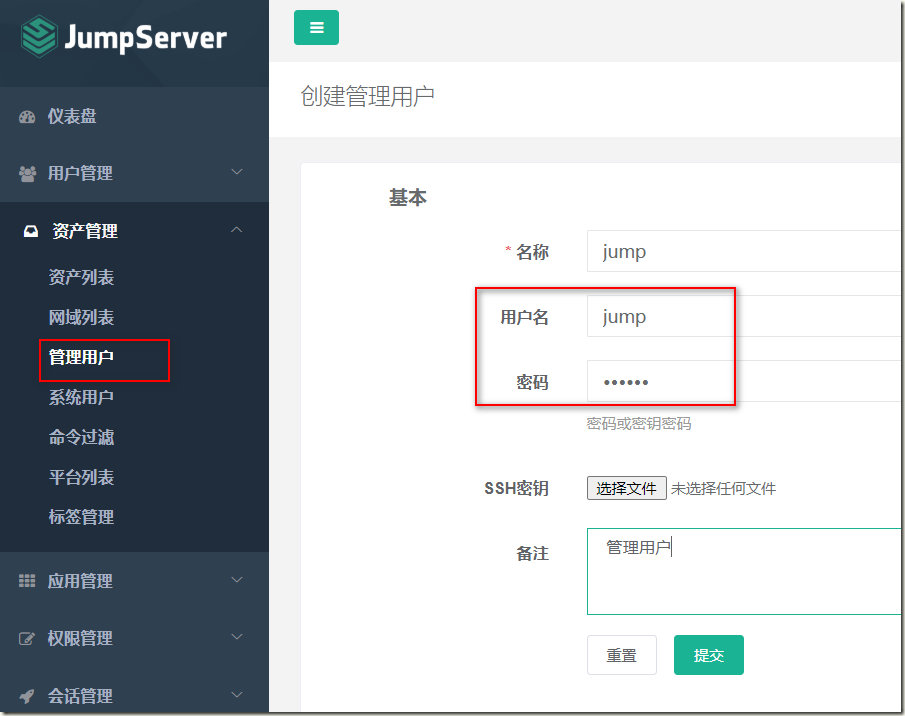
1)创建管理用户
管理用户是资产(被控服务器)上的 root,或拥有 NOPASSWD: ALL sudo 权限的用户, JumpServer 使用该用户来 `推送系统用户`、`获取资产硬件信息` 等。
首先在被控服务器上创建管理用户,可以使用root,我这里单独创建一个用户
[root@service06 ~]# useradd jump && echo "123456"|passwd --stdin jump
Changing password for user jump.
passwd: all authentication tokens updated successfully.

[root@service06 ~]# visudo
## Allow root to run any commands anywhere
root    ALL=(ALL)       ALL
jump    ALL=(ALL)      NOPASSWD: ALL
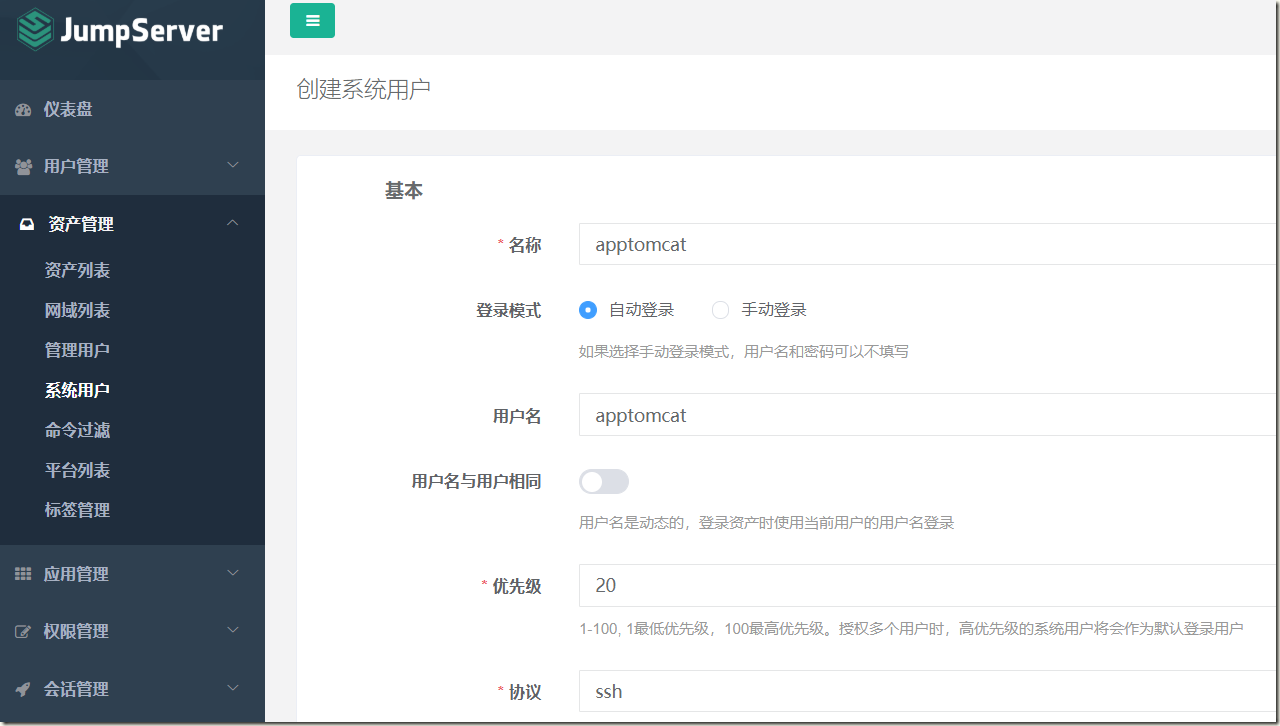
2)创建系统用户
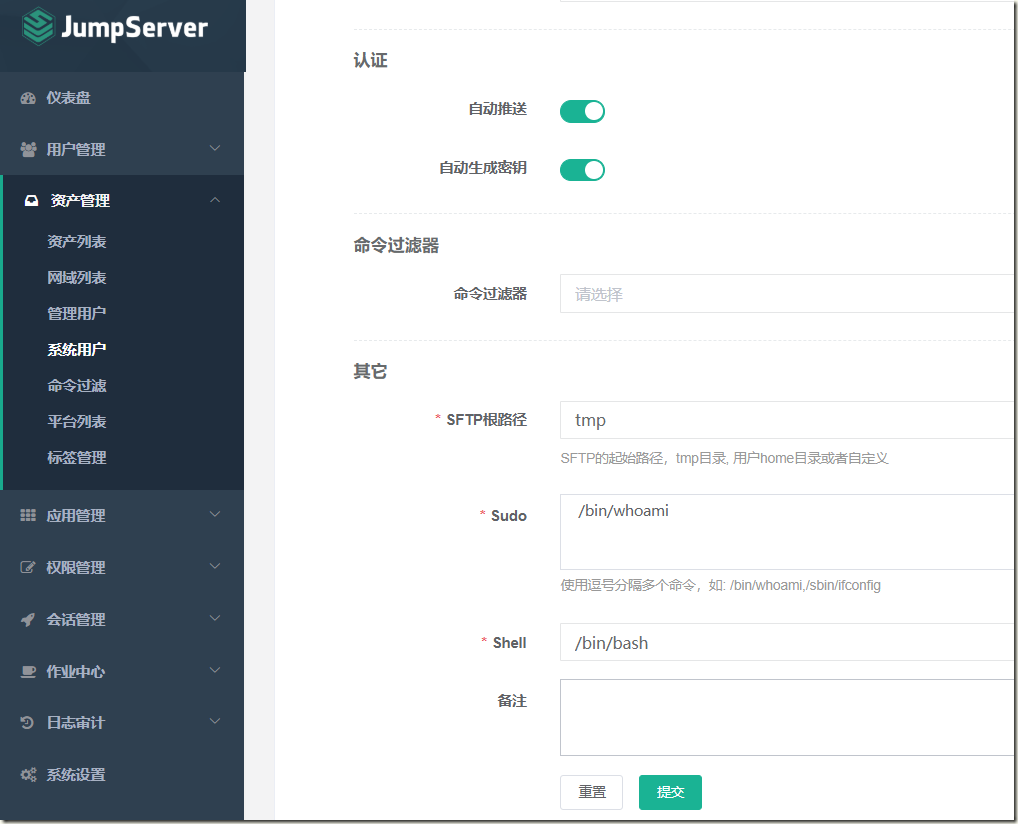
系统用户是 JumpServer 跳转登录资产时使用的用户,可以理解为登录资产用户,如 web,sa,dba(`ssh web@some-host`),而不是使用某个用户的用户名跳转登录服务器(`ssh xiaoming@some-host`); 简单来说是用户使用自己的用户名登录 JumpServer,JumpServer 使用系统用户登录资产。 系统用户创建时,如果选择了自动推送,JumpServer 会使用 Ansible 自动推送系统用户到资产中,如果资产(交换机)不支持 Ansible,请手动填写账号密码。
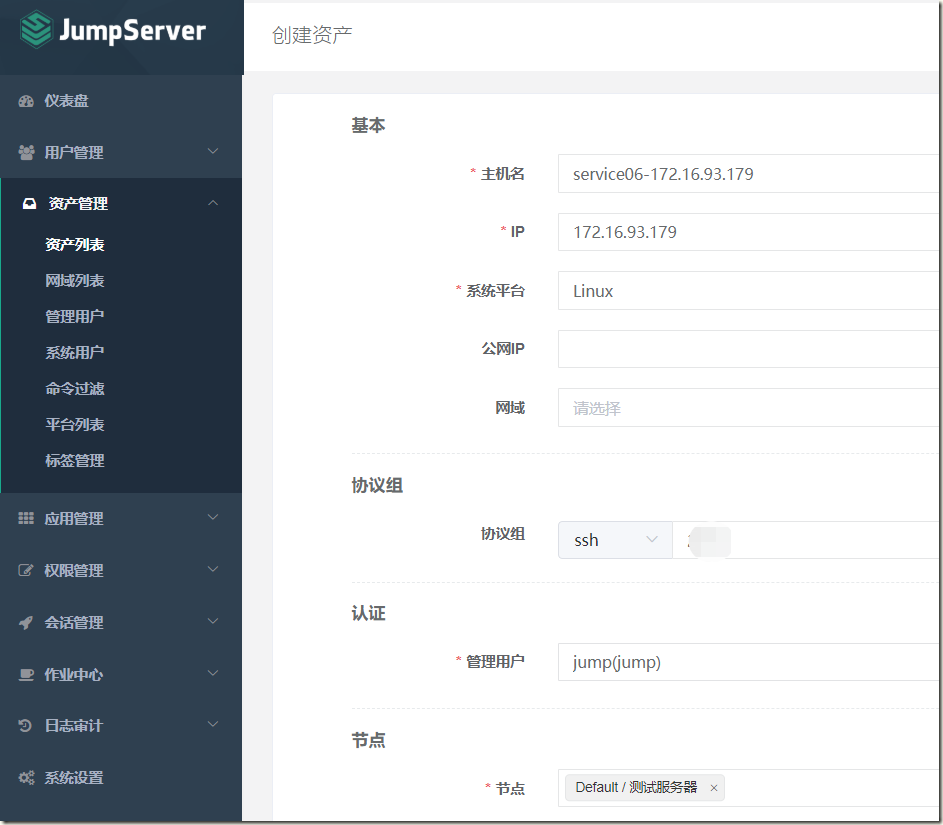
3)创建资产
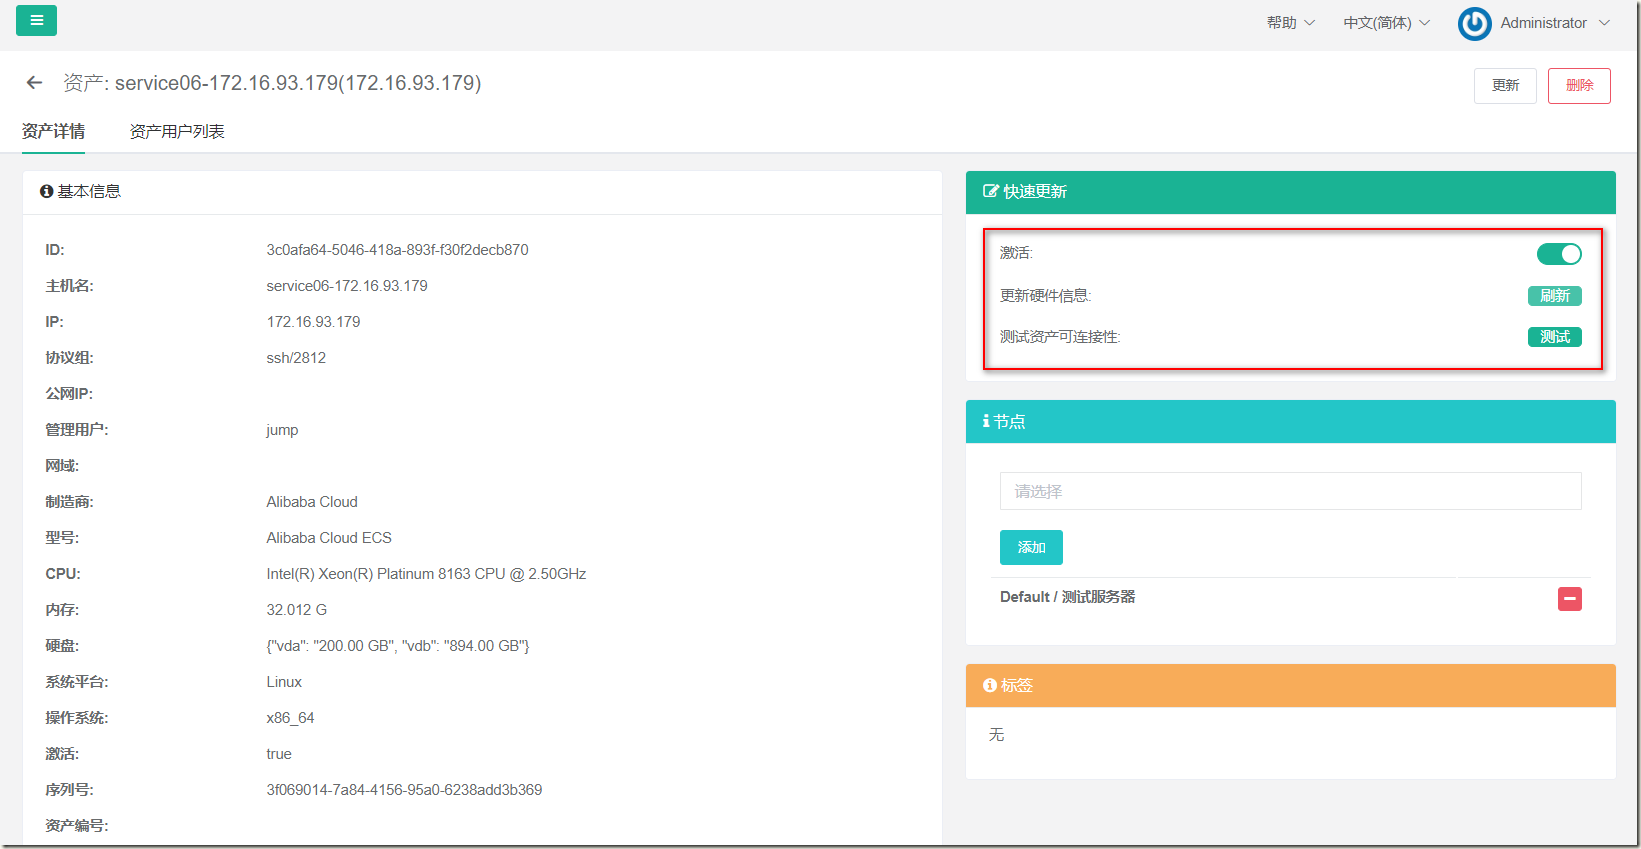
测试连接及更新硬件信息:
再次查看资产列表:
3.4、权限管理
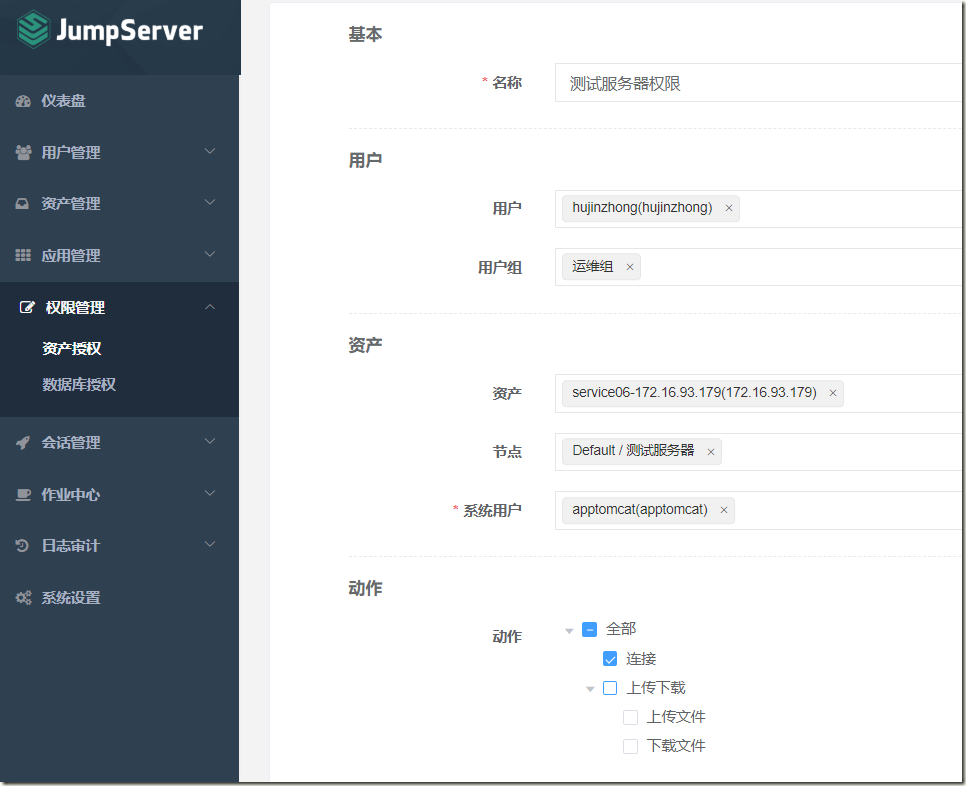
1)资产授权
登录普通用户查看:
使用web终端,默认登录之前创建的系统用户,由jumpserver自动推送过去的
3.5、会话管理
1)会话管理
历史回话支持回放功能:
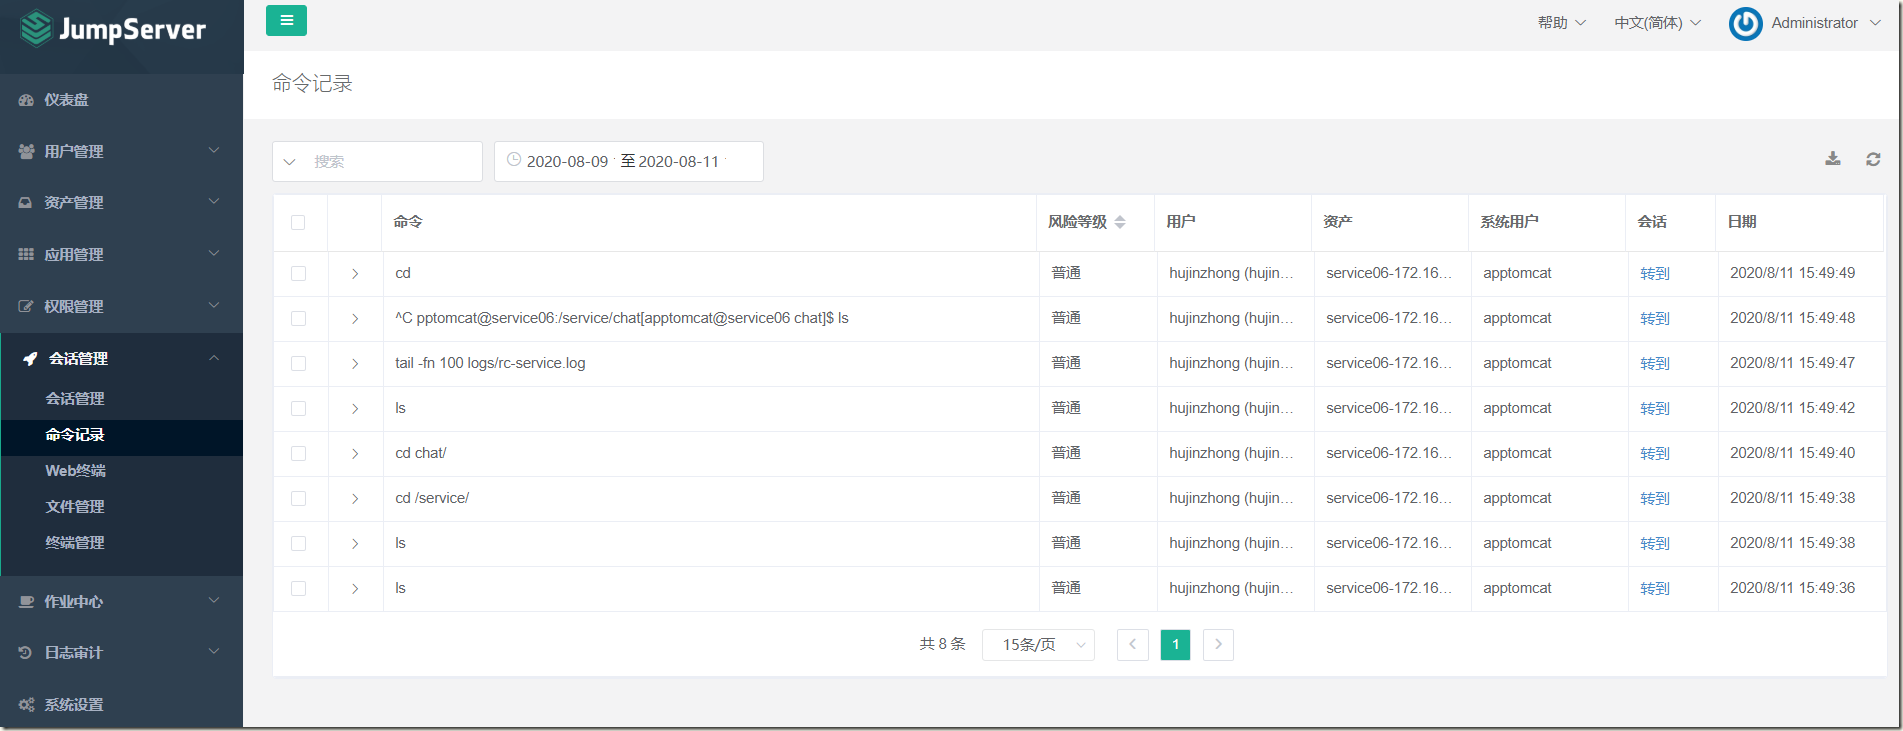
2)命令记录
3)文件管理
可以上传下载文件,也可以对普通用户改权限进行限制
3.6、作业中心
1)任务列表
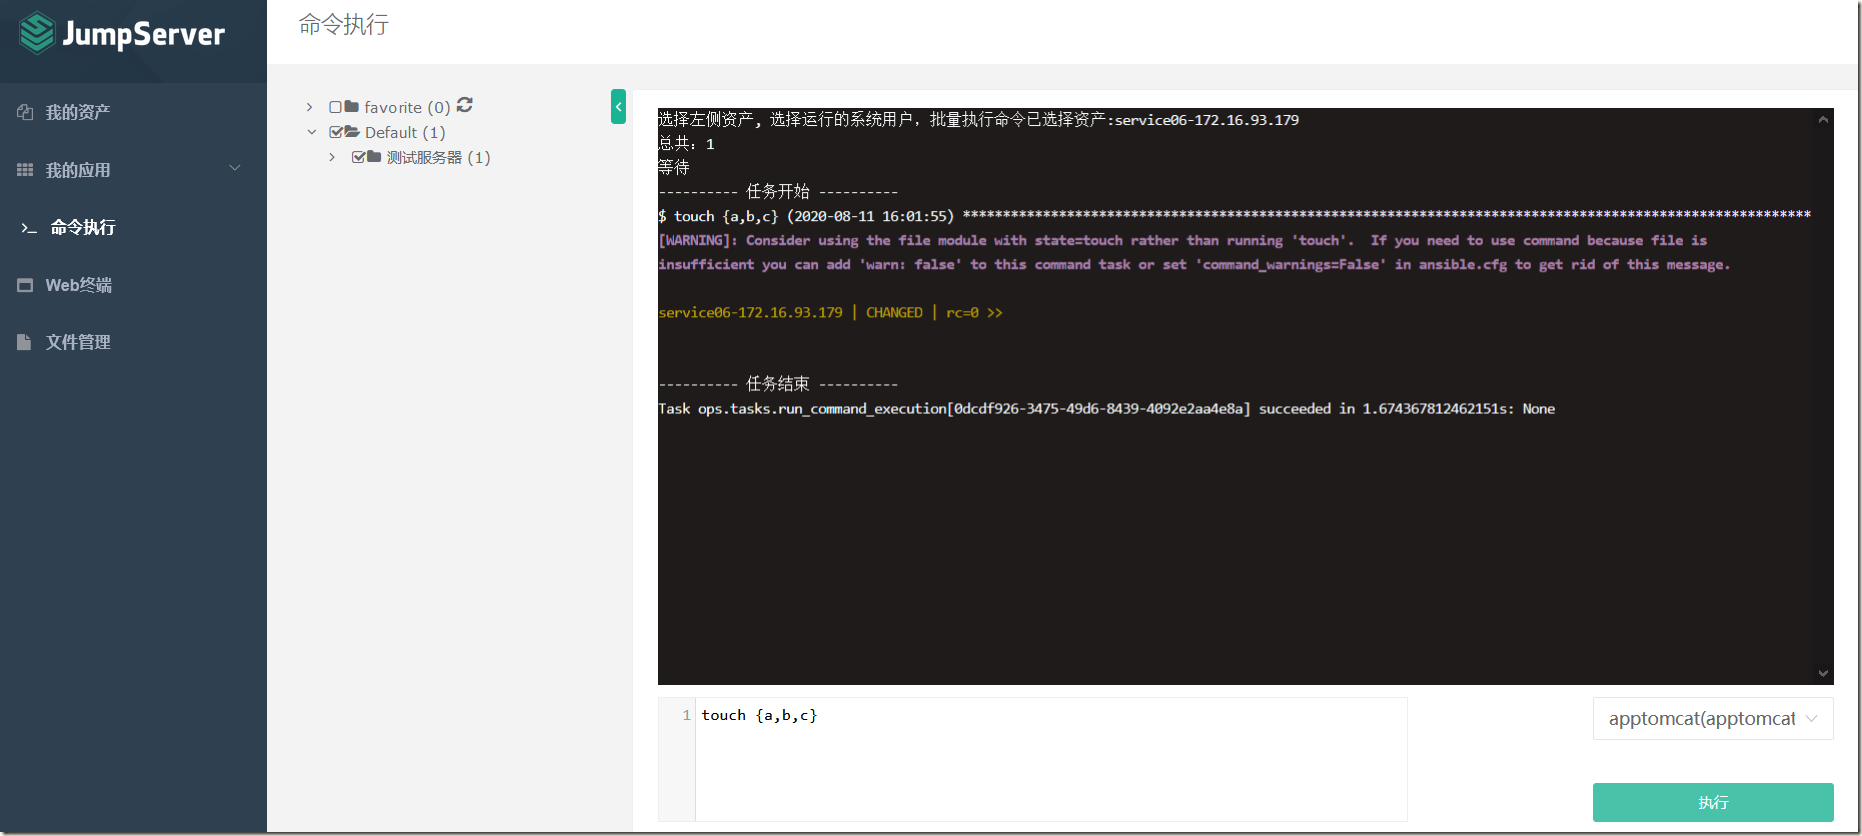
2)批量命令
底层使用的是ansible
3)任务监控
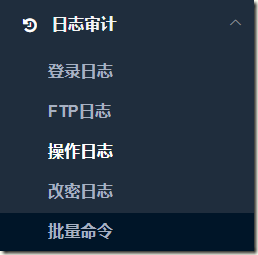
3.7、日志审计
-------------------------------------------
个性签名:独学而无友,则孤陋而寡闻。做一个灵魂有趣的人!


