RabbitMQ消息中间件(第四章)第一部分
本章导航
- RabbitMQ整合Spring AMQP实战
- RabbitMQ整合Spring Boot实战
- RabbitMQ整合Spring Cloud实战
RabbitMQ整合Spring AMQP实战
- RabbitAdmin
- SpringAMQP声明
- SimpleMessageListenerContainer简单消息监听容器
- MessageListenerAdapter消息监听适配器
- MessageConverter 消息转换器,序列化和反序列化等操作
- 注意:autoStartup必须要设置为true,否则Spring容器不会加载RabbitAdmin类
- RabbitAdmin底层实现就是从Spring容器中获取Exchange、Bingding、RoutingKey以及Queue的@Bean声明
- 然后使用RabbitTemplate的execute方法执行对应的声明、修改、删除等一系列RabbitMQ基础功能操作
- 例如:添加一个交换机、删除一个绑定、清空一个队列里的消息等等
创建SpringBoot工程
引用依赖pom.xml
<dependency>
    <groupId>com.rabbitmq</groupId>
    <artifactId>amqp-client</artifactId>
</dependency>

<dependency>
    <groupId>org.springframework.boot</groupId>
    <artifactId>spring-boot-starter-amqp</artifactId>
</dependency>
RabbitMQConfig
package com.cx.temp.common.rabbitmq.spring;

import org.springframework.amqp.rabbit.connection.CachingConnectionFactory;
import org.springframework.amqp.rabbit.connection.ConnectionFactory;
import org.springframework.amqp.rabbit.core.RabbitAdmin;
import org.springframework.context.annotation.Bean;
import org.springframework.context.annotation.ComponentScan;
import org.springframework.context.annotation.Configuration;

/**
 *
 */
@Configuration
@ComponentScan({"com.cx.temp.*"})
public class RabbitMQConfig {

    @Bean
    public ConnectionFactory connectionFactory() {
        CachingConnectionFactory connectionFactory = new CachingConnectionFactory();
        connectionFactory.setAddresses("127.0.0.1:5672");
        connectionFactory.setUsername("root");
        connectionFactory.setPassword("123456");
        connectionFactory.setVirtualHost("/test001");
        return connectionFactory;
    }

    public RabbitAdmin rabbitAdmin(ConnectionFactory connectionFactory) {
        RabbitAdmin rabbitAdmin = new RabbitAdmin(connectionFactory);
        rabbitAdmin.setAutoStartup(true);
        return rabbitAdmin;
    }

}
测试类
package com.cx.temp.rabbitmq;

import com.cx.temp.admin.AdminApplication;
import org.junit.Test;
import org.junit.runner.RunWith;
import org.springframework.amqp.core.*;
import org.springframework.amqp.rabbit.core.RabbitAdmin;
import org.springframework.beans.factory.annotation.Autowired;
import org.springframework.boot.test.context.SpringBootTest;
import org.springframework.test.context.junit4.SpringJUnit4ClassRunner;

import java.util.HashMap;

@RunWith(SpringJUnit4ClassRunner.class)
@SpringBootTest(classes = AdminApplication.class)
public class RabbitMQTest {

    @Autowired
    private RabbitAdmin rabbitAdmin;

    @Test
    public void testAdmin() throws Exception {

        //第一种声明与绑定方式
        rabbitAdmin.declareExchange(new DirectExchange("test.direct", false, false));

        rabbitAdmin.declareExchange(new TopicExchange("test.topic", false, false));

        rabbitAdmin.declareExchange(new FanoutExchange("test.fanout", false, false));

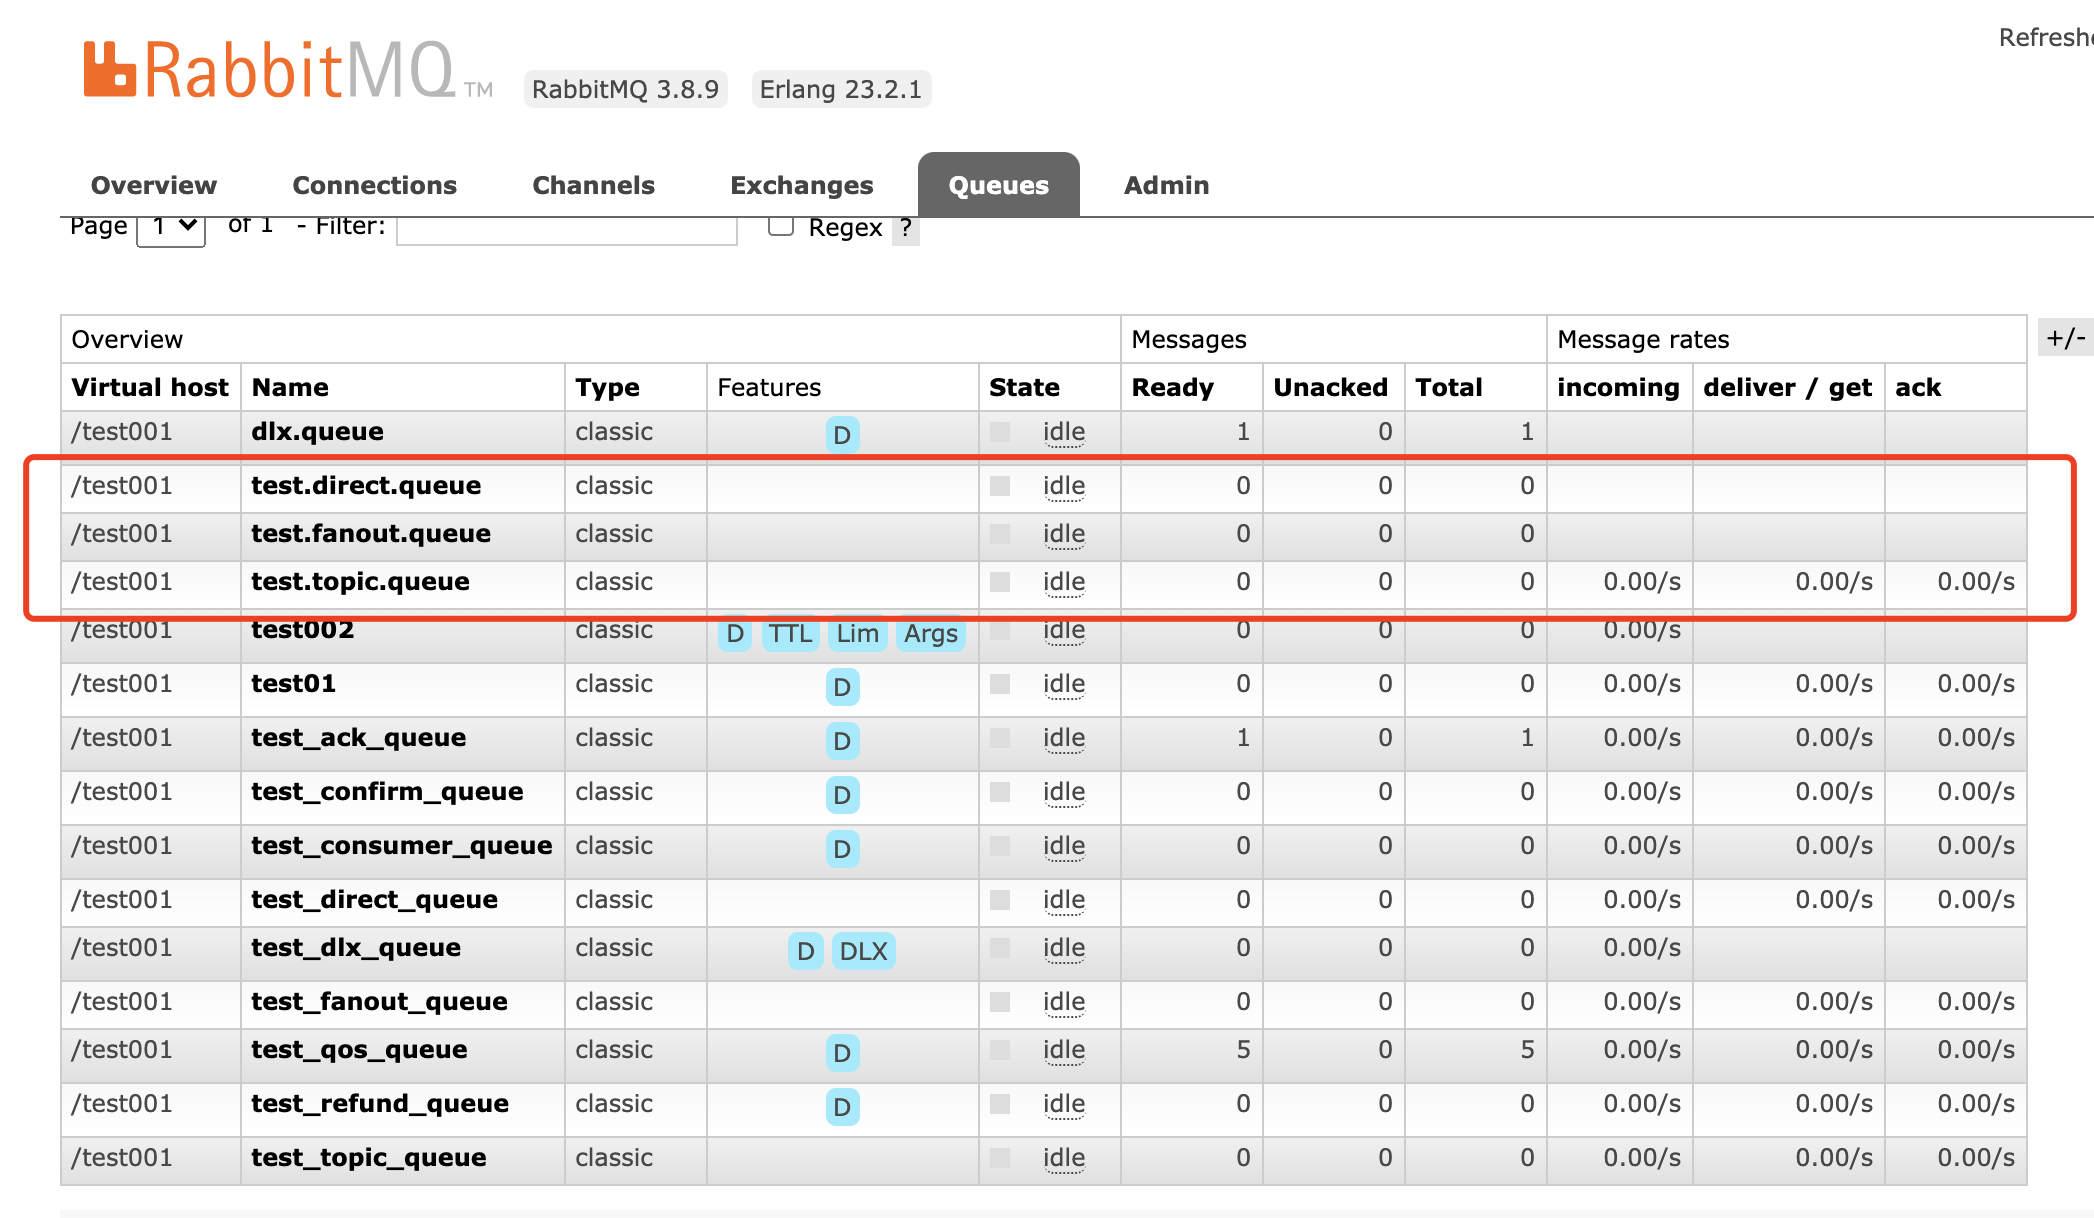
        rabbitAdmin.declareQueue(new Queue("test.direct.queue", false));

        rabbitAdmin.declareQueue(new Queue("test.topic.queue", false));

        rabbitAdmin.declareQueue(new Queue("test.fanout.queue", false));

        rabbitAdmin.declareBinding(new Binding("test.direct.queue", Binding.DestinationType.QUEUE,
                "test.direct", "direct", new HashMap<>()));

        //第二种 支持链式声明与绑定
        rabbitAdmin.declareBinding(BindingBuilder
                .bind(new Queue("test.topic.queue", false))
                .to(new TopicExchange("test.topic", false, false))
                .with("user.#"));

        rabbitAdmin.declareBinding(BindingBuilder
                .bind(new Queue("test.fanout.queue", false))
                .to(new FanoutExchange("test.fanout", false, false)));


        //清空队列数据
        rabbitAdmin.purgeQueue("test.topic.queue", false);

    }

}


SpringAMQP声明
- 在Rabbit基础API里面声明一个Exchange、声明一个绑定、一个队列,以下是实例
-
rabbitAdmin.declareExchange(new DirectExchange("test.direct", false, false)); rabbitAdmin.declareQueue(new Queue("test.direct.queue", false)); rabbitAdmin.declareBinding(new Binding("test.direct.queue", Binding.DestinationType.QUEUE, "test.direct", "direct", new HashMap<>())); -
使用SpringAMQP去声明,就需要使用SpringAMQP的如下模式,即声明@Bean方式

代码实现:
package com.cx.temp.common.rabbitmq.spring;

import org.springframework.amqp.core.Binding;
import org.springframework.amqp.core.BindingBuilder;
import org.springframework.amqp.core.Queue;
import org.springframework.amqp.core.TopicExchange;
import org.springframework.amqp.rabbit.connection.CachingConnectionFactory;
import org.springframework.amqp.rabbit.connection.ConnectionFactory;
import org.springframework.amqp.rabbit.core.RabbitAdmin;
import org.springframework.context.annotation.Bean;
import org.springframework.context.annotation.ComponentScan;
import org.springframework.context.annotation.Configuration;

/**
 *
 */
@Configuration
@ComponentScan({"com.cx.temp.*"})
public class RabbitMQConfig {

    @Bean
    public ConnectionFactory connectionFactory() {
        CachingConnectionFactory connectionFactory = new CachingConnectionFactory();
        connectionFactory.setAddresses("127.0.0.1:5672");
        connectionFactory.setUsername("root");
        connectionFactory.setPassword("123456");
        connectionFactory.setVirtualHost("/test001");
        return connectionFactory;
    }

    public RabbitAdmin rabbitAdmin(ConnectionFactory connectionFactory) {
        RabbitAdmin rabbitAdmin = new RabbitAdmin(connectionFactory);
        rabbitAdmin.setAutoStartup(true);
        return rabbitAdmin;
    }

    /**
     * 针对消费者配置
     * 1.设置交换机类型
     * 2.将队列绑定到交换机
     * FanoutExchange: 将消息分发到所有的绑定队列,无routingkey的概念
     * HeadersExchange: 通过添加属性key-value匹配
     * DirectExchange: 按照routingkey分发到指定队列
     * TopicExchange: 多关键字匹配
     * @return
     */
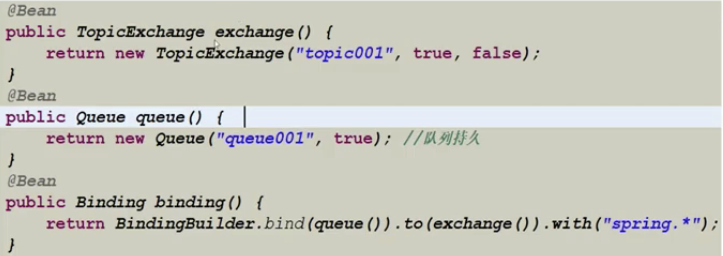
    @Bean
    public TopicExchange exchange001(){
        return new TopicExchange("topic001", true, false);
    }

    @Bean
    public Queue queue001() {
        return new Queue("queue001", true); //队列持久
    }

    @Bean
    public Binding binding001(){
        return BindingBuilder.bind(queue001()).to(exchange001()).with("spring.*");
    }

    @Bean
    public TopicExchange exchange002(){
        return new TopicExchange("topic002", true, false);
    }

    @Bean
    public Queue queue002() {
        return new Queue("queue002", true); //队列持久
    }

    @Bean
    public Binding binding002(){
        return BindingBuilder.bind(queue002()).to(exchange002()).with("rabbit.*");
    }

    @Bean
    public Queue queue_image() {
        return new Queue("image_queue", true); //队列持久
    }

    @Bean
    public Queue queue_pdf() {
        return new Queue("pdf_queue", true); //队列持久
    }


}


消息模板-RabbitTemplate
RabbitTemplate,即消息模板
- 我们在SpringAMQP整合的时候进行发送消息的关键类
- 该类提供了丰富的发送消息方法,包括可靠性投递消息方法、回调监听消息接口ConfirmCallback、返回值确认接口ReturnCallback等等。
- 同样我们需要进行注入到Spring容器中,然后直接使用
- 在与Spring整合时需要实例化,但是在与SpringBoot整合时,在配置文件里添加配置即可。
代码实现:
package com.cx.temp.common.rabbitmq.spring;

import org.springframework.amqp.core.Binding;
import org.springframework.amqp.core.BindingBuilder;
import org.springframework.amqp.core.Queue;
import org.springframework.amqp.core.TopicExchange;
import org.springframework.amqp.rabbit.connection.CachingConnectionFactory;
import org.springframework.amqp.rabbit.connection.ConnectionFactory;
import org.springframework.amqp.rabbit.core.RabbitAdmin;
import org.springframework.amqp.rabbit.core.RabbitTemplate;
import org.springframework.context.annotation.Bean;
import org.springframework.context.annotation.ComponentScan;
import org.springframework.context.annotation.Configuration;

/**
 *
 */
@Configuration
@ComponentScan({"com.cx.temp.*"})
public class RabbitMQConfig {

    @Bean
    public ConnectionFactory connectionFactory() {
        CachingConnectionFactory connectionFactory = new CachingConnectionFactory();
        connectionFactory.setAddresses("127.0.0.1:5672");
        connectionFactory.setUsername("root");
        connectionFactory.setPassword("123456");
        connectionFactory.setVirtualHost("/test001");
        return connectionFactory;
    }

    public RabbitAdmin rabbitAdmin(ConnectionFactory connectionFactory) {
        RabbitAdmin rabbitAdmin = new RabbitAdmin(connectionFactory);
        rabbitAdmin.setAutoStartup(true);
        return rabbitAdmin;
    }

    /**
     * 针对消费者配置
     * 1.设置交换机类型
     * 2.将队列绑定到交换机
     * FanoutExchange: 将消息分发到所有的绑定队列,无routingkey的概念
     * HeadersExchange: 通过添加属性key-value匹配
     * DirectExchange: 按照routingkey分发到指定队列
     * TopicExchange: 多关键字匹配
     * @return
     */
    @Bean
    public TopicExchange exchange001(){
        return new TopicExchange("topic001", true, false);
    }

    @Bean
    public Queue queue001() {
        return new Queue("queue001", true); //队列持久
    }

    @Bean
    public Binding binding001(){
        return BindingBuilder.bind(queue001()).to(exchange001()).with("spring.*");
    }

    @Bean
    public TopicExchange exchange002(){
        return new TopicExchange("topic002", true, false);
    }

    @Bean
    public Queue queue002() {
        return new Queue("queue002", true); //队列持久
    }

    @Bean
    public Binding binding002(){
        return BindingBuilder.bind(queue002()).to(exchange002()).with("rabbit.*");
    }

    @Bean
    public Queue queue_image() {
        return new Queue("image_queue", true); //队列持久
    }

    @Bean
    public Queue queue_pdf() {
        return new Queue("pdf_queue", true); //队列持久
    }

    @Bean
    public RabbitTemplate rabbitTemplate(ConnectionFactory connectionFactory) {
        RabbitTemplate rabbitTemplate = new RabbitTemplate(connectionFactory);
        return rabbitTemplate;
    }


}
package com.cx.temp.common.rabbitmq.spring;

import org.springframework.amqp.core.Binding;
import org.springframework.amqp.core.BindingBuilder;
import org.springframework.amqp.core.Queue;
import org.springframework.amqp.core.TopicExchange;
import org.springframework.amqp.rabbit.connection.CachingConnectionFactory;
import org.springframework.amqp.rabbit.connection.ConnectionFactory;
import org.springframework.amqp.rabbit.core.RabbitAdmin;
import org.springframework.amqp.rabbit.core.RabbitTemplate;
import org.springframework.context.annotation.Bean;
import org.springframework.context.annotation.ComponentScan;
import org.springframework.context.annotation.Configuration;

/**
 *
 */
@Configuration
@ComponentScan({"com.cx.temp.*"})
public class RabbitMQConfig {

    @Bean
    public ConnectionFactory connectionFactory() {
        CachingConnectionFactory connectionFactory = new CachingConnectionFactory();
        connectionFactory.setAddresses("8.131.95.173:5672");
        connectionFactory.setUsername("root");
        connectionFactory.setPassword("123456");
        connectionFactory.setVirtualHost("/test001");
        return connectionFactory;
    }

    public RabbitAdmin rabbitAdmin(ConnectionFactory connectionFactory) {
        RabbitAdmin rabbitAdmin = new RabbitAdmin(connectionFactory);
        rabbitAdmin.setAutoStartup(true);
        return rabbitAdmin;
    }

    /**
     * 针对消费者配置
     * 1.设置交换机类型
     * 2.将队列绑定到交换机
     * FanoutExchange: 将消息分发到所有的绑定队列,无routingkey的概念
     * HeadersExchange: 通过添加属性key-value匹配
     * DirectExchange: 按照routingkey分发到指定队列
     * TopicExchange: 多关键字匹配
     * @return
     */
    @Bean
    public TopicExchange exchange001(){
        return new TopicExchange("topic001", true, false);
    }

    @Bean
    public Queue queue001() {
        return new Queue("queue001", true); //队列持久
    }

    @Bean
    public Binding binding001(){
        return BindingBuilder.bind(queue001()).to(exchange001()).with("spring.*");
    }

    @Bean
    public TopicExchange exchange002(){
        return new TopicExchange("topic002", true, false);
    }

    @Bean
    public Queue queue002() {
        return new Queue("queue002", true); //队列持久
    }

    @Bean
    public Binding binding002(){
        return BindingBuilder.bind(queue002()).to(exchange002()).with("rabbit.*");
    }

    @Bean
    public Queue queue_image() {
        return new Queue("image_queue", true); //队列持久
    }

    @Bean
    public Queue queue_pdf() {
        return new Queue("pdf_queue", true); //队列持久
    }

    @Bean
    public RabbitTemplate rabbitTemplate(ConnectionFactory connectionFactory) {
        RabbitTemplate rabbitTemplate = new RabbitTemplate(connectionFactory);
        return rabbitTemplate;
    }


}
运行后

将消息读出来

综合多种写法
package com.cx.temp.rabbitmq;

import com.cx.temp.admin.AdminApplication;
import org.junit.Test;
import org.junit.runner.RunWith;
import org.springframework.amqp.AmqpException;
import org.springframework.amqp.core.*;
import org.springframework.amqp.rabbit.core.RabbitAdmin;
import org.springframework.amqp.rabbit.core.RabbitTemplate;
import org.springframework.beans.factory.annotation.Autowired;
import org.springframework.boot.test.context.SpringBootTest;
import org.springframework.test.context.junit4.SpringJUnit4ClassRunner;

import java.util.HashMap;

@RunWith(SpringJUnit4ClassRunner.class)
@SpringBootTest(classes = AdminApplication.class)
public class RabbitMQTest {

    @Autowired
    private RabbitAdmin rabbitAdmin;

    @Test
    public void testAdmin() throws Exception {

        //第一种声明与绑定方式
        rabbitAdmin.declareExchange(new DirectExchange("test.direct", false, false));

        rabbitAdmin.declareExchange(new TopicExchange("test.topic", false, false));

        rabbitAdmin.declareExchange(new FanoutExchange("test.fanout", false, false));

        rabbitAdmin.declareQueue(new Queue("test.direct.queue", false));

        rabbitAdmin.declareQueue(new Queue("test.topic.queue", false));

        rabbitAdmin.declareQueue(new Queue("test.fanout.queue", false));

        rabbitAdmin.declareBinding(new Binding("test.direct.queue", Binding.DestinationType.QUEUE,
                "test.direct", "direct", new HashMap<>()));

        //第二种 支持链式声明与绑定
        rabbitAdmin.declareBinding(BindingBuilder
                .bind(new Queue("test.topic.queue", false))
                .to(new TopicExchange("test.topic", false, false))
                .with("user.#"));

        rabbitAdmin.declareBinding(BindingBuilder
                .bind(new Queue("test.fanout.queue", false))
                .to(new FanoutExchange("test.fanout", false, false)));


        //清空队列数据
        rabbitAdmin.purgeQueue("test.topic.queue", false);

    }

    @Autowired
    private RabbitTemplate rabbitTemplate;

    @Test
    public void testSendMessage() throws Exception {
        //1 创建消息
        MessageProperties messageProperties = new MessageProperties();
        messageProperties.getHeaders().put("desc", "信息描述..");
        messageProperties.getHeaders().put("type", "自定义消息类型..");
        Message message = new Message("Hello RabbitMQ".getBytes(), messageProperties);

        rabbitTemplate.convertAndSend("topic001", "spring.amqp", message, new MessagePostProcessor() {
            //消息发送之后在对这个message进行设置
            @Override
            public Message postProcessMessage(Message message) throws AmqpException {
                System.err.println("----------添加额外的设置-----------");
                message.getMessageProperties().getHeaders().put("desc", "额外修改的信息描述");
                message.getMessageProperties().getHeaders().put("attr", "额外新加的属性");
                return message;
            }
        });

    }

    @Test
    public void testSendMessage2() throws Exception {
        //1 创建消息
        MessageProperties messageProperties = new MessageProperties();
        messageProperties.setContentType("text/plain");
        Message message = new Message("mq 消息1234".getBytes(), messageProperties);

        rabbitTemplate.send("topic001", "spring.abc",message);

        rabbitTemplate.convertAndSend("topic001", "spring.amqp", "hello object message send!");
        rabbitTemplate.convertAndSend("topic002", "rabbit.amqp", "hello object message send!");

    }


}

查看queue001消息


SimpleMessageListenerContainer
简单消息监听容器
- 这个类非常的强大,我们可以对他进行很多设置,对于消费者的配置项,这个类都可以满足
- 监听队列(多个队列)、自动启动、自动声明功能
- 设置事务特性、事务管理器、事务属性、事务容量(并发)、是否开启事务、回滚消息等(在互联网企业内用的比较少)
- 设置消费者数量、最小最大数量、批量消费
- 设置消息确认和自动确认模式、是否重回队列、异常捕获handler函数
- 设置消息者标签生成策略、是否独占模式、消费者属性等
- 设置具体的监听器、消息转换器等等。
- 注意:SimpleMessageListenerContainer可以进行动态配置,比如在运行中的应用可以动态的修改其消费者数量的大小、接收消息的模式等
- 很多基于RabbitMQ的自制定制化后端管控台在进行动态设置的时候,也是根据这一特性去实行的。所以可以看出SpringAMQP非常的强大
- SimpleMessageListenerContainer为什么可以动态感知配置变更?
代码实现:
通过启动SpringBootApplicaiton在启动rabbitmq
package com.cx.temp.admin;

import org.springframework.boot.SpringApplication;
import org.springframework.boot.autoconfigure.SpringBootApplication;
import org.springframework.boot.builder.SpringApplicationBuilder;
import org.springframework.boot.web.servlet.support.SpringBootServletInitializer;
import org.springframework.context.annotation.ComponentScan;

@SpringBootApplication
@ComponentScan(basePackages = {"com.cx.temp"})
public class AdminApplication extends SpringBootServletInitializer{

    @Override
    protected SpringApplicationBuilder configure(SpringApplicationBuilder builder) {
        return builder.sources(AdminApplication.class);
    }

    public static void main(String[] args) {
        try {
            SpringApplication.run(AdminApplication.class, args);
        } catch (Exception e) {
            e.printStackTrace();
        }
    }
}
RabbitMQConfig
package com.cx.temp.admin.config;

import com.rabbitmq.client.Channel;
import org.springframework.amqp.core.*;
import org.springframework.amqp.rabbit.connection.CachingConnectionFactory;
import org.springframework.amqp.rabbit.connection.ConnectionFactory;
import org.springframework.amqp.rabbit.core.ChannelAwareMessageListener;
import org.springframework.amqp.rabbit.core.RabbitAdmin;
import org.springframework.amqp.rabbit.core.RabbitTemplate;
import org.springframework.amqp.rabbit.listener.SimpleMessageListenerContainer;
import org.springframework.amqp.support.ConsumerTagStrategy;
import org.springframework.context.annotation.Bean;
import org.springframework.context.annotation.ComponentScan;
import org.springframework.context.annotation.Configuration;

import java.util.UUID;

/**
 *
 */
@Configuration
@ComponentScan({"com.cx.temp.*"})
public class RabbitMQConfig {

    @Bean
    public ConnectionFactory connectionFactory() {
        CachingConnectionFactory connectionFactory = new CachingConnectionFactory();
        connectionFactory.setAddresses("127.0.0.1:5672");
        connectionFactory.setUsername("root");
        connectionFactory.setPassword("123456");
        connectionFactory.setVirtualHost("/test001");
        return connectionFactory;
    }

    public RabbitAdmin rabbitAdmin(ConnectionFactory connectionFactory) {
        RabbitAdmin rabbitAdmin = new RabbitAdmin(connectionFactory);
        rabbitAdmin.setAutoStartup(true);
        return rabbitAdmin;
    }

    /**
     * 针对消费者配置
     * 1.设置交换机类型
     * 2.将队列绑定到交换机
     * FanoutExchange: 将消息分发到所有的绑定队列,无routingkey的概念
     * HeadersExchange: 通过添加属性key-value匹配
     * DirectExchange: 按照routingkey分发到指定队列
     * TopicExchange: 多关键字匹配
     * @return
     */
    @Bean
    public TopicExchange exchange001(){
        return new TopicExchange("topic001", true, false);
    }

    @Bean
    public Queue queue001() {
        return new Queue("queue001", true); //队列持久
    }

    @Bean
    public Binding binding001(){
        return BindingBuilder.bind(queue001()).to(exchange001()).with("spring.*");
    }

    @Bean
    public TopicExchange exchange002(){
        return new TopicExchange("topic002", true, false);
    }

    @Bean
    public Queue queue002() {
        return new Queue("queue002", true); //队列持久
    }

    @Bean
    public Queue queue003() {
        return new Queue("queue003", true); //队列持久
    }

    @Bean
    public Binding binding002(){
        return BindingBuilder.bind(queue002()).to(exchange002()).with("rabbit.*");
    }

    @Bean
    public Binding binding003(){
        return BindingBuilder.bind(queue003()).to(exchange002()).with("spring.*");
    }

    @Bean
    public Queue queue_image() {
        return new Queue("image_queue", true); //队列持久
    }

    @Bean
    public Queue queue_pdf() {
        return new Queue("pdf_queue", true); //队列持久
    }

    @Bean
    public RabbitTemplate rabbitTemplate(ConnectionFactory connectionFactory) {
        RabbitTemplate rabbitTemplate = new RabbitTemplate(connectionFactory);
        return rabbitTemplate;
    }

    @Bean
    public SimpleMessageListenerContainer messageContainer(ConnectionFactory connectionFactory) {

        SimpleMessageListenerContainer container = new SimpleMessageListenerContainer(connectionFactory);
        container.setQueues(queue001(), queue002(), queue003(), queue_image(), queue_pdf());
        container.setConcurrentConsumers(1);
        container.setMaxConcurrentConsumers(5);
        container.setDefaultRequeueRejected(false); //不进行重回队列
        container.setAcknowledgeMode(AcknowledgeMode.AUTO); //自动签收机制
        container.setConsumerTagStrategy(new ConsumerTagStrategy() {
            @Override
            public String createConsumerTag(String queue) {
                return queue + "_" + UUID.randomUUID().toString();
            }
        });
        container.setMessageListener(new ChannelAwareMessageListener() {
            @Override
            public void onMessage(Message message, Channel channel) throws Exception {
                String msg = new String(message.getBody());
                System.err.println("-----------消费者:" + msg);
            }
        });

        return container;
    }
}
启动后,AdminApplicaiton控制台收到

RabbitMQTest控制台

这里是由于Test启动也启动了RabbitMQConfig配置,所以在Test控制台消费了一条,到Application只剩2条可消费


