
Angular5 服务器渲染(SSR)
由于业务需求,需要对项目中的文档部分做 SEO 搜索引擎优化,这里我采用的是angular官方推荐的服务器渲染方案Angular Universal。标准的 Angular 应用会运行在浏览器中,它会在 DOM 中渲染页面,以响应用户的操作。而Angular Universal 会在服务端通过一个名叫服务端渲染(server-side rendering - SSR)的过程生成静态的应用页面。在分享之前,我们先看一下服务器渲染的工作原理:
-
Angular提供了一个
platform-server包,它包含了服务端的DOM实现、XMLHttpRequest和其它底层特性,但不再依赖浏览器。我们需要使用platform-server模块来编译客户端应用,并且在一个 Web 服务器上运行这个Universal应用。 -
服务器会把客户端对应用页面的请求传给
renderModuleFactory函数。renderModuleFactory函数接受一个模板 HTML 页面(通常是 index.html)、一个包含组件的 Angular 模块和一个用于决定该显示哪些组件的路由作为输入。该路由从客户端的请求中传给服务器。 每次请求都会给出所请求路由的一个适当的视图。renderModuleFactory在模板中的标记中渲染出哪个视图,并为客户端创建一个完成的 HTML 页面。 -
最后,服务器就会把渲染好的页面返回给客户端。
那么,下面我用一个简单的demo来分享我的实现过程以及遇到的问题。我的项目用的是Angular 5.2.3版本,本次调试主要涉及修改/添加的文件有如下:
* 表示修改的文件,+表示添加的文件
src/
  main.ts *
  main.server.ts +
  tsconfig.app.json  *
  tsconfig.server.json   +
app.module.ts *
app.server.module.ts +
server.ts +
package.json *
webpack.config.js +
安装依赖
需要安装的依赖如下:
@angular/platform-server 编译客户端应用,并在服务器上运行其生成的 Universal 应用
@nguniversal/module-map-ngfactory-loader 处理服务端渲染环境下的惰性加载
@nguniversal/express-engine 渲染引擎
ts-loader 解析typescript,供Webpack构建时使用
安装命令
npm install -S @angular/platform-server@^5 express
npm install -D ts-loader@^3 webpack-node-externals npm-run-all
npm install
注意: @angular/platform-server 的版本号最好根据当前 angular 版本进行安装,避免与其它依赖有版本冲突。
修改应用文件
● 修改文件 src/app/app.module.ts
import { BrowserModule } from '@angular/platform-browser';
import { NgModule } from '@angular/core';

import { AppComponent } from './app.component';

@NgModule({
  declarations: [
	AppComponent
  ],
  imports: [
	BrowserModule.withServerTransition({ appId: 'ssr-test-app' })
  ],
  providers: [],
  bootstrap: [AppComponent]
})
export class AppModule { }
该模块将由浏览器使用,并将在客户端启动应用程序。 BrowserModule.withServerTransition({ appId: 'ssr-test-app' })导入BrowserModule,告诉 Angular 这是服务器端呈现的应用程序。 appId文件是应用的名称,它是唯一的。
● 新建文件 src/app/app.server.module.ts
import { NgModule } from '@angular/core';
import { ServerModule } from '@angular/platform-server';

import { AppModule } from './app.module';
import { AppComponent } from './app.component';

@NgModule({
  imports: [
    AppModule,
    ServerModule
  ],
  bootstrap: [AppComponent],
})
export class AppServerModule { }
该模块是服务端应用模块,它包装了应用的根模块 AppModule,以便 Universal 可以在你的应用和服务器之间进行协调。 AppServerModule 还会告诉 Angular 在应用以 Universal 方式运行时,该如何启动它。
● 新建src/main.server.ts 导出服务器模块
export { AppServerModule } from './app/app.server.module';
main.server.ts 文件是服务器端的入口文件,类似于浏览器端的入口文件main.ts。稍后会在angular-cli.json中引入到它,以便设置一个服务器端的入口配置。
● 修改angular-cli.json配置,添加server部分配置
{
    "$schema": "./node_modules/@angular/cli/lib/config/schema.json",
	    "project": {
	        "name": "ssr-test-app"
	    },
    "apps": [{
            "root": "src",
            "outDir": "dist/browser",
            "assets": ["assets", "favicon.ico"],
            "index": "index.html",
            "main": "main.ts",
            "polyfills": "polyfills.ts",
            "test": "test.ts",
            "tsconfig": "tsconfig.app.json",
            "testTsconfig": "tsconfig.spec.json",
            "prefix": "app",
            "styles": [
                "styles.css",
                "assets/js/swiper/css/swiper.css"
            ],
            "scripts": [
                "assets/js/jquery/dist/jquery.min.js",
                "assets/js/jquery-cookie/jquery-cookie.js",
                "assets/js/swiper/js/swiper.min.js"
            ],
            "environmentSource": "environments/environment.ts",
            "environments": {
                "dev": "environments/environment.ts",
                "prod": "environments/environment.prod.ts"
            }
        },
        {
            "platform": "server",
            "root": "src",
            "outDir": "dist/server",
            "assets": [],
            "index": "index.html",
            "main": "main.server.ts",
            "test": "test.ts",
            "tsconfig": "tsconfig.server.json",
            "testTsconfig": "tsconfig.spec.json",
            "prefix": "app",
            "scripts": [],
            "environmentSource": "environments/environment.ts",
            "environments": {
                "dev": "environments/environment.ts",
                "prod": "environments/environment.prod.ts"
            }
        }
    ],
    "e2e": {
        "protractor": {
            "config": "./protractor.conf.js"
        }
    },
    "lint": [{
            "project": "src/tsconfig.app.json",
            "exclude": "**/node_modules/**"
        },
        {
            "project": "src/tsconfig.spec.json",
            "exclude": "**/node_modules/**"
        },
        {
            "project": "e2e/tsconfig.e2e.json",
            "exclude": "**/node_modules/**"
        }
    ],
    "test": {
        "karma": {
            "config": "./karma.conf.js"
        }
    },
	"defaults": {
    	"styleExt": "scss",
    	"component": {}
	}
}
● 修改文件: src/tsconfig.app.json
{
  	"extends": "../tsconfig.json",
 	"compilerOptions": {
	    "outDir": "../out-tsc/app",
	    "baseUrl": "./",
	    "module": "es2015",
	    "types": []
     },
     "exclude": [
	    "test.ts",
	    "**/*.spec.ts",
	    "server.ts"
     ]
}
● 新建src/tsconfig.server.json,把 tsconfig.app.json 复制到 tsconfig.server.json 中,并做如下修改:
在 "compilerOptions" 中,把 "module" 改为 "commonjs"(因为node中运行的是common格式模块)。
添加一个 "angularCompilerOptions" 属性,并把 "entryModule"(入口模块)指向你的 AppServerModule 实例,格式为 importPath#symbolName。在这个例子中,这个入口模块是 app/app.server.module#AppServerModule
{
  	"extends": "../tsconfig.json",
  	"compilerOptions": {
	    "outDir": "../out-tsc/app",
	    "baseUrl": "./",
	    "module": "commonjs",
	    "types": []
     },
    "exclude": [
	    "test.ts",
	    "**/*.spec.ts",
	    "server.ts"
     ],
    "angularCompilerOptions": {
	    "entryModule": "app/app.server.module#AppServerModule"
     }
}
● 建立nodejs服务器,采用express, 创建文件: src/server.ts
import 'reflect-metadata';
import 'zone.js/dist/zone-node';
import { renderModuleFactory } from '@angular/platform-server'
import { enableProdMode } from '@angular/core'
import * as express from 'express';
import { join } from 'path';
import { readFileSync } from 'fs';

enableProdMode();

const PORT = process.env.PORT || 4200;
const DIST_FOLDER = join(process.cwd(), 'dist');

const app = express();

const template = readFileSync(join(DIST_FOLDER, 'browser', 'index.html')).toString();
const { AppServerModuleNgFactory } = require('main.server');

app.engine('html', (_, options, callback) => {
  const opts = { document: template, url: options.req.url };

  renderModuleFactory(AppServerModuleNgFactory, opts)
.then(html => callback(null, html));
});

app.set('view engine', 'html');
app.set('views', 'src')

app.get('*.*', express.static(join(DIST_FOLDER, 'browser')));

app.get('*', (req, res) => {
  res.render('index', { req });
});

app.listen(PORT, () => {
  console.log(`listening on http://localhost:${PORT}!`);
});
● 我们需要一个webpack配置文件,来打包server.ts文件:webpack.config.js
const path = require('path');
var nodeExternals = require('webpack-node-externals');

module.exports = {
  entry: {
server: './src/server.ts'
  },
  resolve: {
extensions: ['.ts', '.js'],
alias: {
  'main.server': path.join(__dirname, 'dist', 'server', 'main.bundle.js')
}
  },
  target: 'node',
  externals: [nodeExternals()],
  output: {
path: path.join(__dirname, 'dist'),
filename: '[name].js'
  },
  module: {
rules: [
  { test: /\.ts$/, loader: 'ts-loader' }
]
  }
}
● 将build和serve命令添加到package.json中的scripts部分,方便打包:
"scripts": {
    "ng": "ng",
    "start": "run-p build:dev nodemon",
    "build": "run-s build:client build:aot build:server",
    "build:client": "ng build --prod --app 0",
    "build:aot": "ng build --aot --app 1",
    "build:server": "webpack -p",
    "build:dev": "run-p build:dev:client build:dev:aot build:dev:server",
    "build:dev:client": "ng build -w --aot --app 0",
    "build:dev:aot": "ng build -w --aot --delete-output-path=false --app 1",
    "build:dev:server": "webpack -w",
    "nodemon": "sleep 25 && nodemon --watch dist/browser/index.html --watch dist/server.js dist/server.js",
    "test": "ng test",
    "lint": "ng lint",
    "e2e": "ng e2e"
}
打包运行
执行命令进行打包:
npm run build
打包结果如下:
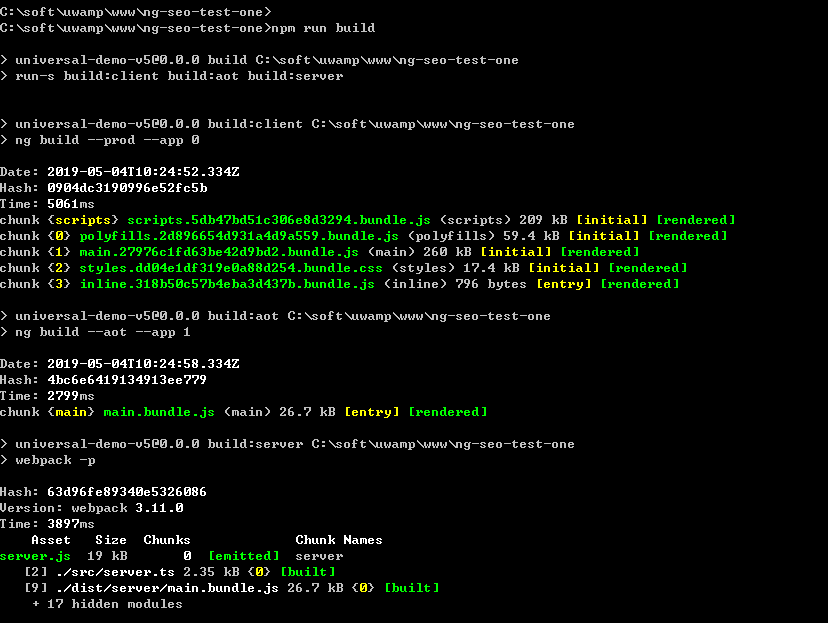
生成的包:

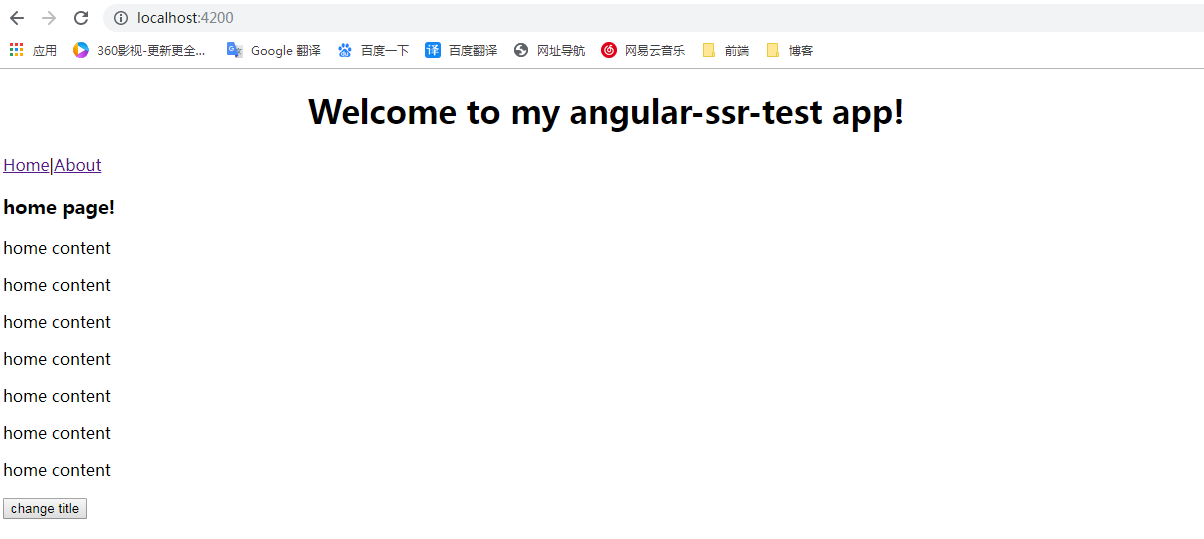
node 运行刚刚打包好的文件:
node dist/server.js

打开 http://localhost:4200/ 会正常显示项目主页面:
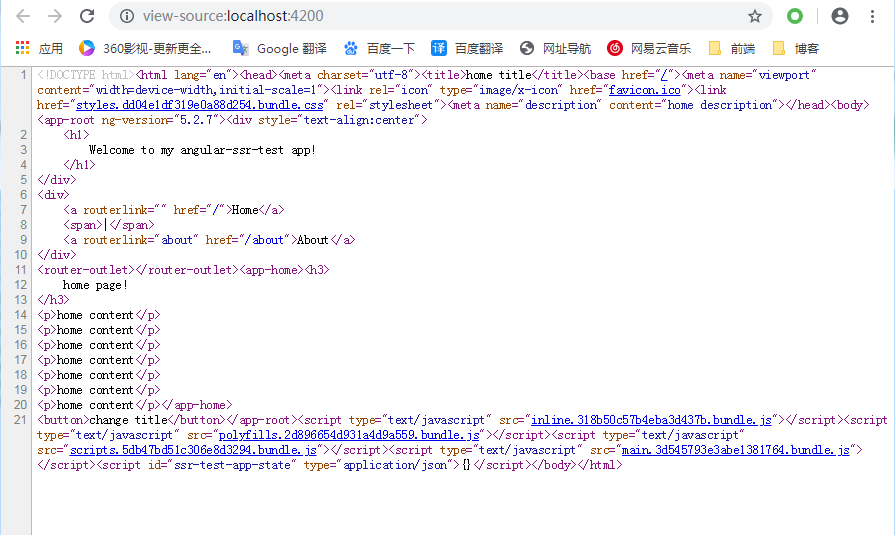
右键“查看源代码”:
存在问题
1.使用浏览器 API
相信会有同学在打包的时候出现过下面的报错问题
ReferenceError: window is not defined
或者
ReferenceError: document is not defined
因为这些是浏览器独有的原生对象(比如 window、document、navigator 或 location),在服务器上面是没有的,因此运行的时候会报错。因此,我们需要对使用浏览器的API方法做好兼容。
方案1:在server.ts,引入domino做兼容
const domino = require('domino');
const win = domino.createWindow(template);

global['window'] = win;
global['document'] = win.document;
global['DOMTokenList'] = win.DOMTokenList;
global['Node'] = win.Node;
global['Text'] = win.Text;
global['HTMLElement'] = win.HTMLElement;
global['navigator'] = win.navigator;
但是,domino并非兼容了所有浏览器的api,只是兼容了大部分方法(有兴趣的同学可以看,domin的源码 https://github.com/fgnass/domino)。但是如果是用到的api不多,可以考虑用这个方案。
方案2:使用Angular官方推荐的方法
通过PLATFORM_ID令牌注入的对象来检查当前平台是浏览器还是服务器,从而解决该问题。判断是浏览器环境,才执行使用到浏览器方法的代码片段。不过个人觉得有些麻烦,因为在用到浏览器独有API方法的地方都得做引入判断兼容。
import { PLATFORM_ID } from '@angular/core';
import { isPlatformBrowser, isPlatformServer } from '@angular/common';

constructor(@Inject(PLATFORM_ID) private platformId: Object) { ... }

ngOnInit() {
  if (isPlatformBrowser(this.platformId)) {
	// 浏览器代码
	// eg:let url=window.location.href;
 ...
  }
  if (isPlatformServer(this.platformId)) {
	// 服务器代码
...
  }
}
2.使用第三方库,例如jq
ReferenceError: $ is not defined
方案1:使用Angular官方推荐的方法
和上面一样,检查当前平台是浏览器还是服务器,执行相应的代码。
import { PLATFORM_ID } from '@angular/core';
import { isPlatformBrowser, isPlatformServer } from '@angular/common';

constructor(@Inject(PLATFORM_ID) private platformId: Object) { ... }

ngOnInit() {
  if (isPlatformBrowser(this.platformId)) {
	// 浏览器代码
	// eg:let userID =$.cookie('userID');
 ...
  }
}

