jupyter notebook(python 3.7)网页版安装
参考链接:https://blog.csdn.net/NickHan_cs/article/details/108204297
#1.进入python的Scripts目录下
>activate.bat ------- >#激活Scripts
>cd d:\Opencv\python3.7\venv\Scripts
#2.安装jupyter notebook
>\python3.7\venv\Scripts\pip install jupyter notebook
>jupyter notebook (成功打开则安装成功)
#3.配置jupyter notebook
>jupyter notebook --generate-config,会发现C:\Users\admin\ .jupyter下多出了一个配置文件jupyter_notebook_config.py;

(1)打开这个配置文件,找到下面这句#c.NotebookApp.notebook_dir = ''。可以把它修改成c.NotebookApp.notebook_dir = 'D:\Opencv\jupyter-notebook' ,并去掉注释符(具体的目录由自己创建的文件夹决定(需要自己创建)。)
(2)配置文件修改完成后,以后在jupyter notebook中写的代码都会保存在该目录下。现在重新启动jupyter notebook,就进入了新的工作目录;
#4.添加代码自动补全功能
(1)打开cmd,输入pip install jupyter_contrib_nbextensions,等待安装成功;
(2)安装完之后需要配置nbextension(配置前要确保已关闭jupyter notebook),在cmd中输入jupyter contrib nbextension install --user --skip-running-check,等待配置成功;
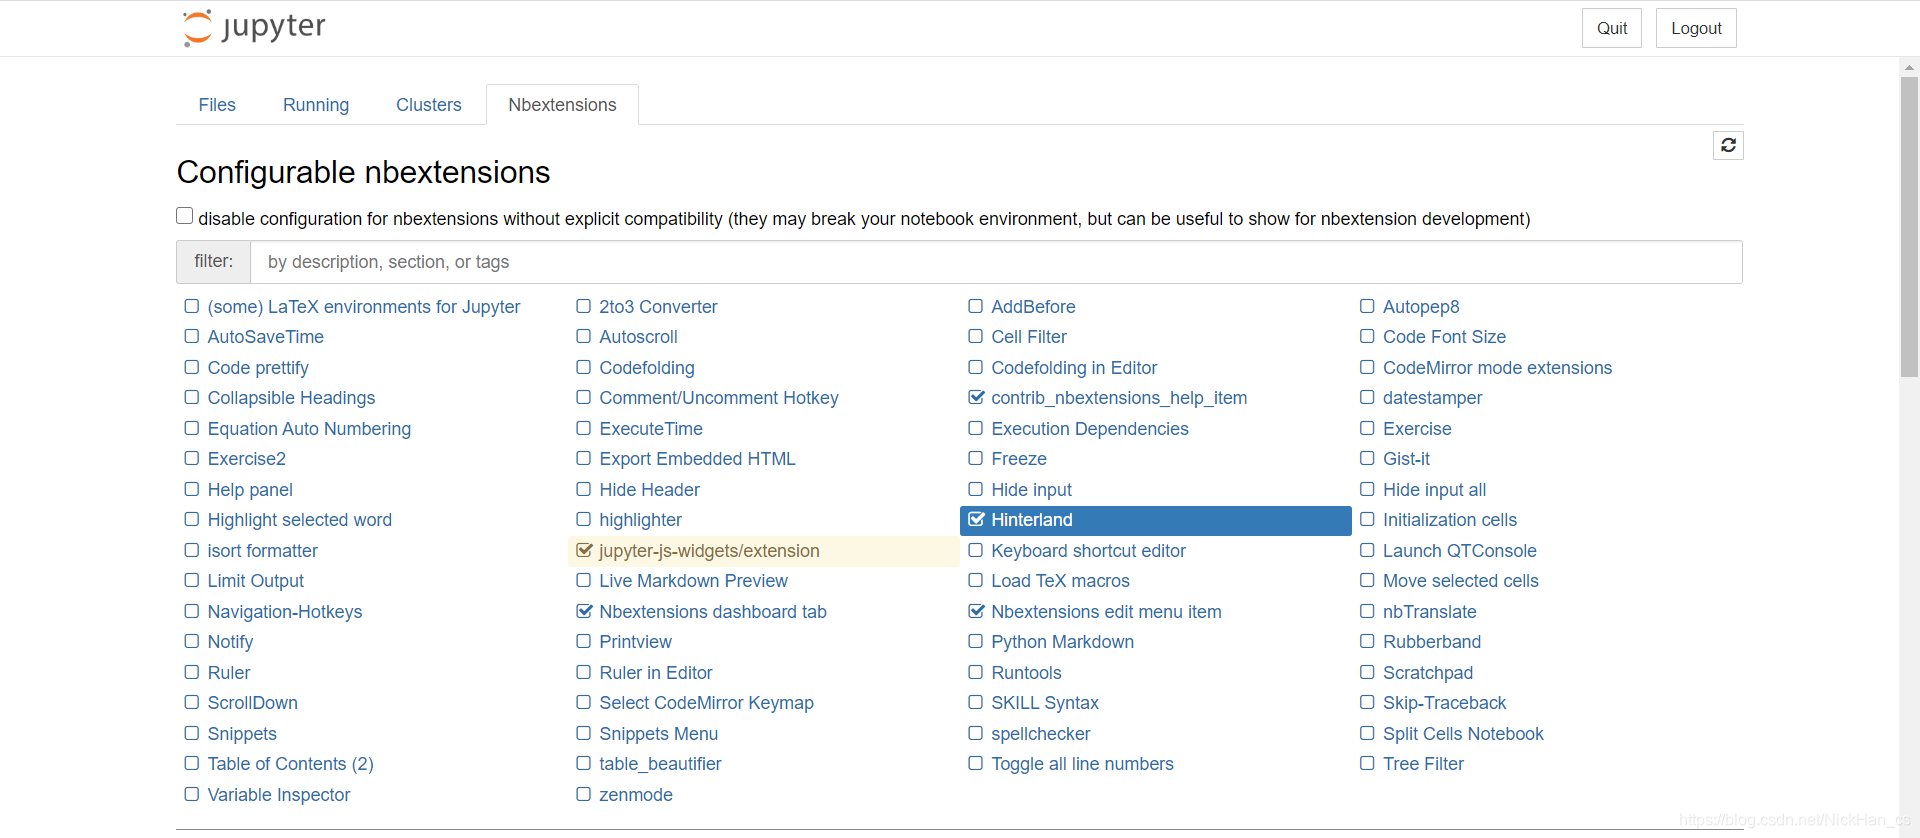
(3)在前两步成功的情况下,启动jupyter notebook,会发现在选项栏中多出了Nbextension的选项,点开该选项,并勾选Hinterland,即可添加代码自动补全功能。

#5.cmd打开jupyter notebook
win+R 输入cmd
>cd d:\Opencv\pythonProject3.7.6\venv
>cd d:
pythonProject3.7.6\venv\>cd Scripts
>jupyter notebook
#6.自动补全功能
https://blog.csdn.net/dayuquan6226/article/details/101402541 (未成功)
————————————————


