spring基础知识(一)
spring基础知识(一)——入门
spring:
Spring是一个开源框架,Spring是于2003 年兴起的一个轻量级的Java 开发框架,由Rod Johnson 在其著作Expert One-On-One J2EE Development and Design中阐述的部分理念和原型衍生而来。它是为了解决企业应用开发的复杂性而创建的。框架的主要优势之一就是其分层架构,分层架构允许使用者选择使用哪一个组件,同时为 J2EE 应用程序开发提供集成的框架。Spring使用基本的JavaBean来完成以前只可能由EJB完成的事情。然而,Spring的用途不仅限于服务器端的开发。从简单性、可测试性和松耦合的角度而言,任何Java应用都可以从Spring中受益。Spring的核心是控制反转(IoC)和面向切面(AOP)。简单来说,Spring是一个分层的JavaSE/EEfull-stack(一站式) 轻量级开源框架。
首先先说下,IOC (inverse of controller) 控制反转,(具体可以IoC理论访问http://blog.csdn.net/m13666368773/article/details/7802126)
控制正转:控制权掌握在自己手中,在执行过程中需要另外的类(工具)支持,直接去创建(new)该工具,然后利用该工具使用。(new的过程耦合性太高)
控制反转:去创建工具的过程,交给其他类去完成,IOC容器会主动创建一个对象B注入到对象A需要的地方。
IOC的别名:依赖注入(DI)(dependcy injection) 通过引入IOC容器,利用依赖关系注入的方式,实现对象之间的解耦。
搭建环境
1、导入相应jar包
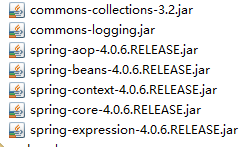
commons-collections-3.2.jar --集合包
commons-logging.jar --日志
spring-aop-4.0.6.RELEASE.jar --aop
spring-beans-4.0.6.RELEASE.jar --bean实体类
spring-context-4.0.6.RELEASE.jar --实体类依赖包
spring-core-4.0.6.RELEASE.jar --核心代码
spring-expression-4.0.6.RELEASE.jar --表达式语言
jar包地址:http://pan.baidu.com/s/1c2xjIa0
2、在src下导入applicationContext.xml文件
<?xml version="1.0" encoding="UTF-8"?>
<beans xmlns="http://www.springframework.org/schema/beans"
    xmlns:aop="http://www.springframework.org/schema/aop" xmlns:tx="http://www.springframework.org/schema/tx"
    xmlns:xsi="http://www.w3.org/2001/XMLSchema-instance" xmlns:p="http://www.springframework.org/schema/p"
    xsi:schemaLocation="http://www.springframework.org/schema/beans http://www.springframework.org/schema/beans/spring-beans-3.0.xsd
    http://www.springframework.org/schema/aop http://www.springframework.org/schema/aop/spring-aop-3.0.xsd
    http://www.springframework.org/schema/tx http://www.springframework.org/schema/tx/spring-tx-3.0.xsd
    ">
   //如果不对应" org.springframework.beans.factory.CannotLoadBeanClassException: Cannot find class 。。。。
     <bean id="car" class="entity.Car"></bean>
    </beans>
3、测试的一个案例
Ioc(控制反转),又称依赖注入 减耦合
3.1建立个实体类
package entity;

public class Car {
    public void go(){
        System.out.println("汽车以30码的速度跑...");
    }
}
3.2建个测试类(直接从BeanFactory调用不再去New一个对象)
package test;

import org.springframework.context.ApplicationContext;
import org.springframework.context.support.ClassPathXmlApplicationContext;

import entity.Car;

public class Test {
    public static void main(String[] args) {
        //1.获取 BeanFactory
        ApplicationContext ac=new ClassPathXmlApplicationContext("applicationContext.xml");
        //2.产生 car
        Car car = (Car) ac.getBean("car");
        car.go();

    }
}
3.3结果

4、下面演示第二个案列
4.1、在原有基础上加个entity 上Person类
package entity;

public class Person {
    private Car car;

    public void drive(){
        System.out.println("该人准备用车。这车来自于 beanFactory");
        car.go();
    }
    public void setCar(Car car) {
        this.car = car;
    }
}
4.2在applicationContext.xml新增
<bean id="car" class="entity.Car"></bean>
    <bean id ="person" class="entity.Person">
        <property name="car" ref="car"></property>
    </bean>
4.3测试类文件
package test;

import org.springframework.context.ApplicationContext;
import org.springframework.context.support.ClassPathXmlApplicationContext;

import entity.Car;
import entity.Person;

public class Test {
    public static void main(String[] args) {
        //1.获取 BeanFactory
        ApplicationContext ac=new ClassPathXmlApplicationContext("applicationContext.xml");
        //2.产生 car
        Person p = (Person) ac.getBean("person");
        p.drive();
    }
}
4.4运行结果

上述xml配置文件注意
<?xml version="1.0" encoding="UTF-8"?>
<beans xmlns="http://www.springframework.org/schema/beans"
    xmlns:aop="http://www.springframework.org/schema/aop" xmlns:tx="http://www.springframework.org/schema/tx"
    xmlns:xsi="http://www.w3.org/2001/XMLSchema-instance" xmlns:p="http://www.springframework.org/schema/p"
    xsi:schemaLocation="http://www.springframework.org/schema/beans http://www.springframework.org/schema/beans/spring-beans-3.0.xsd
    http://www.springframework.org/schema/aop http://www.springframework.org/schema/aop/spring-aop-3.0.xsd
    http://www.springframework.org/schema/tx http://www.springframework.org/schema/tx/spring-tx-3.0.xsd
    ">

     <bean id="car" class="entity.Car"></bean>
    <bean id ="person" class="entity.Person">

    <!--注意:name的"car"来自  person类申明的car,ref来自上面本案中的id

    如果该成这样<property name="car" ref="coo">
    提示 No bean named 'coo' is defined    -->

        <property name="car" ref="car"></property>

    </bean>
    </beans>
2.加载spring 容器的三种方式
1.类路径获得配置文件
2.文件系统路径获得配置文件
3.使用BeanFactory(了解)
package test;

import org.springframework.beans.factory.BeanFactory;
import org.springframework.beans.factory.xml.XmlBeanFactory;
import org.springframework.context.ApplicationContext;
import org.springframework.context.support.ClassPathXmlApplicationContext;
import org.springframework.context.support.FileSystemXmlApplicationContext;
import org.springframework.core.io.FileSystemResource;

import service.LoginSv;
import entity.UserInfo;

public class Test {
    public static void main(String[] args) {
        //1.类路径获得配置文件(推荐使用)
        ApplicationContext ac=new ClassPathXmlApplicationContext("applicationContext.xml");
        //2.文件系统路径获得配置文件
        ApplicationContext ac2 =
            new FileSystemXmlApplicationContext("E:\\workspce\\day5-15spring\\src\\applicationContext.xml");
        //3.使用BeanFactory(了解)
        BeanFactory bf =
            new XmlBeanFactory(new FileSystemResource("E:\\workspce\\day5-15spring\\src\\applicationContext.xml"));

        LoginSv ls =(LoginSv) bf.getBean("loginCC");
        ls.canLogin(new UserInfo());

    }
}
BeanFactory和ApplicationContext对比
BeanFactory 采取延迟加载,第一次getBean时才会初始化Bean
ApplicationContext是对BeanFactory扩展,提供了更多功能
国际化处理
事件传递
Bean自动装配
各种不同应用层的Context实现
以上文档只是个人学习记录,不足之处还望指出。


 浙公网安备 33010602011771号