Initialize the Kubernetes Basic Environment Configuration on CentOS 7.9
一、Initialize the Kubernetes Basic Environment Configuration on CentOS 7.9
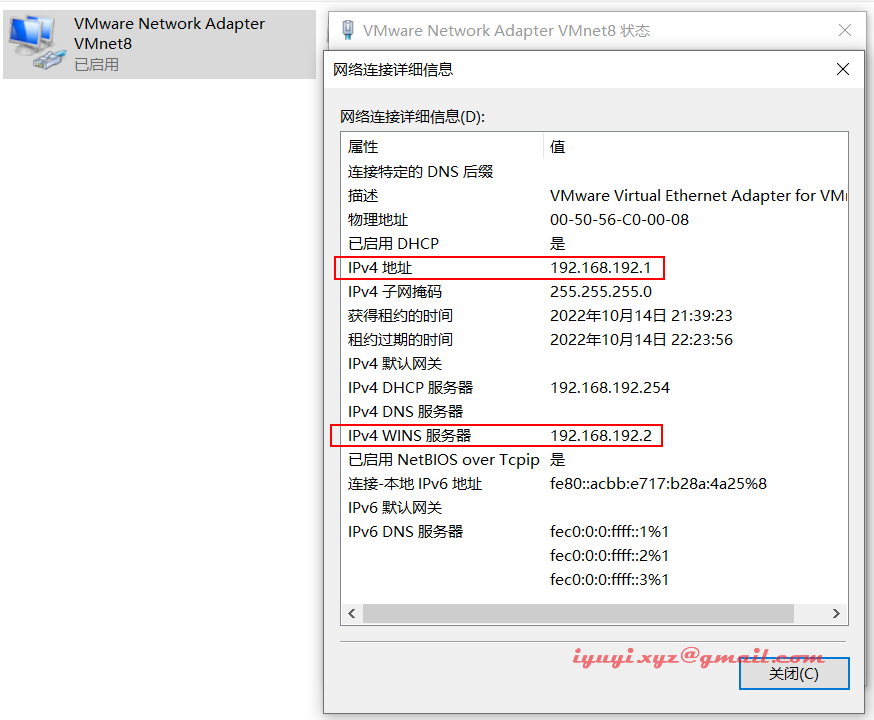
1 IP 修改
机器克隆后 IP 修改,使Xshell连接上
[root@localhost ~]# vi /etc/sysconfig/network-scripts/ifcfg-ens160
TYPE=Ethernet
PROXY_METHOD=none
BROWSER_ONLY=no
BOOTPROTO=static # 配置静态IP,防止修改
DEFROUTE=yes
IPV4_FAILURE_FATAL=no
IPV6INIT=yes
IPV6_AUTOCONF=yes
IPV6_DEFROUTE=yes
IPV6_FAILURE_FATAL=no
IPV6_ADDR_GEN_MODE=stable-privacy
NAME=ens32
UUID=d368b9f1-2b0c-4dbd-b691-e24ea590ccbe
DEVICE=ens32
ONBOOT=yes # 是否开机时就启用
IPADDR=192.168.192.16 # 修改ip地址
PREFIX=24
GATEWAY=192.168.192.2 # 修改网关地址
IPV6_PRIVACY=no
DNS1=114.114.114.114 # DSN配置上,不然使用域名会找不到的
DNS2=8.8.8.8
重启网卡,并测试好不好使
systemctl restart network
ping baiud.com
2 设置主机名
hostnamectl set-hostname kube-master01
hostnamectl set-hostname kube-master02
hostnamectl set-hostname kube-node01
hostnamectl set-hostname kube-node02
3 设置域名解析
修改/etc/hosts
cat > /etc/hosts <<EOF
127.0.0.1   localhost localhost.localdomain localhost4 localhost4.localdomain4
::1         localhost localhost.localdomain localhost6 localhost6.localdomain6

192.168.192.16 kube-master01
192.168.192.17 kube-master02
192.168.192.18 kube-node01
192.168.192.19 kube-node02
EOF
4 关闭防火墙 / Selinux / Swap
为了避免额外的干扰,需要关闭防火墙,对于公有云,内网端口一般全开放,外网端口通过安全组控制
# 关闭防火墙
[root@localhost ~]# systemctl stop firewalld
[root@localhost ~]# systemctl disable --now firewalld
Removed symlink /etc/systemd/system/multi-user.target.wants/firewalld.service.
Removed symlink /etc/systemd/system/dbus-org.fedoraproject.FirewallD1.service.

[root@localhost ~]# systemctl disable --now NetworkManager
Removed symlink /etc/systemd/system/multi-user.target.wants/NetworkManager.service.
Removed symlink /etc/systemd/system/dbus-org.freedesktop.nm-dispatcher.service.
Removed symlink /etc/systemd/system/network-online.target.wants/NetworkManager-wait-online.service.

# 关闭Selinux
# 永久关闭
[root@localhost ~]# sed -i 's#SELINUX=enforcing#SELINUX=disabled#g' /etc/selinux/config
# 临时关闭
[root@localhost ~]# setenforce 0
# 检查
[root@localhost ~]# cat /etc/selinux/config
[root@localhost ~]# /usr/sbin/sestatus -v
SELinux status:                 enabled

# 先查看 Swap有没有
[root@localhost ~]# free -m
              total        used        free      shared  buff/cache   available
Mem:           1800        1208         122          15         469         417
Swap:          2047          15        2032
# 关闭 Swap 分区,Swap 会影响性能
[root@localhost ~]# sed -ri 's/.*swap.*/#&/' /etc/fstab
vm.swappiness = 0
[root@localhost ~]# swapoff -a
# 在确认下 [查看swap一行全是0就正确]
[root@localhost ~]# free -m
              total        used        free      shared  buff/cache   available
Mem:           1800        1210         110          25         479         406
Swap:             0           0           0
5 YUM 源配置
本地或者自建服务器都需要配置 YUM 源,如果是云服务器由于本身就有对应云的 YUM 源,不需要配置
# 备份旧的 yum 源
cd /etc/yum.repos.d/
mkdir backup-$(date +%F)
mv *repo backup-$(date +%F)

# 上面看不懂,这有简单的
[root@localhost yum.repos.d]# mkdir /etc/yum.repos.d.bak
[root@localhost yum.repos.d]# cp /etc/yum.repos.d/* /etc/yum.repos.d.bak/
[root@localhost yum.repos.d]# ls /etc/yum.repos.d.bak/

# 添加阿里云 yum 源
[root@localhost yum.repos.d]# curl http://mirrors.aliyun.com/repo/Centos-7.repo -o ali.repo
  % Total    % Received % Xferd  Average Speed   Time    Time     Time  Current
                                 Dload  Upload   Total   Spent    Left  Speed
100  2523  100  2523    0     0  13637      0 --:--:-- --:--:-- --:--:-- 13637
6 基础依赖安装
由于服务器最小化安装,需要安装一些常用的依赖和工具,否则后面安装可能会报错
# 安装常用依赖
yum -y install vim tree lrzsz wget jq psmisc net-tools telnet yum-utils device-mapper-persistent-data lvm2 git
7 配置时间同步
本地或者自建服务器都需要配置时间同步,如果是云服务器由于本身就有对应云的时间同步机制,不需要配置
timedatectl8 互相免密
Master 节点执行以下操作
ssh-keygen -t rsa

# 定义 master 列表
MASTER_LIST=(
192.168.85.12
192.168.85.13
)

# 配置免密登录
for i in ${MASTER_LIST[@]};do
    ssh-copy-id -i /root/.ssh/id_rsa.pub root@$i
done

# yes
# 输入密码
9 内核升级
CentOS 7.9 内核是3.10,kubernetes需要内核是4.18或以上版本,CentOS 7.9 必须升级内核才可以安装kubernetes。
其它系统根据自己的需求去升级,CentOS 7.9 需要升级内核至4.18+。
CentOS 7.9 升级内核 kernel-ml-5.6.14版本:https://www.cnblogs.com/huaxiayuyi/p/16788084.html
CentOS 8.2 升级内核通过elrepo源:https://www.cnblogs.com/huaxiayuyi/p/16794239.html
10 系统优化
对系统打开文件数进行修改,提升性能
ulimit -SHn 65535
cat >>/etc/security/limits.conf <<EOF
* soft nofile 65536
* hard nofile 131072
* soft nproc 65535
* hard nproc 655350
* soft memlock unlimited
* hard memlock unlimited
EOF

cat /etc/security/limits.conf
11 加载模块
ipvs模块配置
kube-proxy开启ipvs的前置条件
- 原文:https://github.com/kubernetes/kubernetes/blob/master/pkg/proxy/ipvs/README.md
- 参考:https://www.qikqiak.com/post/how-to-use-ipvs-in-kubernetes/
创建配置文件
内核 4.19+版本 nf_conntrack_ipv4 已改为 nf_conntrack ,4.18以下使用 nf_conntrack_ipv4即可。
安装 ipvsadm,节点通信需要用到 LVS,所有需要安装 ipvsadm。ipset 和 ipvsadm (便于查看 ipvs 的代理规则)
yum -y install ipvsadm ipset sysstat conntrack libseccomp配置 ipvs 模块(内核 4.19 版本以前使用 nf_conntrack_ipv4,以后使用 nf_conntrack)
modprobe -- ip_vs
modprobe -- ip_vs_rr
modprobe -- ip_vs_wrr
modprobe -- ip_vs_sh
modprobe -- nf_conntrack

cat >> /etc/modules-load.d/ipvs.conf <<EOF
ip_vs
ip_vs_lc
ip_vs_wlc
ip_vs_rr
ip_vs_wrr
ip_vs_lblc
ip_vs_lblcr
ip_vs_dh
ip_vs_sh
ip_vs_fo
ip_vs_nq
ip_vs_sed
ip_vs_ftp
ip_vs_sh
nf_conntrack
ip_tables
ip_set
xt_set
ipt_set
ipt_rpfilter
ipt_REJECT
ipip
EOF
重新加载配置
systemctl enable --now systemd-modules-load.service12 优化系统参数
开启一些k8s集群中必须的内核参数,某些参数对 Kubernetes 集群很重要(不一定是最优,各取所有)
cat > /etc/sysctl.d/k8s.conf <<EOF
net.ipv4.ip_forward = 1
net.bridge.bridge-nf-call-iptables = 1
net.bridge.bridge-nf-call-ip6tables = 1
fs.may_detach_mounts = 1
vm.overcommit_memory=1
vm.panic_on_oom=0
fs.inotify.max_user_watches=89100
fs.file-max=52706963
fs.nr_open=52706963
net.netfilter.nf_conntrack_max=2310720

net.ipv4.tcp_keepalive_time = 600
net.ipv4.tcp_keepalive_probes = 3
net.ipv4.tcp_keepalive_intvl =15
net.ipv4.tcp_max_tw_buckets = 36000
net.ipv4.tcp_tw_reuse = 1
net.ipv4.tcp_max_orphans = 327680
net.ipv4.tcp_orphan_retries = 3
net.ipv4.tcp_syncookies = 1
net.ipv4.tcp_max_syn_backlog = 16384
net.ipv4.ip_conntrack_max = 65536
net.ipv4.tcp_max_syn_backlog = 16384
net.ipv4.tcp_timestamps = 0
net.core.somaxconn = 16384
EOF
两种方式
1 单独指定配置文件加载
sysctl -p /etc/sysctl.d/k8s.conf2 手动加载所有的配置文件
[root@kube-master01 ~]# sysctl --system
* Applying /usr/lib/sysctl.d/00-system.conf ...
net.bridge.bridge-nf-call-ip6tables = 0
net.bridge.bridge-nf-call-iptables = 0
net.bridge.bridge-nf-call-arptables = 0
* Applying /usr/lib/sysctl.d/10-default-yama-scope.conf ...
* Applying /usr/lib/sysctl.d/50-default.conf ...
kernel.sysrq = 16
kernel.core_uses_pid = 1
kernel.kptr_restrict = 1
net.ipv4.conf.default.rp_filter = 1
net.ipv4.conf.all.rp_filter = 1
net.ipv4.conf.default.accept_source_route = 0
net.ipv4.conf.all.accept_source_route = 0
net.ipv4.conf.default.promote_secondaries = 1
net.ipv4.conf.all.promote_secondaries = 1
fs.protected_hardlinks = 1
fs.protected_symlinks = 1
* Applying /etc/sysctl.d/99-sysctl.conf ...
* Applying /etc/sysctl.d/user.conf ...
net.ipv4.ip_forward = 1
net.bridge.bridge-nf-call-iptables = 1
net.bridge.bridge-nf-call-ip6tables = 1
vm.overcommit_memory = 1
vm.panic_on_oom = 0
fs.inotify.max_user_watches = 89100
fs.file-max = 52706963
fs.nr_open = 52706963
net.netfilter.nf_conntrack_max = 2310720
net.ipv4.tcp_keepalive_time = 600
net.ipv4.tcp_keepalive_probes = 3
net.ipv4.tcp_keepalive_intvl = 15
net.ipv4.tcp_max_tw_buckets = 36000
net.ipv4.tcp_tw_reuse = 1
net.ipv4.tcp_max_orphans = 327680
net.ipv4.tcp_orphan_retries = 3
net.ipv4.tcp_syncookies = 1
net.ipv4.tcp_max_syn_backlog = 16384
net.ipv4.tcp_timestamps = 0
net.core.somaxconn = 16384
* Applying /etc/sysctl.conf ...
13 重启服务器
配置完内核后,保证重启后内核依旧加载
reboot重启完成,在查看 ipvs 的配置效果
lsmod | grep --color=auto -e ip_vs -e nf_conntrack
ip_vs_ftp              16384  0
nf_nat                 45056  1 ip_vs_ftp
ip_vs_sed              16384  0
ip_vs_nq               16384  0
ip_vs_fo               16384  0
ip_vs_dh               16384  0
ip_vs_lblcr            16384  0
ip_vs_lblc             16384  0
ip_vs_wlc              16384  0
ip_vs_lc               16384  0
ip_vs_sh               16384  0
ip_vs_wrr              16384  0
ip_vs_rr               16384  0
ip_vs                 155648  24 ip_vs_wlc,ip_vs_rr,ip_vs_dh,ip_vs_lblcr,ip_vs_sh,ip_vs_fo,ip_vs_nq,ip_vs_lblc,ip_vs_wrr,ip_vs_lc,ip_vs_sed,ip_vs_ftp
nf_conntrack          155648  2 nf_nat,ip_vs
nf_defrag_ipv6         24576  2 nf_conntrack,ip_vs
nf_defrag_ipv4         16384  1 nf_conntrack
libcrc32c              16384  4 nf_conntrack,nf_nat,xfs,ip_vs
14 参数详解
Kubernetes 内核优化常用参数详解
net.ipv4.ip_forward = 1 #其值为0,说明禁止进行IP转发;如果是1,则说明IP转发功能已经打开。
net.bridge.bridge-nf-call-iptables = 1 #二层的网桥在转发包时也会被iptables的FORWARD规则所过滤,这样有时会出现L3层的iptables rules去过滤L2的帧的问题
net.bridge.bridge-nf-call-ip6tables = 1 #是否在ip6tables链中过滤IPv6包
fs.may_detach_mounts = 1 #当系统有容器运行时,需要设置为1

vm.overcommit_memory=1
#0, 表示内核将检查是否有足够的可用内存供应用进程使用;如果有足够的可用内存,内存申请允许;否则,内存申请失败,并把错误返回给应用进程。
#1, 表示内核允许分配所有的物理内存,而不管当前的内存状态如何。
#2, 表示内核允许分配超过所有物理内存和交换空间总和的内存

vm.panic_on_oom=0
#OOM就是out of memory的缩写,遇到内存耗尽、无法分配的状况。kernel面对OOM的时候,咱们也不能慌乱,要根据OOM参数来进行相应的处理。
#值为0:内存不足时,启动 OOM killer。
#值为1:内存不足时,有可能会触发 kernel panic(系统重启),也有可能启动 OOM killer。
#值为2:内存不足时,表示强制触发 kernel panic,内核崩溃GG(系统重启)。

fs.inotify.max_user_watches=89100 #表示同一用户同时可以添加的watch数目(watch一般是针对目录,决定了同时同一用户可以监控的目录数量)

fs.file-max=52706963 #所有进程最大的文件数
fs.nr_open=52706963 #单个进程可分配的最大文件数
net.netfilter.nf_conntrack_max=2310720 #连接跟踪表的大小,建议根据内存计算该值CONNTRACK_MAX = RAMSIZE (in bytes) / 16384 / (x / 32),并满足nf_conntrack_max=4*nf_conntrack_buckets,默认262144

net.ipv4.tcp_keepalive_time = 600  #KeepAlive的空闲时长,或者说每次正常发送心跳的周期,默认值为7200s(2小时)
net.ipv4.tcp_keepalive_probes = 3 #在tcp_keepalive_time之后,没有接收到对方确认,继续发送保活探测包次数,默认值为9(次)
net.ipv4.tcp_keepalive_intvl =15 #KeepAlive探测包的发送间隔,默认值为75s
net.ipv4.tcp_max_tw_buckets = 36000 #Nginx 之类的中间代理一定要关注这个值,因为它对你的系统起到一个保护的作用,一旦端口全部被占用,服务就异常了。 tcp_max_tw_buckets 能帮你降低这种情况的发生概率,争取补救时间。
net.ipv4.tcp_tw_reuse = 1 #只对客户端起作用,开启后客户端在1s内回收
net.ipv4.tcp_max_orphans = 327680 #这个值表示系统所能处理不属于任何进程的socket数量,当我们需要快速建立大量连接时,就需要关注下这个值了。

net.ipv4.tcp_orphan_retries = 3
#出现大量fin-wait-1
#首先,fin发送之后,有可能会丢弃,那么发送多少次这样的fin包呢?fin包的重传,也会采用退避方式,在2.6.358内核中采用的是指数退避,2s,4s,最后的重试次数是由tcp_orphan_retries来限制的。

net.ipv4.tcp_syncookies = 1 #tcp_syncookies是一个开关,是否打开SYN Cookie功能,该功能可以防止部分SYN攻击。tcp_synack_retries和tcp_syn_retries定义SYN的重试次数。
net.ipv4.tcp_max_syn_backlog = 16384 #进入SYN包的最大请求队列.默认1024.对重负载服务器,增加该值显然有好处.
net.ipv4.ip_conntrack_max = 65536 #表明系统将对最大跟踪的TCP连接数限制默认为65536
net.ipv4.tcp_max_syn_backlog = 16384 #指定所能接受SYN同步包的最大客户端数量,即半连接上限;
net.ipv4.tcp_timestamps = 0 #在使用 iptables 做 nat 时,发现内网机器 ping 某个域名 ping 的通,而使用 curl 测试不通, 原来是 net.ipv4.tcp_timestamps 设置了为 1 ,即启用时间戳
net.core.somaxconn = 16384	#Linux中的一个kernel参数,表示socket监听(listen)的backlog上限。什么是backlog呢?backlog就是socket的监听队列,当一个请求(request)尚未被处理或建立时,他会进入backlog。而socket server可以一次性处理backlog中的所有请求,处理后的请求不再位于监听队列中。当server处理请求较慢,以至于监听队列被填满后,新来的请求会被拒绝。
二、报错
1 ping name or service not know
# 修改内容
[root@localhost ~]# vi /etc/sysconfig/network-scripts/ifcfg-ens160
BOOTPROTO=“static” #启用静态IP地址
ONBOOT=“yes”       # 是否开机时就启用
重启网络
service network restartping
ping baidu.com
ping 114.114.114.114
三、安装 kubernetes -1.25.2
CentOS 7.9 安装 kubernetes-1.25.2:https://www.cnblogs.com/huaxiayuyi/p/16816029.html
