Installation Consul-1.9.14 CentOS 7.9
一、Installation Consul-1.9.14 CentOS 7.9
地址
二、下载解压
1 wget 下载
wget https://releases.hashicorp.com/consul/1.9.14/consul_1.9.14_linux_amd64.zip2 解压
unzip /opt/software/consul_1.9.14_linux_amd64.zip -d /opt/3 界面说明安装成功
[root@ecs-65685 consul_1.9.14]# ./consul
Usage: consul [--version] [--help] <command> [<args>]

Available commands are:
    acl            Interact with Consul's ACLs
    agent          Runs a Consul agent
    catalog        Interact with the catalog
    config         Interact with Consul's Centralized Configurations
    connect        Interact with Consul Connect
    debug          Records a debugging archive for operators
    event          Fire a new event
    exec           Executes a command on Consul nodes
    force-leave    Forces a member of the cluster to enter the "left" state
    info           Provides debugging information for operators.
    intention      Interact with Connect service intentions
    join           Tell Consul agent to join cluster
    keygen         Generates a new encryption key
    keyring        Manages gossip layer encryption keys
    kv             Interact with the key-value store
    leave          Gracefully leaves the Consul cluster and shuts down
    lock           Execute a command holding a lock
    login          Login to Consul using an auth method
    logout         Destroy a Consul token created with login
    maint          Controls node or service maintenance mode
    members        Lists the members of a Consul cluster
    monitor        Stream logs from a Consul agent
    operator       Provides cluster-level tools for Consul operators
    reload         Triggers the agent to reload configuration files
    rtt            Estimates network round trip time between nodes
    services       Interact with services
    snapshot       Saves, restores and inspects snapshots of Consul server state
    tls            Builtin helpers for creating CAs and certificates
    validate       Validate config files/directories
    version        Prints the Consul version
    watch          Watch for changes in Consul
4 启动
consul 自带 UI 界面,打开网址:http://IP:8500 ,可以看到当前注册的服务界面
./consul agent -dev -ui -node=consul-dev -client=192.168.0..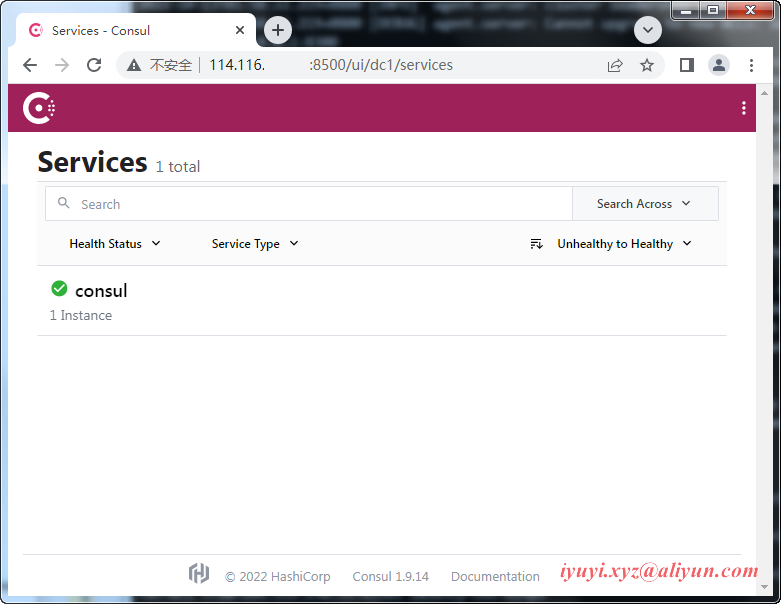
5 关闭
# 查看pid
netstat -nlp |grep consul
# 杀死pid
kill -9 ..
三、agent启动参数说明
-server # 以服务端模式运行,相应的还有客户端模式-client,默认是client
-ui     # 启动内置的Web UI
-bootstrap-expect=3 # 集群最少节点数,类似zookeeper的配置一样,为了防止脑裂,一般为奇数
-data-dir=/opt/consul_1.9.14/data # 数据存储目录
-node=agent-1       # 节点id,集群中的每个node必须有一个唯一的名称。默认情况下,Consul使用机器的hostname
-client=0.0.0.0     # 指定客户端能访问的ip,类似于ip白名单。0.0.0.0表示不限制
-bind=192.168.0...  # 绑定了当前主机的IP地址
-datacenter=dc1     # 指定数据中心名称,默认是dc1
-join               # agent启动时加入到代理服务器地址,不指定不会加入任何节点,可以在启动后通过consul join命令加入
-config-dir         # 指定配置文件夹,Consul会加载其中的所有文件
四、关闭防火墙
# 关闭防火墙
systemctl stop firewalld

# 配置允许放行
firewall-cmd --zone=public --permanent --add-port=8500/tcp && firewall-cmd --reload
云主机需配置安全组,在入方向规则,允许8500放行
![]()
五、配置环境变量
vim /etc/profile
export PATH=$PATH:/opt/consul_1.9.14
# 配置生效
source /etc/profile
