CentOS安装MySql
一、下载
普通的下载安装,直接就复制其他帖子了;参考贴
两种下载方式:1、下载上传;2、直接wget下载;
1、下载上传
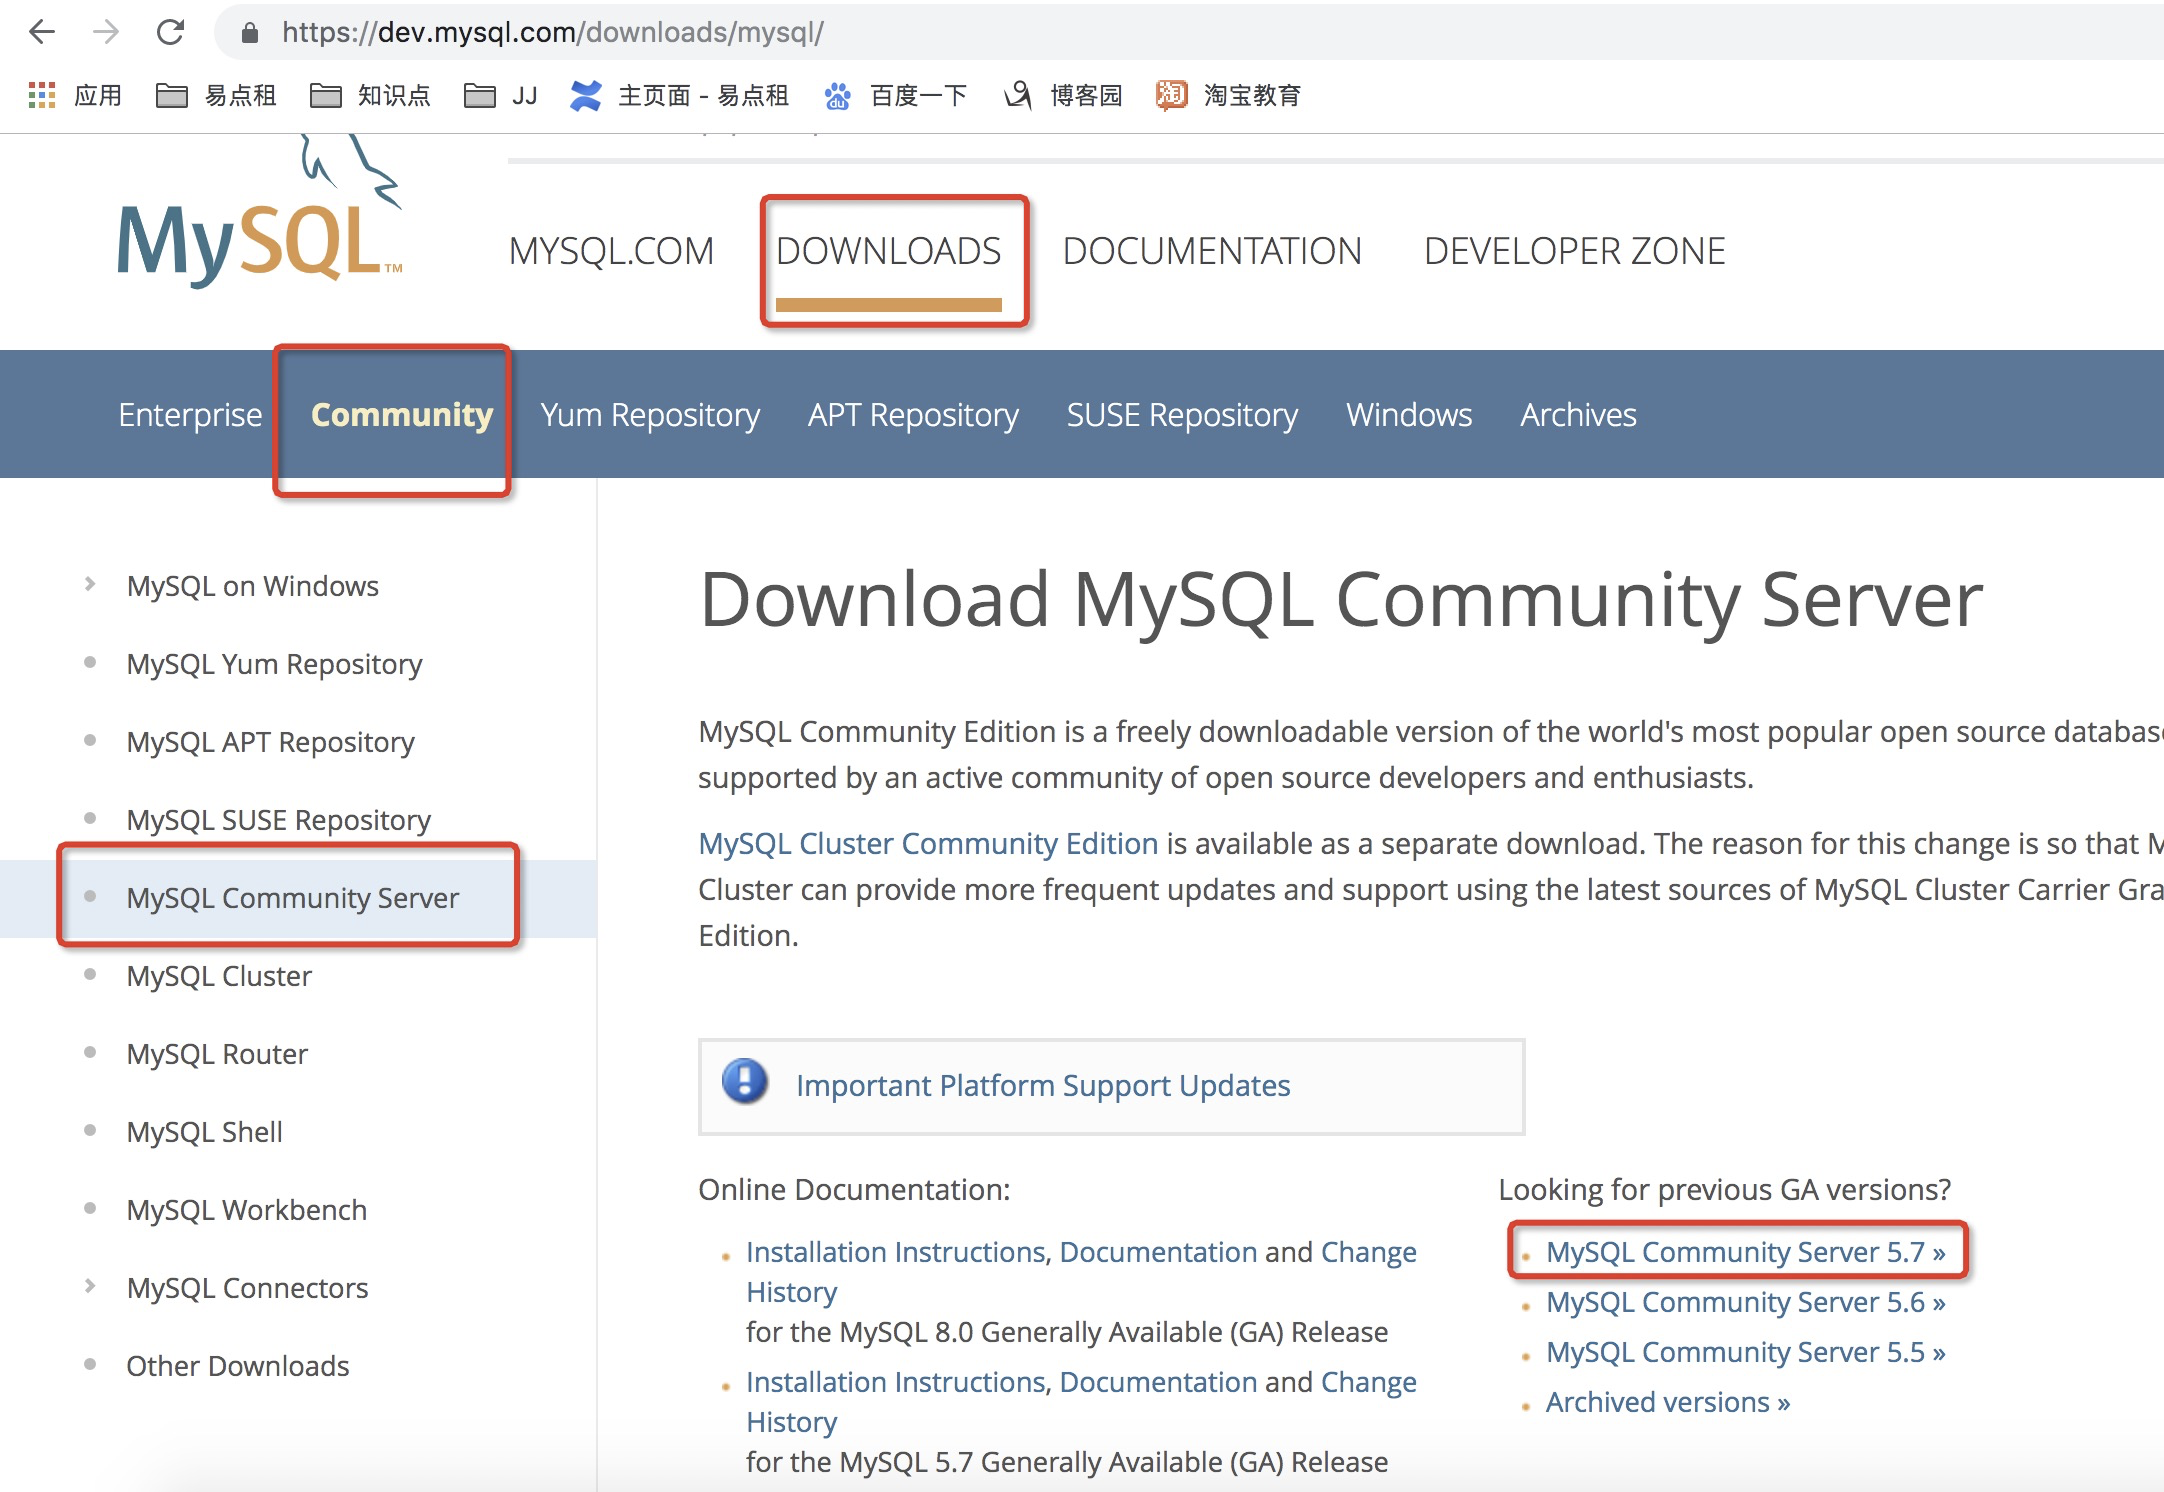
下载地址:https://www.mysql.com/downloads/
点击第一个链接地址,进入MySQL官方网站,单击“Downloads”下载Tab页,进入下载界面

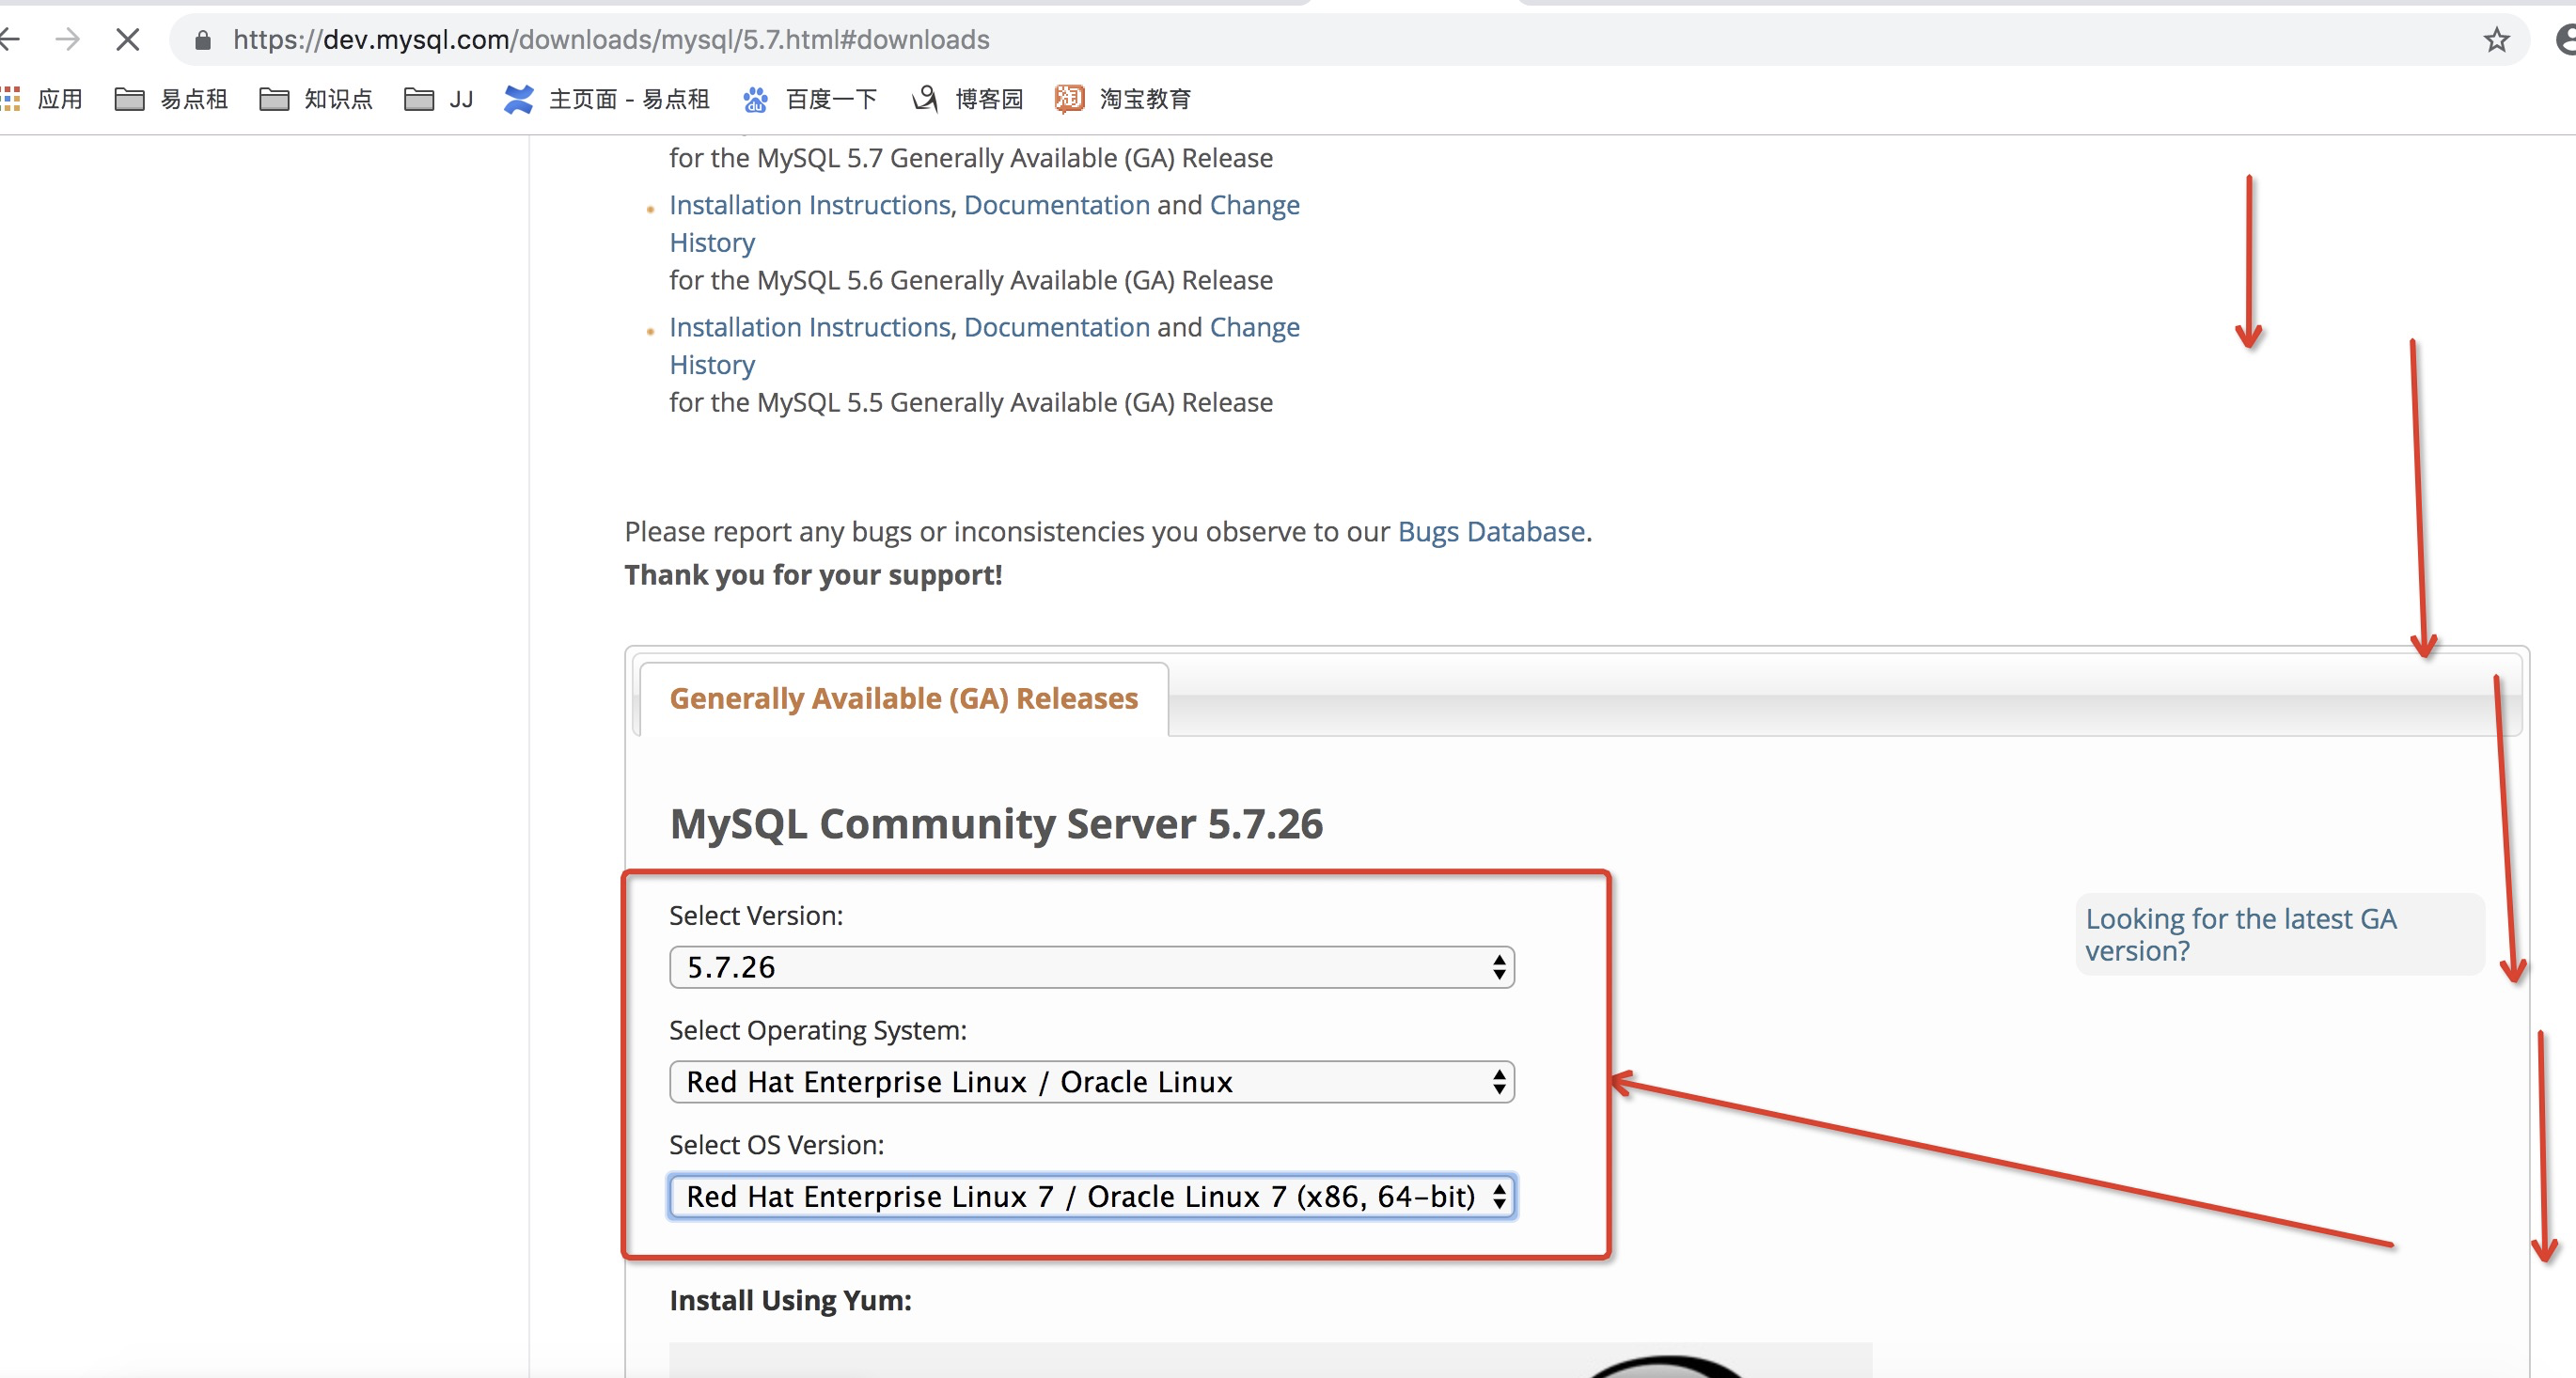
进入下拉下载列表,选择在CentOS7上tar包安装


然后使用FTP工具上传到服务器;
2、wget下载
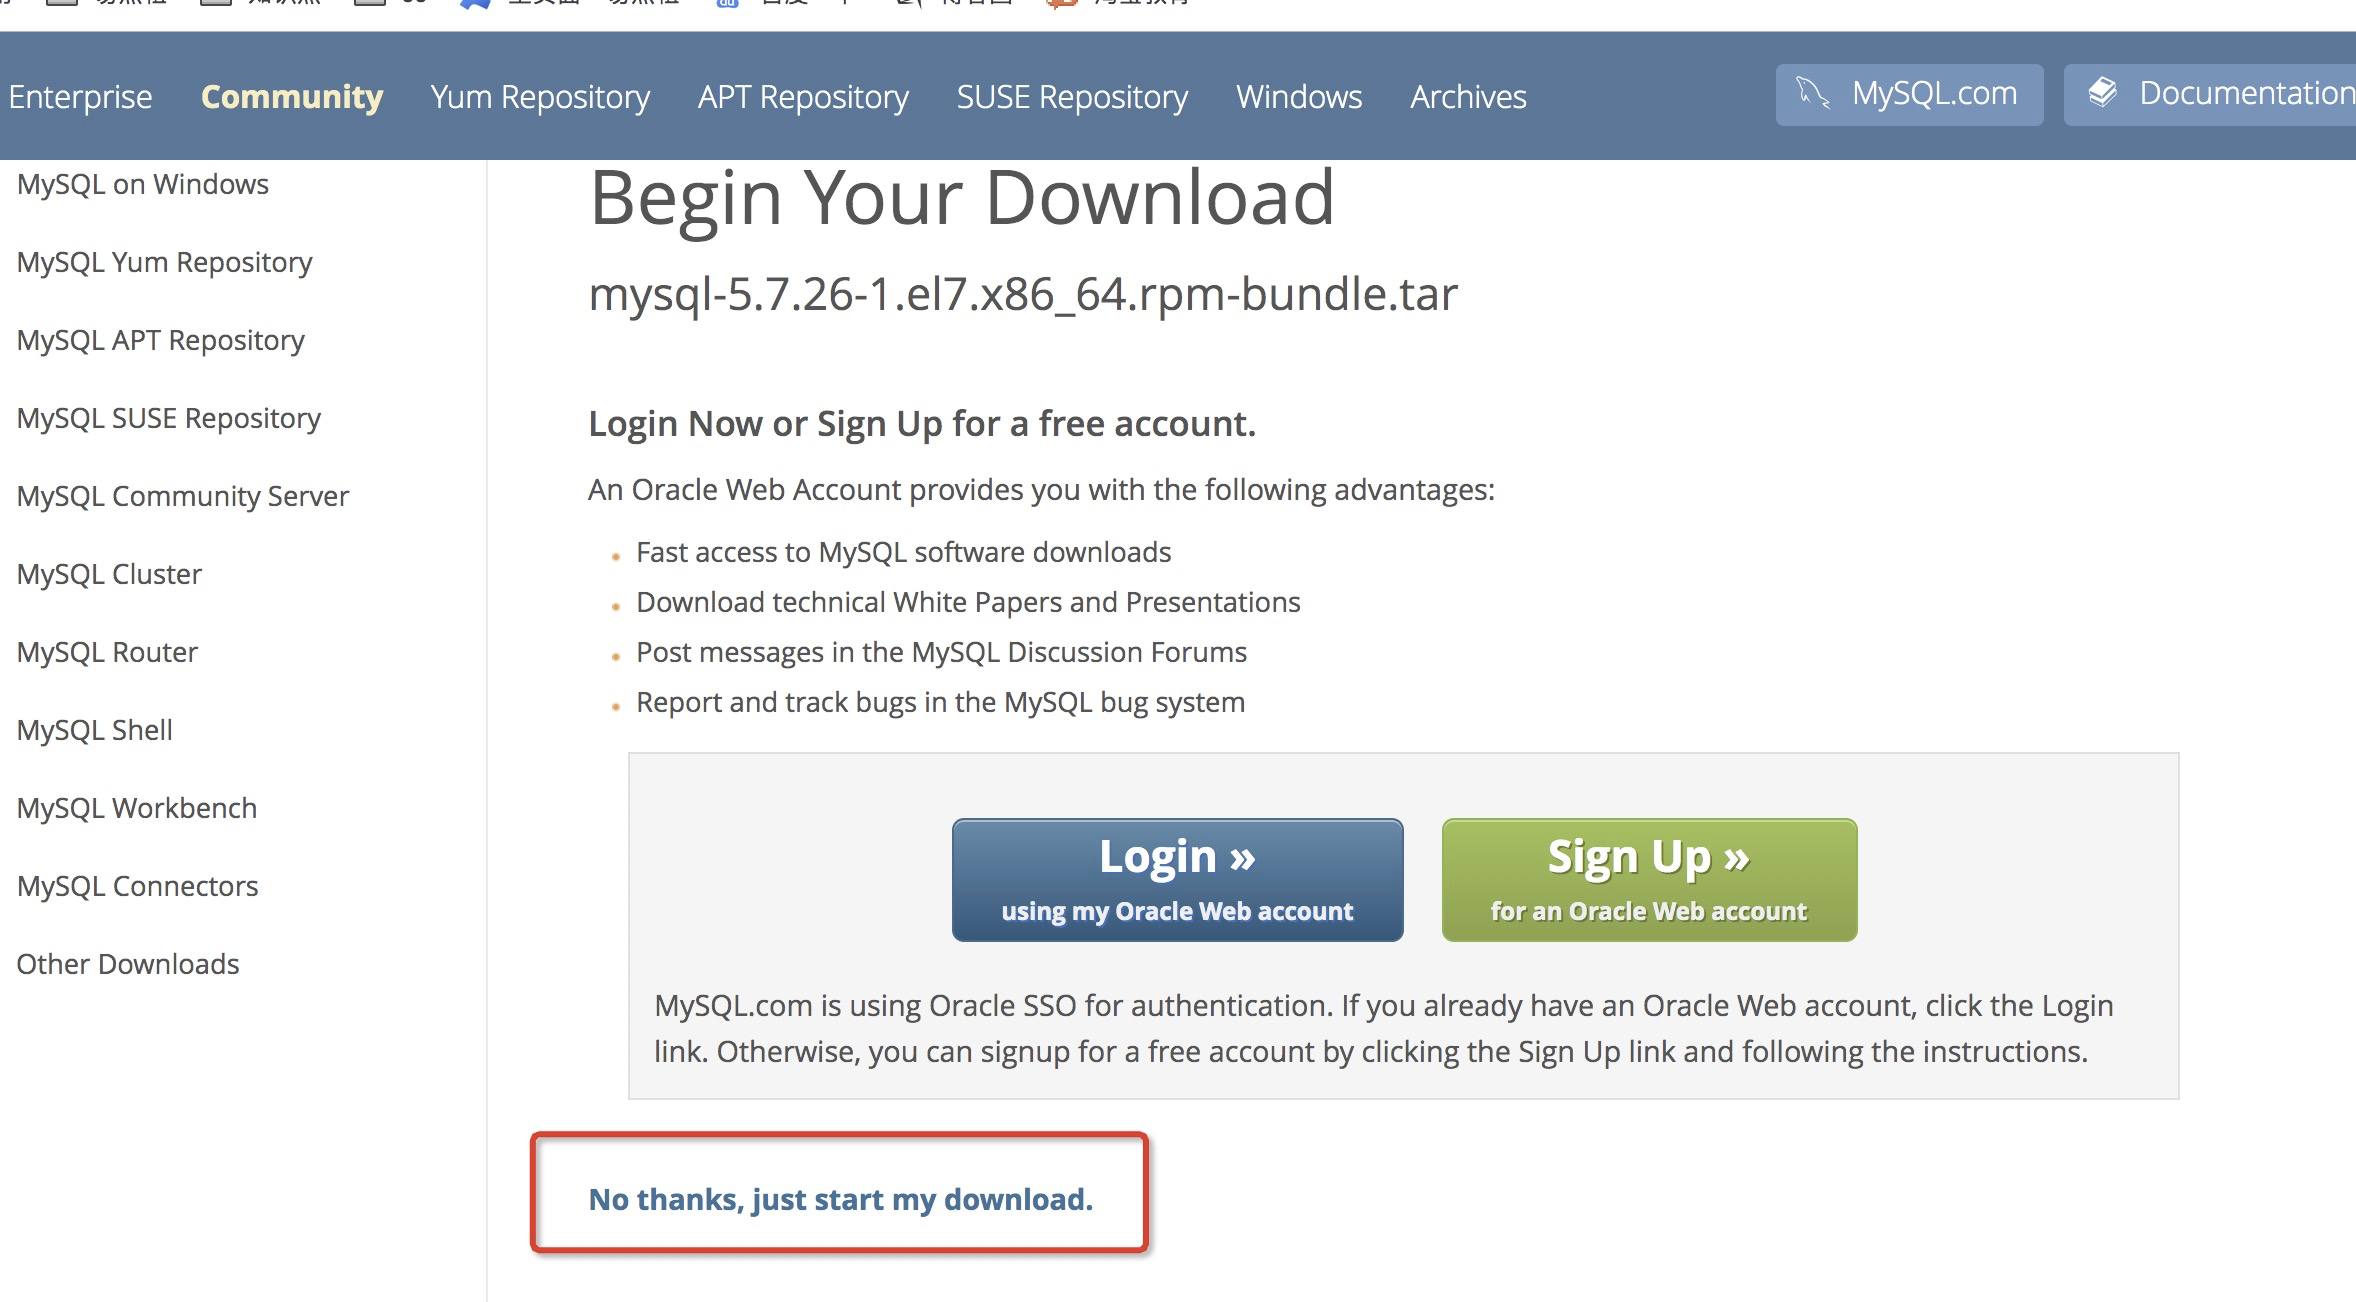
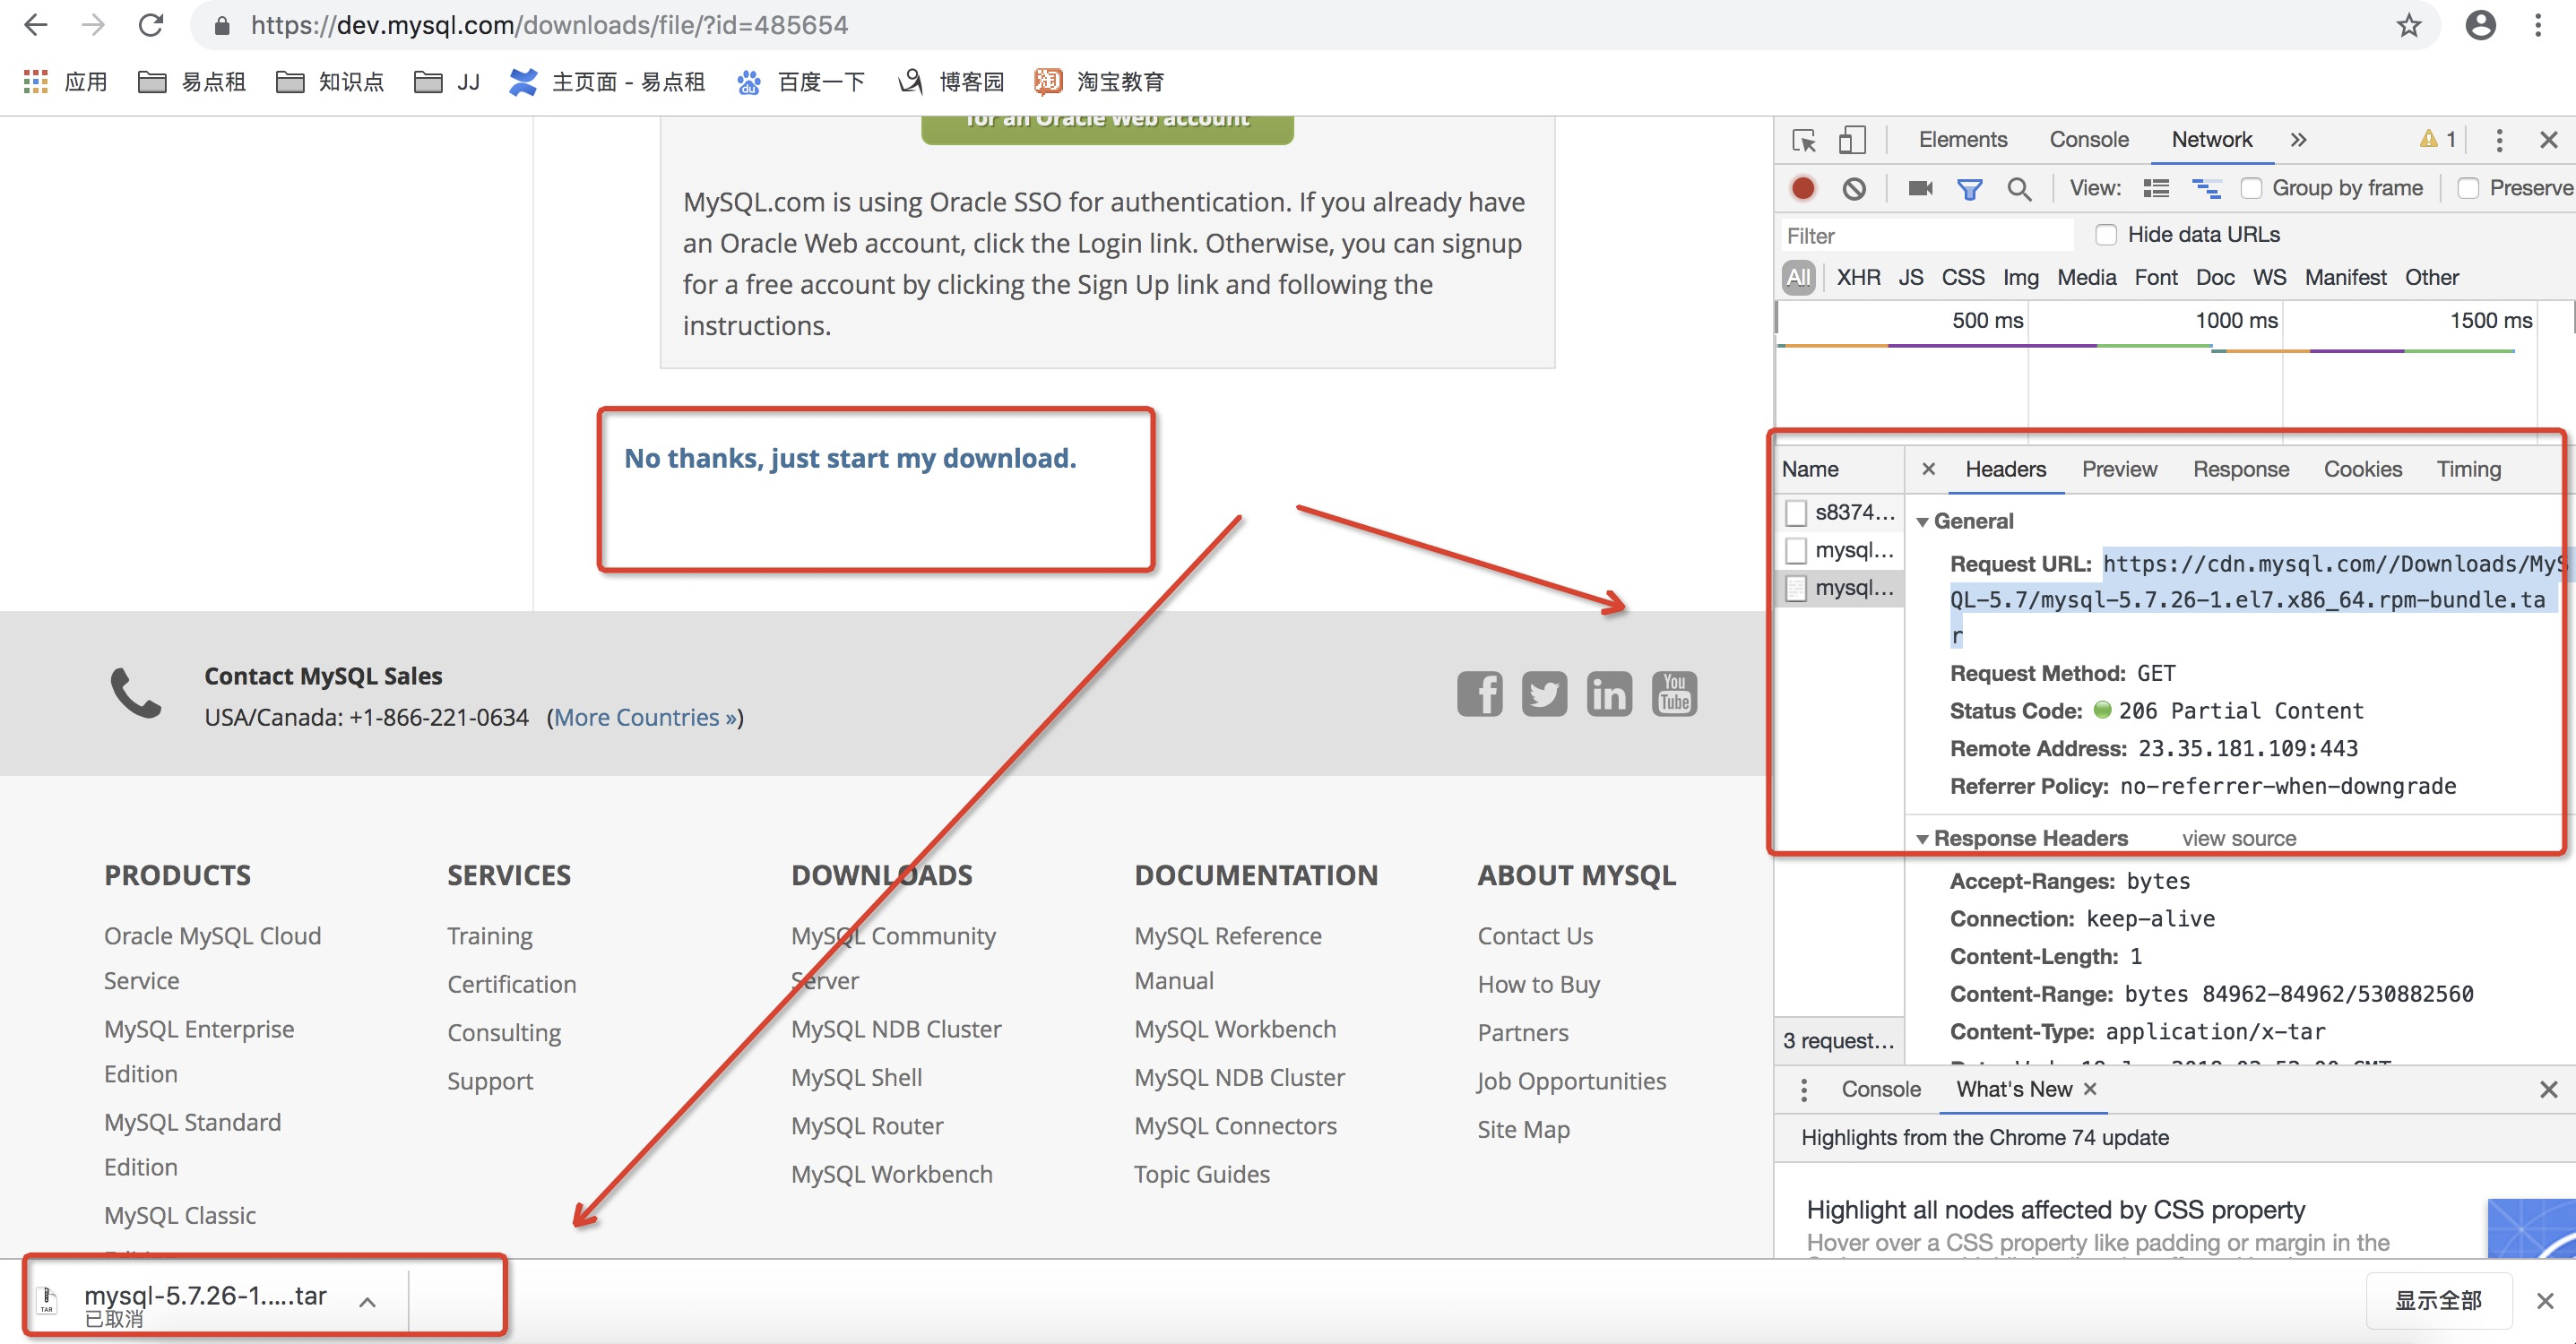
先获取连接

进入到服务器某目录下,然后输入命令
# wget https://cdn.mysql.com//Downloads/MySQL-5.7/mysql-5.7.26-1.el7.x86_64.rpm-bundle.tar
下载速度非常6,下载完毕;
二、安装
查看mysql是否安装,如果安装了,卸载mysql
rpm -qa|grep mysql
卸载之前的
rpm -e --nodeps mysql-libs-5.1.73-7.el6.x86_64
创建目录
# mkdir -p /usr/local/mysql
解压
# tar xvf mysql-5.7.26-1.el7.x86_64.rpm-bundle.tar  -C /usr/local/mysql
mysql-community-client-5.7.26-1.el7.x86_64.rpm
mysql-community-common-5.7.26-1.el7.x86_64.rpm
mysql-community-devel-5.7.26-1.el7.x86_64.rpm
mysql-community-embedded-5.7.26-1.el7.x86_64.rpm
mysql-community-embedded-compat-5.7.26-1.el7.x86_64.rpm
mysql-community-embedded-devel-5.7.26-1.el7.x86_64.rpm
mysql-community-libs-5.7.26-1.el7.x86_64.rpm
mysql-community-libs-compat-5.7.26-1.el7.x86_64.rpm
mysql-community-minimal-debuginfo-5.7.26-1.el7.x86_64.rpm
mysql-community-server-5.7.26-1.el7.x86_64.rpm
mysql-community-server-minimal-5.7.26-1.el7.x86_64.rpm
mysql-community-test-5.7.26-1.el7.x86_64.rpm
安装
依次执行(几个包有依赖关系,所以执行有先后)下面命令安装
# cd /usr/local/mysql/
# rpm -ivh mysql-community-libs-5.7.26-1.el7.x86_64.rpm
# rpm -ivh mysql-community-client-5.7.26-1.el7.x86_64.rpm
# rpm -ivh mysql-community-server-5.7.26-1.el7.x86_64.rpm
注:如果上述操作出现报错如:
1 warning: mysql-community-libs-5.7.26-1.el7.x86_64.rpm: Header V3 DSA/SHA1 Signature, key ID 5072e1f5: NOKEY
2 error: Failed dependencies:
3     mysql-community-common(x86-64) >= 5.7.9 is needed by mysql-community-libs-5.7.26-1.el7.x86_64
4     mariadb-libs is obsoleted by mysql-community-libs-5.7.26-1.el7.x86_64
解决方法是:
后面加上 --force --nodeps 如:
# rpm -ivh mysql-community-libs-5.7.26-1.el7.x86_64.rpm --force --nodeps
安装结束
三、初始化数据库
1、初始化命令
# mysqld --initialize --user=mysql
2、查看初始化的密码
# cat /var/log/mysqld.log
显示内容如下:
2019-05-19T05:53:03.738829Z 0 [Warning] TIMESTAMP with implicit DEFAULT value is deprecated. Please use --explicit_defaults_for_timestamp server option (see documentat
ion for more details).2019-05-19T05:53:03.739304Z 0 [ERROR] Can't find error-message file '/usr/share/mysql/errmsg.sys'. Check error-message file location and 'lc-messages-dir' configuratio
n directive.2019-05-19T05:53:08.434726Z 0 [Warning] InnoDB: New log files created, LSN=45790
2019-05-19T05:53:08.872448Z 0 [Warning] InnoDB: Creating foreign key constraint system tables.
2019-05-19T05:53:08.954300Z 0 [Warning] No existing UUID has been found, so we assume that this is the first time that this server has been started. Generating a new U
UID: 0fb455fb-6560-11e8-a2f0-000c29c94111.2018-05-19T05:53:08.956569Z 0 [Warning] Gtid table is not ready to be used. Table 'mysql.gtid_executed' cannot be opened.
2019-05-19T05:53:08.958761Z 1 [Note] A temporary password is generated for root@localhost: ?2nt4!-t&s#M
注:上述标红位置就是初始化密码
3、启动数据库
# service mysqld start
4、登陆
# mysql -u root -p
输入上述默认密码,登陆成功;
5、修改密码
 1 #修改密码
 2 mysql>ALTER USER 'root'@'localhost' IDENTIFIED BY '123';
 3
 4 # 查询user表
 5 mysql>select User,host,authentication_string from user;
 6
 7 # 修改user表,把Host表内容修改为%
 8 mysql> update user set host='%' where host='localhost';
 9
10 #删除root用户的其他host
11 mysql> delete from user where host != '%';
12
13 #刷新退出
14 mysql> flush privileges;
15 Query OK, 0 rows affected (0.01 sec)
16 mysql> exit;
注:上述3、4、5步如有报错,如下:
ERROR 2002 (HY000): Can’t connect to local MySQL server through socket ‘/var/lib/mysql/mysql.sock’ (2)
解决方法:修改/etc/my.cnf
# 添加以下内容到/etc/my.conf:
[client]
socket = /Data/mydata/mysql.sock
[mysqld]
socket = /Data/mydata/mysql.sock


