前言
第三方jar包在开发工具中引入后编译没问题, 启动调试包括打包时会提示找不到jar包的错误.需要上传到maven仓库中,并在pom文件内引入.
-
导入jar包
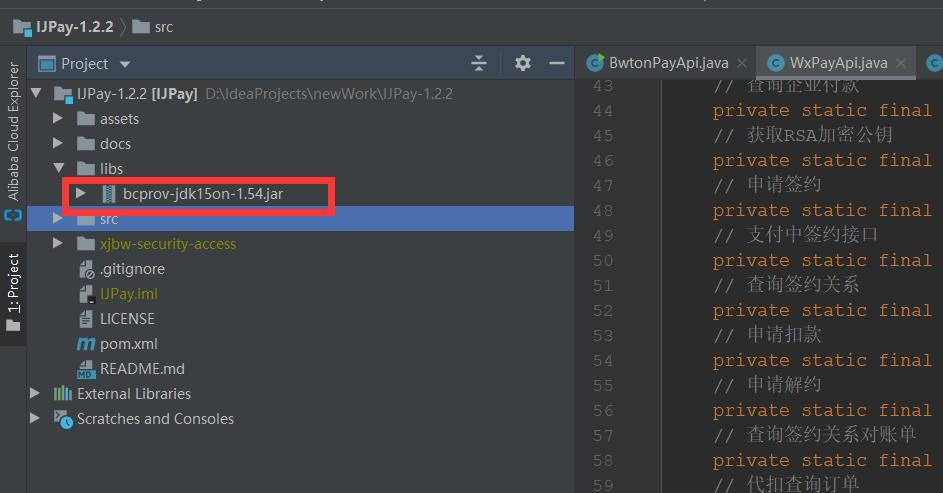
-
点击Project Structure进行项目设置,在Modules中Dependencies标签中点击+号 添加lib下的所有jar
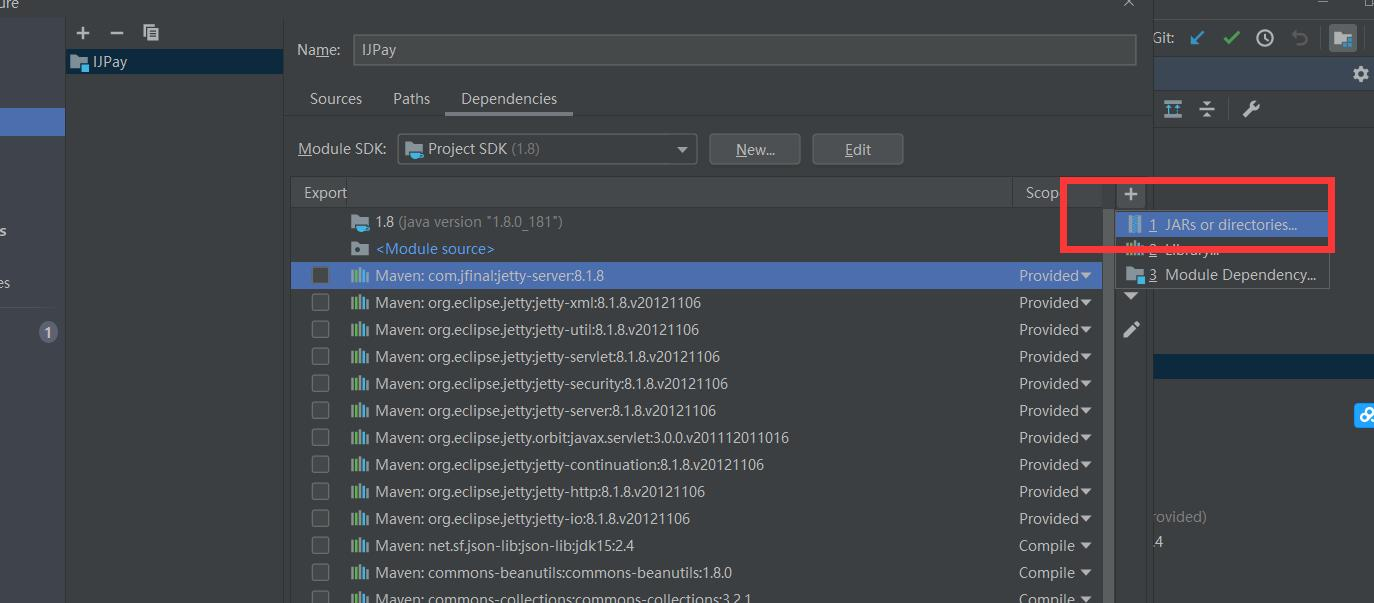
这样的话项目中就可以使用lib中依赖的jar了,但是如果要打包则会报错,须进行相关配置。
一、使用开发工具引入
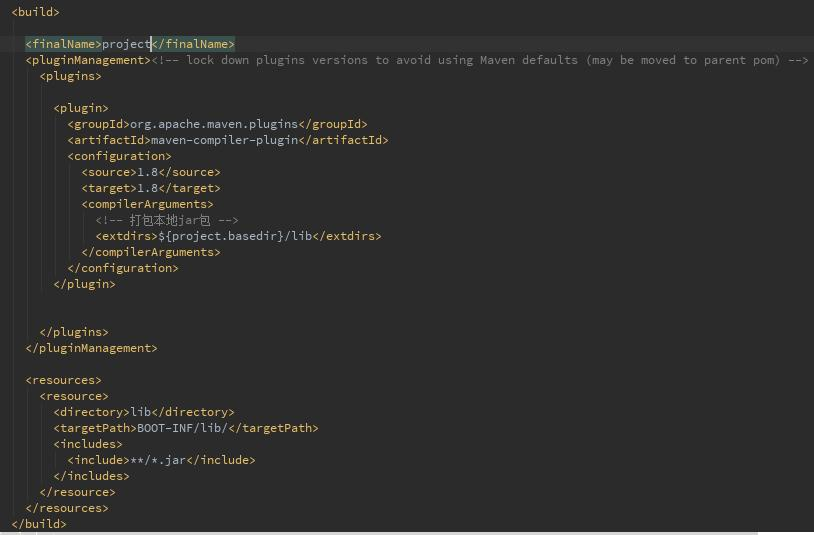
- 在pom.xml中的build标签内容添加resources标签,如下:
 <resources>
  <resource>
    <directory>lib</directory>
    <targetPath>BOOT-INF/lib/</targetPath>
    <includes>
      <include>**/*.jar</include>
    </includes>
  </resource>
</resources>
- 然后在plugin标签的configuration标签内加入compilerArguments标签
 <compilerArguments>
      <!-- 打包本地jar包 -->
      <extdirs>${project.basedir}/lib</extdirs>
  </compilerArguments>
-
如图
-
然后使用maven命令进行打包即可
mvn clean install -Dmaven.test.skip=true -Dcheckstyle.skip=true
示例:pandas 是基于NumPy 的一种工具,该工具是为了解决数据分析任务而创建的。
二、引入jar包路径
- 在pom.xml中通过以下方式引入lib中的每个依赖
<dependency>
  <groupId>com.xxx.www</groupId>
  <artifactId>out-jar-1</artifactId>
  <version>1.0.0</version>
  <scope>system</scope>
  <systemPath>${project.basedir}/lib/commons-cxxxx.jar</systemPath>
</dependency>

<dependency>
  <groupId>com.xxx.www</groupId>
  <artifactId>out-jar-2</artifactId>
  <version>1.0.0</version>
  <scope>system</scope>
  <systemPath>${project.basedir}/lib/commons-httxxxx.jar</systemPath>
</dependency>
-
其中groupId和artifactId可以随便填,注意artifactId不要重复了
-
然后使用maven命令进行打包即可:
mvn clean install -Dmaven.test.skip=true -Dcheckstyle.skip=true
- 如果是SpringBoot项目还要加如下配置:
  <plugin>
            <groupId>org.springframework.boot</groupId>
            <artifactId>spring-boot-maven-plugin</artifactId>
            <configuration>
                <includeSystemScope>true</includeSystemScope>
            </configuration>
        </plugin>
- 主要是
<includeSystemScope>true</includeSystemScope>
三、jar包生成maven
- Maven 相关命令
安装指定文件到本地仓库命令:mvn install:install-file

-DgroupId=<groupId>       : 设置上传到仓库的包名

-DartifactId=<artifactId> : 设置该包所属的模块名

-Dversion=1.0.0           : 设置该包的版本号

-Dpackaging=jar           : 设置该包的类型(很显然jar包)

-Dfile=<myfile.jar> : 设置该jar包文件所在的路径与文件名- 上传jar包 win+r cmd打开命令行输入以下命令
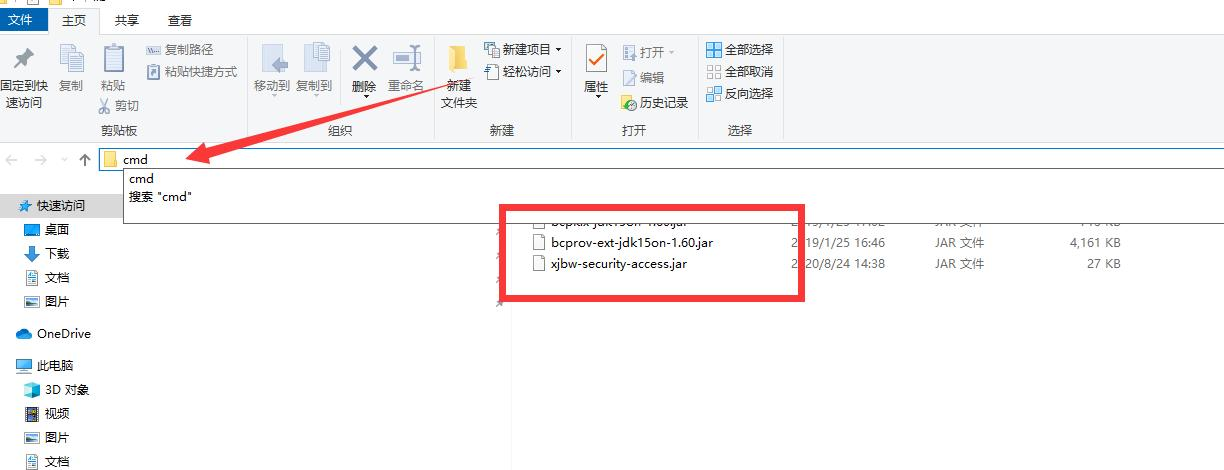
# 进入到jar包目录,进行cmd命令

#  xjbw-security-access
mvn install:install-file -Dfile=xjbw-security-access.jar -DgroupId=com.github -DartifactId=xjbw-security-access -Dversion=1.4.5 -Dpackaging=jar
-
结果
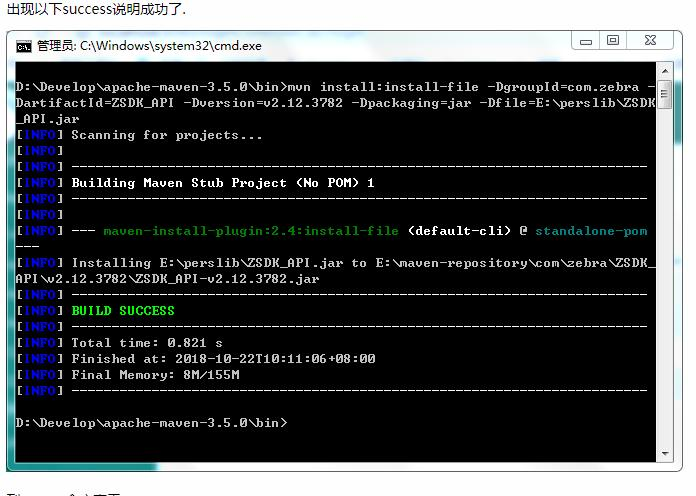
-
使用
<dependency>
    <groupId>com.github</groupId>
    <artifactId>xjbw-security-access</artifactId>
    <version>1.4.5</version>
</dependency>
本文来自博客园,作者:大码王,转载请注明原文链接:https://www.cnblogs.com/huanghanyu/


 posted on


【推荐】国内首个AI IDE,深度理解中文开发场景,立即下载体验Trae
【推荐】编程新体验,更懂你的AI,立即体验豆包MarsCode编程助手
【推荐】抖音旗下AI助手豆包,你的智能百科全书,全免费不限次数
【推荐】轻量又高性能的 SSH 工具 IShell:AI 加持,快人一步
· 阿里最新开源QwQ-32B,效果媲美deepseek-r1满血版,部署成本又又又降低了!
· 开源Multi-agent AI智能体框架aevatar.ai,欢迎大家贡献代码
· Manus重磅发布:全球首款通用AI代理技术深度解析与实战指南
· 被坑几百块钱后,我竟然真的恢复了删除的微信聊天记录!
· AI技术革命,工作效率10个最佳AI工具
2021-05-13 SparkSQL电商用户画像(二)之如何构建画像
2021-05-13 SparkSQL电商用户画像(一)之介绍
2020-05-13 hadoop入门到实战(3)hive数据仓库入门到实战及面试