visual Studio 2017 扩展开发(一)《向Visual Studio菜单栏新增一个菜单》
最近有接触到关于visual studio 2017 扩展的开发,特此记录,也是为了督促自己去深入了解其原理。
开始开发Visual Studio 扩展,在这里我安装了visual studio 2017, 在安装的时候记得勾选上visual studio 扩展开发。
创建一个项目
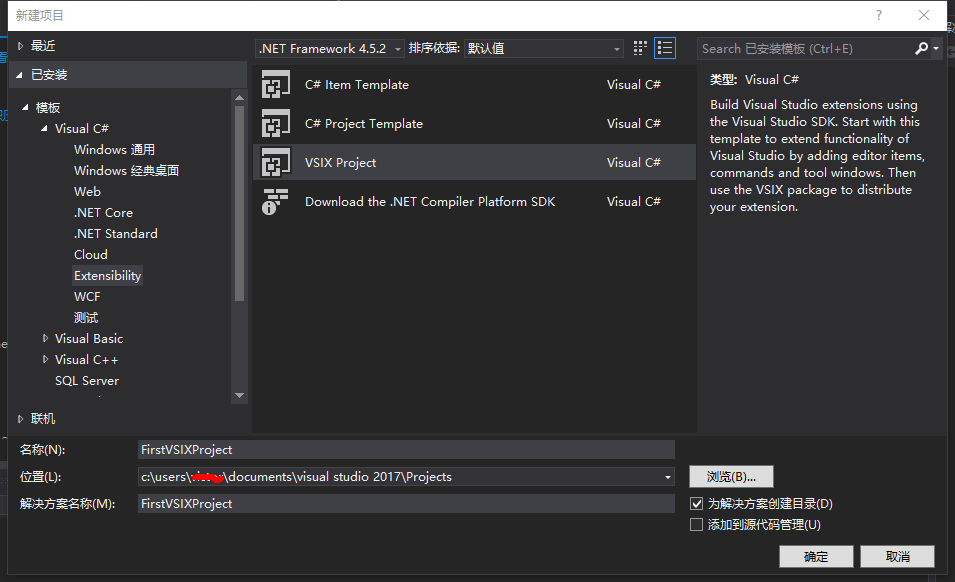
我们打开编译器,文件→新建项目,模板→Visual C#→Extensibility 选择 VSIX Project.创建一个项目。

添加自定义命令
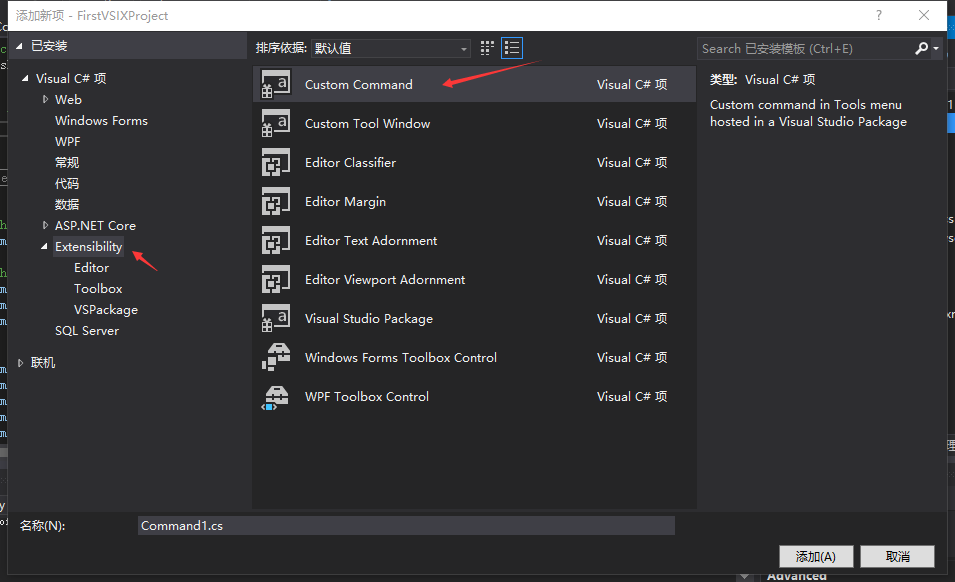
右键项目,添加新项。Visual C#项→Extensibility→Custom Command

我们找到CommandPackage.vsct文件 修改菜单名。
在Commands节点下的Buttons。
<Buttons>
      <!--To define a menu group you have to specify its ID, the parent menu and its display priority.
          The command is visible and enabled by default. If you need to change the visibility, status, etc, you can use
          the CommandFlag node.
          You can add more than one CommandFlag node e.g.:
              <CommandFlag>DefaultInvisible</CommandFlag>
              <CommandFlag>DynamicVisibility</CommandFlag>
          If you do not want an image next to your command, remove the Icon node /> -->
      <Button guid="guidCommandPackageCmdSet" id="CommandId" priority="0x0100" type="Button">
        <Parent guid="guidCommandPackageCmdSet" id="MyMenuGroup" />
        <Icon guid="guidImages" id="bmpPic1" />
        <Strings>
          <ButtonText>测试菜单</ButtonText>
        </Strings>
      </Button>
    </Buttons>
再打开Command.cs文件。下拉到最后。
        private void MenuItemCallback(object sender, EventArgs e)
        {
            string message = "Hello Word";
            string title = "测试";

            // Show a message box to prove we were here
            VsShellUtilities.ShowMessageBox(
                this.ServiceProvider,
                message,
                title,
                OLEMSGICON.OLEMSGICON_INFO,
                OLEMSGBUTTON.OLEMSGBUTTON_OK,
                OLEMSGDEFBUTTON.OLEMSGDEFBUTTON_FIRST);
        }
结果
运行,会打开一个新的Visual Studio,这是调试模式。
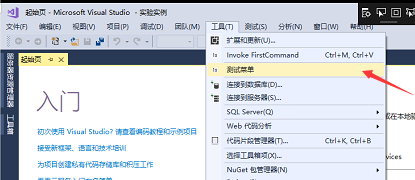
点开工具 我们可以看到我们扩展的那个菜单。

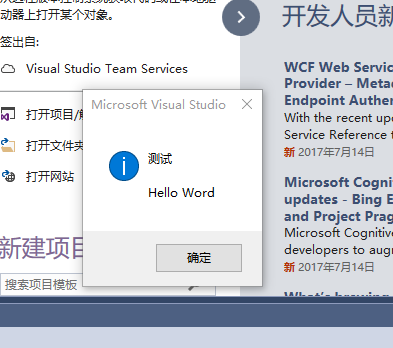
点击测试菜单

此随笔仅是本人学习记录,后续应该会继续写,如果对你有帮助,动动你的鼠标,右下方给我来个赞。你的支持是我最大的动力。
标签:
visual studio 扩展


【推荐】国内首个AI IDE,深度理解中文开发场景,立即下载体验Trae
【推荐】编程新体验,更懂你的AI,立即体验豆包MarsCode编程助手
【推荐】抖音旗下AI助手豆包,你的智能百科全书,全免费不限次数
【推荐】轻量又高性能的 SSH 工具 IShell:AI 加持,快人一步
· 如何编写易于单元测试的代码
· 10年+ .NET Coder 心语,封装的思维:从隐藏、稳定开始理解其本质意义
· .NET Core 中如何实现缓存的预热?
· 从 HTTP 原因短语缺失研究 HTTP/2 和 HTTP/3 的设计差异
· AI与.NET技术实操系列:向量存储与相似性搜索在 .NET 中的实现
· 周边上新:园子的第一款马克杯温暖上架
· Open-Sora 2.0 重磅开源!
· 分享 3 个 .NET 开源的文件压缩处理库,助力快速实现文件压缩解压功能!
· Ollama——大语言模型本地部署的极速利器
· DeepSeek如何颠覆传统软件测试?测试工程师会被淘汰吗?