

1.4(Spring MVC学习笔记)JSON数据交互与RESTful支持
一、JSON数据交互
1.1JSON简介
JSON(JavaScript Object Notation)是一种数据交换格式。
1.2JSON对象结构
{}代表一个对象,{}中写入数据信息,通常为key:value形式。
{key:value,key:value},属性名和属性之间用“:”隔开,各个属性间用“,”隔开.
同时value不仅可以为字符串或数字,也可为一个{}表示的对象。
{key:{key1:value1}}
数组采用[]表示,[value1,value2...] value可为数字,布尔类型,String。
其中key必须为String类型,value可以为对象({}),数字,布尔类型,数组,null。
{
    “name”:"hcf",
    “age":20,
    "hobby":["篮球","足球","网球"],
    “address”:{
        "city":"xx",
        "street":"xxx",
        "postcode",123456,
    }
    "isAdult":true
}
2.1SpringMVC实现JSON数据绑定
首先需要准备一些.jar包。
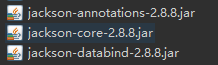
下载地址:https://mvnrepository.com/artifact/com.fasterxml.jackson.core
还需要下载jQuery库:http://jquery.com/download/
不想下载jQuery库也可以通过CDN引用。
百度 CDN:
<head>
<script src="https://apps.bdimg.com/libs/jquery/2.1.4/jquery.min.js">
</script>
</head>
这个类似数据绑定,将JSON数据与控制类中的参数绑定,不过这里绑定的是JSON类型的数据。
JSON转换注解:
@RequestBody:将请求中的JSON格式数据绑定到对应参数上(用在形参上)。
@ResponseBody:用于方法上,返回值不会解析为路径,而是被解析为JSON,同时将JSON写入response对象的body区。
首先来配置前端控制器:
web.xml
<?xml version="1.0" encoding="UTF-8"?>
<web-app xmlns="http://xmlns.jcp.org/xml/ns/javaee"
  xmlns:xsi="http://www.w3.org/2001/XMLSchema-instance"
  xsi:schemaLocation="http://xmlns.jcp.org/xml/ns/javaee
                      http://xmlns.jcp.org/xml/ns/javaee/web-app_3_1.xsd"
  version="3.1"
  metadata-complete="true">
  <display-name>SpringMVC</display-name>


  <!-- 配置前端控制器 -->
  <servlet>
      <servlet-name>springmvc</servlet-name>
      <servlet-class >
          org.springframework.web.servlet.DispatcherServlet
      </servlet-class>

      <!-- 初始化时加载配置文件,该配置文件是在src目录下创建的。 -->
      <!-- <init-param>  该选项不配置,则会自动寻找WEB-INF下名为springmvc-servlet.xml的文件。-->
      <!--    <param-name>contextConfigLocation</param-name>-->
      <!--    <param-value>classpath:springmvc-config.xml</param-value>-->
      <!--</init-param>-->
      <!-- 当前servlet与容器一起加载 -->
      <load-on-startup>1</load-on-startup>
  </servlet>
  <!-- 所有请求都会被前端控制器拦截-->
  <servlet-mapping>
      <servlet-name>springmvc</servlet-name>
      <url-pattern>/</url-pattern>
  </servlet-mapping>
</web-app>
springmvc-servlet.xml
<?xml version="1.0" encoding="UTF-8"?>
<beans     xmlns="http://www.springframework.org/schema/beans"
        xmlns:mvc="http://www.springframework.org/schema/mvc"
        xmlns:xsi="http://www.w3.org/2001/XMLSchema-instance"
        xmlns:context="http://www.springframework.org/schema/context"
        xmlns:tx="http://www.springframework.org/schema/tx"
         xsi:schemaLocation="
             http://www.springframework.org/schema/mvc
            http://www.springframework.org/schema/mvc/spring-mvc-4.3.xsd
            http://www.springframework.org/schema/beans
            http://www.springframework.org/schema/beans/spring-beans-4.3.xsd
            http://www.springframework.org/schema/context
            http://www.springframework.org/schema/context/spring-context-4.3.xsd">
       <!-- 开启扫描 -->
       <context:component-scan base-package = "com.springmvc.*"></context:component-scan>
       <!-- testJson -->
       <!-- 配置注解驱动 -->
       <mvc:annotation-driven/>
       <!-- 指定某些文件不被前端控制器拦截,直接访问静态文件。 -->
       <!-- 静态资源文件被前端控制器拦截,会导致找不到静态文件 -->
       <mvc:resources location="/js/" mapping="/js/**"></mvc:resources>


       <!-- 配置处理器(Handle),映射/firstController请求 (Controller类),已由注解完成-->
       <!-- <bean name = "/firstController" class = "com.springmvc.firstmvc.FirstController"/> -->
       <!-- 配置映射处理器(handlerMapping) 将处理器(Handle)的name作为url进行查找(Spirng4.0以后无需配置) -->
       <!-- 配置适配处理器(HandlerAdapter) 适配处理器会调用处理器(Handle)即FirstController类(Spirng4.0以后无需配置) -->
       <!-- 处理器会返回一个ModelAndView,适配处理器将返回的ModelAndView交给前端控制器去处理了 -->
       <!-- 前端控制器根据ModelAndView中的View选择一个视图解析器(ViewReslover) -->
       <!-- 前端控制器将Model(msg "hello SpringMVC")填充进视图解析器返回的视图,用户看到最后页面 -->

       <!-- 设置视图处理器及其前缀后缀 -->
       <bean id = "viewResolver" class = "org.springframework.web.servlet.view.InternalResourceViewResolver">
           <property name="prefix" value = "/WEB-INF/jsp/"></property>
           <property name="suffix" value = ".jsp"></property>
       </bean>

       <!-- 视图处理器解析后会将视图传递给前端控制器,前端控制对View进行渲染(将模型数据填入视图) -->
       <!-- 渲染结果会返回客户端浏览器显示 -->

       <!-- 配置自定义转换器 -->
       <!-- <mvc:annotation-driven conversion-service="formatService"/>  -->

       <!-- 自定义转换器(Convert) -->
       <!-- <bean id = "conversionService" class = "org.springframework.context.support.ConversionServiceFactoryBean">
           converters属性用于指定所有自定义的Convert
           <property name="converters">
               <set>
                   <bean class = "com.springmvc.convert.DataConvert"></bean>
               </set>
           </property>
       </bean>  -->

       <!-- 自定义转换器(Format) -->
       <!-- <bean id = "formatService" class = "org.springframework.format.support.FormattingConversionServiceFactoryBean">
        <property name="formatters">
            <set>
                <bean class = "com.springmvc.formatter.DataFormatter"></bean>
            </set>
        </property>
       </bean> -->

</beans>
User.java(作为Contrller类参数类型,用于封装一个JSON类型,属性名与JSON中的key要对应。)
package com.springmvc.json;

public class User {
    public String userName;
    public String password;

    public String getUserName() {
        return userName;
    }

    public void setUserName(String userName) {
        this.userName = userName;
    }


    public String getPassword() {
        return password;
    }


    public void setPassword(String password) {
        this.password = password;
    }

    @Override
    public String toString() {
        // TODO Auto-generated method stub
        return "name:" + this.getUserName() + "\nage:" + this.getPassword();
    }
}
控制类:
import org.springframework.stereotype.Controller;
import org.springframework.web.bind.annotation.RequestBody;
import org.springframework.web.bind.annotation.RequestMapping;
import org.springframework.web.bind.annotation.ResponseBody;

@Controller
public class JsonController {
    @ResponseBody()//加上注解,返回一个JSON形式组织的对象
    @RequestMapping("/testJson")
    //User获取JSON发送的数据
    public User testJosn(@RequestBody User user) {
        System.out.println(user);
        System.out.println("into TestJson");
        return user;//后续用于ajax中success属性中的方法输出。
    }

    //用于页面跳转,跳转到WBE-INF/jsp/testJson.jsp页面
    @RequestMapping("/toTestJson")
    public String toTestJson() {
        System.out.println("into toTestJson");
        return "testJson";
    }
}
testJson.jsp
<%@ page language="java" contentType="text/html; charset=UTF-8" pageEncoding="UTF-8"%> <!DOCTYPE html> <html> <head> <meta charset="UTF-8"> <title>Insert title here</title> <script src="${pageContext.request.contextPath}/js/jquery-3.3.1.js"> /* 使用分发的js,springmvc-servlet.xml中可以不设置静态解析文件映射。 <script src="https://apps.bdimg.com/libs/jquery/2.1.4/jquery.min.js"> <script/> */ </script> <script type="text/javascript" > function testJson(){ //$(#xxx)获取id为xxx元素的值 var userName = $("#userName").val(); var password = $("#password").val(); //使用jQuery ajax携带数据发送请求 $.ajax({ //发送地址,即目的地。 url:"${pageContext.request.contextPath}/testJson", type:"post",//发送方式 //发送的内容以key:value形式组织 //key要与对应POJO类中的属性名对应 data:JSON.stringify({userName:userName,password:password}), //指定内容类型 contentType:"application/json;charset=UTF-8", //数据类型 dataType:"json", //请求成时执行的函数。 //data为服务器(控制类)返回的对象,
success:function(data){ if(data!=null){ alert("用户名:" + data.userName + "\n" + "密 码" + data.password); }else{ alert("data is null"); } } }); } </script> </head> <body> <form> 用户名:<input type = "text" id = "userName" name = "userName"/><br> 密 码:<input type = "password" id = "password" name = "password"/> <input type = "button" value = "testJson" onclick = "testJson()" /> </form> </body> </html>
点击testJson按钮,触发testJson方法。
首先获取输入值,然后通过ajax向SpringMVC/testJson发送请求和数据。
控制类中的testJson方法执行,接受发送的数据并输出。
发送成功后执行ajax success属性中的方法,弹出用户名和密码信息。

二、RESTful支持
RESTful又称REST(representational state transfer)。
传统URL格式:
localhost:8080/SpringMVC/test?id=1
RESTful风格:
localhost:8080/SpringMVC/test/1
这里主要用到@RequestMapping 和@PahtVariable注解。
可参阅:https://www.cnblogs.com/huang-changfan/p/10398369.html中3.2部分内容。
接下来采用RESTful风格的URL,然后通过ajax发送数据。
User.java
package com.springmvc.restful;

public class User {
    public int id;
    public String name;
    public int age;

    public User() {};

    public User(int id, String name, int age) {
        super();
        this.id = id;
        this.name = name;
        this.age = age;
    }


    public int getId() {
        return id;
    }

    public void setId(int id) {
        this.id = id;
    }

    public String getName() {
        return name;
    }

    public void setName(String name) {
        this.name = name;
    }

    public int getAge() {
        return age;
    }

    public void setAge(int age) {
        this.age = age;
    }

}
控制类
import org.springframework.stereotype.Controller;
import org.springframework.web.bind.annotation.PathVariable;
import org.springframework.web.bind.annotation.RequestMapping;
import org.springframework.web.bind.annotation.ResponseBody;

@Controller
public class RestfulController {
    @ResponseBody
    @RequestMapping("/restful/{id}")//执行查询
    public User selectUser(@PathVariable("id") int id) {
        if(id == 1) //模拟数据库查询
            return new User(1,"hcf",20);
        else
            return new User();
    }

    //跳转WEB-INF/jsp/testRESTful.jsp
    @RequestMapping("/toTestRESTful")
    public String toTestRESTful() {
        return "testRESTful";
    }
}
testRESTful.jsp
<%@ page language="java" contentType="text/html; charset=UTF-8"
    pageEncoding="UTF-8"%>

<!DOCTYPE html>
<html>
<head>
<meta charset="UTF-8">
<title>Insert title here</title>
<script src="${pageContext.request.contextPath}/js/jquery-3.3.1.js">
/* 使用分发的js,springmvc-servlet.xml中可以不设置静态解析文件映射。
<script src="https://apps.bdimg.com/libs/jquery/2.1.4/jquery.min.js">
<script/> */
</script>
<script type="text/javascript" >
    function testRestful(){
        //$(#xxx)获取id为xxx元素的值
        var id = $("#id").val();
        //使用jQuery ajax携带数据发送请求
        //$.ajax返回一个XMLHttpRequest 对象
        $.ajax({    //发送地址,即目的地。
                    url:"${pageContext.request.contextPath}/restful/" + id,
                    type:"get",//发送方式
                    //指定内容类型
                    contentType:"application/json;charset=UTF-8",
                    //数据类型
                    dataType:"json",
                    //请求成时执行的函数。
                    //data为返回的对象
                    success:function(data){
                        if(data.name != null){
                            alert(data + "\n" +
                                  "姓名:" + data.name + "\n" +
                                  "年龄" + data.age);
                        }else{
                            alert("id error");
                        }
                    }
        });

    }
</script>
</head>
<body>
    <form>
        id:<input type = "text" id = "id" name = "id"/><br>
        <input type = "button" value = "查询用户" onclick = "testRestful()" />
    </form>
</body>
</html>
输入查询id,点击查询按钮后执行testRestful方法。
首先获取输入的id,然后将id作为URL的一部分发送请求。
控制类中获取指定参数并进行查询,最后返回结果。
请求成功后ajax中success执行对应方法,弹出查询的用户名及密码。
参考资料:
