prometheus + grafana + node_exporter + alertmanager 的安装部署与邮件报警 (一)
大家一定要先看详细的理论教程,再开始搭建,这样报错后才容易找到突破口
参考文档
https://www.cnblogs.com/afterdawn/p/9020129.html
https://www.ibm.com/developerworks/cn/cloud/library/cl-lo-prometheus-getting-started-and-practice/
https://www.hi-linux.com/posts/25047.html    参考grafana安装
https://www.ctolib.com/docs/sfile/prometheus-book/
https://www.ctolib.com/docs/sfile/prometheus-book/quickstart/index.html      理论 详解教程
https://codegreen.cn/2018/09/28/prometheus-install/#31%E5%AE%89%E8%A3%85%E9%85%8D%E7%BD%AE-alertmanager
背景介绍
Prometheus是由SoundCloud开发的开源监控报警系统和时序列数据库(TSDB)。Prometheus使用Go语言开发,是Google BorgMon监控系统的开源版本。
Prometheus的特点
多维度数据模型。
灵活的查询语言。
不依赖分布式存储,单个服务器节点是自主的。
通过基于HTTP的pull方式采集时序数据。
可以通过中间网关进行时序列数据推送。
通过服务发现或者静态配置来发现目标服务对象。
支持多种多样的图表和界面展示,比如Grafana等。
相关组件
Prometheus Server --- Prometheus组件中的核心部分,负责实现对监控数据的获取,存储以及查询。
Push Gateway --- Prometheus数据采集基于Pull模型,当Prometheus Server不能直接与Exporter进行通信时,可利用PushGateway来进行中转。即通过PushGateway将内部网络的监控数据主动Push到Gateway当中,Prometheus Server再采用同样Pull的方式从PushGateway中获取监控数据。
Exporter --- 数据采集组件,它并不向中央服务器发送数据,而是等待中央服务器主动前来抓取。其将监控数据采集的端点通过HTTP服务的形式暴露给Prometheus Server,Prometheus Server通过访问该Exporter提供的Endpoint端点,即可获取到需要采集的监控数据。
alertmanager --- 若Promtheus Server中发现某监控项满足PromQL中定义的告警规则,则会产生一条告警,并将其交于AlertManager进行管理。在AlertManager中可以配置各种通知方式,也可以定义Webhook自定义告警处理方式。AlertManager即Prometheus体系中的告警处理中心。
服务器
| ip | 安装软件 |
|---|---|
| 192.168.20.135 | Prometheus、grafana 、alertmanager |
| 192.168.20.137 | node_exporter |
安装Prometheus
wget https://github.com/prometheus/prometheus/releases/tag/v2.1.0/prometheus-2.1.0.linux-amd64.tar.gz
tar -xvf prometheus-2.1.0.linux-amd64.tar.gz -C /usr/local/
mv /usr/local/prometheus-2.1.0.linux-amd64  /usr/local/prometheus-2.1
启动prometheus
cd /usr/local/prometheus-2.1
./prometheus &
netstat -tunlp|grep 9090
prometheus server是可以获取到本机数据的,可用以下命令查看
curl localhost:9090/metrics
web页面
http://192.168.20.135:9090/targets
安装node_exporter
node_exporter我安装在192.168.20.137上,你也可以安装在server上,采集server数据。
wget https://github.com/prometheus/node_exporter/releases/download/v0.16.0-rc.3/node_exporter-0.16.0-rc.3.linux-amd64.tar.gz
tar -xvf node_exporter-0.16.0-rc.3.linux-amd64.tar.gz -C /usr/local/
mv /usr/local/node_exporter-0.16.0-rc.3.linux-amd64/ /usr/local/node_exporter-0.16
启动node_exporter
cd /usr/local/node_exporter-0.16
./node_exporter &
netstat -tunlp|grep 9100
查看各项监控指标是否有数据了:
curl localhost:9100/metrics
在server端prometheus.yml末尾添加job:
vim /usr/local/prometheus-2.1/prometheus.yml
  - job_name: 'export_test2'
    static_configs:
      - targets: ['192.168.20.137:9100']
        labels:
          instance: 'node2'
重启prometheus:
killall prometheus
cd /usr/local/prometheus-2.1/
./prometheus
在prometheus的web界面查看:status --> targets

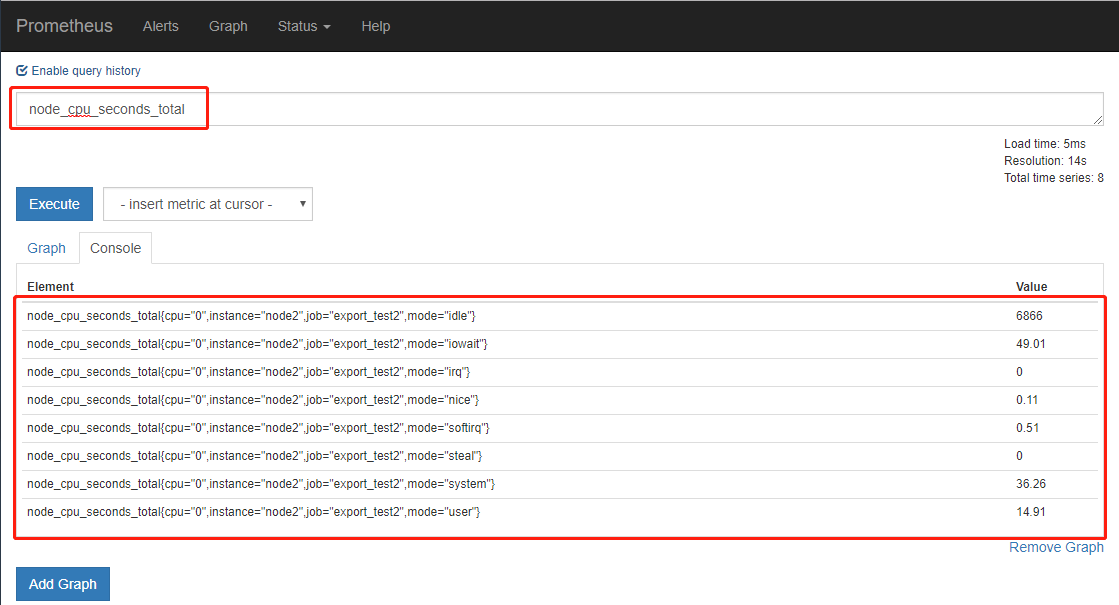
我们可以随便查看一个监控项,看是否获取到值,也可在Graph下进行数据的查找与曲线图的展示
安装grafana
grafana与prometheus进行对接,可以对数据进行更好的展示
wget https://dl.grafana.com/oss/release/grafana-5.4.3.linux-amd64.tar.gz
tar -xvf grafana-5.4.3.linux-amd64.tar.gz -C /usr/local/
启动grafana
cd /usr/local/grafana-5.4.3/bin/
./grafana-server &
登录grafana的web页面
http://192.168.20.135:3000/
admin/admin
添加数据源与自带模板
Add data source --> http://192.168.20.135:9090 --> Dashboards --> prometheus2.0 --> save&test


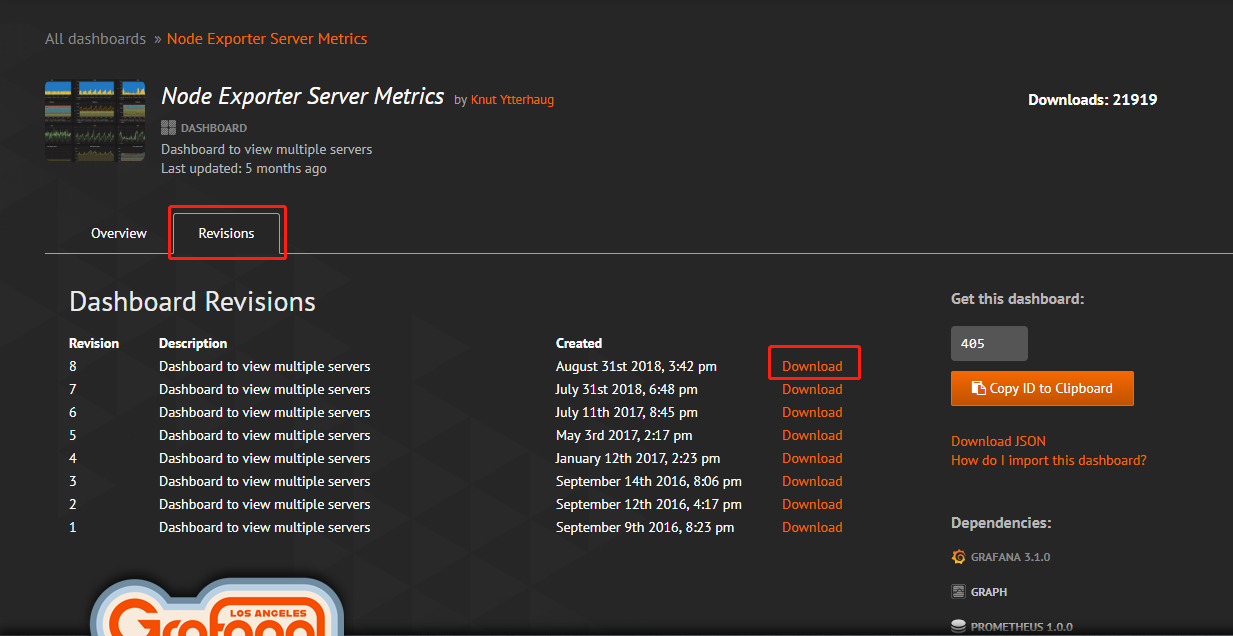
添加node-exporter-server-metrics 模板
下载方法:https://grafana.com/dashboards/405 --> Dashboards -->在如图搜索框搜索node-exporter-server-metrics -->点击第一个进去 --> version --> download

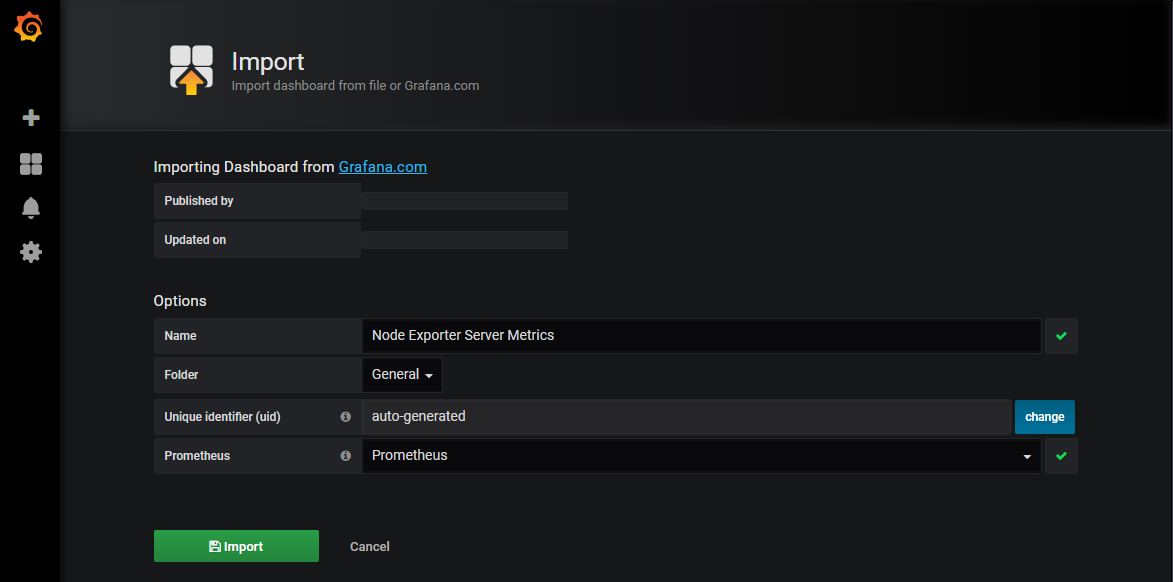
在grafana的Dashboard 中导入模板的json文件

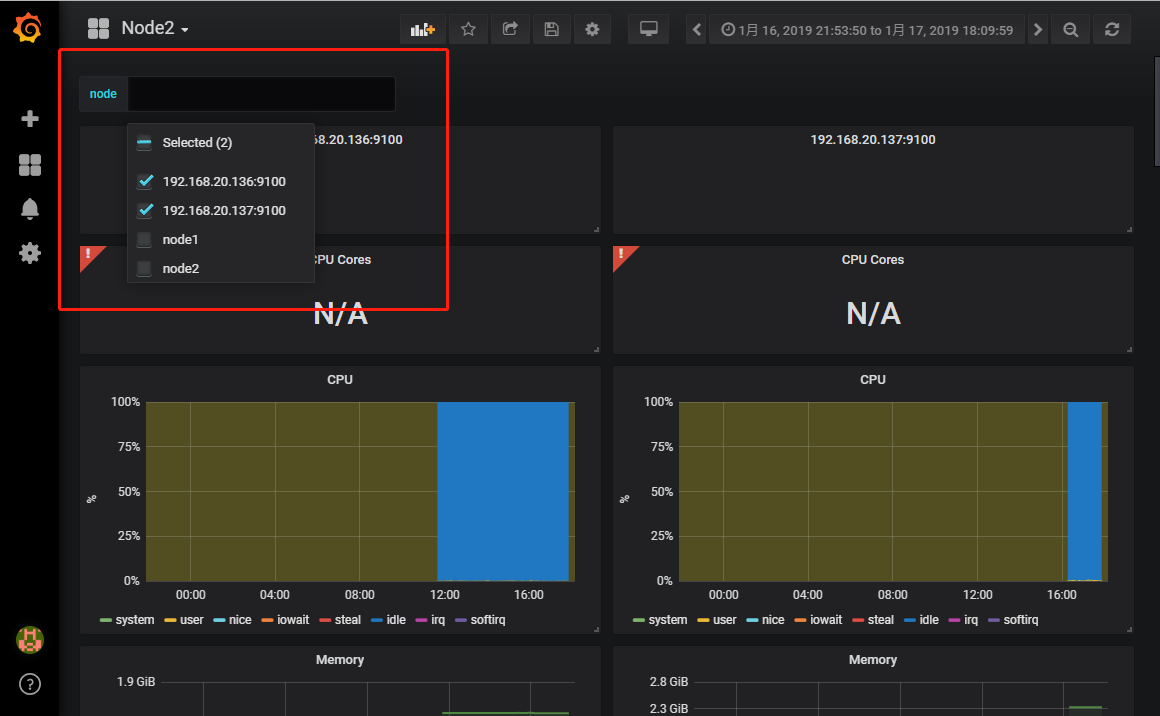
同时存在多个job,可以勾选展示。
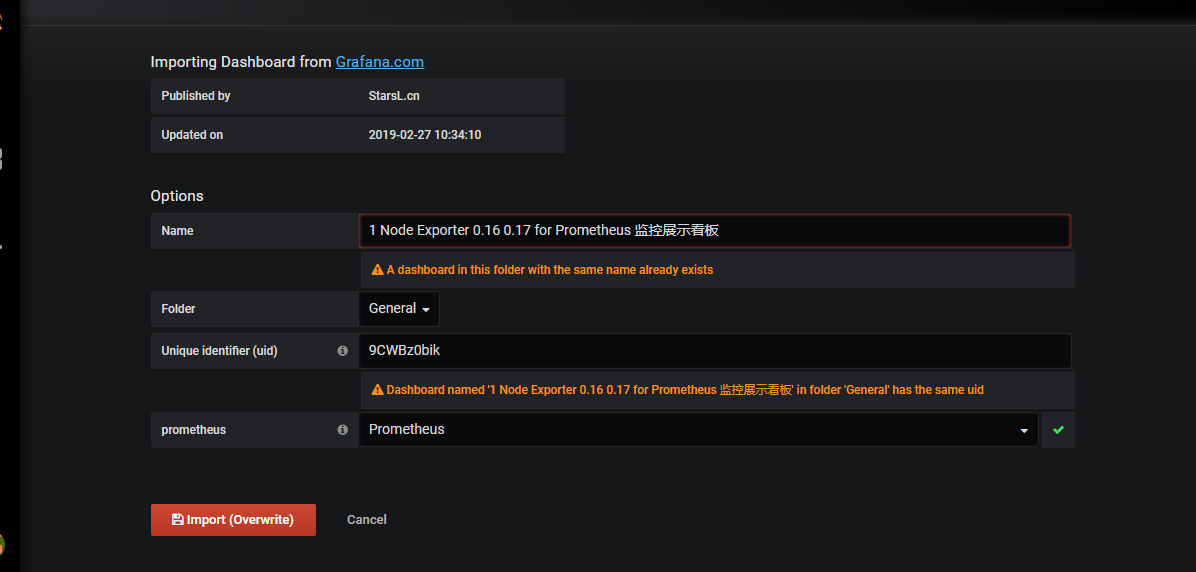
添加1 Node Exporter 0.16 0.17 for Prometheus 监控展示看板
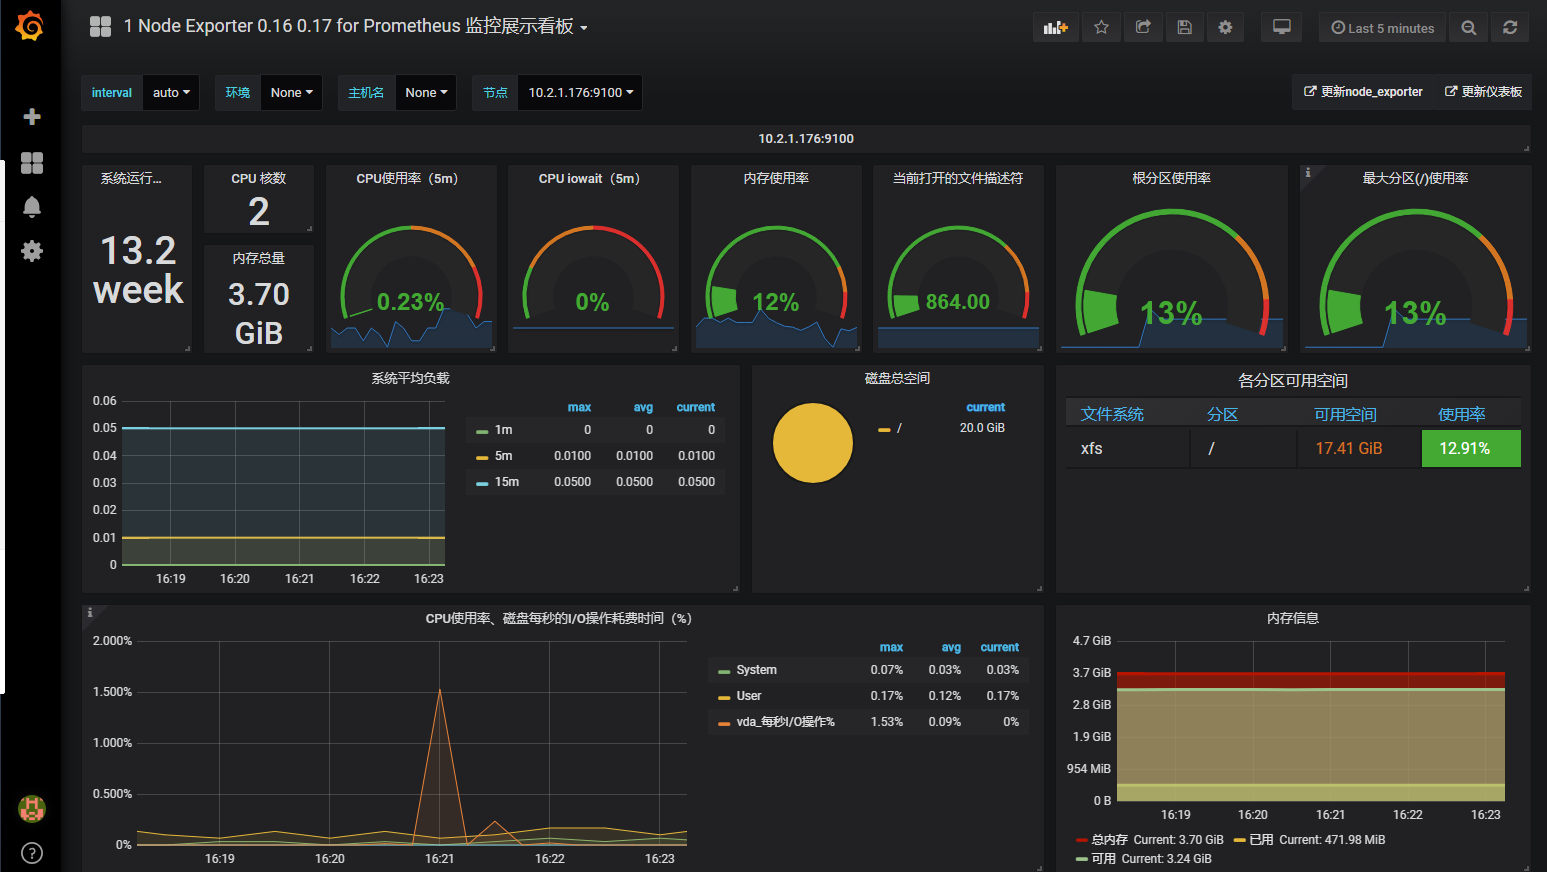
此监控模板基于node_exporter 可以更好的展示多项基本监控项
模板url: https://grafana.com/dashboards/8919
在grafana所在server安装饼图插件,并重启grafana
cd /usr/local/grafana/bin
./grafana-cli plugins install grafana-piechart-panel
killall grafana-server
./grafana-server restart &
图形界面配置
grafana + --> import --> 将以上该模板的url 填到Grafana.com Dashboard中 -->
展示
alertmanager的告警配置
自定义prometheus告警规则
以下规则定义当job export_test2的node_exporter服务挂掉,即产生一个告警
vim /usr/local/prometheus-2.1/rule.yml
groups:
- name: alert-rules                               #告警的分组,后续告警优化时,可通过分组做优化配置
  rules:
  - alert: InstanceStatus                        #告警规则名称
    expr: up{job="export_test2"} == 0    #1是服务正常 ,0服务挂了
    for: 10s                                             #评估等待10s,等待期间报警状态为pending
    labels:                                               #此标签可用于match之后的通知操作
      severity: 'critical'
    annotations:                                      #描述告警信息
      description: 服务器 已宕机
      summary: 服务器 运行状态
在prometheus的配置文件中添加该规则
vim /usr/local/prometheus-2.1/prometheus.yml
rule_files:
  - "/usr/local/prometheus-2.1/rule.yml"
安装alertmanager
https://github.com/prometheus/alertmanager/releases/download/v0.15.2/alertmanager-0.15.2.linux-amd64.tar.gz
tar -xvf alertmanager-0.15.2.linux-amd64.tar.gz -C /usr/local
mv /usr/local/alertmanager-0.15.2.linux-amd64 /usr/local/alertmanager-0.15.2
启动alertmanager
cd /usr/local/alertmanager-0.15.2
./alertmanager &
在prometheus的配置文件中配置alertmanager地址,让其知晓alertmanager的地址,以传送告警信息
vim /usr/local/prometheus-2.1/prometheus.yml
alerting:
  alertmanagers:
  - static_configs:
    - targets: ['localhost:9093']
重启promethous
killall prometheus
cd /usr/local/prometheus-2.1/
./prometheus
测试:
此时关闭192.168.20.137的node_exporter服务
killall node_exporter
查看prometheus的web界面,已经产生告警:

再查看alertmanager已经接收到来自prometheus的告警:

配置告警处理策略
新建alertmanager.yml,由于要进行发邮件测试,将等待时间和间隔时间设置的很短
vim /usr/local/alertmanager-0.15.2/alertmanager.yml
global:                  #若所有的邮件配置使用相同的SMTP配置,则可以直接定义全局的SMTP配置
  smtp_smarthost: 'smtp.126.com:25'
  smtp_from: 'xxxx@126.com'
  smtp_auth_username: 'xxxx@126.com'
  smtp_auth_password: 'xxx121212'        #这是授权码,不是密码,
  smtp_require_tls: false

#templates:          #默认Alertmanager使用系统自带的默认通知模板 ,用户也可在此自定义模板
#  - '/alertmanager/template/*.tmpl'

route:                   #顶级路由必须匹配所有报警,因为他要接受所有报警,再分匹配到分支路由上
  group_by: ['alertname']   #满足group_by中定义标签名称,那么这些告警将会合并为一个通知发送给接收器。
  group_wait: 1s              #同一group的等待时间,在等待时间内当前group接收到了新的告警,这些告警将会合并为一个通知向receiver发送
  group_interval: 5s         #同一Gourp发送告警通知的时间间隔
  repeat_interval: 20s      #在连续告警触发的情况下,重复发送告警的时间间隔
  receiver: 'default-receiver'
  routes:                 #分支路由,可设置不同的匹配规则
  - receiver: 'default-receiver'
    match:              #匹配告警规则的key:value
      severity: 'critical'

receivers:
- name: 'default-receiver'
  email_configs:
  - to: '1xxxx@qq.com'
    send_resolved: true  #告警解除发送恢复通知
重启alertmanager
killall alertmanager
cd /usr/local/alertmanager-0.15.2
./alertmanager &
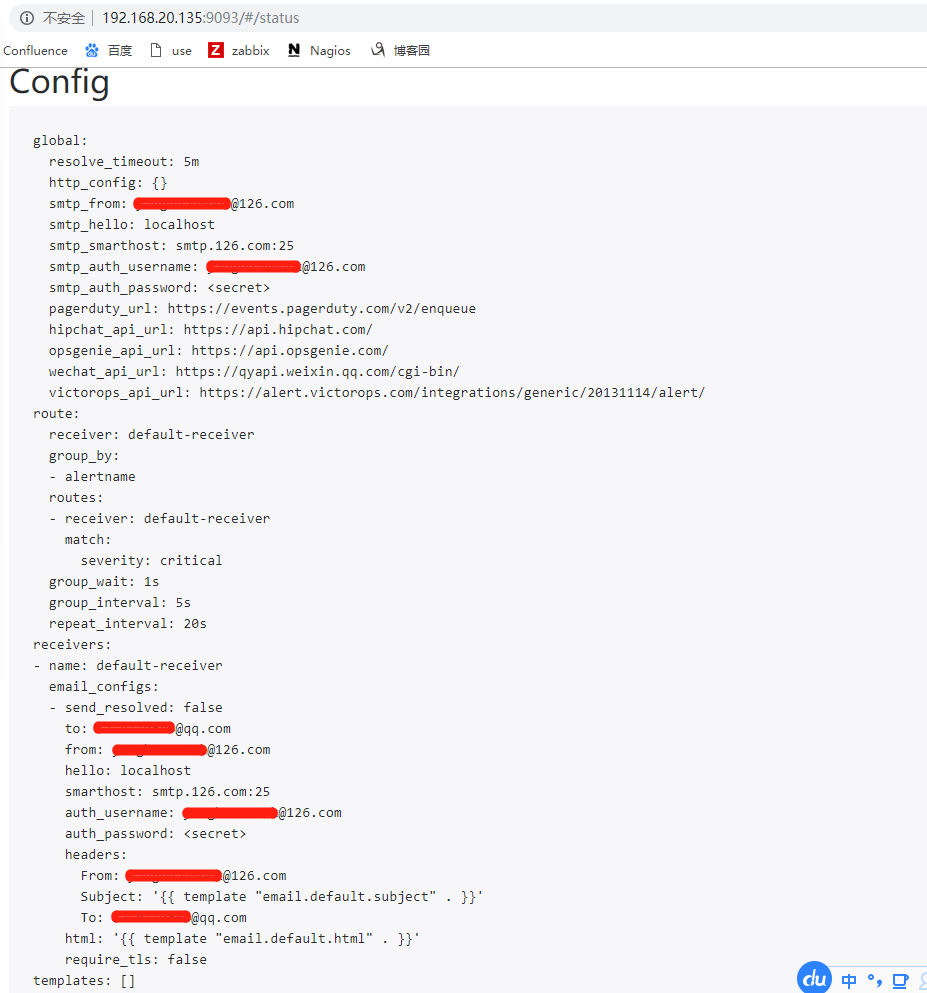
查看alertmanager的配置是否加载,点击web页面的status
查看接收到的邮件报警信息
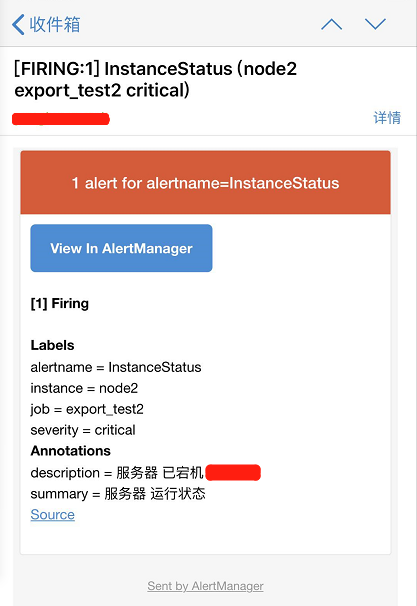
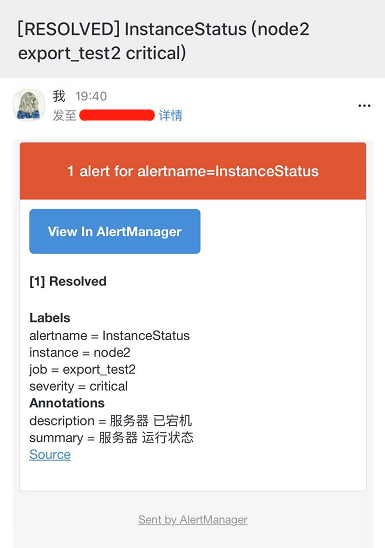
解除报警后的恢复邮件
