

第二篇(下)常用模块
- 实用网址
1 PythonCodeExample:https://www.programcreek.com/python/(模块代码示例) - 模块
 模块
模块1 ''' 2 1、什么是模块? 3 模块就是一系列功能的集合体,分为三大类 4 I:内置的模块 5 II:第三方的模块 6 III:自定义的模块 7 一个python文件本身就一个模块,文件名m.py,模块名叫m 8 9 ps:模块有四种形式 10 1 使用python编写的.py文件 11 12 2 已被编译为共享库或DLL的C或C++扩展 13 14 3 把一系列模块组织到一起的文件夹(注:文件夹下有一个__init__.py文件,该文件夹称之为包) 15 16 4 使用C编写并链接到python解释器的内置模块 17 18 2、为何有用模块 19 I:内置与第三的模块拿来就用,无需定义,这种拿来主义,可以极大地提升自己的开发效率 20 II:自定义的模块 21 可以将程序的各部分功能提取出来放到一模块中为大家共享使用 22 好处是减少了代码冗余,程序组织结构更加清晰 23 24 25 3、如何用模块 26 ''' 27 28 y=333 29 z=444 30 import foo 31 # 1、首次导入模块会发生3件事 32 # 1、执行foo.py 33 # 2、产生foo.py的名称空间,将foo.py运行过程中产生的名字都丢到foo的名称空间中 34 # 3、在当前文件中产生的有一个名字foo,该名字指向2中产生的名称空间 35 36 # 之后的导入,都是直接引用首次导入产生的foo.py名称空间,不会重复执行代码 37 # import foo 38 # import foo 39 # import foo 40 # import foo 41 42 43 # 2、引用: 44 # print(foo.x) 45 # print(foo.get) 46 # print(foo.change) 47 # 强调1:模块名.名字,是指名道姓地问某一个模块要名字对应的值,不会与当前名称空间中的名字发生冲突 48 # x=1111111111111 49 # print(x) 50 # print(foo.x) 51 52 # 强调2:无论是查看还是修改操作的都是模块本身,与调用位置无关 53 # import foo 54 # 55 # x=3333333333 56 # # foo.get() 57 # 58 # foo.change() 59 # print(x) 60 # 61 # print(foo.x) 62 # foo.get() 63 64 65 66 67 # 3、可以以逗号为分隔符在一行导入多个模块 68 # 建议如下所示导入多个模块 69 # import time 70 # import foo 71 # import m 72 73 # 不建议在一行同时导入多个模块 74 import time,foo,m 75 76 77 # 4、导入模块的规范 78 #I. python内置模块 79 #II. 第三方模块 80 #III. 程序员自定义模块 81 82 # import time 83 # import sys 84 # 85 # import 第三方1 86 # import 第三方2 87 # 88 # import 自定义模块1 89 # import 自定义模块2 90 # import 自定义模块3 91 92 93 # 5、import 。。。 as 。。。 94 # import foo as f # f=foo 95 # f.get() 96 97 98 # import abcdefgadfadfas 99 # # 100 # # abcdefgadfadfas.f1 101 # # abcdefgadfadfas.f2 102 # # abcdefgadfadfas.f3 103 104 105 # import abcdefgadfadfas as mmm 106 # 107 # mmm.f1 108 # mmm.f2 109 # mmm.f3 110 111 112 #6、模块是第一类对象 113 import foo 114 115 #7、自定义模块的命名应该采用纯小写+下划线的风格 116 117 118 #8、可以在函数内导入模块 119 def func(): 120 import foo
模块导入1 1# 一个python文件有两种用途 2 # 1、被当成程序运行 3 # 2、被当做模块导入 4 5 2# impot导入模块在使用时必须加前缀"模块." 6 # 优点:肯定不会与当前名称空间中的名字冲突 7 # 缺点:加前缀显得麻烦 8 9 # from ... import ...导入也发生了三件事 10 # 1、产一个模块的名称空间 11 # 2、运行foo.py将运行过程中产生的名字都丢到模块的名称空间去 12 # 3、在当前名称空间拿到一个名字,该名字与模块名称空间中的某一个内存地址 13 # from foo import x # x=模块foo中值0的内存地址 14 # from foo import get 15 # from foo import change 16 17 # print(x) 18 # print(get) 19 # print(change) 20 # x=333333333 21 # print(x) 22 # get() 23 # change() 24 # get() 25 26 # print(x) 27 # from foo import x # x=新地址 28 # print(x) 29 30 # from...impot...导入模块在使用时不用加前缀 31 # 优点:代码更精简 32 # 缺点:容易与当前名称空间混淆 33 # from foo import x # x=模块foo中值1的内存地址 34 # x=1111 35 36 37 # 一行导入多个名字(不推荐) 38 # from foo import x,get,change 39 40 # *:导入模块中的所有名字 41 # name='egon' 42 # from foo import * 43 # print(name) 44 45 from socket import * 46 47 48 # 了解:__all__ 49 # from foo import * 50 # print(x) 51 # print(get) 52 # print(change) 53 54 55 # 起别名 56 from foo import get as g 57 print(g) 58 59 3模块的搜索路径 60 # 无论是import还是from...import在导入模块时都涉及到查找问题 61 # 优先级: 62 # 1、内存(内置模块) 63 # 2、硬盘:按照sys.path中存放的文件的顺序依次查找要导入的模块 64 65 # import sys 66 # 值为一个列表,存放了一系列的对文件夹 67 # 其中第一个文件夹是当前执行文件所在的文件夹 68 # print(sys.path) 69 70 # import foo # 内存中已经有foo了 71 # foo.say() 72 # 73 # import time 74 # time.sleep(10) 75 # 76 # import foo 77 # foo.say() 78 79 80 # 了解:sys.modules查看已经加载到内存中的模块 81 import sys 82 # import foo # foo=模块的内存地址 83 # del foo 84 85 # def func(): 86 # import foo # foo=模块的内存地址 87 # 88 # func() 89 # 90 # # print('foo' in sys.modules) 91 # print(sys.modules) 92 93 94 import sys 95 # 找foo.py就把foo.py的文件夹添加到环境变量中 96 sys.path.append(r'/Users/linhaifeng/PycharmProjects/s14/day21/aa') 97 # import foo 98 # foo.say() 99 100 from foo import say
函数的类型提示1 def register(name:"必须传入名字傻叉",age:1111111,hobbbies:"必须传入爱好元组")->"返回的是整型": 2 print(name) 3 print(age) 4 print(hobbbies) 5 return 111 6 7 # register(1,'aaa',[1,]) 8 # res=register('egon',18,('play','music')) 9 # res=register('egon',19,(1,2,3)) 10 11 print(register.__annotations__) #{'name': '必须传入名字傻叉', 'age': 1111111, 'hobbbies': '必须传入爱好元组', 'return': '返回的是整型'}
包的使用1 ''' 2 1、包就是一个包含有__init__.py文件的文件夹 3 4 5 2、为何要有包 6 包的本质是模块的模块的一种形式,包是用来被当做模块导入 7 ''' 8 9 #1、产生一个名称空间 10 #2、运行包下的__init__.py文件,将运行过程中产生的名字都丢到1的名称空间中 11 #3、在当前执行文件的名称空间中拿到一个名字mmm,mmm指向1的名称空间 12 # import mmm 13 # print(mmm.x) 14 # print(mmm.y) 15 # mmm.say() 16 17 # from mmm import x 18 19 20 # 模块的使用者:egon老湿 21 22 # 环境变量是以执行文件为准备的,所有的被导入的模块或者说后续的其他文件引用 23 # 的sys.path都是参照执行文件的sys.path 24 import sys 25 sys.path.append('/aaaaaaaaaaaaaaaaaaaaaaaaaa') 26 # print(sys.path) 27 28 sys.path.append(r'/Users/linhaifeng/PycharmProjects/s14/day21/aa') 29 30 31 # import foo # foo下__init__.py 32 # # 33 # # 34 # foo.f1() 35 # foo.f2() 36 # foo.f3() 37 38 # from foo import f1,f2,f3,f4 39 40 # f1() 41 # f2() 42 # f3() 43 # f4() 44 45 # import foo 46 # foo.f4() 47 48 # 强调: 49 # 1.关于包相关的导入语句也分为import和from ... import ... 50 # 两种,但是无论哪种,无论在什么位置,在导入时都必须遵循一个原则: 51 # 凡是在导入时带点的,点的左边都必须是一个包,否则非法。 52 # 可以带有一连串的点,如import 顶级包.子包.子模块,但都必须遵循这个原则。但对于导入后,在使用时就没有这种限制了,点的左边可以是包,模块,函数,类(它们都可以用点的方式调用自己的属性)。 53 # 例如: 54 # from a.b.c.d.e.f import xxx 55 # import a.b.c.d.e.f 56 # 其中a、b、c、d、e 都必须是包 57 58 59 # 2、包A和包B下有同名模块也不会冲突,如A.a与B.a来自俩个命名空间 60 # 61 # 3、import导入文件时,产生名称空间中的名字来源于文件, 62 # import 包,产生的名称空间的名字同样来源于文件,即包下的__init__.py,导入包本质就是在导入该文件 63 64 65 # import foo 66 # # print(foo.f1) 67 # # print(foo.f2) 68 # # print(foo.f3) 69 # # print(foo.f4) 70 # 71 # foo.f4() 72 73 # from foo import * 74 # print(f1) 75 # print(f2) 76 # print(f3) 77 # print(f4)
-
查模块&使用
1 dir ---返回内部方法
2 help ---方法使用说明
- 常用模块1
日期格式化:
datetime# import datetime # i = datetime.datetime.now() # print ("当前的日期和时间是 %s" % i) # 2019-01-04 11:04:24.874607 # print ("ISO格式的日期和时间是 %s" % i.isoformat()) # print ("当前的年份是 %s" %i.year) # print ("当前的月份是 %s" %i.month) # print ("当前的日期是 %s" %i.day) # print ("dd/mm/yyyy 格式是 %s/%s/%s" % (i.day, i.month, i.year)) #4/1/2019 # print ("当前小时是 %s" %i.hour) # print ("当前分钟是 %s" %i.minute) # print ("当前秒是 %s" %i.second) # 获取星期 def get_week_day(): week_day = { 0: '星期一', 1: '星期二', 2: '星期三', 3: '星期四', 4: '星期五', 5: '星期六', 6: '星期日', } day = datetime.date.today().weekday() return week_day[day] # print(datetime.date.today(), get_week_day()) #2021-12-06 星期一
datetime.datetime.now().strftime("%Y-%m-%d %H:%M:%S") #'2021-09-16 20:13:43'

datetime.datetime.now().strftime("%A %d %B %Y %I:%M:%S%p") #'Thursday 16 September 2021 08:14:52PM' 时间模块
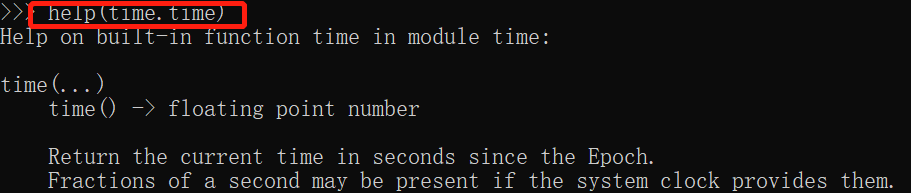
时间模块1 # 时间模块优先掌握的操作 2 #一:time 3 import time 4 5 # 时间分为三种格式: 6 # 1、时间戳:从1970年到现在经过的秒数 7 # 作用:用于时间间隔的计算 8 9 # print(time.time()) 10 11 # 2、按照某种格式显示的时间:2020-03-30 11:11:11 12 # 作用:用于展示时间 13 14 # print(time.strftime('%Y-%m-%d %H:%M:%S %p')) 15 # print(time.strftime('%Y-%m-%d %X')) 16 17 # 3、结构化的时间 18 # 作用:用于单独获取时间的某一部分 19 20 # res=time.localtime() 21 # print(res) 22 # print(res.tm_year) 23 # print(res.tm_yday) 24 25 #二:datetime 26 import datetime 27 28 # print(datetime.datetime.now()) 29 # print(datetime.datetime.now() + datetime.timedelta(days=3)) 30 # print(datetime.datetime.now() + datetime.timedelta(weeks=1)) 31 32 33 34 # 时间模块需要掌握的操作 35 # 1、时间格式的转换 36 # struct_time->时间戳 37 import time 38 # s_time=time.localtime() 39 # print(time.mktime(s_time)) 40 41 # 时间戳->struct_time 42 # tp_time=time.time() 43 # print(time.localtime(tp_time)) 44 45 # 补充:世界标准时间与本地时间 46 # print(time.localtime()) 47 # print(time.gmtime()) # 世界标准时间,了解 48 # print(time.localtime(333333333)) 49 # print(time.gmtime(333333333)) 50 51 52 # struct_time->格式化的字符串形式的时间 53 # s_time=time.localtime() 54 # print(time.strftime('%Y-%m-%d %H:%M:%S',s_time)) 55 56 # print(time.strptime('1988-03-03 11:11:11','%Y-%m-%d %H:%M:%S')) 57 58 59 # !!!真正需要掌握的只有一条:format string<------>timestamp 60 # '1988-03-03 11:11:11'+7 61 62 # format string--->struct_time--->timestamp 63 # struct_time=time.strptime('1988-03-03 11:11:11','%Y-%m-%d %H:%M:%S') 64 # timestamp=time.mktime(struct_time)+7*86400 65 # print(timestamp) 66 67 # format string<---struct_time<---timestamp 68 # res=time.strftime('%Y-%m-%d %X',time.localtime(timestamp)) 69 # print(res) 70 71 # time.sleep(3) 72 73 # 了解知识 74 # import time 75 # print(time.asctime()) 76 77 78 import datetime 79 # print(datetime.datetime.now()) 80 # print(datetime.datetime.utcnow()) 81 82 print(datetime.datetime.fromtimestamp(333333))
random模块1 import random 2 3 # print(random.random()) #(0,1)----float 大于0且小于1之间的小数 4 # print(random.randint(1, 3)) # [1,3] 大于等于1且小于等于3之间的整数 5 6 # print(random.randrange(1, 3)) # [1,3) 大于等于1且小于3之间的整数 7 # 8 # print(random.choice([111, 'aaa', [4, 5]])) # 1或者23或者[4,5] 9 # 10 # print(random.sample([111, 'aaa', 'ccc','ddd'],2)) # 列表元素任意2个组合 11 # 12 # print(random.uniform(1, 3)) # 大于1小于3的小数,如1.927109612082716 13 # 14 # item = [1, 3, 5, 7, 9] 15 # random.shuffle(item) # 打乱item的顺序,相当于"洗牌" 16 # print(item) 17 18 # 应用:随机验证码 19 20 # import random 21 # 22 # res='' 23 # for i in range(6): 24 # 从26大写字母中随机取出一个=chr(random.randint(65,90)) 25 # 从10个数字中随机取出一个=str(random.randint(0,9)) 26 # 27 # 随机字符=random.choice([从26大写字母中随机取出一个,从10个数字中随机取出一个]) 28 # res+=随机字符 29 30 31 import random 32 33 def make_code(size=4): 34 res='' 35 for i in range(size): 36 s1=chr(random.randint(65,90)) 37 s2=str(random.randint(0,9)) 38 res+=random.choice([s1,s2]) 39 return res 40 41 print(make_code(6))
os模块1 import os 2 3 # 获取某一个文件夹下所有的子文件以及子文件夹的名字 4 # res=os.listdir('.') 5 # print(res) 6 # 7 # 8 # size=os.path.getsize(r'/Users/linhaifeng/PycharmProjects/s14/day22/01 时间模块.py') 9 # print(size) 10 11 12 13 # os.remove() 删除一个文件 14 # os.rename("oldname","newname") 重命名文件/目录 15 16 17 18 # 应用程序----》"ls /" 19 # os.system("ls /") 20 21 # 规定:key与value必须都为字符串 22 23 # os.environ['aaaaaaaaaa']='111' 24 # print(os.environ) 25 26 27 # print(os.path.dirname(r'/a/b/c/d.txt')) 28 # print(os.path.basename(r'/a/b/c/d.txt')) 29 30 31 # print(os.path.isfile(r'笔记.txt')) 32 # print(os.path.isfile(r'aaa')) 33 # print(os.path.isdir(r'aaa')) 34 35 # print(os.path.join('a','/','b','c','d')) 36 37 38 39 40 # 推荐用这种 41 BASE_DIR=os.path.dirname(os.path.dirname(__file__)) 42 # print(BASE_DIR) 43 44 45 # BASE_DIR=os.path.normpath(os.path.join( 46 # __file__, 47 # '..', 48 # '..' 49 # )) 50 # print(BASE_DIR) 51 52 # 在python3.5之后,推出了一个新的模块pathlib 53 from pathlib import Path 54 55 # res = Path(__file__).parent.parent 56 # print(res) 57 58 59 # res=Path('/a/b/c') / 'd/e.txt' 60 # print(res) 61 62 # print(res.resolve())
sys&打印进度条1 import sys 2 3 # python3.8 run.py 1 2 3 4 # sys.argv获取的是解释器后参数值 5 # print(sys.argv) 6 7 # src_file=input('源文件路径: ').strip() 8 # dst_file=input('目标文件路径: ').strip() 9 # 10 # src_file=sys.argv[1] 11 # dst_file=sys.argv[2] 12 # # 判断 13 # 14 # with open(r'%s' %src_file,mode='rb') as read_f,\ 15 # open(r'%s' %dst_file,mode='wb') as write_f: 16 # for line in read_f: 17 # write_f.write(line) 18 19 # python3.8 run.py src_file dst_file 20 21 22 # print('[%-50s]' %'#') 23 # print('[%-50s]' %'##') 24 # print('[%-50s]' %'###') 25 26 27 28 # import time 29 # 30 # res='' 31 # for i in range(50): 32 # res+='#' 33 # time.sleep(0.5) 34 # print('\r[%-50s]' % res,end='') 35 36 37 import time 38 39 40 def progress(percent): 41 if percent > 1: 42 percent = 1 43 res = int(50 * percent) * '#' 44 print('\r[%-50s] %d%%' % (res, int(100 * percent)), end='') 45 46 recv_size=0 47 total_size=1025011 48 49 while recv_size < total_size: 50 time.sleep(0.01) # 下载了1024个字节的数据 51 52 recv_size+=1024 # recv_size=2048 53 54 # 打印进度条 55 # print(recv_size) 56 percent = recv_size / total_size # 1024 / 333333 57 progress(percent)
- 常用模块2
json&pickle模块1 # 1、什么是序列化&反序列化 2 # 内存中的数据类型---->序列化---->特定的格式(json格式或者pickle格式) 3 # 内存中的数据类型<----反序列化<----特定的格式(json格式或者pickle格式) 4 5 # 土办法: 6 # {'aaa':111}--->序列化str({'aaa':111})----->"{'aaa':111}" 7 # {'aaa':111}<---反序列化eval("{'aaa':111}")<-----"{'aaa':111}" 8 9 # 2、为何要序列化 10 # 序列化得到结果=>特定的格式的内容有两种用途 11 # 1、可用于存储=》用于存档 12 # 2、传输给其他平台使用=》跨平台数据交互 13 # python java 14 # 列表 特定的格式 数组 15 16 # 强调: 17 # 针对用途1的特定一格式:可是一种专用的格式=》pickle只有python可以识别 18 # 针对用途2的特定一格式:应该是一种通用、能够被所有语言识别的格式=》json 19 20 21 # 3、如何序列化与反序列化 22 # 示范1 23 # import json 24 # # 序列化 25 # json_res=json.dumps([1,'aaa',True,False]) 26 # # print(json_res,type(json_res)) # "[1, "aaa", true, false]" 27 # 28 # # 反序列化 29 # l=json.loads(json_res) 30 # print(l,type(l)) 31 32 33 # 示范2: 34 import json 35 36 # 序列化的结果写入文件的复杂方法 37 # json_res=json.dumps([1,'aaa',True,False]) 38 # # print(json_res,type(json_res)) # "[1, "aaa", true, false]" 39 # with open('test.json',mode='wt',encoding='utf-8') as f: 40 # f.write(json_res) 41 42 # 将序列化的结果写入文件的简单方法 43 # with open('test.json',mode='wt',encoding='utf-8') as f: 44 # json.dump([1,'aaa',True,False],f) 45 46 47 # 从文件读取json格式的字符串进行反序列化操作的复杂方法 48 # with open('test.json',mode='rt',encoding='utf-8') as f: 49 # json_res=f.read() 50 # l=json.loads(json_res) 51 # print(l,type(l)) 52 53 # 从文件读取json格式的字符串进行反序列化操作的简单方法 54 # with open('test.json',mode='rt',encoding='utf-8') as f: 55 # l=json.load(f) 56 # print(l,type(l)) 57 58 59 # json验证: json格式兼容的是所有语言通用的数据类型,不能识别某一语言的所独有的类型 60 # json.dumps({1,2,3,4,5}) 61 62 # json强调:一定要搞清楚json格式,不要与python混淆 63 # l=json.loads('[1, "aaa", true, false]') 64 # l=json.loads("[1,1.3,true,'aaa', true, false]") 65 # print(l[0]) 66 67 # 了解 68 # l = json.loads(b'[1, "aaa", true, false]') 69 # print(l, type(l)) 70 71 # with open('test.json',mode='rb') as f: 72 # l=json.load(f) 73 74 75 # res=json.dumps({'name':'哈哈哈'}) 76 # print(res,type(res)) 77 78 # res=json.loads('{"name": "\u54c8\u54c8\u54c8"}') 79 # print(res,type(res)) 80 81 # 4、猴子补丁 82 # 在入口处打猴子补丁 83 # import json 84 # import ujson 85 # 86 # def monkey_patch_json(): 87 # json.__name__ = 'ujson' 88 # json.dumps = ujson.dumps 89 # json.loads = ujson.loads 90 # 91 # monkey_patch_json() # 在入口文件出运行 92 93 94 # import ujson as json # 不行 95 96 # 后续代码中的应用 97 98 # json.dumps() 99 # json.loads() 100 101 102 # 5.pickle模块 103 import pickle 104 # res=pickle.dumps({1,2,3,4,5}) 105 # print(res,type(res)) 106 107 # s=pickle.loads(res) 108 # print(s,type(s))
configparser1 """ 2 解析.ini(初始化类文件)配置文件 3 文件格式示例: 4 [alex] 5 name = alex Li 6 password = e99a18c428cb38d5f260853678922e03 7 expire = 2017-09-20 8 9 10 [egon] 11 name = egg lin 12 password = dddd 13 expire = 2018-01-01 14 """ 15 config=configparser.ConfigParser() 16 config.read('test.ini') 17 18 # 1、获取sections 19 # print(config.sections()) 20 21 # 2、获取某一section下的所有options 22 # print(config.options('section1')) 23 24 # 3、获取items 25 # print(config.items('section1')) 26 27 # 4、 28 # res=config.get('section1','user') 29 # print(res,type(res)) 30 31 # res=config.getint('section1','age') 32 # print(res,type(res)) 33 34 35 # res=config.getboolean('section1','is_admin') 36 # print(res,type(res)) 37 38 39 # res=config.getfloat('section1','salary') 40 # print(res,type(res))
hashlib哈希1 # 1、什么是哈希hash 2 # hash一类算法,该算法接受传入的内容,经过运算得到一串hash值 3 # hash值的特点: 4 #I 只要传入的内容一样,得到的hash值必然一样 5 #II 不能由hash值返解成内容 6 #III 不管传入的内容有多大,只要使用的hash算法不变,得到的hash值长度是一定 7 8 # 2、hash的用途 9 # 用途1:特点II用于密码密文传输与验证 10 # 用途2:特点I、III用于文件完整性校验 11 12 # 3、如何用 13 # import hashlib 14 # 15 # m=hashlib.md5() 16 # m.update('hello'.encode('utf-8')) 17 # m.update('world'.encode('utf-8')) 18 # res=m.hexdigest() # 'helloworld' 19 # print(res) 20 # 21 # m1=hashlib.md5('he'.encode('utf-8')) 22 # m1.update('llo'.encode('utf-8')) 23 # m1.update('w'.encode('utf-8')) 24 # m1.update('orld'.encode('utf-8')) 25 # res=m1.hexdigest()# 'helloworld' 26 # print(res) 27 28 29 30 # 模拟撞库 31 # cryptograph='aee949757a2e698417463d47acac93df' 32 # import hashlib 33 # 34 # # 制作密码字段 35 # passwds=[ 36 # 'alex3714', 37 # 'alex1313', 38 # 'alex94139413', 39 # 'alex123456', 40 # '123456alex', 41 # 'a123lex', 42 # ] 43 # 44 # dic={} 45 # for p in passwds: 46 # res=hashlib.md5(p.encode('utf-8')) 47 # dic[p]=res.hexdigest() 48 # 49 # # 模拟撞库得到密码 50 # for k,v in dic.items(): 51 # if v == cryptograph: 52 # print('撞库成功,明文密码是:%s' %k) 53 # break 54 55 56 # 提升撞库的成本=>密码加盐 57 import hashlib 58 59 m=hashlib.md5() 60 61 m.update('天王'.encode('utf-8')) 62 m.update('alex3714'.encode('utf-8')) 63 m.update('盖地虎'.encode('utf-8')) 64 print(m.hexdigest()) 65 66 67 68 69 # m.update(文件所有的内容) 70 # m.hexdigest() 71 # 72 # f=open('a.txt',mode='rb') 73 # f.seek() 74 # f.read(2000) # 巨琳 75 # m1.update(文见的一行) 76 # 77 # m1.hexdigest()
subprocess(子进程)import subprocess def runcmd(command): ret = subprocess.run(command,shell=True,stdout=subprocess.PIPE,stderr=subprocess.PIPE,encoding="utf-8",timeout=1) if ret.returncode == 0: print("success:",ret) else: print("error:",ret) # 方式一:#序列参数 # runcmd(["curl" ,"-i", "www.baidu.com"]) # 方式二:#字符串参数(推荐) runcmd("curl -i ww.baidu.com")
MD5加密import hashlib def gen_md5(origin): """ md5加密 :param origin: :return: """ ha = hashlib.md5(b'jk3usodfjwkrsdf') ha.update(origin.encode('utf-8')) return ha.hexdigest()
-
日志库(logging)
logging1#!\Users\Local\Programs\Python37 # -*- coding: utf-8 -*- # # a ={'title': 'VA、VD缺乏,对儿童健康有什么影响?', 'url': 'https://baijiahao.baidu.com/s?id=1702173637719000648&wfr=spider&for=pc', 'release_time': '2021-06-09', 'web_source_id': 1, 'hospital_id': 2, 'source': 'PSM药盾公益', 'article_abstract': '作者:南方医科大学深圳医院药剂科 药师 崔旭兰 维生素A(简称VA)和维生素D(简称VD)是与儿童健康密切相关的两种脂溶性维生素,而维生素AD(简称VAD)是一种复合维生素,是维生素A与维生素D的复合制剂,用于需要同时补充维A和维D的人群...'} # print(tuple(a.values())) # 日志记录 # import logging # # logging.basicConfig(level=logging.DEBUG, # filename='output.log', # datefmt='%Y/%m/%d %H:%M:%S', # format='%(asctime)s - %(name)s - %(levelname)s - %(lineno)d - %(module)s - %(message)s') # logger = logging.getLogger(__name__) # # logger.info('This is a log info') # logger.debug('Debugging') # logger.warning('Warning exists') # logger.info('Finish') import logging logger = logging.getLogger(__name__) logger.setLevel(level=logging.DEBUG) # Formatter formatter = logging.Formatter('%(asctime)s - %(name)s - %(levelname)s - %(message)s') # FileHandler file_handler = logging.FileHandler('result.log') file_handler.setFormatter(formatter) logger.addHandler(file_handler) # StreamHandler stream_handler = logging.StreamHandler() stream_handler.setFormatter(formatter) logger.addHandler(stream_handler) # Log logger.info('Start') logger.warning('Something maybe fail.') try: result = 10 / 0 except Exception: logger.error('Faild to get result', exc_info=True) logger.info('Finished')
logging#原文链接:#https://juejin.cn/post/6844903616046694413#heading-4 # 捕获 Traceback import logging logger = logging.getLogger(__name__) logger.setLevel(level=logging.DEBUG) # Formatter formatter = logging.Formatter('%(asctime)s - %(name)s - %(levelname)s - %(message)s') # FileHandler file_handler = logging.FileHandler('result.log') file_handler.setFormatter(formatter) logger.addHandler(file_handler) # StreamHandler (输出到控制台) stream_handler = logging.StreamHandler() stream_handler.setFormatter(formatter) logger.addHandler(stream_handler) # Log logger.info('Start') logger.warning('Something maybe fail.') try: result = 10 / 0 except Exception: logger.error('Faild to get result', exc_info=True) logger.info('Finished')
loguru#!\Users\Local\Programs\Python37 # -*- coding: utf-8 -*- #打印日志: #方式一: # import logging # logging.basicConfig(level=logging.INFO, format='%(asctime)s - %(name)s - %(levelname)s - %(message)s') # logger = logging.getLogger(__name__) # # logger.info('this is another debug message') # logger.warning('this is another debug message') # logger.error('this is another debug message') # logger.info('this is another debug message') # 方式二 from loguru import logger logger.debug('this is a debug message') logger.info('this is another debug message') logger.warning('this is another debug message') logger.error('this is another debug message') logger.info('this is another debug message') logger.success('this is success message!') logger.critical('this is critical message!')
 loguru详解
原文链接:https://mp.weixin.qq.com/s/COzw38LgM_M-qiw1GTsvOQ

示例:
import os
from loguru import logger

# 日志相关配置
base_dir = os.path.dirname(os.path.dirname(__file__))
log_dir = os.path.join(base_dir, 'log/lora/lora.log')
logger.add(log_dir,encoding="utf-8",retention='7 days',level='INFO',rotation="200 MB") # 旧日志保留7天,200MB分割日志,最低级别为INFO

logger.debug("debug相关日志记录")
logger.info("INFO消息记录!!" )
logger.success("插入异常数据成功 -- %s")
logger.error("提示:有新的设备`devEUI=%s`了,请录入数据库哦!!" )
- 进度条(tqdm)
tqdm进度条# Tqdm 是一个智能进度表。它能够显示所有可迭代对象当前执行的进度 (Tqdm) # 显示---> 100%|██████████| 100/100 [00:01<00:00, 99.36it/s] # pip install tqdm from tqdm import tqdm from time import sleep #1 使用 tqdm() 封装可迭代的对象 text = "" for char in tqdm(["a", "b", "c", "d"]): sleep(0.25) text = text + char #2 trange(i) 是特殊的关键字,是封装了range的tqdm对象 from tqdm import trange from tqdm import trange for i in trange(100): sleep(0.01) # 3 手动的形式 pbar = tqdm(total=100) for i in range(10): sleep(0.1) pbar.update(10) pbar.close() # 4 qdm 在命令行中结合使用 #只需在管道之间插入 tqdm (或 python -m tqdm),即可将进度条显示到终端上 #实例: """ $ find . -name '*.py' -type f -exec cat \{} \; | tqdm --unit loc --unit_scale --total 857366 >> /dev/null 100%|█████████████████████████████████| 857K/857K [00:04<00:00, 246Kloc/s] """ """ 备份大目录 $ tar -xcf - docs/ | tqdm --bytes --total `du -sb docs/ | cut -f1` \ > backup.tgz 44%|██████████████▊ | 153M/352M [00:14<00:18, 11.0MB/s] """
- 路径(os&pathlib&glob)
os# os模块 import os # 返回当前所在目录 dir =os.getcwd() # 返回上上层目录 base_dir =os.path.dirname(os.path.dirname(os.getcwd())) # 拼接目录 new_path =os.path.join(base_dir,"test","test.txt") # 获取当前目录下所有文件或文件夹名字 dir_list =os.listdir() # 创建文件夹,重命名 # new_dir =os.makedirs(os.path.join('project', 'test'), exist_ok=True) # os.rename('test.txt','new_test.txt', ) # 将test.txt 重命名为 new_test.txt # print(dir,"\n",base_dir,"\n",new_path) # 使用os.walk扫描目录(默认自上而下扫描,没扫描一返回一个元组(curDir, dirs, files)) # for curDir, dirs, files in os.walk("./"): # print("====================") # print("现在的目录:" + curDir) # print("该目录下包含的子目录:" + str(dirs)) # print("该目录下包含的文件:" + str(files))
pathlib####### pathlib模块 ########## from pathlib import Path #1 遍历目录的子目录或者文件 dirs=Path("./").iterdir() for i in Path("./").iterdir(): print(i) # 2返回当前所在目录 cur_dir = Path.cwd() # 3返回上上一级目录 base_dir=Path.cwd().parent.parent # 4目录拼接 paths = ["test","test.txt"] new_dir =Path.cwd().parent.joinpath(*paths) # print(new_dir) # 5创建 project/test目录,重命名 # Path('project/test').mkdir(parents=True, exist_ok=True) # Path('test.txt').rename('new_test.txt') # 6返回绝对路径 print(Path("./").resolve()) # print(os.path.abspath("./")) print(Path("./project").is_dir()) # 判断是否是目录 print(Path("./new_test.txt").is_file()) # 是否是文件 print(Path("test").exists()) # 判断路径是否存在 # Path("./tt").unlink() # 删除文件(文件非空触发异常) # Path("./project").rmdir() # 删除目录(目录非空触发异常)
from pathlib import Path

FILE = Path(__file__).resolve()  # <class 'pathlib.WindowsPath'>
ROOT = FILE.parents[0]  # 上级目录路径
print(Path("./").resolve()) # 解析为绝对路径,解析符号链接并正常化(例如在Windows下将 斜杠 转换为 反斜杠)
print(Path("./")) #D:\rsrc

#方式二
import os
script_path = os.path.realpath(__file__) #当前文件路径
script_dir = os.path.dirname(script_path) #所在目录绝对路径
Glob(示例:jpg,png结尾的所有图片路径)# Glob 匹配指定路径下的文件信息,列表的形式返回匹配到的文件绝对路径 import glob pic_type =["jpg","png"] paths =[] paths.extend(glob.glob(r"D:\rsrc\data\electromobile\electric_car\JPEGImages\*.{}".format(i)) for i in pic_type) #二维数组:所有jpg绝对路径和png图片绝对路径 print(paths) #[['D:\\rsrc\\data\\electromobile\\electric_car\\JPEGImages\\00001.jpg',],[xxx.png]]
os,shutilimport shutil import os # 1. 获取当前脚本绝对路径 """ abs_path = os.path.abspath(__file__) print(abs_path) """ # 2. 获取当前文件的上级目录 """ base_path = os.path.dirname( os.path.dirname(路径) ) print(base_path) """ # 3. 路径拼接 """ p1 = os.path.join(base_path, 'xx') print(p1) p2 = os.path.join(base_path, 'xx', 'oo', 'a1.png') print(p2) """ # 4. 判断路径是否存在 """ exists = os.path.exists(p1) print(exists) """ # 5. 创建文件夹 """ os.makedirs(路径) """ """ path = os.path.join(base_path, 'xx', 'oo', 'uuuu') if not os.path.exists(path): os.makedirs(path) """ # 6. 是否是文件夹 """ file_path = os.path.join(base_path, 'xx', 'oo', 'uuuu.png') is_dir = os.path.isdir(file_path) print(is_dir) # False folder_path = os.path.join(base_path, 'xx', 'oo', 'uuuu') is_dir = os.path.isdir(folder_path) print(is_dir) # True """ # 7. 删除文件或文件夹 """ os.remove("文件路径") """ """ path = os.path.join(base_path, 'xx') shutil.rmtree(path) """ # 8. 拷贝文件夹 """ shutil.copytree("/Users/wupeiqi/Desktop/图/csdn/","/Users/wupeiqi/PycharmProjects/CodeRepository/files") """ # 9.拷贝文件 """ shutil.copy("/Users/wupeiqi/Desktop/图/csdn/WX20201123-112406@2x.png","/Users/wupeiqi/PycharmProjects/CodeRepository/") shutil.copy("/Users/wupeiqi/Desktop/图/csdn/WX20201123-112406@2x.png","/Users/wupeiqi/PycharmProjects/CodeRepository/x.png") """ # 10.文件或文件夹重命名 """ shutil.move("/Users/wupeiqi/PycharmProjects/CodeRepository/x.png","/Users/wupeiqi/PycharmProjects/CodeRepository/xxxx.png") shutil.move("/Users/wupeiqi/PycharmProjects/CodeRepository/files","/Users/wupeiqi/PycharmProjects/CodeRepository/images") """
- image
PIL&cv2from PIL import Image import numpy as np import cv2 im = Image.open(jpg) # <class 'PIL.JpegImagePlugin.JpegImageFile'> a = np.array(im) # <class 'numpy.ndarray'> img = cv2.imread(jpg) #<class 'numpy.ndarray'> image = Image.fromarray(img) # np转化为PIL图片 --> <class 'PIL.Image.Image'>
-
容器数据类型 (collections)
# 1 Counter 计数统计
from collections import Counter
data =["1","2","1","3","3","2","4"]
counter_dict =Counter(data)
print(counter_dict.most_common()) #[('1', 2), ('2', 2), ('3', 2), ('4', 1)]
print(counter_dict.values()) # dict_values([2, 2, 2, 1])
Counter(列表元素统计)from collections import Counter ct2 =Counter() a =[1,2,3,1,2,5] c =(i for i in a) # generator object ct2.update(c) print(ct2) #Counter({1: 2, 2: 2, 3: 1, 5: 1})
Counter对象(计数工具)# 计数器工具提供方面、快速的计数方法。示例 >>> # Tally occurrences of words in a list >>> cnt = Counter() >>> for word in ['red', 'blue', 'red', 'green', 'blue', 'blue']: ... cnt[word] += 1 >>> cnt Counter({'blue': 3, 'red': 2, 'green': 1}) >>> # Find the ten most common words in Hamlet >>> import re >>> words = re.findall(r'\w+', open('hamlet.txt').read().lower()) >>> Counter(words).most_common(10) [('the', 1143), ('and', 966), ('to', 762), ('of', 669), ('i', 631), ('you', 554), ('a', 546), ('my', 514), ('hamlet', 471), ('in', 451)] >>> Counter('abracadabra').most_common(3) [('a', 5), ('r', 2), ('b', 2)] >>> c = Counter(a=4, b=2, c=0, d=-2) >>> sorted(c.elements()) ['a', 'a', 'a', 'a', 'b', 'b'] >>> c = Counter() # a new, empty counter >>> c = Counter('gallahad') # a new counter from an iterable >>> c = Counter({'red': 4, 'blue': 2}) # a new counter from a mapping >>> c = Counter(cats=4, dogs=8) # a new counter from keyword args # 常用模式 sum(c.values()) # total of all counts c.clear() # reset all counts list(c) # list unique elements set(c) # convert to a set dict(c) # convert to a regular dictionary c.items() # convert to a list of (elem, cnt) pairs Counter(dict(list_of_pairs)) # convert from a list of (elem, cnt) pairs c.most_common()[:-n-1:-1] # n least common elements +c # remove zero and negative counts
defaultdict示例>>> s = [('yellow', 1), ('blue', 2), ('yellow', 3), ('blue', 4), ('red', 1)] >>> d = defaultdict(list) >>> for k, v in s: ... d[k].append(v) ... >>> sorted(d.items()) [('blue', [2, 4]), ('red', [1]), ('yellow', [1, 3])] # dict.setdefault()技术更简单和更快 >>> d = {} >>> for k, v in s: ... d.setdefault(k, []).append(v) ... >>> sorted(d.items()) [('blue', [2, 4]), ('red', [1]), ('yellow', [1, 3])]
OrderDict对象(字典排序)>>> # regular unsorted dictionary >>> d = {'banana': 3, 'apple': 4, 'pear': 1, 'orange': 2} >>> # dictionary sorted by key >>> OrderedDict(sorted(d.items(), key=lambda t: t[0])) OrderedDict([('apple', 4), ('banana', 3), ('orange', 2), ('pear', 1)]) >>> # dictionary sorted by value >>> OrderedDict(sorted(d.items(), key=lambda t: t[1])) OrderedDict([('pear', 1), ('orange', 2), ('banana', 3), ('apple', 4)]) >>> # dictionary sorted by length of the key string >>> OrderedDict(sorted(d.items(), key=lambda t: len(t[0]))) OrderedDict([('pear', 1), ('apple', 4), ('orange', 2), ('banana', 3)])
- 编码检测(chardet库)
编码检测-(爬虫应用)#!\Users\Local\Programs\Python37 # -*- coding: utf-8 -*- # 现字符串/文件的编码检测 import chardet # 中文检测 str1 ="你好chardet,我是中文".encode("gbk") a =chardet.detect(str1) print(a) # {'encoding': 'GB2312', 'confidence': 0.99, 'language': 'Chinese'} print(a["encoding"]) #GB2312 str2 = '我有一个梦想'.encode('utf-8') chardet.detect(str2) print(chardet.detect(str2)["encoding"]) # 日文检测 str3 = 'ありがとう'.encode('euc-jp') #{'encoding': 'EUC-JP', 'confidence': 0.99, 'language': 'Japanese'} a=chardet.detect(str3) print(a) # 爬虫应用实例 import chardet import requests headers = {'User-Agent':'Mozilla/5.0 (Windows NT 6.1; WOW64) AppleWebKit/537.36 (KHTML, like Gecko) Chrome/55.0.2883.87 Safari/537.36'} response = requests.get('https://www.baidu.com',headers=headers) # 使用chardet指定编码 response.encoding = chardet.detect(response.content)['encoding'] print(response.text)
- pdfkit库生成pdf文件
pdfkit-->pdf(string,html,url)#!\Users\Local\Programs\Python37 # -*- coding: utf-8 -*- """ 1 pip install pdfkit 2 安装wkhtmltopdf.exe文件 (https://wkhtmltopdf.org/downloads.html) 注意:记住安装地址,找到wkhtmltopdf.exe文件所在的绝对路径,后面要用到 3 使用pdfkit库生成pdf文件 """ # 导入库 import pdfkit '''将网页url生成pdf文件''' def url_to_pdf(url, to_file): # 将wkhtmltopdf.exe程序绝对路径传入config对象 path_wkthmltopdf = r'E:\常用软件安装包\wkhtmltopdf\bin\wkhtmltopdf.exe' config = pdfkit.configuration(wkhtmltopdf=path_wkthmltopdf) # 生成pdf文件,to_file为文件路径 pdfkit.from_url(url, to_file, configuration=config) print('完成') # 传入知乎专栏文章url,转换为pdf # url_to_pdf(r'https://zhuanlan.zhihu.com/p/69869004', 'out_1.pdf') # 导入库 import pdfkit '''将html文件生成pdf文件''' def html_to_pdf(html, to_file): # 将wkhtmltopdf.exe程序绝对路径传入config对象 path_wkthmltopdf = r'E:\常用软件安装包\wkhtmltopdf\bin\wkhtmltopdf.exe' config = pdfkit.configuration(wkhtmltopdf=path_wkthmltopdf) # 生成pdf文件,to_file为文件路径 pdfkit.from_file(html, to_file, configuration=config) print('完成') # html_to_pdf('sample.html','out_2.pdf') # 导入库 import pdfkit '''将字符串生成pdf文件''' def str_to_pdf(string, to_file): # 将wkhtmltopdf.exe程序绝对路径传入config对象 path_wkthmltopdf = r'E:\常用软件安装包\wkhtmltopdf\bin\wkhtmltopdf.exe' config = pdfkit.configuration(wkhtmltopdf=path_wkthmltopdf) # 生成pdf文件,to_file为文件路径 pdfkit.from_string(string, to_file, configuration=config) print('完成') str_to_pdf('This is test!','out_3.pdf')
-
ddddocr(验证码识别)
环境要求:python >=3.8安装: pip install ddddocr
ddddocr-验证码识别import ddddocr ocr = ddddocr.DdddOcr() with open('code1.png', 'rb') as f: img_bytes = f.read() res = ocr.classification(img_bytes) print(res)
- 日志处理-读取配置文件-markdown转化为html(工具类)
Config/user.conf[wechat] appID="你的appid" appsecret=fc20919dc4b52409abf20a6d723c3285 wechatID=oJ3nX591TD5ri1IJPhsDCSv6-3Gc tempID=1WyxLp1ll9rc4muW02BGtNUxyt4ehuNgnv124ptUuiM [API] token=https://api.weixin.qq.com/cgi-bin/token tmpsend=https://api.weixin.qq.com/cgi-bin/message/template/send info=http://127.0.0.1 [log] logdir=log level=debug
logger & markdown等-->html#! /usr/bin env python3 # -*- coding:utf-8 -*- """ 用途:集成工具为App使用 1 日志处理(读取配置文件) 2 markdowm等文件格式转换为html """ import datetime import os import sys import markdown from WebApi.WebApi import settings # 调试 # from WebApi import settings loglevel = { "debug": 0, "info": 1, "warn": 2, "error": 3 } work_dir = settings.BASE_DIR resouce_dir = os.path.join(work_dir, "Res") config_dir = os.path.join(work_dir, "Config") cache_dir = os.path.join(work_dir, "cache") config_file_name = os.path.join(config_dir, "user.conf") templeates_dir = os.path.join(work_dir, "templates") def init_all_resouce(): config_dict = {} with open(os.path.join(work_dir, config_file_name), 'r', encoding='utf-8') as config_file: all_config = config_file.read() print("all_config",all_config) config_list_tmp = all_config.split("[") for config_data in config_list_tmp: if config_data: config_list = config_data.split("]", maxsplit=1) config_dict[config_list[0]] = {} for key_value in config_list[1].split("\n"): if key_value and not key_value[0] == "#": key, value = key_value.split("=", maxsplit=1) config_dict[config_list[0]][key] = value return config_dict all_config = init_all_resouce() # 读取配置文件,构造为字典数据格式 # {'wechat': {'appID': 'wxc1feb2ec1499039e', 'appsecret': 'fc20919dc4b52409abf20a6d723c3285', 'wechatID': 'oJ3nX591TD5ri1IJPhsDCSv6-3Gc', 'tempID': '1WyxLp1ll9rc4muW02BGtNUxyt4ehuNgnv124ptUuiM'}, 'API': {'token': 'https://api.weixin.qq.com/cgi-bin/token', 'tmpsend': 'https://api.weixin.qq.com/cgi-bin/message/template/send', 'info': 'http://127.0.0.1'}, 'log': {'logdir': 'log', 'level': 'debug'}} # 用途:记录日志,分debug、info、warn、error四个等级 def loger(msg: str, logfrom=os.path.basename(sys.argv[0]).replace(".py", ""), level="info"): now = datetime.datetime.now().strftime('%y-%m-%d %H:%M:%S') logstr = "[%s] [%s] %s\n" % (level, now, msg) if loglevel[level] > loglevel[all_config["log"]["level"]]: path = os.path.join(work_dir, all_config["log"]["logdir"]) if not os.path.exists(path): os.makedirs(path.encode('utf-8')) with open(os.path.join(path, logfrom + ".log"), 'a', encoding='utf-8') as log_file: log_file.write(logstr) print(logstr, end="") # 将文本转成html def str2html(rel_str: str, str_type: str, filename="", path=""): if str_type == "markdown": html_str = markdown.markdown(rel_str) elif str_type == "text": html_str = "<pre>%s</pre>" % rel_str else: return False if filename and path: if not os.path.exists(path): os.makedirs(path.encode('utf-8')) with open(os.path.join(path, filename + ".html"), 'w', encoding='utf-8') as html_file: html_file.write(html_str) else: return html_str if __name__ == '__main__': print(init_all_resouce())
- python连接Linux(paramiko库)
#1、安装依赖包
pip install ecdsa
pip install Crypto
pip install Twisted
#2、安装paramiko
pip install paramiko
1 执行linux命令#!\Users\Local\Programs\Python37 # -*- coding: utf-8 -*- """Python执行Linux命令""" import paramiko # 1 连接服务器 # ip、用户名、密码 ip = "远程Linux的IP地址" port = 22 user = "root" password = "密码" # 创建SSHClient 实例对象 ssh = paramiko.SSHClient() # 调用方法,表示没有存储远程机器的公钥,允许访问 ssh.set_missing_host_key_policy(paramiko.AutoAddPolicy()) # 连接远程机器,地址,端口,用户名密码 ssh.connect(ip, port, user, password, timeout=10) """ # 2 执行单条linux命令,如:ls # 输入linux命令 command1 = "ls" ssh.exec_command(command1) # stdout 为正确输出,stderr为错误输出 stdin, stdout, stderr = ssh.exec_command(command1) # 输出命令执行结果 result = stdout.read() print(result) """ # 3 执行多条Linux命令 # 输入linux命令 command = "cd / ;ls" stdin, stdout, stderr = ssh.exec_command(command) # 输出命令执行结果 result = stdout.read() ## bytes 转 str result = str(result) result = result.split('\\n') for i in result: print(i)
2 上传-下载文件(linux)#!\Users\Local\Programs\Python37 # -*- coding: utf-8 -*- #SFTPClient 传送文件 import paramiko # 1 连接Linux服务器 # 获取Transport实例 tran = paramiko.Transport(('远程Linuxip', 22)) # 连接SSH服务端,使用password tran.connect(username="root", password='密码') # 获取SFTP实例 sftp = paramiko.SFTPClient.from_transport(tran) # 2 上传文件 # 设置上传的本地/远程文件路径 localpath = "D:\python\\LH_healthypush_system.zip" remotepath = "/LH_healthypush_system.zip" # 执行上传动作 sftp.put(localpath, remotepath) # 关闭连接 tran.close() # # 3、从Linux服务器下载文件 # localpath2 = "D:/a1.txt" # remotepath2 = "/a1.txt" # # 执行下载动作 # sftp.get(remotepath2, localpath2) # # 关闭连接 # tran.close()
示例(上传-下载-zip)#!\Users\Local\Programs\Python37 # -*- coding: utf-8 -*- import paramiko from pathlib import Path ip ='49.235.88.xx' port =22 # 1 上传文件到linux def window_to_linux(localpath): """ :param path: 本地文件路径 :param remote_path:远程文件路径 :return: """ tran = paramiko.Transport((ip, port)) tran.connect(username="root", password='Hw199499') sftp = paramiko.SFTPClient.from_transport(tran) # 2 上传文件 remotepath ="/root/"+localpath.split("\\")[-1] sftp.put(localpath, remotepath) tran.close() print(remotepath,"--上传成功") return remotepath # # 3、从Linux服务器下载文件 def linux_to_window(remotepath ="/root/lhpush.sh"): tran = paramiko.Transport((ip, port)) tran.connect(username="root", password='Hw1994XX') sftp = paramiko.SFTPClient.from_transport(tran) file_name =remotepath.split("/")[-1] localpath =Path.cwd().joinpath(file_name) print(localpath) # 执行下载动作 sftp.get(remotepath, localpath) tran.close() print(localpath,"--下载成功") # 3 解压压缩包,覆盖原先的已有压缩包 def unzip(remotepath): # 1 连接服务器 ssh = paramiko.SSHClient() ssh.set_missing_host_key_policy(paramiko.AutoAddPolicy()) ssh.connect(ip, port, "root", "Hw1994XX", timeout=10) # 2 执行单条linux命令,如:ls # 输入linux命令 command1 = f"unzip -o {remotepath}" ssh.exec_command(command1) # stdout 为正确输出,stderr为错误输出 stdin, stdout, stderr = ssh.exec_command(command1) # 如果错误输出error result = stderr.read() if result: print(result) else: print("解压成功") # # # 3 执行多条Linux命令 # # 输入linux命令 # command = "cd / ;ls" # stdin, stdout, stderr = ssh.exec_command(command) # # 输出命令执行结果 # result = stdout.read() # ## bytes 转 str # result = str(result) # result = result.split('\\n') # for i in result: # print(i) if __name__ == '__main__': remotepath =window_to_linux(localpath="D:\python\\LH_healthypush_system.zip") unzip(remotepath) # linux_to_window() # window_to_linux(localpath="D:\python\LH_healthypush_system\lhpush.sh")
- python 调用微信公众号接口
公众号-客服消息(获取access_token)import json import requests # 我们可以接受定义的复杂,但是不能接受调用的复杂 # 把代码从面向函数改成面向对象 class WxTools(): def __init__(self, app_id, app_secret): self.app_id = app_id self.app_secret = app_secret def get_access_token(self): url = f'https://api.weixin.qq.com/cgi-bin/token?grant_type=client_credential&appid={self.app_id}&secret={self.app_secret}' resp = requests.get(url).json() access_token = resp.get('access_token') return access_token def send_wx_customer_msg(self, opend_id, msg="有人闯入了你的家"): url = f'https://api.weixin.qq.com/cgi-bin/message/custom/send?access_token={self.get_access_token()}' req_data = { "touser": opend_id, "msgtype":"text", "text": { "content": msg } } requests.post(url, data=json.dumps(req_data, ensure_ascii=False).encode('utf-8')) if __name__ == "__main__": app_id = 'wx7f23641379450a2' app_secret = '2bfecd48e13964d00b4a1b0b26b0b' wx_tools = WxTools('wx7f23641379450a28', '2bfecd48e13964d00b4a1b0bf26b0acb') wx_tools.send_wx_customer_msg("oqtB6wXelAcohf9rasCA7VLHNk9c")
- 界面命令行工具click
click# 官网:https://click.palletsprojects.com/en/8.0.x/options/#name-your-options # 参考:https://mp.weixin.qq.com/s/QNhO_EeF7_wKqtoyq9dwRg # 作用:命令行界面实现工具—Click import click @click.command() @click.option("--count",default=1,help="Number of grettings") @click.option("--name",prompt="Your name",help="The person to greet") def hello(count,name): for i in range(count): click.echo(f"Hello {name}!") @click.command() @click.option('--n', default=1) # 设定了默认值 def dots1(n): click.echo('.' * n) @click.command() @click.option('--n', required=True, type=int) # 设定必须传入参数值 def dots2(n): click.echo('.' * n) @click.command() @click.option('--from', '-f', 'from_') @click.option('--to', '-t') def reserved_param_name(from_, to): click.echo(f"from {from_} to {to}") @click.command() @click.option('--pos', nargs=2, type=float) #多值参数 --pos 5 2 def findme(pos): a, b = pos click.echo(f"{a} / {b}") @click.command() @click.option('--message', '-m', multiple=True) #多值参数 -m python -m list def commit(message): click.echo(' '.join(message)) import sys @click.command() @click.option('--shout/--no-shout', default=False) # 布尔标志 def info(shout): rv = sys.platform if shout: rv = rv.upper() + '!!!!111' click.echo(rv) @click.command() @click.option('--hash-type', type=click.Choice(['MD5', 'SHA1'], case_sensitive=False)) #选择选项 def digest(hash_type): click.echo(hash_type) @click.command() @click.option('--name', prompt='Your name please') #提示文本 def hello(name): click.echo(f"Hello {name}!") if __name__ == '__main__': # hello() # dots1() # dots2() reserved_param_name()
- Argparse 编写命令行
View Code# 3 Argparse 编写命令行接口 from argparse import ArgumentParser parse =ArgumentParser() parse.add_argument("--a",default=0,type=int,required=True,help="the first number") parse.add_argument("--b",default=0,type=int,required=False,help="the second number") args =parse.parse_args() print("两数之和为:",args.a +args.b)
View Code2import argparse parser =argparse.ArgumentParser() parser.add_argument('--freeze', nargs='+', type=int, default=[0], help='Freeze layers') # python test12.py --freeze 18 12 --> [18,12] # parser.add_argument('--freeze', type=list, default=[], help='Freeze layers') # python test12.py --freeze 1911 --> ['1', '9', '1', '1'] parser.add_argument('--epochs', type=int, default=300) opt =parser.parse_args() print(opt.freeze) # python test12.py --freeze 18 12 --> [18,12] print(opt.epochs) # 300

作者:华王
博客:https://www.cnblogs.com/huahuawang/
