安装PHP服务
准备
镜像:CentOS-7-x86_64-DVD-1511.iso
本地yum源
关闭防火墙和se
PHP
安装
[root@php ~]#yum -y install gcc gcc-c++ libxml2-devel libcurl-devel openssl-devel bzip2-devel net-tools
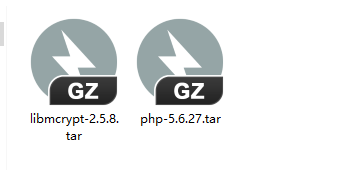
将这两个包使用 xftp 放到虚拟机 root 目录下

解压压缩包
[root@php ~]# tar -zxvf libmcrypt-2.5.8.tar.gz
[root@php ~]# tar -zxvf php-5.6.27.tar.gz
编辑第一个包的服务
[root@php ]# cd libmcrypt-2.5.8/
[root@php libmcrypt-2.5.8]# ./configure --prefix=/usr/local/libmcrypt && make && make install
配置PHP环境
[root@php libmcrypt-2.5.8]#cd
[root@php ]# tar -zxvf php-5.6.27.tar.gz
[root@php ]# cd php-5.6.27/
[root@php php-5.6.27]#./configure --prefix=/usr/local/php5.6 --with-mysql=mysqlnd \
--with-pdo-mysql=mysqlnd --with-mysqli=mysqlnd --with-openssl --enable-fpm \
--enable-sockets --enable-sysvshm --enable-mbstring --with-freetype-dir --with-jpeg-dir \
--with-png-dir --with-zlib --with-libxml-dir=/usr --enable-xml --with-mhash \
--with-mcrypt=/usr/local/libmcrypt --with-config-file-path=/etc \
--with-config-file-scan-dir=/etc/php.d --with-bz2 --enable-maintainer-zts
开始编辑
需要十分钟左右(在上面的完成后再来编辑)
[root@php php-5.6.27]#make && make install
创建用户
创建用户ID,注意这个nginx的id号要和nginx主机(192.168.233.20)上的保持一致
[root@php php-5.6.27]# groupadd -g 1001 nginx
[root@php php-5.6.27]# useradd -u 900 nginx -g nginx -s /sbin/nologin
[root@php php-5.6.27]# tail -1 /etc/passwd
nginx:x:900:1001::/home/nginx:/sbin/nologin
配置PHP环境
PHP压缩包中提供了PHP环境需要用到的模板文件,需要对文件进行改名后才能使用,复制文件并改名
[root@php php-5.6.27]# cp php.ini-production /etc/php.ini
[root@php php-5.6.27]# cp sapi/fpm/init.d.php-fpm /etc/init.d/php-fpm
赋予文件执行权限
[root@php php-5.6.27]# chmod +x /etc/init.d/php-fpm
添加PHP服务到启动列表,并设置开机启动
[root@php php-5.6.27]# chkconfig --add php-fpm
[root@php php-5.6.27]# chkconfig php-fpm on
修改PHP的主配置文件php-fpm.conf
[root@php php-5.6.27]# cp /usr/local/php5.6/etc/php-fpm.conf.default /usr/local/php5.6/etc/php-fpm.conf
[root@php php-5.6.27]# vi /usr/local/php5.6/etc/php-fpm.conf
[root@php ~]# grep -n '^'[a-Z] /usr/local/php5.6/etc/php-fpm.conf
25:pid = run/php-fpm.pid
149:user = nginx
150:group = nginx
164:listen = 192.168.233.20:9000
224:pm = dynamic
235:pm.max_children = 50
240:pm.start_servers = 5
245:pm.min_spare_servers = 5
250:pm.max_spare_servers = 35
找到配置文件中的相应参数并修改,修改成上述配置 (注意要有分号,在分号后配置)
启动PHP服务
在完成上述配置并保存退出之后,就可以启动PHP服务,并检查是否启动成功。(netstat命令无法使用时,请自行使用YUM源安装net-tools工具)
[root@localhost php-5.6.27]# service php-fpm start
Starting php-fpm  done
[root@php ~]# netstat -ntpl
Active Internet connections (only servers)
Proto Recv-Q Send-Q Local Address           Foreign Address         State       PID/Program name
tcp        0      0 192.168.233.20:9000     0.0.0.0:*               LISTEN      123948/php-fpm: mas
tcp        0      0 0.0.0.0:22              0.0.0.0:*               LISTEN      1403/sshd
tcp        0      0 127.0.0.1:25            0.0.0.0:*               LISTEN      2516/master
tcp6       0      0 :::22                   :::*                    LISTEN      1403/sshd
tcp6       0      0 ::1:25                  :::*                    LISTEN      2516/master
如果发现9000端口已启动,则说明PHP环境安装完毕


